
Recomendados
Más contenido relacionado
Más de sunlisunny
Más de sunlisunny (19)
How to make a slideshow on mac
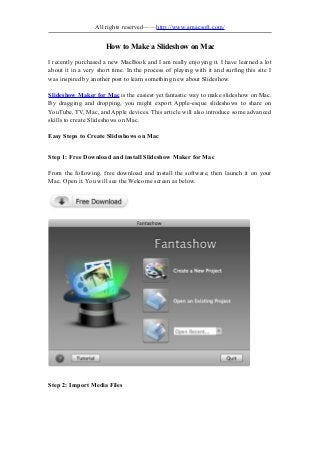
- 1. All rights reserved——http://www.amacsoft.com/ How to Make a Slideshow on Mac I recently purchased a new MacBook and I am really enjoying it. I have learned a lot about it in a very short time. In the process of playing with it and surfing this site I was inspired by another post to learn something new about Slideshow. Slideshow Maker for Mac is the easiest yet fantastic way to make slideshow on Mac. By dragging and dropping, you might export Apple-esque slideshows to share on YouTube, TV, Mac, and Apple devices. This article will also introduce some advanced skills to create Slideshows on Mac. Easy Steps to Create Slideshows on Mac Step 1: Free Download and install Slideshow Maker for Mac From the following, free download and install the software, then launch it on your Mac. Open it. You will see the Welcome screen as below. Step 2: Import Media Files
- 2. All rights reserved——http://www.amacsoft.com/ Go through the Media Browser icon to turn it on or off. When the media is added to the storyboard, drag and drop specific slide to arrange it. The most interesting feature here is that you can drag media out of Fantashow to delete it. Step 3: Change Styles and Make a Slideshow on Mac Styles (themes) instantly bring your images to life. Once you import photos and videos, styles will be automatically applied. To change it, simple drag and drop desired style to replace the original one. From the following picture, you can see there are two main option for you to set the style properties.
- 3. All rights reserved——http://www.amacsoft.com/ After settings, check the option "Apply to all clips" to make all clips have the same duration. Only General and 3D styles allows you to change the background to pre- design paper or a local image on Mac. This software provides more functions for you to edit Slideshow, such as Photo Editing, Video Editing, Audio Editing, Intro/Credit/Blank slide etc. Now you can go to "Share" menu on top, You could directly upload your shows to YouTube, iDVD, iTunes, Apple devices etc.