SlideShare una empresa de Scribd logo
1 de 28
Descargar para leer sin conexión
testo 308 · Smoke tester
Instruction manual
Downloaded from www.Manualslib.com manuals search engine
2 0970 3080 en 01 testo AG
Downloaded from www.Manualslib.com manuals search engine
1 Contents
0970 3080 en 01 3
Pos: 1 /TD/Überschriften/1. Inhalt @ 0mod_1177587817070_79.doc @ 1243
1 Contents
1 Contents .............................................................................................3
2 Safety and the environment ..............................................................5
2.1. About this document ..................................................................5
2.2. Ensure safety.............................................................................6
2.3. Protecting the environment ........................................................7
3 Specifications.....................................................................................8
3.1. Use .........................................................................................8
3.2. Technical data............................................................................8
4 Product description .........................................................................10
5 First steps.........................................................................................12
5.1. Charging the battery ................................................................12
5.2. Connecting the mains unit .......................................................13
5.3. Switching the instrument on/off................................................13
6 Using the product ............................................................................15
6.1. Performing the leakage test .....................................................15
6.2. Performing settings..................................................................15
6.3. Measuring ................................................................................16
6.4. Printing the measurement results ............................................18
6.5. Transferring the measurement results .....................................18
7 Maintaining the product ..................................................................19
7.1. Emptying the condensate trap .................................................19
7.2. Changing the battery................................................................20
7.3. Changing the filter paper..........................................................21
7.4. Replacing the particle filter.......................................................23
7.5. Cleaning the instrument ...........................................................24
7.6. Calibration................................................................................24
Downloaded from www.Manualslib.com manuals search engine
1 Contents
4 0970 3080 en 01 testo AG
8 Tips and assistance.........................................................................25
8.1. Questions and answers ...........................................................25
8.2. Accessories and spare parts....................................................26
8.3. Service information ..................................................................27
Pos: 2 /TD/--- Seitenwechsel --- @ 0mod_1173774430601_0.doc @ 283
Downloaded from www.Manualslib.com manuals search engine
2 Safety and the environment
0970 3080 en 01 5
Pos: 3 /TD/Überschriften/2. Sicherheit und Umwelt @ 0mod_1173774719351_79.doc @ 292
2 Safety and the environmentPos: 4 /TD/Überschriften/2.1 Zu diesem Dokument @ 0mod_1173775252351_79.doc @ 346
2.1. About this documentPos: 5 /TD/Sicherheit und Umwelt/Zu diesem Dokument/Verwendung (Standard) @ 0mod_1173775068554_79.doc @ 337
Use
> Please read this documentation through carefully and
familiarize yourself with the product before putting it to use.
Pay particular attention to the safety instructions and
warning advice in order to prevent injuries and damage to
the products.
> Keep this document to hand so that you can refer to it when
necessary.
> Hand this documentation on to any subsequent users of the
product.
Pos: 6 /TD/Sicherheit und Umwelt/Zu diesem Dokument/Symbole und Schreibkonv. [Standard] @ 0mod_1174982140622_79.doc @ 515
Symbols and writing standards
Representation Explanation
Warning advice, risk level according to the
signal word:
Warning! Serious physical injury may occur.
Caution! Slight physical injury or damage to
the equipment may occur.
> Implement the specified precautionary
measures.
Note: Basic or further information.
1. ...
2. ...
Action: more steps, the sequence must be
followed.
> ... Action: a step or an optional step.
- ... Result of an action.
Menu Elements of the instrument, the instrument
display or the program interface.
[OK] Control keys of the instrument or buttons of
the program interface.
... | ... Functions/paths within a menu.
“...” Example entries
Downloaded from www.Manualslib.com manuals search engine
2 Safety and the environment
6 0970 3080 en 01 testo AG
Pos: 7 /TD/Überschriften/2.2 Sicherheit gewährleisten @ 0mod_1173780783960_79.doc @ 366
2.2. Ensure safetyPos: 8 /TD/Sicherheit und Umwelt/Sicherheit gewährleisten/Produkt bestimmungsgemäß verwenden @ 0mod_1173781261848_79.doc @ 386
> Only operate the product properly, for its intended purpose
and within the parameters specified in the technical data. Do
not use any force.
Pos: 9 /TD/Sicherheit und Umwelt/Sicherheit gewährleisten/Sonden abkühlen lassen @ 0mod_1190094931187_79.doc @ 4873
> After the final measurement, allow probes and probe shafts
to cool down sufficiently in order to avoid burns from the hot
sensor tip or the probe shaft.
Pos: 10 /TD/Sicherheit und Umwelt/Sicherheit gewährleisten/Nicht mit Lösungsmitteln lagern @ 0mod_1175692375179_79.doc @ 583
> Do not store the product together with solvents. Do not use
any desiccants.
Pos: 11 /TD/Sicherheit und Umwelt/Sicherheit gewährleisten/Nur beschriebene Wartungsarbeiten durchführen @ 0mod_1175692705195_79.doc @ 601
> Carry out only the maintenance and repair work on this
instrument that is described in the documentation. Follow
the prescribed steps exactly. Use only original spare parts
from Testo.
Pos: 12 /TD/Sicherheit und Umwelt/Sicherheit gewährleisten/Akku-Sicherheitshinweise (LiIon) @ 0mod_1187184666109_79.doc @ 2363
> Improper use of the rechargeable battery can lead to
destruction or injuries by means of current surges, fire or
escaping chemicals. The following instructions must be
observed to avoid such hazards:
• Only use in accordance with the directions in the
instruction manual.
• Do not short, take apart or modify.
• Do not expose to heavy impacts, water, fire or
temperatures above 60 °C.
• Do not store in the proximity of metal objects.
• Do not use leaky or damaged rechargeable batteries. In
the event of contact with battery acid: Thoroughly wash
affected area with water and consult a doctor, if
necessary.
• Only charge in the measuring instrument or the
recommended charging station.
• Immediately stop the charging process if this is not
completed in the given time.
• In the event of improper function or signs of overheating,
immediately remove the rechargeable battery from the
measuring instrument/charging station. Caution:
Rechargeable battery may be hot!
Downloaded from www.Manualslib.com manuals search engine
2 Safety and the environment
0970 3080 en 01 7
Pos: 13 /TD/Überschriften/2.3 Umwelt schützen @ 0mod_1173780843645_79.doc @ 375
2.3. Protecting the environmentPos: 14.1 /TD/Sicherheit und Umwelt/Umwelt schützen/Akkus/Batterien entsorgen @ 0mod_1175693637007_79.doc @ 619
> Dispose of faulty rechargeable batteries/spent batteries in
accordance with the valid legal specifications.
Pos: 14.2 /TD/Sicherheit und Umwelt/Umwelt schützen/Produkt entsorgen @ 0mod_1173780307072_79.doc @ 357
> At the end of its useful life, send the product to the separate
collection for electric and electronic devices (observe local
regulations) or return the product to Testo for disposal.
Pos: 15 /TD/--- Seitenwechsel --- @ 0mod_1173774430601_0.doc @ 283
Downloaded from www.Manualslib.com manuals search engine
3 Specifications
8 0970 3080 en 01 testo AG
Pos: 16 /TD/Überschriften/3. Leistungsbeschreibung @ 0mod_1173774791554_79.doc @ 301
3 SpecificationsPos: 17 /TD/Überschriften/3.1 Verwendung @ 0mod_1176211016437_79.doc @ 695
3.1. UsePos: 18 /TD/Leistungsbeschreibung/Verwendung/testo 308 @ 0mod_1177404646997_79.doc @ 1182
Functions and use
The digital smoke tester is a hand-held instrument for
determining the smoke number of oil firing installations.
These systems can be monitored using the testo 308 and
checked for compliance with the applicable limit values.
The measuring instrument is approved for measurements under
the First Federal Immission Control Ordinance (1. BImSchV,
German ordinance).
Pos: 19 /TD/Überschriften/3.2 Technische Daten @ 0mod_1176211088437_79.doc @ 704
3.2. Technical dataPos: 20 /TD/Leistungsbeschreibung/Technische Daten/testo 308 @ 0mod_1176727248645_79.doc @ 797
Characteristic Values
Sensor Photodiode
Measuring range 0 - 6 smoke number
Resolution 0.1 smoke number
Accuracy ±0.2 smoke number
Test sample volume 1.63 ± 0.1 reference litre (990 mbar,
20 °C / 68°F)
Storage/transport
temperature
-20 to 50°C / -4 to 122°F
Operating
temperature
5 to 45°C / 41 to 113°F
Rechargeable
battery
Lithium ion, 2600mAh / 3.7V
Battery operation
time
45 individual measurements
Protection class IP 40
Interfaces IR, IRDA, optional: Bluetooth (0632 0309)
Dimensions 270 x 63 x 120 mm / 10.63 x 2.48 x 4.73"
Weight 600g / 1.33lb (including battery)
Downloaded from www.Manualslib.com manuals search engine
3 Specifications
0970 3080 en 01 9
Characteristic Values
Warranty 2 years, warranty conditions: See
guarantee card
EU Directive 2004/108/EC
Standards/Tests 1st Federal Immission Control Ordinance
(German ordinance)
Pos: 21 /TD/--- Seitenwechsel --- @ 0mod_1173774430601_0.doc @ 283
Downloaded from www.Manualslib.com manuals search engine
4 Product description
10 0970 3080 en 01 testo AG
Pos: 22 /TD/Überschriften/4. Produktbeschreibung @ 0mod_1173774846679_79.doc @ 310
4 Product descriptionPos: 23 /TD/Produktbeschreibung/Übersicht/testo 308/Anzeige- und Bedienelemente @ 0mod_1176813221481_79.doc @ 833
Display and control elements
1 IR/IrDA interface
2 Gas outlet
3 Display. Instrument status icons:
Icon Significance
Error message
Data exchange possible
Printing
Meter running
Configuration menu opened
Battery capacity: > 75 %/> 50 %/> 25 %/< 10 %
Downloaded from www.Manualslib.com manuals search engine
4 Product description
0970 3080 en 01 11
4 Control keys:
Key Function
Switching the instrument on/off
Left function key:
[Start]
[Ok]
[ ]
[set]
Function changes depending on the
instrument status:
Begin smoke measurement
Accept setting/reading
Oil derivative present
Open configuration menu
Right function
key:
[ ]
[No]
[ ]
[End]
[ ]
[ ]
Function changes depending on the
instrument status:
Begin leakage test
Cancel selection
Change selection
End measurement, back to measurement
menu
Start printout
No oil derivative present
5 Probe shaft
6 Condensate outlet
7 Service lid: Access to filter paper, battery
8 Probe shaft
9 Eyelet for wrist strap
10 Condensate trap
Pos: 24 /TD/--- Seitenwechsel --- @ 0mod_1173774430601_0.doc @ 283
Downloaded from www.Manualslib.com manuals search engine
5 First steps
12 0970 3080 en 01 testo AG
Pos: 25 /TD/Überschriften/5. Erste Schritte @ 0mod_1173774895039_79.doc @ 319
5 First stepsPos: 26 /TD/Erste Schritte/testo 308/Akku laden @ 0mod_1177413427960_79.doc @ 1210
5.1. Charging the battery
Fully charge the rechargeable battery before using the
instrument.
The rechargeable battery can only be charged at an ambient
temperature of 0 to 35°C / 32 to 95°F. If the rechargeable
battery pack has discharged completely, the charging time at
room temperature is approx. 8-9 hrs.
Rechargeable battery care:
• If possible, always discharge the rechargeable
battery and recharge it fully.
• Do not store a discharged battery for an extended
period, fully charge before renewed use.
• Best storage conditions: 50-80 % residual capacity,
10 to 20°C / 50 to 68°F ambient temperature.
It is not possible to charge batteries in the instrument when
switched on.
> Switch the instrument off before charging the battery.
1. Insert the instrument plug of the mains unit into the mains
socket on the instrument.
2. Insert the mains plug of the mains unit into a mains socket.
- The charging process will start. The battery symbol
illuminates with a variable number of segments. The
charging process stops automatically and illuminates
when the battery is charged.
Alternatively, the battery can be charged in a charger
(accessory, 0554 1103).
> Refer to the documentation that comes with the charger for
this.
Downloaded from www.Manualslib.com manuals search engine
5 First steps
0970 3080 en 01 13
Pos: 27 /TD/Erste Schritte/testo 308/Netzteil anschließen @ 0mod_1177413775799_79.doc @ 1219
5.2. Connecting the mains unit
If the mains unit is connected, the instrument is powered
automatically via the mains unit. It is not possible to charge the
battery in the instrument during operation.
Even when running from the mains supply, a battery
must be inserted in the instrument.
1. Insert the instrument plug of the mains unit 0554 1096 into
the mains socket on the instrument.
2. Insert the mains plug of the mains unit into a mains socket.
- If the instrument is switched off, the battery charging
process begins automatically. By switching the instrument
on, the battery charging process is stopped and the
instrument is then powered via the mains unit.
Pos: 28 /TD/Erste Schritte/testo 308/Gerät ein-/ausschalten @ 0mod_1176899337954_79.doc @ 879
5.3. Switching the instrument on/off
Switch the instrument on
If the service lid is not locked, incorrect measurements
will result:
> Check that the service lid is locked before switching
on the instrument.
Testo recommends performing a leakage test before every
measurement:
> To do so, close the probe shaft before switching on the
instrument.
1. Press and hold [ ] until a message appears in the display.
- A segment test is performed: All display segments illuminate
for 2 sec.
- Finally, the firmware version is displayed for 2 sec and the
left function key is assigned the set function.
During this time, you have the following options:
> Open configuration menu: Press [set].
- The configuration menu is opened, see Performing
settings Page 15.
> Begin leakage test: Press [ ].
- The leakage test is started, see Performing the leakage
test Page 15.
Downloaded from www.Manualslib.com manuals search engine
5 First steps
14 0970 3080 en 01 testo AG
- When initially switching on the instrument, the configuration
menu is opened automatically:
> Perform the basic settings, see Performing settings
Page 15.
- If no function key is pressed, the instrument changes to
measurement view, see Measuring Page 16.
Switch the instrument off
With the instrument switched on, the filter paper heating
is automatically activated. This reduces the operating
time of the rechargeable battery.
> Switch the instrument off if you are not performing a
measurement.
- The measurement view is opened.
> Press and hold [ ] until the display goes out or the rinsing
phase begins.
- If a measurement was performed since the instrument was
last switched on, a rinsing phase begins (length: 20 sec).
The rinsing phase can be manually interrupted:
> Press [End].
- The instrument switches off automatically.
The instrument has an automatic switch-off function.
10 minutes after the last button was pressed, the
instrument switches itself off to protect the rechargeable
battery.
Pos: 29 /TD/--- Seitenwechsel --- @ 0mod_1173774430601_0.doc @ 283
Downloaded from www.Manualslib.com manuals search engine
6 Using the product
0970 3080 en 01 15
Pos: 30 /TD/Überschriften/6. Produkt verwenden @ 0mod_1173774928554_79.doc @ 328
6 Using the productPos: 31 /TD/Produkt verwenden/testo 308/Dichtigkeitstest durchführen @ 0mod_1195830451218_79.doc @ 5923
6.1. Performing the leakage test
- The leakage test was started, see Switching the instrument
on/off Page 13.
- Test lights up and the smoke tester is running. Air is sucked
in for max. 30 seconds. For this time period, the probe shaft
must remain closed.
- If the instrument is leak-tight, Test OK lights up before the
30 seconds elapse.
> Press [End] to switch to measurement view.
- If the instrument is leaky, lights up:
> Check whether the service lid is locked correctly.
> Check whether the condensate trap is correctly inserted
and closed.
> Repeat the leakage test: Press [Start].
> Contact your dealer or Testo Customer Service if you
receive another error message.
Pos: 32 /TD/Überschriften/6.1 Einstellungen vornehmen @ 0mod_1184584321421_79.doc @ 1863
6.2. Performing settingsPos: 33 /TD/Produkt verwenden/testo 308/Einstellungen vornehmen @ 0mod_1193034020203_79.doc @ 5523
- The configuration menu was opened, see Switching the
instrument on/off Page 13.
- flashes. You can set whether the oil derivative prompt (Oil
derivative yes/no?) should appear after a smoke number
measurement.
When the oil derivative prompt is switched on, the paper is
transported forward sfter the measurement so that the
measurement spot is visible. When the oil derivative prompt
is switched off, the paper is not transported.
1. Press [OK] to switch on the oil derivative prompt or [no] to
switch off the prompt.
- (Prompt switched on) or (Prompt switched off) is
shown for 2 seconds.
- 1 or 3 flashes. You can set whether the smoke number
measurement should occur via an individual measurement
or as the average of three measurements.
Downloaded from www.Manualslib.com manuals search engine
6 Using the product
16 0970 3080 en 01 testo AG
2. Press [ ] to set the measuring method:
• 1 Test: Individual measurement.
• 3 Tests: Average of three measurements.
3. Press [OK].
- 1 Test (individual measurement) or 3 Tests (average) is
shown for 2 seconds.
- 545 or 547 flashes. The printer type that is used can
be set.
4. Press [ ] to select the printer used:
• 545: Testo protocol printer (IR) 0554 0545.
• 547: Testo protocol printer (IrDA) 0554 0547.
5. Press [OK].
- 545 (IR printer) or 547 (IrDA printer) is shown for
2 seconds.
- The firmware version, the selected measuring method and
the selected setting of the oil derivative prompt are shown
for 3 seconds.
- The instrument switches to measurement view.
Pos: 34 /TD/Überschriften/6.3 Messungen durchführen @ 0mod_1184584650078_79.doc @ 1872
6.3. MeasuringPos: 35 /TD/Produkt verwenden/testo 308/Messungen durchführen @ 0mod_1193040408187_79.doc @ 5573
> Check the fill level of the condensate trap. Empty this if the
max. marking is exceeded, see Emptying the condensate
trap Page 19.
> Check the particle filter for signs of contamination. Change
the filter if it is contaminated, see Replacing the particle filter
Page 23.
> Check whether there is enough filter paper in the instrument
(viewing window of the service lid). Replace the filter paper
if it is insufficient, see Changing the filter paper page 21.
1. Position the tip of the probe shaft in the centre of the flow
(area with the highest flue gas temperature).
2. Press [Start].
- The measurement begins, the smoke tester is running. The
elapsed measurement period is displayed.
A measurement can be interrupted early:
> Press [End].
Downloaded from www.Manualslib.com manuals search engine
6 Using the product
0970 3080 en 01 17
- The smoke tester automatically stops as soon as
1.63 reference litres of flue gas have been sucked in.
- The evaluation of the blackening mark created on the filter
paper is performed.
- The detected smoke number is shown.
3. Press [OK] to accept the value or [no] to delete the value.
- If the 3 Tests measuring method is set, the next
measurement can begin:
> Repeat steps 2 to 3 for the second and third
measurement.
- If the oil derivative prompt is switched on, the result of the oil
derivative determination can be entered after the
measurement:
• : Oil derivative present.
• : No oil derivative present
> Press [ ] or [ ].
- The detected smoke number (value of the individual
measurement or average from three measurements) is
shown. The entry of the oil derivative prompt is also shown
(if performed).
> To tear off the filter paper strip issued from the instrument:
Grip the paper just above the paper outlet and pull
sideways.
Caution! Damage to the instrument.
> Do not pull the filter paper out of the instrument
when the service lid is closed.
> Only pull the paper sideways in order to tear it off.
Pos: 36 /TD/(Warn-)Hinweise/Fühler/Sonden/Vorsicht! Verbrennungsgefahr Sondenrohr @ 1mod_1201618356937_79.doc @ 7984
Caution! Risk of burns due to hot probe shaft.
> Allow the probe shaft to cool down after a
measurement before touching it or placing it in the
transport packaging.
Downloaded from www.Manualslib.com manuals search engine
6 Using the product
18 0970 3080 en 01 testo AG
Pos: 37 /TD/Produkt verwenden/testo 308/Messergebnisse drucken @ 0mod_1193040403390_79.doc @ 5563
6.4. Printing the measurement results
- A measurement was performed and the right function key is
assigned the function.
> Press [ ].
- The data is sent to the protocol printer. lights up during
the data transfer.
Pos: 38 /TD/Produkt verwenden/testo 308/Messergebnisse übertragen @ 0mod_1196164346187_79.doc @ 5933
6.5. Transferring the measurement results
Data transfer is presently possible to the following
instruments:
• testo 327 with Firmware version from 1.07
• testo 330 with Firmware version from 1.33
• testo 335 with Firmware version from 1.23
- A measurement was performed and lights up.
> Request the data from another Testo measuring instrument
with the testo 308. Please refer to the documentation for the
respective Testo measuring instrument for this.
- The data transfer takes place by Bluetooth, as long as both
instruments have this interace. Otherwise the data transfer
takes place via the IrDA interface.
Pos: 39 /TD/--- Seitenwechsel --- @ 0mod_1173774430601_0.doc @ 283
Downloaded from www.Manualslib.com manuals search engine
7 Maintaining the product
0970 3080 en 01 19
Pos: 40 /TD/Überschriften/7. Produkt instand halten @ 0mod_1173789831362_79.doc @ 397
7 Maintaining the productPos: 41 /TD/Produkt instand halten/testo 308/Kondensatfalle leeren @ 0mod_1177416851747_79.doc @ 1228
7.1. Emptying the condensate trap
Caution! Damage to the smoke tester by means of
condensate entering the gas path.
> Do not empty the condensate trap with the smoke
tester running.
The condensate consists of a weak mix of acids:
> Avoid contact with the skin.
> Make sure that the condensate does not run over
the housing.
1. Hold the instrument in such a way that the condensate
outlet points upwards.
2. Pull out the sealing plug of the condensate outlet
approx. 5 mm to the stop (1).
3. Empty the condensate into a sink.
4. Wipe off any remaining drops at the condensate outlet using
a cloth.
5. Close the condensate outlet with the sealing plug.
> Ensure that the condensate outlet is fully closed, as
otherwise incorrect measurements may occur due to
external air entering.
1
Downloaded from www.Manualslib.com manuals search engine
7 Maintaining the product
20 0970 3080 en 01 testo AG
Pos: 42 /TD/Produkt instand halten/testo 308/Akku wechseln @ 0mod_1177412872617_79.doc @ 1201
7.2. Changing the battery
1. Isolate the instrument from the mains and switch it off before
changing the rechargeable battery.
2. Open the lock of the service lid (1).
3. Open the service lid and remove it from the instrument (2).
4. Open the battery lock by pressing the grey button and
simultaneously pushing in the direction of the arrow (3).
5. Remove the rechargeable battery from the instrument and
insert a new battery. Only use the Testo rechargeable
battery 0515 0107!
6. Close the battery lock by pressing the grey button and
simultaneously pushing opposite the direction of the arrow
until the battery engages.
7. Insert the service lid in the retaining hinge and close it.
8. Close the lock of the service lid.
1 2
3
Downloaded from www.Manualslib.com manuals search engine
7 Maintaining the product
0970 3080 en 01 21
Pos: 43 /TD/Produkt instand halten/testo 308/Filterpapier wechseln @ 0mod_1193051672843_79.doc @ 5583
7.3. Changing the filter paper
Caution! Damage to or contamination of the measuring
lens.
> Keep the paper rolls free of contamination, as this
could potentially be transmitted to the measuring
lens.
> Do not touch the protection glass of the measuring
lens.
1. Isolate the instrument from the mains and switch it off before
changing the filter paper (1).
2. Open the lock of the service lid (2).
3. Open the service lid (3) and remove it from the instrument.
4. Pull the winder out of the bracket (4).
5. Remove the plastic sleeve of the spent paper roll from the
winder and dispose of this (5).
Off
1
2
3
4
5
(3)
Downloaded from www.Manualslib.com manuals search engine
7 Maintaining the product
22 0970 3080 en 01 testo AG
6. Slide a new paper roll onto the winder (6).
7. Align the paper roll as shown below (6) and fasten the
winder in the bracket (7).
8. Detach the adhesive strip from the paper roll and unwind
approx. 10 cm of paper from the roll (8).
9. Cut off the unwound paper and dispose of this (9).
Caution! Damage to the gear wheel for paper transport.
> Do not turn the gear wheel for paper transport.
10. Slide through the end of the paper strip, under the guide
tabs on the side, until it lies underneath the draw roll (10).
11. Press [ ].
- The instrument is switched on and the automatic paper feed
pushes out the paper underneath the draw roll.
12. Insert the service lid in the retaining hinge (12) and close it
(13).
13. Close the lock of the service lid (14).
Caution! Damage to the instrument.
> Do not pull the filter paper out of the instrument
when the service lid is closed.
> Only pull the paper sideways in order to tear it off.
click
7
6 click
10 cm
4 in.
8
9
11
10
On
12
(11)13
14
Downloaded from www.Manualslib.com manuals search engine
7 Maintaining the product
0970 3080 en 01 23
Pos: 44 /TD/Produkt instand halten/testo 308/Partikelfilter wechseln @ 0mod_1195635723421_79.doc @ 5853
7.4. Replacing the particle filter
1. Isolate the instrument from the mains and switch it off before
changing the particle filter.
2. Disconnect the instrument plug of a connected mains unit
from the instrument.
3. Remove the condensate trap from the instrument (1).
4. Remove the spent particle filter from the plastic sleeve (2)
and insert a new filter.
5. Place the condensate trap on the instrument again.
1
2
Downloaded from www.Manualslib.com manuals search engine
7 Maintaining the product
24 0970 3080 en 01 testo AG
Pos: 45 /TD/Produkt instand halten/testo 308/Gerät reinigen @ 0mod_1196170437015_79.doc @ 5943
7.5. Cleaning the instrument
Housing
> If the housing of the instrument is dirty, clean it with a damp
cloth.
Do not use any aggressive cleaning agents or solvents! Weak
household cleaning agents and soap suds may be used.
Protecting glass of the measuring lens
Caution! Danger of breaking the protecting glass of the
measuring lens!
> When cleaning, only exert light pressure on the
protecting glass.
> If contaminated, clean the protecting glass of the measuring
lens with a damp cloth that is not too moist.
Do not use any aggressive cleaning agents or solvents! Weak
household cleaning agents and soap suds may be used.
Pos: 46 /TD/Produkt instand halten/testo 308/Kalibrierung @ 2mod_1207921490093_79.doc @ 14584
7.6. Calibration
In order to guarantee measurement accuracy, we recommend
having the instrument calibrated once a year. Please contact
your dealer or Testo customer service. For contact details see
Service information page 27 or in the internet at:
www.testo.com
Pos: 47 /TD/--- Seitenwechsel --- @ 0mod_1173774430601_0.doc @ 283
Downloaded from www.Manualslib.com manuals search engine
8 Tips and assistance
0970 3080 en 01 25
Pos: 48 /TD/Überschriften/8. Tipps und Hilfe @ 0mod_1173789887985_79.doc @ 406
8 Tips and assistancePos: 49 /TD/Überschriften/8.1 Fragen und Antworten @ 0mod_1177402017078_79.doc @ 1093
8.1. Questions and answersPos: 50 /TD/Tipps und Hilfe/Fragen und Antworten/testo 308 @ 0mod_1193059333062_79.doc @ 5592
Question Possible causes/solutions
uu lights up The measured smoke number is less than 0. The
filter paper was contaminated before the
measurement.
> Repeat the measurement.
and E1 or
E2 light up
The measured smoke number is above the
permissible range:
> Check the blackening mark and set the
system as needed. Repeat the
measurement.
The gas path is blocked:
> Check the probe shaft for foreign matter and
repeat the measurement.
and E4
light up
The instrument temperature is outside the
permissible range:
> Let the instrument warm up or cool down.
and E3
light up
A measurement error has occurred because the
service lid is not correctly locked, the condensate
trap is not correctly inserted / closed, or there is
no filter paper in the instrument:
> Eliminate the cause of the error and repeat
the measurement.
and E7
light up
A mechanical error has occurred:
> Confirm the error message with [End] and
repeat the measurement.
and E41
to E49 light
up
A serious error has occurred:
> Contact your dealer or Testo Customer
Service.
and
flash
Recharging the battery is impossible:
> Check the contact of the battery.
Downloaded from www.Manualslib.com manuals search engine
8 Tips and assistance
26 0970 3080 en 01 testo AG
If we could not answer your question or the solutions given
during troubleshooting did not help: please contact your dealer
or Testo Customer Service. For contact data, see Service
information page 27 or look up our website: www.testo.com
Pos: 51 /TD/Überschriften/8.2 Zubehör und Ersatzteile @ 0mod_1177402058734_79.doc @ 1102
8.2. Accessories and spare partsPos: 52 /TD/Tipps und Hilfe/Zubehör und Ersatzteile/testo 308 @ 0mod_1176810317388_79.doc @ 818
Description Article no.
Mains unit 0554 1096
Smoke tester bracket 0554 0616
Rechargeable battery charger 0554 1103
Spare rechargeable battery 0515 0107
Spare filter paper (8 rolls) 0554 0146
Spare particle filter 0554 1101
Acetone dispenser 0554 0159
Cone 0554 9010
Case 0516 0002
Pos: 53 /TD/Überschriften/8.3 Service-Informationen @ 0mod_1177402096406_79.doc @ 1111
Downloaded from www.Manualslib.com manuals search engine
8 Tips and assistance
0970 3080 en 01 27
8.3. Service informationPos: 54 /TD/Tipps und Hilfe/Service-Informationen/Kontaktdaten (Abgas-Analyse) @ 0mod_1195738937875_79.doc @ 5903
Contact details Service
Testo AG
Kundendienst
Kolumban-Kayser-Str. 17, D-79853 Lenzkirch
Service hotline: Tel.: +49-7653-681-620
Service hours: Mo. - Th.: 07:00 19:00
Fr.: 07.00 - 17:30 (excluding holidays)
Pos: 55 /TD/Tipps und Hilfe/Service-Informationen/Kontaktdaten Zentrale @ 1mod_1199887093359_79.doc @ 7003
Contact details Head office
GREAT BRITAIN / IRELAND
Testo Ltd.
Alton, Hampshire GU34 2QJ
Tel. (14 20) 54 44 33, Fax (14 20) 54 44
E-mail: info@testo.co.uk
USA
Testo Inc.
Sparta, NJ. 07871
Tel. (800) 227-0729, Fax (862) 354-5020
E-mail: info@testo.com
AUSTRALIA
Testo Pty. Ltd.
Croydon South VIC 3136
Tel. (3) 98 00 46 77, Fax (3) 98 00 46 99
E-mail: info@testo.com.au
The most up-to-date address details of our subsidiaries and
agencies can be found in Internet at: www.testo.com
===== Ende der Stückliste =====
Downloaded from www.Manualslib.com manuals search engine
testo AG
Postfach 1140, 79849 Lenzkirch
Testo-Strasse 1, 79853 Lenzkirch
GERMANY
Phone: +49 (0) 7653 681-0
Fax: +49 (0) 7653 681-100
Internet: www.testo.com
email : info@testo.com
Document code:
0970 3080 en 01
Downloaded from www.Manualslib.com manuals search engine

Más contenido relacionado

La actualidad más candente

Crst001 forte technical_service_manual_chapter_1_eng_rev1
Crst001 forte technical_service_manual_chapter_1_eng_rev1Crst001 forte technical_service_manual_chapter_1_eng_rev1
Crst001 forte technical_service_manual_chapter_1_eng_rev1
jayr torres
 
Perkins 2200 series 2206 d e13ta industrial engine service repair manual
Perkins 2200 series 2206 d e13ta industrial engine service repair manualPerkins 2200 series 2206 d e13ta industrial engine service repair manual
Perkins 2200 series 2206 d e13ta industrial engine service repair manual
fujsekfksmemer
 
Kawasaki tj27 d 2 stroke air-cooled gasoline engine service repair manual
Kawasaki tj27 d 2 stroke air-cooled gasoline engine service repair manualKawasaki tj27 d 2 stroke air-cooled gasoline engine service repair manual
Kawasaki tj27 d 2 stroke air-cooled gasoline engine service repair manual
ufjjdjjskekemm
 

La actualidad más candente (15)

Ykogowa installation manual of transmitter
Ykogowa installation manual  of transmitterYkogowa installation manual  of transmitter
Ykogowa installation manual of transmitter
 
Crst001 forte technical_service_manual_chapter_1_eng_rev1
Crst001 forte technical_service_manual_chapter_1_eng_rev1Crst001 forte technical_service_manual_chapter_1_eng_rev1
Crst001 forte technical_service_manual_chapter_1_eng_rev1
 
Sentinel - PARKER
Sentinel - PARKERSentinel - PARKER
Sentinel - PARKER
 
367465305 woodward-732
367465305 woodward-732367465305 woodward-732
367465305 woodward-732
 
Perkins 2200 series 2206 d e13ta industrial engine service repair manual
Perkins 2200 series 2206 d e13ta industrial engine service repair manualPerkins 2200 series 2206 d e13ta industrial engine service repair manual
Perkins 2200 series 2206 d e13ta industrial engine service repair manual
 
ZIPPTORK Smart Torque Controller System
ZIPPTORK Smart Torque Controller SystemZIPPTORK Smart Torque Controller System
ZIPPTORK Smart Torque Controller System
 
Vibration analysis
Vibration analysisVibration analysis
Vibration analysis
 
Kawasaki tj27 d 2 stroke air-cooled gasoline engine service repair manual
Kawasaki tj27 d 2 stroke air-cooled gasoline engine service repair manualKawasaki tj27 d 2 stroke air-cooled gasoline engine service repair manual
Kawasaki tj27 d 2 stroke air-cooled gasoline engine service repair manual
 
SR1068 Solar Water Heater Controller
SR1068 Solar Water Heater ControllerSR1068 Solar Water Heater Controller
SR1068 Solar Water Heater Controller
 
C option control panel operator's manual Generac
C option control panel   operator's manual   GeneracC option control panel   operator's manual   Generac
C option control panel operator's manual Generac
 
Vibration monitoring
Vibration monitoringVibration monitoring
Vibration monitoring
 
Deutz fahr tcd 2013 4 v engine service repair manual
Deutz fahr tcd 2013 4 v engine service repair manualDeutz fahr tcd 2013 4 v engine service repair manual
Deutz fahr tcd 2013 4 v engine service repair manual
 
Deutz fahr tcd 2012 2 v engine service repair manual
Deutz fahr tcd 2012 2 v engine service repair manualDeutz fahr tcd 2012 2 v engine service repair manual
Deutz fahr tcd 2012 2 v engine service repair manual
 
CONDITION BASED MAINTAINACE BASICS presentation
CONDITION BASED MAINTAINACE BASICS presentation CONDITION BASED MAINTAINACE BASICS presentation
CONDITION BASED MAINTAINACE BASICS presentation
 
Condition monitoring
Condition monitoringCondition monitoring
Condition monitoring
 

Similar a Hướng dẫn sử dụng Testo 308

Similar a Hướng dẫn sử dụng Testo 308 (20)

Hướng dẫn sử dụng Testo 310
Hướng dẫn sử dụng Testo 310Hướng dẫn sử dụng Testo 310
Hướng dẫn sử dụng Testo 310
 
Hướng dẫn sử dụng bộ camera nhiệt Testo 885-2
Hướng dẫn sử dụng bộ camera nhiệt Testo 885-2Hướng dẫn sử dụng bộ camera nhiệt Testo 885-2
Hướng dẫn sử dụng bộ camera nhiệt Testo 885-2
 
Hướng dẫn sử dụng Testo 435
Hướng dẫn sử dụng Testo 435Hướng dẫn sử dụng Testo 435
Hướng dẫn sử dụng Testo 435
 
Hướng dẫn sử dụng máy đo nhiệt độ bề mặt Testo 435-3
Hướng dẫn sử dụng máy đo nhiệt độ bề mặt Testo 435-3Hướng dẫn sử dụng máy đo nhiệt độ bề mặt Testo 435-3
Hướng dẫn sử dụng máy đo nhiệt độ bề mặt Testo 435-3
 
Hướng dẫn sử dụng Testo 435
Hướng dẫn sử dụng Testo 435Hướng dẫn sử dụng Testo 435
Hướng dẫn sử dụng Testo 435
 
Hướng dẫn sử dụng Testo 435-3
Hướng dẫn sử dụng Testo 435-3Hướng dẫn sử dụng Testo 435-3
Hướng dẫn sử dụng Testo 435-3
 
Hướng dẫn sử dụng testo 435-3
Hướng dẫn sử dụng  testo 435-3 Hướng dẫn sử dụng  testo 435-3
Hướng dẫn sử dụng testo 435-3
 
Hướng dẫn sử dụng máy đo đa năng Testo 435
Hướng dẫn sử dụng máy đo đa năng Testo 435Hướng dẫn sử dụng máy đo đa năng Testo 435
Hướng dẫn sử dụng máy đo đa năng Testo 435
 
Hướng dẫn sử dụng Testo 480
Hướng dẫn sử dụng Testo 480Hướng dẫn sử dụng Testo 480
Hướng dẫn sử dụng Testo 480
 
Hướng dẫn sử dụng nhiệt ẩm kế tự ghi Testo 480
Hướng dẫn sử dụng nhiệt ẩm kế tự ghi Testo 480Hướng dẫn sử dụng nhiệt ẩm kế tự ghi Testo 480
Hướng dẫn sử dụng nhiệt ẩm kế tự ghi Testo 480
 
Hướng dẫn sử dụng máy đo đa năng Testo 550 KIT
Hướng dẫn sử dụng máy đo đa năng Testo 550 KIT Hướng dẫn sử dụng máy đo đa năng Testo 550 KIT
Hướng dẫn sử dụng máy đo đa năng Testo 550 KIT
 
Hướng dẫn sử dụng máy đo nhiệt độ hồng ngoại Testo 845
Hướng dẫn sử dụng máy đo nhiệt độ hồng ngoại Testo 845Hướng dẫn sử dụng máy đo nhiệt độ hồng ngoại Testo 845
Hướng dẫn sử dụng máy đo nhiệt độ hồng ngoại Testo 845
 
Instruction Manual ATN OTS-X Series Thermal Imaging Viewers | Optics Trade
Instruction Manual ATN OTS-X Series Thermal Imaging Viewers | Optics TradeInstruction Manual ATN OTS-X Series Thermal Imaging Viewers | Optics Trade
Instruction Manual ATN OTS-X Series Thermal Imaging Viewers | Optics Trade
 
Atlas-Copco-QAS-100. intruction manual.pdf
Atlas-Copco-QAS-100. intruction manual.pdfAtlas-Copco-QAS-100. intruction manual.pdf
Atlas-Copco-QAS-100. intruction manual.pdf
 
John Deere 160CLC Excavator Operation Test Manual TM1932.pdf
John Deere 160CLC Excavator Operation Test Manual TM1932.pdfJohn Deere 160CLC Excavator Operation Test Manual TM1932.pdf
John Deere 160CLC Excavator Operation Test Manual TM1932.pdf
 
John Deere 160CLC Excavator Operation Test Manual TM1932.pdf
John Deere 160CLC Excavator Operation Test Manual TM1932.pdfJohn Deere 160CLC Excavator Operation Test Manual TM1932.pdf
John Deere 160CLC Excavator Operation Test Manual TM1932.pdf
 
Hướng dẫn sử dụng Testo 380
Hướng dẫn sử dụng Testo 380Hướng dẫn sử dụng Testo 380
Hướng dẫn sử dụng Testo 380
 
Hướng dẫn sử dụng Testo 380
Hướng dẫn sử dụng Testo 380Hướng dẫn sử dụng Testo 380
Hướng dẫn sử dụng Testo 380
 
Hướng dẫn sử dụng Testo 870
Hướng dẫn sử dụng Testo 870Hướng dẫn sử dụng Testo 870
Hướng dẫn sử dụng Testo 870
 
Toro workman 200 spray system service repair manual
Toro workman 200 spray system service repair manualToro workman 200 spray system service repair manual
Toro workman 200 spray system service repair manual
 

Más de Tenmars Việt Nam

Más de Tenmars Việt Nam (20)

Cam bien vi tri
Cam bien vi triCam bien vi tri
Cam bien vi tri
 
Hướng dẫn sử dụng máy in nhãn PT-E300
Hướng dẫn sử dụng máy in nhãn PT-E300Hướng dẫn sử dụng máy in nhãn PT-E300
Hướng dẫn sử dụng máy in nhãn PT-E300
 
Huong dan su dung Teso 770-1
Huong dan su dung Teso 770-1Huong dan su dung Teso 770-1
Huong dan su dung Teso 770-1
 
Hướng dẫn sử dụng Testo 872
Hướng dẫn sử dụng Testo 872Hướng dẫn sử dụng Testo 872
Hướng dẫn sử dụng Testo 872
 
Hướng dẫn sử dụng Testo 511
Hướng dẫn sử dụng Testo 511Hướng dẫn sử dụng Testo 511
Hướng dẫn sử dụng Testo 511
 
Hướng dẫn sử dụng Testo 324
Hướng dẫn sử dụng Testo 324Hướng dẫn sử dụng Testo 324
Hướng dẫn sử dụng Testo 324
 
Hướng dẫn sử dụng nhiệt kế hồng ngoại Fluke VT04
Hướng dẫn sử dụng nhiệt kế hồng ngoại Fluke VT04 Hướng dẫn sử dụng nhiệt kế hồng ngoại Fluke VT04
Hướng dẫn sử dụng nhiệt kế hồng ngoại Fluke VT04
 
Hướng dẫn sử dụng máy đo áp suất gió Fluke 922
Hướng dẫn sử dụng máy đo áp suất gió Fluke 922Hướng dẫn sử dụng máy đo áp suất gió Fluke 922
Hướng dẫn sử dụng máy đo áp suất gió Fluke 922
 
Hướng dẫn sử dụng máy đo khí CO2, nhiệt độ, độ ẩm Extech CO200
Hướng dẫn sử dụng máy đo khí CO2, nhiệt độ, độ ẩm Extech CO200Hướng dẫn sử dụng máy đo khí CO2, nhiệt độ, độ ẩm Extech CO200
Hướng dẫn sử dụng máy đo khí CO2, nhiệt độ, độ ẩm Extech CO200
 
Hướng dẫn sử dụng máy đo khí CO Extech CO10
Hướng dẫn sử dụng máy đo khí CO Extech CO10Hướng dẫn sử dụng máy đo khí CO Extech CO10
Hướng dẫn sử dụng máy đo khí CO Extech CO10
 
Hướng dẫn sử dụng Ampe kìm đo điên trở đất không tiếp xúc Extech 382357
Hướng dẫn sử dụng Ampe kìm đo điên trở đất không tiếp xúc Extech 382357Hướng dẫn sử dụng Ampe kìm đo điên trở đất không tiếp xúc Extech 382357
Hướng dẫn sử dụng Ampe kìm đo điên trở đất không tiếp xúc Extech 382357
 
Hướng dẫn sử dụng Ampe kìm với 100A với đo nhiệt độ hồng ngoại và Bluetooth E...
Hướng dẫn sử dụng Ampe kìm với 100A với đo nhiệt độ hồng ngoại và Bluetooth E...Hướng dẫn sử dụng Ampe kìm với 100A với đo nhiệt độ hồng ngoại và Bluetooth E...
Hướng dẫn sử dụng Ampe kìm với 100A với đo nhiệt độ hồng ngoại và Bluetooth E...
 
Hướng dẫn sử dụng máy đo hiệu chuẩn đa năng Extech 412400
Hướng dẫn sử dụng máy đo hiệu chuẩn đa năng Extech 412400Hướng dẫn sử dụng máy đo hiệu chuẩn đa năng Extech 412400
Hướng dẫn sử dụng máy đo hiệu chuẩn đa năng Extech 412400
 
Hướng dẫn sử dụng thiết bị kiểm tra dây cáp mạng TG - 20
 Hướng dẫn sử dụng thiết bị kiểm tra dây cáp mạng TG - 20 Hướng dẫn sử dụng thiết bị kiểm tra dây cáp mạng TG - 20
Hướng dẫn sử dụng thiết bị kiểm tra dây cáp mạng TG - 20
 
Hướng dẫn sử dụng bộ kiểm tra mạng Extech 40180
Hướng dẫn sử dụng bộ kiểm tra mạng Extech 40180Hướng dẫn sử dụng bộ kiểm tra mạng Extech 40180
Hướng dẫn sử dụng bộ kiểm tra mạng Extech 40180
 
Hướng dẫn sử dụng USB không dây Extech BRD10
Hướng dẫn sử dụng USB không dây Extech BRD10Hướng dẫn sử dụng USB không dây Extech BRD10
Hướng dẫn sử dụng USB không dây Extech BRD10
 
Hướng dẫn sử dụng máy nội soi công nghiệp tích hợp wireless BR - 250
Hướng dẫn sử dụng máy nội soi công nghiệp tích hợp wireless BR - 250Hướng dẫn sử dụng máy nội soi công nghiệp tích hợp wireless BR - 250
Hướng dẫn sử dụng máy nội soi công nghiệp tích hợp wireless BR - 250
 
Hướng dẫn sử dụng máy nội soi công nghiệp Extech BR100
Hướng dẫn sử dụng  máy nội soi công nghiệp Extech BR100Hướng dẫn sử dụng  máy nội soi công nghiệp Extech BR100
Hướng dẫn sử dụng máy nội soi công nghiệp Extech BR100
 
Hướng dẫn sử dụng máy đo tốc độ gió, nhiệt độ Extech 407123
Hướng dẫn sử dụng máy đo tốc độ gió, nhiệt độ Extech 407123Hướng dẫn sử dụng máy đo tốc độ gió, nhiệt độ Extech 407123
Hướng dẫn sử dụng máy đo tốc độ gió, nhiệt độ Extech 407123
 
Hướng dẫn sử dụng máy đo tốc độ gió và nhiệt độ Extech 407113
Hướng dẫn sử dụng máy đo tốc độ gió và nhiệt độ Extech 407113Hướng dẫn sử dụng máy đo tốc độ gió và nhiệt độ Extech 407113
Hướng dẫn sử dụng máy đo tốc độ gió và nhiệt độ Extech 407113
 

Último

+971581248768>> SAFE AND ORIGINAL ABORTION PILLS FOR SALE IN DUBAI AND ABUDHA...
+971581248768>> SAFE AND ORIGINAL ABORTION PILLS FOR SALE IN DUBAI AND ABUDHA...+971581248768>> SAFE AND ORIGINAL ABORTION PILLS FOR SALE IN DUBAI AND ABUDHA...
+971581248768>> SAFE AND ORIGINAL ABORTION PILLS FOR SALE IN DUBAI AND ABUDHA...
?#DUbAI#??##{{(☎️+971_581248768%)**%*]'#abortion pills for sale in dubai@
 
Why Teams call analytics are critical to your entire business
Why Teams call analytics are critical to your entire businessWhy Teams call analytics are critical to your entire business
Why Teams call analytics are critical to your entire business
panagenda
 

Último (20)

Introduction to Multilingual Retrieval Augmented Generation (RAG)
Introduction to Multilingual Retrieval Augmented Generation (RAG)Introduction to Multilingual Retrieval Augmented Generation (RAG)
Introduction to Multilingual Retrieval Augmented Generation (RAG)
 
ProductAnonymous-April2024-WinProductDiscovery-MelissaKlemke
ProductAnonymous-April2024-WinProductDiscovery-MelissaKlemkeProductAnonymous-April2024-WinProductDiscovery-MelissaKlemke
ProductAnonymous-April2024-WinProductDiscovery-MelissaKlemke
 
TrustArc Webinar - Unlock the Power of AI-Driven Data Discovery
TrustArc Webinar - Unlock the Power of AI-Driven Data DiscoveryTrustArc Webinar - Unlock the Power of AI-Driven Data Discovery
TrustArc Webinar - Unlock the Power of AI-Driven Data Discovery
 
Mcleodganj Call Girls 🥰 8617370543 Service Offer VIP Hot Model
Mcleodganj Call Girls 🥰 8617370543 Service Offer VIP Hot ModelMcleodganj Call Girls 🥰 8617370543 Service Offer VIP Hot Model
Mcleodganj Call Girls 🥰 8617370543 Service Offer VIP Hot Model
 
Vector Search -An Introduction in Oracle Database 23ai.pptx
Vector Search -An Introduction in Oracle Database 23ai.pptxVector Search -An Introduction in Oracle Database 23ai.pptx
Vector Search -An Introduction in Oracle Database 23ai.pptx
 
Elevate Developer Efficiency & build GenAI Application with Amazon Q​
Elevate Developer Efficiency & build GenAI Application with Amazon Q​Elevate Developer Efficiency & build GenAI Application with Amazon Q​
Elevate Developer Efficiency & build GenAI Application with Amazon Q​
 
EMPOWERMENT TECHNOLOGY GRADE 11 QUARTER 2 REVIEWER
EMPOWERMENT TECHNOLOGY GRADE 11 QUARTER 2 REVIEWEREMPOWERMENT TECHNOLOGY GRADE 11 QUARTER 2 REVIEWER
EMPOWERMENT TECHNOLOGY GRADE 11 QUARTER 2 REVIEWER
 
Repurposing LNG terminals for Hydrogen Ammonia: Feasibility and Cost Saving
Repurposing LNG terminals for Hydrogen Ammonia: Feasibility and Cost SavingRepurposing LNG terminals for Hydrogen Ammonia: Feasibility and Cost Saving
Repurposing LNG terminals for Hydrogen Ammonia: Feasibility and Cost Saving
 
Apidays New York 2024 - APIs in 2030: The Risk of Technological Sleepwalk by ...
Apidays New York 2024 - APIs in 2030: The Risk of Technological Sleepwalk by ...Apidays New York 2024 - APIs in 2030: The Risk of Technological Sleepwalk by ...
Apidays New York 2024 - APIs in 2030: The Risk of Technological Sleepwalk by ...
 
DEV meet-up UiPath Document Understanding May 7 2024 Amsterdam
DEV meet-up UiPath Document Understanding May 7 2024 AmsterdamDEV meet-up UiPath Document Understanding May 7 2024 Amsterdam
DEV meet-up UiPath Document Understanding May 7 2024 Amsterdam
 
Strategies for Landing an Oracle DBA Job as a Fresher
Strategies for Landing an Oracle DBA Job as a FresherStrategies for Landing an Oracle DBA Job as a Fresher
Strategies for Landing an Oracle DBA Job as a Fresher
 
Artificial Intelligence Chap.5 : Uncertainty
Artificial Intelligence Chap.5 : UncertaintyArtificial Intelligence Chap.5 : Uncertainty
Artificial Intelligence Chap.5 : Uncertainty
 
Polkadot JAM Slides - Token2049 - By Dr. Gavin Wood
Polkadot JAM Slides - Token2049 - By Dr. Gavin WoodPolkadot JAM Slides - Token2049 - By Dr. Gavin Wood
Polkadot JAM Slides - Token2049 - By Dr. Gavin Wood
 
+971581248768>> SAFE AND ORIGINAL ABORTION PILLS FOR SALE IN DUBAI AND ABUDHA...
+971581248768>> SAFE AND ORIGINAL ABORTION PILLS FOR SALE IN DUBAI AND ABUDHA...+971581248768>> SAFE AND ORIGINAL ABORTION PILLS FOR SALE IN DUBAI AND ABUDHA...
+971581248768>> SAFE AND ORIGINAL ABORTION PILLS FOR SALE IN DUBAI AND ABUDHA...
 
Web Form Automation for Bonterra Impact Management (fka Social Solutions Apri...
Web Form Automation for Bonterra Impact Management (fka Social Solutions Apri...Web Form Automation for Bonterra Impact Management (fka Social Solutions Apri...
Web Form Automation for Bonterra Impact Management (fka Social Solutions Apri...
 
Why Teams call analytics are critical to your entire business
Why Teams call analytics are critical to your entire businessWhy Teams call analytics are critical to your entire business
Why Teams call analytics are critical to your entire business
 
Corporate and higher education May webinar.pptx
Corporate and higher education May webinar.pptxCorporate and higher education May webinar.pptx
Corporate and higher education May webinar.pptx
 
ICT role in 21st century education and its challenges
ICT role in 21st century education and its challengesICT role in 21st century education and its challenges
ICT role in 21st century education and its challenges
 
How to Troubleshoot Apps for the Modern Connected Worker
How to Troubleshoot Apps for the Modern Connected WorkerHow to Troubleshoot Apps for the Modern Connected Worker
How to Troubleshoot Apps for the Modern Connected Worker
 
Strategize a Smooth Tenant-to-tenant Migration and Copilot Takeoff
Strategize a Smooth Tenant-to-tenant Migration and Copilot TakeoffStrategize a Smooth Tenant-to-tenant Migration and Copilot Takeoff
Strategize a Smooth Tenant-to-tenant Migration and Copilot Takeoff
 

Hướng dẫn sử dụng Testo 308

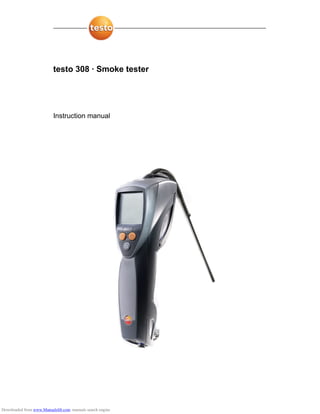
  • 1. testo 308 · Smoke tester Instruction manual Downloaded from www.Manualslib.com manuals search engine
  • 2. 2 0970 3080 en 01 testo AG Downloaded from www.Manualslib.com manuals search engine
  • 3. 1 Contents 0970 3080 en 01 3 Pos: 1 /TD/Überschriften/1. Inhalt @ 0mod_1177587817070_79.doc @ 1243 1 Contents 1 Contents .............................................................................................3 2 Safety and the environment ..............................................................5 2.1. About this document ..................................................................5 2.2. Ensure safety.............................................................................6 2.3. Protecting the environment ........................................................7 3 Specifications.....................................................................................8 3.1. Use .........................................................................................8 3.2. Technical data............................................................................8 4 Product description .........................................................................10 5 First steps.........................................................................................12 5.1. Charging the battery ................................................................12 5.2. Connecting the mains unit .......................................................13 5.3. Switching the instrument on/off................................................13 6 Using the product ............................................................................15 6.1. Performing the leakage test .....................................................15 6.2. Performing settings..................................................................15 6.3. Measuring ................................................................................16 6.4. Printing the measurement results ............................................18 6.5. Transferring the measurement results .....................................18 7 Maintaining the product ..................................................................19 7.1. Emptying the condensate trap .................................................19 7.2. Changing the battery................................................................20 7.3. Changing the filter paper..........................................................21 7.4. Replacing the particle filter.......................................................23 7.5. Cleaning the instrument ...........................................................24 7.6. Calibration................................................................................24 Downloaded from www.Manualslib.com manuals search engine
  • 4. 1 Contents 4 0970 3080 en 01 testo AG 8 Tips and assistance.........................................................................25 8.1. Questions and answers ...........................................................25 8.2. Accessories and spare parts....................................................26 8.3. Service information ..................................................................27 Pos: 2 /TD/--- Seitenwechsel --- @ 0mod_1173774430601_0.doc @ 283 Downloaded from www.Manualslib.com manuals search engine
  • 5. 2 Safety and the environment 0970 3080 en 01 5 Pos: 3 /TD/Überschriften/2. Sicherheit und Umwelt @ 0mod_1173774719351_79.doc @ 292 2 Safety and the environmentPos: 4 /TD/Überschriften/2.1 Zu diesem Dokument @ 0mod_1173775252351_79.doc @ 346 2.1. About this documentPos: 5 /TD/Sicherheit und Umwelt/Zu diesem Dokument/Verwendung (Standard) @ 0mod_1173775068554_79.doc @ 337 Use > Please read this documentation through carefully and familiarize yourself with the product before putting it to use. Pay particular attention to the safety instructions and warning advice in order to prevent injuries and damage to the products. > Keep this document to hand so that you can refer to it when necessary. > Hand this documentation on to any subsequent users of the product. Pos: 6 /TD/Sicherheit und Umwelt/Zu diesem Dokument/Symbole und Schreibkonv. [Standard] @ 0mod_1174982140622_79.doc @ 515 Symbols and writing standards Representation Explanation Warning advice, risk level according to the signal word: Warning! Serious physical injury may occur. Caution! Slight physical injury or damage to the equipment may occur. > Implement the specified precautionary measures. Note: Basic or further information. 1. ... 2. ... Action: more steps, the sequence must be followed. > ... Action: a step or an optional step. - ... Result of an action. Menu Elements of the instrument, the instrument display or the program interface. [OK] Control keys of the instrument or buttons of the program interface. ... | ... Functions/paths within a menu. “...” Example entries Downloaded from www.Manualslib.com manuals search engine
  • 6. 2 Safety and the environment 6 0970 3080 en 01 testo AG Pos: 7 /TD/Überschriften/2.2 Sicherheit gewährleisten @ 0mod_1173780783960_79.doc @ 366 2.2. Ensure safetyPos: 8 /TD/Sicherheit und Umwelt/Sicherheit gewährleisten/Produkt bestimmungsgemäß verwenden @ 0mod_1173781261848_79.doc @ 386 > Only operate the product properly, for its intended purpose and within the parameters specified in the technical data. Do not use any force. Pos: 9 /TD/Sicherheit und Umwelt/Sicherheit gewährleisten/Sonden abkühlen lassen @ 0mod_1190094931187_79.doc @ 4873 > After the final measurement, allow probes and probe shafts to cool down sufficiently in order to avoid burns from the hot sensor tip or the probe shaft. Pos: 10 /TD/Sicherheit und Umwelt/Sicherheit gewährleisten/Nicht mit Lösungsmitteln lagern @ 0mod_1175692375179_79.doc @ 583 > Do not store the product together with solvents. Do not use any desiccants. Pos: 11 /TD/Sicherheit und Umwelt/Sicherheit gewährleisten/Nur beschriebene Wartungsarbeiten durchführen @ 0mod_1175692705195_79.doc @ 601 > Carry out only the maintenance and repair work on this instrument that is described in the documentation. Follow the prescribed steps exactly. Use only original spare parts from Testo. Pos: 12 /TD/Sicherheit und Umwelt/Sicherheit gewährleisten/Akku-Sicherheitshinweise (LiIon) @ 0mod_1187184666109_79.doc @ 2363 > Improper use of the rechargeable battery can lead to destruction or injuries by means of current surges, fire or escaping chemicals. The following instructions must be observed to avoid such hazards: • Only use in accordance with the directions in the instruction manual. • Do not short, take apart or modify. • Do not expose to heavy impacts, water, fire or temperatures above 60 °C. • Do not store in the proximity of metal objects. • Do not use leaky or damaged rechargeable batteries. In the event of contact with battery acid: Thoroughly wash affected area with water and consult a doctor, if necessary. • Only charge in the measuring instrument or the recommended charging station. • Immediately stop the charging process if this is not completed in the given time. • In the event of improper function or signs of overheating, immediately remove the rechargeable battery from the measuring instrument/charging station. Caution: Rechargeable battery may be hot! Downloaded from www.Manualslib.com manuals search engine
  • 7. 2 Safety and the environment 0970 3080 en 01 7 Pos: 13 /TD/Überschriften/2.3 Umwelt schützen @ 0mod_1173780843645_79.doc @ 375 2.3. Protecting the environmentPos: 14.1 /TD/Sicherheit und Umwelt/Umwelt schützen/Akkus/Batterien entsorgen @ 0mod_1175693637007_79.doc @ 619 > Dispose of faulty rechargeable batteries/spent batteries in accordance with the valid legal specifications. Pos: 14.2 /TD/Sicherheit und Umwelt/Umwelt schützen/Produkt entsorgen @ 0mod_1173780307072_79.doc @ 357 > At the end of its useful life, send the product to the separate collection for electric and electronic devices (observe local regulations) or return the product to Testo for disposal. Pos: 15 /TD/--- Seitenwechsel --- @ 0mod_1173774430601_0.doc @ 283 Downloaded from www.Manualslib.com manuals search engine
  • 8. 3 Specifications 8 0970 3080 en 01 testo AG Pos: 16 /TD/Überschriften/3. Leistungsbeschreibung @ 0mod_1173774791554_79.doc @ 301 3 SpecificationsPos: 17 /TD/Überschriften/3.1 Verwendung @ 0mod_1176211016437_79.doc @ 695 3.1. UsePos: 18 /TD/Leistungsbeschreibung/Verwendung/testo 308 @ 0mod_1177404646997_79.doc @ 1182 Functions and use The digital smoke tester is a hand-held instrument for determining the smoke number of oil firing installations. These systems can be monitored using the testo 308 and checked for compliance with the applicable limit values. The measuring instrument is approved for measurements under the First Federal Immission Control Ordinance (1. BImSchV, German ordinance). Pos: 19 /TD/Überschriften/3.2 Technische Daten @ 0mod_1176211088437_79.doc @ 704 3.2. Technical dataPos: 20 /TD/Leistungsbeschreibung/Technische Daten/testo 308 @ 0mod_1176727248645_79.doc @ 797 Characteristic Values Sensor Photodiode Measuring range 0 - 6 smoke number Resolution 0.1 smoke number Accuracy ±0.2 smoke number Test sample volume 1.63 ± 0.1 reference litre (990 mbar, 20 °C / 68°F) Storage/transport temperature -20 to 50°C / -4 to 122°F Operating temperature 5 to 45°C / 41 to 113°F Rechargeable battery Lithium ion, 2600mAh / 3.7V Battery operation time 45 individual measurements Protection class IP 40 Interfaces IR, IRDA, optional: Bluetooth (0632 0309) Dimensions 270 x 63 x 120 mm / 10.63 x 2.48 x 4.73" Weight 600g / 1.33lb (including battery) Downloaded from www.Manualslib.com manuals search engine
  • 9. 3 Specifications 0970 3080 en 01 9 Characteristic Values Warranty 2 years, warranty conditions: See guarantee card EU Directive 2004/108/EC Standards/Tests 1st Federal Immission Control Ordinance (German ordinance) Pos: 21 /TD/--- Seitenwechsel --- @ 0mod_1173774430601_0.doc @ 283 Downloaded from www.Manualslib.com manuals search engine
  • 10. 4 Product description 10 0970 3080 en 01 testo AG Pos: 22 /TD/Überschriften/4. Produktbeschreibung @ 0mod_1173774846679_79.doc @ 310 4 Product descriptionPos: 23 /TD/Produktbeschreibung/Übersicht/testo 308/Anzeige- und Bedienelemente @ 0mod_1176813221481_79.doc @ 833 Display and control elements 1 IR/IrDA interface 2 Gas outlet 3 Display. Instrument status icons: Icon Significance Error message Data exchange possible Printing Meter running Configuration menu opened Battery capacity: > 75 %/> 50 %/> 25 %/< 10 % Downloaded from www.Manualslib.com manuals search engine
  • 11. 4 Product description 0970 3080 en 01 11 4 Control keys: Key Function Switching the instrument on/off Left function key: [Start] [Ok] [ ] [set] Function changes depending on the instrument status: Begin smoke measurement Accept setting/reading Oil derivative present Open configuration menu Right function key: [ ] [No] [ ] [End] [ ] [ ] Function changes depending on the instrument status: Begin leakage test Cancel selection Change selection End measurement, back to measurement menu Start printout No oil derivative present 5 Probe shaft 6 Condensate outlet 7 Service lid: Access to filter paper, battery 8 Probe shaft 9 Eyelet for wrist strap 10 Condensate trap Pos: 24 /TD/--- Seitenwechsel --- @ 0mod_1173774430601_0.doc @ 283 Downloaded from www.Manualslib.com manuals search engine
  • 12. 5 First steps 12 0970 3080 en 01 testo AG Pos: 25 /TD/Überschriften/5. Erste Schritte @ 0mod_1173774895039_79.doc @ 319 5 First stepsPos: 26 /TD/Erste Schritte/testo 308/Akku laden @ 0mod_1177413427960_79.doc @ 1210 5.1. Charging the battery Fully charge the rechargeable battery before using the instrument. The rechargeable battery can only be charged at an ambient temperature of 0 to 35°C / 32 to 95°F. If the rechargeable battery pack has discharged completely, the charging time at room temperature is approx. 8-9 hrs. Rechargeable battery care: • If possible, always discharge the rechargeable battery and recharge it fully. • Do not store a discharged battery for an extended period, fully charge before renewed use. • Best storage conditions: 50-80 % residual capacity, 10 to 20°C / 50 to 68°F ambient temperature. It is not possible to charge batteries in the instrument when switched on. > Switch the instrument off before charging the battery. 1. Insert the instrument plug of the mains unit into the mains socket on the instrument. 2. Insert the mains plug of the mains unit into a mains socket. - The charging process will start. The battery symbol illuminates with a variable number of segments. The charging process stops automatically and illuminates when the battery is charged. Alternatively, the battery can be charged in a charger (accessory, 0554 1103). > Refer to the documentation that comes with the charger for this. Downloaded from www.Manualslib.com manuals search engine
  • 13. 5 First steps 0970 3080 en 01 13 Pos: 27 /TD/Erste Schritte/testo 308/Netzteil anschließen @ 0mod_1177413775799_79.doc @ 1219 5.2. Connecting the mains unit If the mains unit is connected, the instrument is powered automatically via the mains unit. It is not possible to charge the battery in the instrument during operation. Even when running from the mains supply, a battery must be inserted in the instrument. 1. Insert the instrument plug of the mains unit 0554 1096 into the mains socket on the instrument. 2. Insert the mains plug of the mains unit into a mains socket. - If the instrument is switched off, the battery charging process begins automatically. By switching the instrument on, the battery charging process is stopped and the instrument is then powered via the mains unit. Pos: 28 /TD/Erste Schritte/testo 308/Gerät ein-/ausschalten @ 0mod_1176899337954_79.doc @ 879 5.3. Switching the instrument on/off Switch the instrument on If the service lid is not locked, incorrect measurements will result: > Check that the service lid is locked before switching on the instrument. Testo recommends performing a leakage test before every measurement: > To do so, close the probe shaft before switching on the instrument. 1. Press and hold [ ] until a message appears in the display. - A segment test is performed: All display segments illuminate for 2 sec. - Finally, the firmware version is displayed for 2 sec and the left function key is assigned the set function. During this time, you have the following options: > Open configuration menu: Press [set]. - The configuration menu is opened, see Performing settings Page 15. > Begin leakage test: Press [ ]. - The leakage test is started, see Performing the leakage test Page 15. Downloaded from www.Manualslib.com manuals search engine
  • 14. 5 First steps 14 0970 3080 en 01 testo AG - When initially switching on the instrument, the configuration menu is opened automatically: > Perform the basic settings, see Performing settings Page 15. - If no function key is pressed, the instrument changes to measurement view, see Measuring Page 16. Switch the instrument off With the instrument switched on, the filter paper heating is automatically activated. This reduces the operating time of the rechargeable battery. > Switch the instrument off if you are not performing a measurement. - The measurement view is opened. > Press and hold [ ] until the display goes out or the rinsing phase begins. - If a measurement was performed since the instrument was last switched on, a rinsing phase begins (length: 20 sec). The rinsing phase can be manually interrupted: > Press [End]. - The instrument switches off automatically. The instrument has an automatic switch-off function. 10 minutes after the last button was pressed, the instrument switches itself off to protect the rechargeable battery. Pos: 29 /TD/--- Seitenwechsel --- @ 0mod_1173774430601_0.doc @ 283 Downloaded from www.Manualslib.com manuals search engine
  • 15. 6 Using the product 0970 3080 en 01 15 Pos: 30 /TD/Überschriften/6. Produkt verwenden @ 0mod_1173774928554_79.doc @ 328 6 Using the productPos: 31 /TD/Produkt verwenden/testo 308/Dichtigkeitstest durchführen @ 0mod_1195830451218_79.doc @ 5923 6.1. Performing the leakage test - The leakage test was started, see Switching the instrument on/off Page 13. - Test lights up and the smoke tester is running. Air is sucked in for max. 30 seconds. For this time period, the probe shaft must remain closed. - If the instrument is leak-tight, Test OK lights up before the 30 seconds elapse. > Press [End] to switch to measurement view. - If the instrument is leaky, lights up: > Check whether the service lid is locked correctly. > Check whether the condensate trap is correctly inserted and closed. > Repeat the leakage test: Press [Start]. > Contact your dealer or Testo Customer Service if you receive another error message. Pos: 32 /TD/Überschriften/6.1 Einstellungen vornehmen @ 0mod_1184584321421_79.doc @ 1863 6.2. Performing settingsPos: 33 /TD/Produkt verwenden/testo 308/Einstellungen vornehmen @ 0mod_1193034020203_79.doc @ 5523 - The configuration menu was opened, see Switching the instrument on/off Page 13. - flashes. You can set whether the oil derivative prompt (Oil derivative yes/no?) should appear after a smoke number measurement. When the oil derivative prompt is switched on, the paper is transported forward sfter the measurement so that the measurement spot is visible. When the oil derivative prompt is switched off, the paper is not transported. 1. Press [OK] to switch on the oil derivative prompt or [no] to switch off the prompt. - (Prompt switched on) or (Prompt switched off) is shown for 2 seconds. - 1 or 3 flashes. You can set whether the smoke number measurement should occur via an individual measurement or as the average of three measurements. Downloaded from www.Manualslib.com manuals search engine
  • 16. 6 Using the product 16 0970 3080 en 01 testo AG 2. Press [ ] to set the measuring method: • 1 Test: Individual measurement. • 3 Tests: Average of three measurements. 3. Press [OK]. - 1 Test (individual measurement) or 3 Tests (average) is shown for 2 seconds. - 545 or 547 flashes. The printer type that is used can be set. 4. Press [ ] to select the printer used: • 545: Testo protocol printer (IR) 0554 0545. • 547: Testo protocol printer (IrDA) 0554 0547. 5. Press [OK]. - 545 (IR printer) or 547 (IrDA printer) is shown for 2 seconds. - The firmware version, the selected measuring method and the selected setting of the oil derivative prompt are shown for 3 seconds. - The instrument switches to measurement view. Pos: 34 /TD/Überschriften/6.3 Messungen durchführen @ 0mod_1184584650078_79.doc @ 1872 6.3. MeasuringPos: 35 /TD/Produkt verwenden/testo 308/Messungen durchführen @ 0mod_1193040408187_79.doc @ 5573 > Check the fill level of the condensate trap. Empty this if the max. marking is exceeded, see Emptying the condensate trap Page 19. > Check the particle filter for signs of contamination. Change the filter if it is contaminated, see Replacing the particle filter Page 23. > Check whether there is enough filter paper in the instrument (viewing window of the service lid). Replace the filter paper if it is insufficient, see Changing the filter paper page 21. 1. Position the tip of the probe shaft in the centre of the flow (area with the highest flue gas temperature). 2. Press [Start]. - The measurement begins, the smoke tester is running. The elapsed measurement period is displayed. A measurement can be interrupted early: > Press [End]. Downloaded from www.Manualslib.com manuals search engine
  • 17. 6 Using the product 0970 3080 en 01 17 - The smoke tester automatically stops as soon as 1.63 reference litres of flue gas have been sucked in. - The evaluation of the blackening mark created on the filter paper is performed. - The detected smoke number is shown. 3. Press [OK] to accept the value or [no] to delete the value. - If the 3 Tests measuring method is set, the next measurement can begin: > Repeat steps 2 to 3 for the second and third measurement. - If the oil derivative prompt is switched on, the result of the oil derivative determination can be entered after the measurement: • : Oil derivative present. • : No oil derivative present > Press [ ] or [ ]. - The detected smoke number (value of the individual measurement or average from three measurements) is shown. The entry of the oil derivative prompt is also shown (if performed). > To tear off the filter paper strip issued from the instrument: Grip the paper just above the paper outlet and pull sideways. Caution! Damage to the instrument. > Do not pull the filter paper out of the instrument when the service lid is closed. > Only pull the paper sideways in order to tear it off. Pos: 36 /TD/(Warn-)Hinweise/Fühler/Sonden/Vorsicht! Verbrennungsgefahr Sondenrohr @ 1mod_1201618356937_79.doc @ 7984 Caution! Risk of burns due to hot probe shaft. > Allow the probe shaft to cool down after a measurement before touching it or placing it in the transport packaging. Downloaded from www.Manualslib.com manuals search engine
  • 18. 6 Using the product 18 0970 3080 en 01 testo AG Pos: 37 /TD/Produkt verwenden/testo 308/Messergebnisse drucken @ 0mod_1193040403390_79.doc @ 5563 6.4. Printing the measurement results - A measurement was performed and the right function key is assigned the function. > Press [ ]. - The data is sent to the protocol printer. lights up during the data transfer. Pos: 38 /TD/Produkt verwenden/testo 308/Messergebnisse übertragen @ 0mod_1196164346187_79.doc @ 5933 6.5. Transferring the measurement results Data transfer is presently possible to the following instruments: • testo 327 with Firmware version from 1.07 • testo 330 with Firmware version from 1.33 • testo 335 with Firmware version from 1.23 - A measurement was performed and lights up. > Request the data from another Testo measuring instrument with the testo 308. Please refer to the documentation for the respective Testo measuring instrument for this. - The data transfer takes place by Bluetooth, as long as both instruments have this interace. Otherwise the data transfer takes place via the IrDA interface. Pos: 39 /TD/--- Seitenwechsel --- @ 0mod_1173774430601_0.doc @ 283 Downloaded from www.Manualslib.com manuals search engine
  • 19. 7 Maintaining the product 0970 3080 en 01 19 Pos: 40 /TD/Überschriften/7. Produkt instand halten @ 0mod_1173789831362_79.doc @ 397 7 Maintaining the productPos: 41 /TD/Produkt instand halten/testo 308/Kondensatfalle leeren @ 0mod_1177416851747_79.doc @ 1228 7.1. Emptying the condensate trap Caution! Damage to the smoke tester by means of condensate entering the gas path. > Do not empty the condensate trap with the smoke tester running. The condensate consists of a weak mix of acids: > Avoid contact with the skin. > Make sure that the condensate does not run over the housing. 1. Hold the instrument in such a way that the condensate outlet points upwards. 2. Pull out the sealing plug of the condensate outlet approx. 5 mm to the stop (1). 3. Empty the condensate into a sink. 4. Wipe off any remaining drops at the condensate outlet using a cloth. 5. Close the condensate outlet with the sealing plug. > Ensure that the condensate outlet is fully closed, as otherwise incorrect measurements may occur due to external air entering. 1 Downloaded from www.Manualslib.com manuals search engine
  • 20. 7 Maintaining the product 20 0970 3080 en 01 testo AG Pos: 42 /TD/Produkt instand halten/testo 308/Akku wechseln @ 0mod_1177412872617_79.doc @ 1201 7.2. Changing the battery 1. Isolate the instrument from the mains and switch it off before changing the rechargeable battery. 2. Open the lock of the service lid (1). 3. Open the service lid and remove it from the instrument (2). 4. Open the battery lock by pressing the grey button and simultaneously pushing in the direction of the arrow (3). 5. Remove the rechargeable battery from the instrument and insert a new battery. Only use the Testo rechargeable battery 0515 0107! 6. Close the battery lock by pressing the grey button and simultaneously pushing opposite the direction of the arrow until the battery engages. 7. Insert the service lid in the retaining hinge and close it. 8. Close the lock of the service lid. 1 2 3 Downloaded from www.Manualslib.com manuals search engine
  • 21. 7 Maintaining the product 0970 3080 en 01 21 Pos: 43 /TD/Produkt instand halten/testo 308/Filterpapier wechseln @ 0mod_1193051672843_79.doc @ 5583 7.3. Changing the filter paper Caution! Damage to or contamination of the measuring lens. > Keep the paper rolls free of contamination, as this could potentially be transmitted to the measuring lens. > Do not touch the protection glass of the measuring lens. 1. Isolate the instrument from the mains and switch it off before changing the filter paper (1). 2. Open the lock of the service lid (2). 3. Open the service lid (3) and remove it from the instrument. 4. Pull the winder out of the bracket (4). 5. Remove the plastic sleeve of the spent paper roll from the winder and dispose of this (5). Off 1 2 3 4 5 (3) Downloaded from www.Manualslib.com manuals search engine
  • 22. 7 Maintaining the product 22 0970 3080 en 01 testo AG 6. Slide a new paper roll onto the winder (6). 7. Align the paper roll as shown below (6) and fasten the winder in the bracket (7). 8. Detach the adhesive strip from the paper roll and unwind approx. 10 cm of paper from the roll (8). 9. Cut off the unwound paper and dispose of this (9). Caution! Damage to the gear wheel for paper transport. > Do not turn the gear wheel for paper transport. 10. Slide through the end of the paper strip, under the guide tabs on the side, until it lies underneath the draw roll (10). 11. Press [ ]. - The instrument is switched on and the automatic paper feed pushes out the paper underneath the draw roll. 12. Insert the service lid in the retaining hinge (12) and close it (13). 13. Close the lock of the service lid (14). Caution! Damage to the instrument. > Do not pull the filter paper out of the instrument when the service lid is closed. > Only pull the paper sideways in order to tear it off. click 7 6 click 10 cm 4 in. 8 9 11 10 On 12 (11)13 14 Downloaded from www.Manualslib.com manuals search engine
  • 23. 7 Maintaining the product 0970 3080 en 01 23 Pos: 44 /TD/Produkt instand halten/testo 308/Partikelfilter wechseln @ 0mod_1195635723421_79.doc @ 5853 7.4. Replacing the particle filter 1. Isolate the instrument from the mains and switch it off before changing the particle filter. 2. Disconnect the instrument plug of a connected mains unit from the instrument. 3. Remove the condensate trap from the instrument (1). 4. Remove the spent particle filter from the plastic sleeve (2) and insert a new filter. 5. Place the condensate trap on the instrument again. 1 2 Downloaded from www.Manualslib.com manuals search engine
  • 24. 7 Maintaining the product 24 0970 3080 en 01 testo AG Pos: 45 /TD/Produkt instand halten/testo 308/Gerät reinigen @ 0mod_1196170437015_79.doc @ 5943 7.5. Cleaning the instrument Housing > If the housing of the instrument is dirty, clean it with a damp cloth. Do not use any aggressive cleaning agents or solvents! Weak household cleaning agents and soap suds may be used. Protecting glass of the measuring lens Caution! Danger of breaking the protecting glass of the measuring lens! > When cleaning, only exert light pressure on the protecting glass. > If contaminated, clean the protecting glass of the measuring lens with a damp cloth that is not too moist. Do not use any aggressive cleaning agents or solvents! Weak household cleaning agents and soap suds may be used. Pos: 46 /TD/Produkt instand halten/testo 308/Kalibrierung @ 2mod_1207921490093_79.doc @ 14584 7.6. Calibration In order to guarantee measurement accuracy, we recommend having the instrument calibrated once a year. Please contact your dealer or Testo customer service. For contact details see Service information page 27 or in the internet at: www.testo.com Pos: 47 /TD/--- Seitenwechsel --- @ 0mod_1173774430601_0.doc @ 283 Downloaded from www.Manualslib.com manuals search engine
  • 25. 8 Tips and assistance 0970 3080 en 01 25 Pos: 48 /TD/Überschriften/8. Tipps und Hilfe @ 0mod_1173789887985_79.doc @ 406 8 Tips and assistancePos: 49 /TD/Überschriften/8.1 Fragen und Antworten @ 0mod_1177402017078_79.doc @ 1093 8.1. Questions and answersPos: 50 /TD/Tipps und Hilfe/Fragen und Antworten/testo 308 @ 0mod_1193059333062_79.doc @ 5592 Question Possible causes/solutions uu lights up The measured smoke number is less than 0. The filter paper was contaminated before the measurement. > Repeat the measurement. and E1 or E2 light up The measured smoke number is above the permissible range: > Check the blackening mark and set the system as needed. Repeat the measurement. The gas path is blocked: > Check the probe shaft for foreign matter and repeat the measurement. and E4 light up The instrument temperature is outside the permissible range: > Let the instrument warm up or cool down. and E3 light up A measurement error has occurred because the service lid is not correctly locked, the condensate trap is not correctly inserted / closed, or there is no filter paper in the instrument: > Eliminate the cause of the error and repeat the measurement. and E7 light up A mechanical error has occurred: > Confirm the error message with [End] and repeat the measurement. and E41 to E49 light up A serious error has occurred: > Contact your dealer or Testo Customer Service. and flash Recharging the battery is impossible: > Check the contact of the battery. Downloaded from www.Manualslib.com manuals search engine
  • 26. 8 Tips and assistance 26 0970 3080 en 01 testo AG If we could not answer your question or the solutions given during troubleshooting did not help: please contact your dealer or Testo Customer Service. For contact data, see Service information page 27 or look up our website: www.testo.com Pos: 51 /TD/Überschriften/8.2 Zubehör und Ersatzteile @ 0mod_1177402058734_79.doc @ 1102 8.2. Accessories and spare partsPos: 52 /TD/Tipps und Hilfe/Zubehör und Ersatzteile/testo 308 @ 0mod_1176810317388_79.doc @ 818 Description Article no. Mains unit 0554 1096 Smoke tester bracket 0554 0616 Rechargeable battery charger 0554 1103 Spare rechargeable battery 0515 0107 Spare filter paper (8 rolls) 0554 0146 Spare particle filter 0554 1101 Acetone dispenser 0554 0159 Cone 0554 9010 Case 0516 0002 Pos: 53 /TD/Überschriften/8.3 Service-Informationen @ 0mod_1177402096406_79.doc @ 1111 Downloaded from www.Manualslib.com manuals search engine
  • 27. 8 Tips and assistance 0970 3080 en 01 27 8.3. Service informationPos: 54 /TD/Tipps und Hilfe/Service-Informationen/Kontaktdaten (Abgas-Analyse) @ 0mod_1195738937875_79.doc @ 5903 Contact details Service Testo AG Kundendienst Kolumban-Kayser-Str. 17, D-79853 Lenzkirch Service hotline: Tel.: +49-7653-681-620 Service hours: Mo. - Th.: 07:00 19:00 Fr.: 07.00 - 17:30 (excluding holidays) Pos: 55 /TD/Tipps und Hilfe/Service-Informationen/Kontaktdaten Zentrale @ 1mod_1199887093359_79.doc @ 7003 Contact details Head office GREAT BRITAIN / IRELAND Testo Ltd. Alton, Hampshire GU34 2QJ Tel. (14 20) 54 44 33, Fax (14 20) 54 44 E-mail: info@testo.co.uk USA Testo Inc. Sparta, NJ. 07871 Tel. (800) 227-0729, Fax (862) 354-5020 E-mail: info@testo.com AUSTRALIA Testo Pty. Ltd. Croydon South VIC 3136 Tel. (3) 98 00 46 77, Fax (3) 98 00 46 99 E-mail: info@testo.com.au The most up-to-date address details of our subsidiaries and agencies can be found in Internet at: www.testo.com ===== Ende der Stückliste ===== Downloaded from www.Manualslib.com manuals search engine
  • 28. testo AG Postfach 1140, 79849 Lenzkirch Testo-Strasse 1, 79853 Lenzkirch GERMANY Phone: +49 (0) 7653 681-0 Fax: +49 (0) 7653 681-100 Internet: www.testo.com email : info@testo.com Document code: 0970 3080 en 01 Downloaded from www.Manualslib.com manuals search engine