
Recomendados
Más contenido relacionado
La actualidad más candente
La actualidad más candente (20)
Similar a A DIY Science Video Toolkit in 10 Steps
Similar a A DIY Science Video Toolkit in 10 Steps (20)
Último
Último (20)
A DIY Science Video Toolkit in 10 Steps
- 1. A DIY Science Video Toolkit in 10 Steps
- 2. Karen L. McKee, Ph.D. The Scientist Videographer http://thescientistvideographer.com/wordpress Twitter: @scivideographer
- 3. Producing your own videos is an easy and effective way to communicate with a global audience. This DIY toolkit explains in 10 steps some of the basics of video-making and provides useful links to additional information.
- 4. If you are going to use video to communicate, it must be as outstanding as your other information products. Just like a journal article or presentation, your video must be well organized, free of content and technical errors, and accessible on common platforms. In addition, it must meet a viewer’s expectations. Tip: Watch videos on your topic and notice what enhances or detracts from the experience. Step 1: Understand what makes a good (and bad) video
- 5. There are many ways to use video to communicate science. Here are a few ideas: 1. A video abstract enhances a journal article and makes it more discoverable online. Learn More 2. A methods video can be submitted to a journal as Supplemental Online Material. Learn More 3. A video resume’ can be used to show intangible qualities such as enthusiasm, confidence, eloquence, or humor or to illustrate your unique skills and experiences. Learn More 4. Enhance your next conference poster with a video. Learn More Step 2: Decide what you want to communicate
- 6. Decide what your main message is going to be and who your target audience will be. If you are not clear about the message, your audience won’t be either. Your target audience will determine how you format and deliver your message. Tip: Don’t bombard the viewer with facts, facts, and more facts. Instead, tell a story. Learn More Step 3: Frame your message
- 7. The simplest approach is to use a three-part structure: a beginning, middle, and end. This structure will organize your information and will meet the viewer’s expectations for a story format. Also, set a time limit and decide on pacing (e.g., a fast-paced delivery vs. slow reveal). Tip: Keep your video brief and focused on the most important aspects of your message. Aim for a video of between one and three minutes. Learn More Step 4: Decide on a story structure and pacing
- 8. Before starting to film, you need a clear plan of action. A script will help you organize your thoughts and avoid rambling and digressions. Create a concise narrative that covers each key point to be made in your video. Then decide how and where each segment or scene will be filmed. Select locations for filming without distracting movements and noise in the background. Tip: Read your script aloud to gauge timing. Cut or rephrase if it goes too long. Learn More Step 5: Write your script and plan your shots
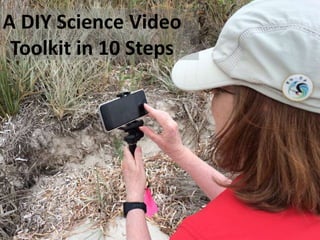
- 9. You will need a recording device (camera, smartphone, tablet, webcam) to film your video and movie-editing software to trim your footage and organize it in sequence. You may also need an external microphone and tripod to ensure stable shots. Tip: If you are a beginner, start off with whatever device you already own and know how to operate, such as a phone camera. Simple-to-use but powerful editing apps (iMovie, Kinemaster) are inexpensive and easy to learn. Learn More Step 6: Select your equipment and software
- 10. Filming will likely be the most challenging part of creating your video. Practice your script until it feels natural; if you flub your lines, just do a retake. Don’t forget to capture additional footage (b-roll) of plants, animals, equipment, facilities, or landscapes to illustrate what you are talking about. Tip: There are many dos and don’ts in filmmaking. By knowing the most common filming mistakes, you can avoid them. Learn More Step 7: Film your video
- 11. You need to edit your video footage to remove mistakes and organize it in a sequence to tell your story. If you add media downloaded from the Internet, be sure it is in the public domain or you have written permission to reuse in your video. Tip: Editing is more about removing material than about adding special effects or music. Select only the best clips and trim those down as much as possible. Learn More Step 8: Edit your video
- 12. The easiest way to share your video is to post it on a media-sharing platform such as YouTube or Vimeo. You can adjust the viewing settings to share your video publicly or privately, to allow voting and commenting, and to show viewing statistics. Tip: Be sure to add “tags” to your video, which makes it easier for people searching for information on your topic to find your video. Learn More Step 9: Publish your video
- 13. Many people fail to take this final step and wonder why their video has so few views. Make people aware of your video by including a link to it on your website, your blog, social media (Facebook, Twitter), and professional networking sites such as LinkedIn. Tip: You can take the “embed code” for your video and install it in a window on your website or blog. Visitors can watch the video without leaving your site. Learn More Step 10: Promote your video
- 14. Want to learn how to make an effective and professional science video? Read The Scientist Videographer eBook (available in iTunes Store) Link to book Watch trailer Download flyer