Sony Digital Video Camera
•Descargar como PPT, PDF•
0 recomendaciones•1,234 vistas

Instructions on how to use the Sony digital video camera. Created by Mr. Jim Berry, Cherokee County School District Instructional Technology Specialist

Recomendados
Más contenido relacionado
La actualidad más candente
La actualidad más candente (17)
Similar a Sony Digital Video Camera
Similar a Sony Digital Video Camera (20)
Más de B. Hamilton
Más de B. Hamilton (20)
Último
Último (20)
Sony Digital Video Camera
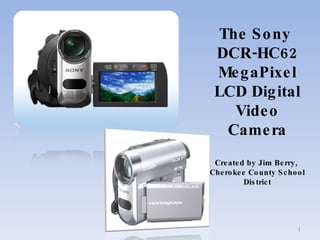
- 1. The Sony DCR-HC62 MegaPixel LCD Digital Video Camera Created by Jim Berry, Cherokee County School District
- 2. External Speaker Lens Wrist Strap
- 3. Pull out to extend/open viewfinder Record/Stop Button Battery
- 4. Lens Cover: Slide to Open/Close
- 5. Push Green Button & Slide Right to Power On Press “Photo” for quick picture Turn On Camera
- 6. Push and hold Battery Release to Pull Battery Out Then Pull Battery Out Gently, from Top ***When Inserting Battery, Slide Bottom End in First, then Press Inward*** Extended Battery Included
- 7. USB Connection (For Pictures, not Video) 2 Gig Memory Card for Pictures (Slides into slot until it ‘clicks’)
- 8. Viewfinder is a Touch Screen Press and slide green button to the right to toggle between screens
- 9. To Eject/Remove/Replace Tape (Video) Slide Switch to the Left Then Pull Gently to Open
- 10. 60 Minute Video Tape Slides Up and Out; (Careful!) Extra Tape Included
- 11. Record Video: Press Red Button w/Right Thumb Zoom in or Out w/Right Index Finger Stop Recording w/Red Button
- 12. Capture Pictures to Your Computer (via USB cable) Connect Smaller End of USB to Camera Connect the Other end to the Computer Then….See Next page
- 13. Getting Video to Your Computer: Firewire (Video) Connection Smaller end of Firewire to Camera Here The larger end of the Firewire cable goes to the computer; either to the built in firewire port on the Dell D630, or to the external Firewire adapter that’s inserted into the Dell D620
- 14. Record Live Video From Camera Directly to Your Computer: Once Cables are Connected, Turn Power on Camera Windows XP will display this message; choose “Record Video using Windows Movie Maker” or on Creation Stations you can choose “Edit and Record Video using Adobe Premiere Elements”
- 15. This is the screen you’ll select to capture stored VIDEO This is the screen you’ll select to capture stored PICTURES (From the TAPE) Use FIREWIRE Cable (From the Memory Card) Use USB Cable
- 16. Battery Low? Run camera from AC power adapter; connect here: (DC in)