2. 5. /inde
ex.html ‐ blan
nk files
The b
blank "index.html" files are
e there to pre
event direct a
access to the default Apac
che index pag
ge.
Step 1
1: Design
The first thing you should do when creating a template is to desig the layou grid, graphics,
s w g e gn ut,
typograph hy, etc. for yo
our site. I like
e to use Mac
cromedia Fire
eworks to design my site before I writ
te any
code. Her re is what my design looks like:
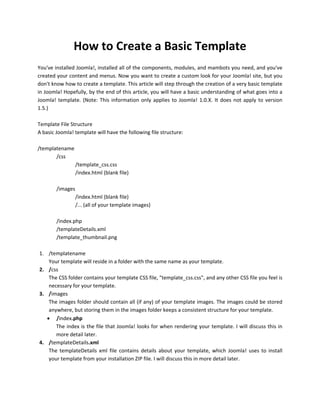
Step 2
2: HTML M
Markup
Now that you have de esigned the lo ook of your te emplate, it is time to write some XHTM ML markup in n your
p' file. Becaus
'index.php se this is a sim
mple 2‐column design with h no headers and no foote ers, I am only using
2 DIV elem
menets for my site's layout. Here is the XHTML mark kup:
<?xml version="1.0" encoding="i
v iso‐8859‐1"?> ><!DOCTYPE html PUBLIC "‐
//W3C// /DTD XHTML 1.0
0 T
Transitional//
/EN"
"http://w
www.w3.org/ /TR/xhtml1/D DTD/xhtml1‐t ransitional.dt td">
<html xmmlns="http:// /www.w3.org g/1999/xhtml ">
<head>
<title>Re
edSpheresRul le.com</title>>
<link hre
ef="css/templ late_css.css" rel="stylesheeet" type="tex xt/css" />
3. </head>
<body id d="bodybg">
<div id=" "sidebar">
<h1 id="sitetitle"><a
a href="index.php">RedSp pheresRule.co
om</a></h1>
>
<h2 id="siteslogan">>Your source for red spher
res</h2>
<!‐‐ side
ebar moduless go here ‐‐>
</div><!‐‐ end sidebar ‐‐>
<div id=" "mainbar">
<!‐‐ mainBody goes hhere ‐‐>
</div><!‐‐ end mainbar ‐‐>
</body>
</html>
Notice tha
at I have put comments as s placeholders for where I will load the modules and d the mainBody for
the template. Because we have no written an of the CSS code, this is what the re
e ot ny S s esulting html page
would loook like:
Step 3
3: CSS
here we start to see the de
This is wh e shape. At the end of this step, we will
esign elements really take l have
our basic framework inn place. Here is the CSS code:
* {
margin:
: 0;
padding
g: 0;
}
5. margin: 10px 10px 10px 235px;
}
/*
Joomla Elements Will be added in Step 4: Joomlafy
*/
Step 4: Joomlafy
The next step is to "Joomlafy" our 'index.php' and 'template_css.css' files. Here is the XHTML markup,
Joomlafied:
XHTML Markup
<?php
defined( '_VALID_MOS' ) or die( 'Restricted access' );
// needed to seperate the ISO number from the language file constant _ISO
$iso = explode( '=', _ISO );
// xml prolog
echo '<?xml version="1.0" encoding="'. $iso[1] .'"?' .'>';
?>
<!DOCTYPE html PUBLIC "‐//W3C//DTD XHTML 1.0 Transitional//EN"
"http://www.w3.org/TR/xhtml1/DTD/xhtml1‐transitional.dtd">
<html xmlns="http://www.w3.org/1999/xhtml">
<head>
<?php mosShowHead(); ?>
<?php
if ( $my‐>id ) {
initEditor();
}
?>
<meta http‐equiv="Content‐Type" content="text/html; <?php echo _ISO;
?>" />
<link href="<?php echo $mosConfig_live_site;
?>/templates/redspheres/css/template_css.css" rel="stylesheet"
type="text/css" />
</head>
<body id="bodybg">
6. <div id="sidebar">
<h1 id="sitetitle"><a href="index.php"><?php echo $mosConfig_sitename;
?></a></h1>
<h2 id="siteslogan">Your source for red spheres</h2>
<?php
if( mosCountModules( 'left' ) > 0 ) {
mosLoadModules( 'left', ‐2 );
}
?>
</div><!‐‐ end sidebar ‐‐>
<div id="mainbar">
<?php mosMainBody(); ?>
</div><!‐‐ end mainbar ‐‐>
</body>
</html>
Now that we have our "Joomlafied" XHTML markup, let's take a look at what's different. In the header, I
have added the following code:
<?php
defined( '_VALID_MOS' ) or die( 'Restricted access' );
// needed to seperate the ISO number from the language file constant _ISO
$iso = explode( '=', _ISO );
// xml prolog
echo '<?xml version="1.0" encoding="'. $iso[1] .'"?' .'>';
?>
<!DOCTYPE html PUBLIC "‐//W3C//DTD XHTML 1.0 Transitional//EN"
"http://www.w3.org/TR/xhtml1/DTD/xhtml1‐transitional.dtd">
<html xmlns="http://www.w3.org/1999/xhtml">
<head>
<?php mosShowHead(); ?>
<?php
if ( $my‐>id ) {
initEditor();
}
?>
<meta http‐equiv="Content‐Type" content="text/html; <?php echo _ISO;
?>" />
7. <link href="<?php echo $mosConfig_live_site;
?>/templates/redspheres/css/template_css.css" rel="stylesheet"
type="text/css" />
</head>
"defined( '_VALID_MOS' )..."
The first line, "defined( '_VALID_MOS')...", prevents direct access to the 'index.php' file.
mosShowHead
Another important part to note is the line that says "mosShowHead". I have used this in place of my
"title" and "meta" tags because Joomla! uses this function to automatically show the site's title along
with important meta tags.
initEditor
The third part I would like to point out is "initEditor". This function initializes the WYSIWYG editor for the
front end of your site. It is inside a conditional statement that tests whether or not the user is logged in.
The conditional statement improves load time for users who are not logged in, because it prevents
Joomla! from executing the initEditor function when it is not necessary.
echo $mosConfig_live_site
You should also note that the link element has been changed to use an absolute href for the template's
CSS file. Using $mosConfig_live_site along with the path to the template (templates/redspheres...), your
template now knows exactly where its corresponding CSS file is.
Now let's take a look at what else we've added to "Joomlafy" our 'index.php' file.
Left Module Position
The following code is used to 1) determine whether or not there are modules published to the "left"
module position, and 2) load those modules in the "left" module position with a style of ‐2. (see
"mosLoadModules ‐ An Explanation")
<?php
if( mosCountModules( 'left' ) > 0 ) {
mosLoadModules( 'left', ‐2 );
}
?>
8. Main Body
The following code is used to load the Main Body of your Joomla! template. This is where all content
items and components are loaded for your Joomla! site.
<?php mosMainBody(); ?>
CSS Code
* {
margin: 0;
padding: 0;
}
body {
background‐color: #fff;
color: #666;
font‐family: Arial, Helvetica, sans‐serif;
font‐size: 12px;
}
a, a:link, a:visited {
color: #900;
text‐decoration: none;
}
a:hover {
text‐decoration: underline;
color: #000;
}
h1#sitetitle {
padding: 100px 0 0;
background: #fff url('../images/logo.png') center top no‐repeat;
font‐size: 20px;
font‐weight: bold;
text‐align: center;
color: #000;
}
h1#sitetitle a, h1#sitetitle a:link, h1#sitetitle a:visited {
text‐decoration: none;
color: #000;
}
11. }
.contentheading {
font‐size: 20px;
color: #900;
font‐weight: bold;
margin: 0 0 2px;
}
.small, .createdate, .modifydate {
font‐size: 10px;
font‐weight: normal;
}
a.readon {
display: block;
padding: 3px 0 3px 18px;
background: #fff url('../images/bullet.gif') left center no‐repeat;
margin: 5px 0 0;
}
.article_seperator {
display: block;
height: 10px;
}
We also Joomlafied our CSS code. Everything below "Joomla Elements" was added to the CSS for
Joomla!‐specific elements. I will not take time to discuss the Joomla!‐specific CSS elements, but rather I
will just give you a link to "A Blank Template CSS file for Joomla" from CompassDesign.
Step 5: Create a Thumbnail
This step is not entirely necessary. Your template will load and run properly with or without a thumbnail.
This just gives you a quick look at the template from the template manager.
The dimensions of a thumbnail do not have to meet specific requirements, but they should be around
225 pixels wide by 150 pixels high. Give your thumbnail the name 'template_thumbnail.png'.
Here is my thumbnail:
12.
Step 6
6: Create "templa
ateDetail
ls.xml"
The next step is to cre eate the 'templateDetails.x xml' file. Her e is the XML markup thatt goes into th
his file
for our template:
<mosinst tall type="temmplate" version="1.0.x">
<name> >redspheres< </name>
<creatio onDate>09/26/2006</crea ationDate>
<author>Cory Webb b</author>
<copyright>Copyrigh ht 2006 ‐ Cory Webb, Released under
GNU/GPL</copyright>
<authorEmail>your e email here</a authorEmail> >
<authorUrl>www.ho owtojoomla.n net</authorU Url>
<version>1.0</versio on>
<description>RedSpheres is a sam mple Joomla ! template fo or the purposse of
instructio on. I hope we e all learn som
mething.</de scription>
<files>
<filena
ame>index.ht tml</filename e>
<filena
ame>index.ph hp</filename e>
<filena
ame>templat te_thumbnail.png</filenam me>
<filena
ame>templat teDetails.xml< </filename>
<filena
ame>css/inde ex.html</filenname>
<filena
ame>css/template_css.css s</filename>
<filena
ame>images/ /index.html</ /filename>
<filena
ame>images/ /logo.png</filename>
<filena
ame>images/ /bullet.gif</fil
lename>
</files>>
</mosins stall>
It is impo
ortant that every file in your installation package has a corre
e e esponding filename tag in the
'template eDetails.xml' ffile.
13. Step 7: Zip It
All of your template files should be in a folder that is named with your template name. Use a file
compression application, like WinZip, to create a ZIP file with your template files. This ZIP file is your
installation file.
Step 8: Install It
In your template manager, install your new template, and set it as your default template.
Step 9: Modify It
Nobody's perfect. We all make mistakes. For that reason, you should be prepared to check your
template for errors, browser compatability, and overall quality. Using the Joomla! template manager,
you can modify your template 'index.php' and 'template_css.css' files right from the browser. You can
make changes, save them, and immediately see the result by previewing your site.