
Recomendados
Más contenido relacionado
La actualidad más candente
La actualidad más candente (20)
Similar a Intro to photography
Similar a Intro to photography (20)
Intro to photography
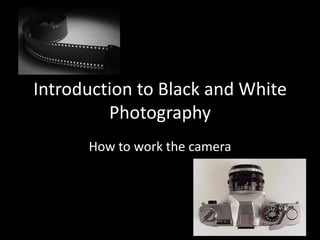
- 1. Introduction to Black and White Photography How to work the camera
- 2. Aperture (F-Stop) • The F-Stop is how large the eye of your lens opens up. A larger aperture means a larger opening in your lens for light to pass through. • When referring to aperture, a smaller number is always a larger opening.
- 3. Aperture continued……. • An aperture of F/5.6 is a LARGER opening and lets in more light than an aperture of F/11, which wouldn’t let in as much light. • Each unit of measurement in aperture is called a ‘stop’= 1 “stop” UP would be making the lens opening larger, and one step DOWN would be making it smaller. A single stop down of aperture lets half the light in that the previous stop did.
- 4. Depth of Field (D.O.F.) • Adjusting your aperture changes your DEPTH OF FIELD. D.O.F. is how much of the area, measuring away from your camera, is IN focus. • If you are tightly focused on a group of people standing at varying distances, you would need a large Depth of Field. • A short D.O.F. (caused by a large aperture) will be clearly focused on a relatively shallow area. • The objects you focus on may be sharp and clear, but any objects in the foreground or background may be blurred. (A smaller aperture would create a LARGER depth of field, and bring all objects into perfect focus.
- 6. Film Speed (ISO) • Film speed (or ISO) is a measurement of how sensitive your camera's sensor (or in the case of a film camera, your camera's film) is to light. • The larger the ISO (higher number), the more sensitive it is to light. • he smaller the ISO (smaller number), the less sensitive it is to light. • Each step up in ISO doubles the amount of light sensitivity (ISO 400 is 2x as sensitive to light as ISO 200). • The higher the ISO is set, the grainier your picture will appear
- 7. ISO 100 ISO - Less grainy, good for shots with plenty of light. 200 ISO - Still not very grainy, don't need as much light as ISO 100. Grain will be more noticable when printed in larger formats. 400 ISO - Mainly used for shooting lower-light outdoors or indoors without a flash, but with an ample amount of light. Slightly more grainy than ISO 200, but not by much. 800 ISO - Very grainy, but will give 8x the light sensitivity of ISO 100.
- 8. Rule of Thirds • The Rule of Thirds is a photographic composition technique that most if not all advanced photographers employ quite a bit. The basis of this rule is that a photograph is divided into 9 equal sized sections, with 2 lines vertically and 2 lines horizontally. The four intersections of these lines are a good guidepoint for where your subject should be centered. These points (and lines also) also work as guides for other aspects of the photograph, for example, a horizon may look better when lined up with one of the lines. Also, when photographing people, a good use of the rule of thirds in many circumstances would be to line a person's body up with a vertical line, and line their eyes up with a horizontal line. This is likely one of the most important compositional techniques, as many photographers feel that a centered subject is not as interesting (in most situations). It is, however, recommended that you treat this 'rule' as more of a guideline though, as there are many circumstances where a more appealing photograph can be produced without the use of this rule. The rule of thirds goes all the way back to 1845, where it originated as a rule for composing scenic artwork.
- 9. Rule of Thirds A good example of employing the use of the Rule of Thirds in a landscape photo.
- 10. Subject All good pictures start with a subject. Before taking a picture, decide what you want the primary subject or point of interest to be. Generally, the picture should be taken in a way that makes the subject the first thing which is seen in the photograph. Your subject should be the primary point of focus and should be crisp and clear. Ideally, there should be nothing in the photograph that draws more attention than the subject itself. If, for example, you were to photograph a beach scene with a lighthouse as your subject, and a viewer is more drawn to a sandcastle on the beach, you've done a poor job of making your subject clear. Obviously, there can be, and many times are, multiple subjects in one photograph. In this case, the objective is to obtain harmony and balance between all subjects. Do you want them both to be equally attractive, do you want one to pop while the others are slightly more subtle? These are all questions which you must address, and plan accordingly. When choosing a subject, don't look at the photograph as the photographer, look at it as another photographer critiquing your work.
- 11. Framing Frames can be basically any item that encloses or surrounds your subject. This could be branches of nearby trees or even a solid frame such as a cut-out in a wall. Take note of your surroundings, and keep an eye out for objects that would make for an image-enhancing 'frame'. Take shape, texture, and color into consideration, frames which contrast sharply with the subject of your picture can make for beautiful photographs. Use frames with care, as misuse can create cluttered or visually unappealing pictures.
- 12. Balance • Obtaining the right balance between your subject and other aspects of the picture is extremely important. You don't want other parts of the photograph distracting from your subject. Things that you should pay attention to are color, contrast, size, and symmetry. Generally speaking, asymmetrical photographs are more appealing than symmetrical photographs. Placing your subject off-center usually has more of an impact and is more pleasing to the eye than having your subject smack dab in the middle, which brings me to the Rule of Thirds
- 13. Color and Contrast A subject which is light will have much more impact when placed against a dark background, but a dark subject against a light background may be distracting. The only way to get a feel for colors and contrast is to experience it first-hand, as there are so many different situations which have different applications of this.
- 14. Positioning • A photo may be able to improved many measures by just taking a few steps forward or backward, or to one side, or by moving up or down. If you have good accessibility to the location, you may want to consider getting the shot from a completely different angle. In still life shots, positioning the subject also can work wonders. In pictures in which a subject is moving, it is generally more pleasing to have a subject appear to be moving into the scene instead of moving out of it.