2. 2
sew desu ne?
| www.cholyknight.com |
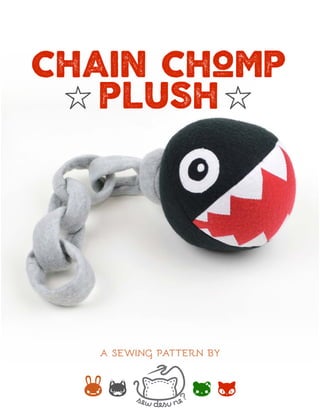
chain chomp plush
sewing tutorial
chain
chomp
plush
difficulty:
before you begin:
makes:
materials & tools
• Matching sewing thread
• Basic sewing tools (sewing machine,
scissors, iron, needles, pins, fabric
marker, seam ripper)
• 1/3 yd. or 15” x 10” scrap of black
fleece
• 1/3 yd. or 6” x 10” scrap of red fleece
• 1/4 yd. of gray fleece
• Batting
• Appliqué supplies:
• 10” x 10” scrap of white appliqué
fabric
• 2” x 2” scrap of black appliqué
fabric
• 9” x 9” scrap of light or heavy-
weight fusible web
one plush that’s about 6” x 6” (head), and 21”
long (head with chain)
The hardest part is likely making the chain, which
requires a bit of dexterity
This plush is made to look like a scary chain chomp -- that is one of the
enemies from the Super Mario games. It features a big appliqued face
and attached chain that’s assembled by machine for speed and ease.
1. Print out the project pattern, pages 13-14
2. Lay out the pattern pieces on your fabric
and cut them out
3. Mark the fabric pieces with the guidelines
from the pattern
3. 3
sew desu ne?
| www.cholyknight.com |
chain chomp plush
sewing tutorial
Like with most of my
projects, first you start off
with the appliqué. Trace
the appliqué outlines onto
your fusible web and fuse
them it to your appliqué fabric. Cut
out the shapes, then fuse the fabric
shapes to the corresponding pieces
of the pattern. The two eyes go
on opposite sides of one black ball
segment while the teeth go around
the edges of one red segment. When
complete, you can either sew them
in place if you used lightweight fusible
web, but if you used the tough stuff
just ironing is enough.
Pair up the ball segments
and pin them together
along one curved side.
Pair up the eyes and
teeth together and the
last two blank black segments
together. Sew up one curved
side of these pairs, but be sure
to leave a small opening in the
black pair for turning right side
out later.
2
1
4. 4
chain chomp plush
sewing tutorial
sew desu ne?
| www.cholyknight.com |
With both halves of the
ball complete, put them
together by lining up all
the raw edges and sewing
around the circle that it makes.
Turn the ball right side out
from the opening to left
in step 2 and stuff the ball
really nice and tight with
batting. If you used stretchy
fleece and followed the grain lines,
you’ll find that it should take on
a pretty decent spherical shape.
Tuck under the seam allowances
in the opening and sew them
closed with a ladder stitch. That
finishes the ball!
4
3
5. 5
sew desu ne?
| www.cholyknight.com |
chain chomp plush
sewing tutorial
Up next is the base of the
chain. First up, sew the
base side piece together
into a ring, right sides facing.
Use that ring to sew
around the circumference
of the base bottom.
Be sure to leave a small
opening where the pattern
indicates for turning right side
out. You’ll find that the fleece
should stretch around the piece,
making it easy to conform to the
curves. When complete, repeat
this with the other side of the
base side and the base top, but
without the opening.
6
5
6. 6
chain chomp plush
sewing tutorial
sew desu ne?
| www.cholyknight.com |
When complete, turn the
base right side out and
stuff it semi-firmly with
batting so it still retains
its cylinder-like shape. Tuck in
the seam allowances from the
opening and sew it closed with a
ladder stitch.
All that’s left to do is add
it to your ball. Center it
in the middle of the panel
opposite the teeth and sew
around the perimeter of the
base with a ladder stitch. It helps
to hold it in place with a dab of
glue or some pins going down
the top.
8
7
7. 7
sew desu ne?
| www.cholyknight.com |
chain chomp plush
sewing tutorial
And lastly we have the
chains! This part is a little
trickier, so it helps to just
focus on one step at a time
to not get bogged down by
the finicky-ness of it. Start off by
making one chain. Fold it in half
widthwise with right sides facing
and sew it together along the
short edge.
What we’re going to do
to make this a perfectly
sewn tube is kind of a neat
trick. Lay out the ring flat
so the seam is in the center.
Pinch the middle of the seam so
it moves out of the way of the
two lower side edges. We want
to bring those together so we
can sew them.
10
9
8. 8
chain chomp plush
sewing tutorial
sew desu ne?
| www.cholyknight.com |
Here’s what it should look
like when the edges are
brought together. Note
the pinched side is trapped
inside. Put a pin here if you
want, cuz we’re about to sew
this puppy!
Take it to your machine
and sew those edges
together a little at a
time. When you can’t sew
any further, pull down the
middle of the tube to free that
“trapped” portion from before.
Now you have more to sew!
Going this way, you’ll only be able
to sew about an inch or two at
a time, but you should be able
to get through the whole thing.
Stop short about 2” from the
beginning and that’s your opening
for turning.
12
11
9. 9
sew desu ne?
| www.cholyknight.com |
chain chomp plush
sewing tutorial
When you’ve reached the
stopping point and left an
opening for turning, the
tube should look something
like this. Pull out the “trapped”
tube from the opening you left
to reveal a completely sewn loop!
Just like with any project,
sew the opening you left
closed. Simply tuck in the
seam allowances here and
close it up with a ladder stitch.
14
13
10. 10
chain chomp plush
sewing tutorial
sew desu ne?
| www.cholyknight.com |
Now, to add more chains
to this configuration, we
do the same thing, but
we’ll have another chain
attached the whole time so
it’s a little bit more of a pain. The
new chain in the next 4 pictures
will be red to differentiate it.
Start by wrapping the chain
piece through the last chain you
completed, then sew the short
edge just like you did in step 9.
Repeat the same thing
as in step 10, pinching
the middle of the loop
and bringing together the
outside edges. As you do this,
remember to keep the attached
chain at the BOTTOM. This will
become very important in step 18.
16
15
11. 11
sew desu ne?
| www.cholyknight.com |
chain chomp plush
sewing tutorial
Here it is with the edges
brought together as in
step 11. Again, keep the
attached chain on one side,
which will be the bottom when
you bring it to the machine.
When you actually sew it,
you’ll only be able to do an
inch at a time really, but
be patient! When you can’t
go any further, pull down the
fabric from the middle as in step
12 by tugging on the attached
chain link. Keep doing this until
you’re about 2” away from the
beginning of your seam, just like
with step 12. When finished, pull
the completed chain out of the
opening for turning just like in
step 13, then sew the opening
closed like in step 14. Repeat
steps 15-18 three more times to
make a chain of 5 links.
18
17
12. 12
chain chomp plush
sewing tutorial
sew desu ne?
| www.cholyknight.com |
With your completed chain,
attach it to the chain base
with a ladder stitch. Stitch
around a wide area for the
most strength.
19
13. Pg. 1/2
openingforturning
appliqueplacement
Chain Chomp Plush
P A T T E R N
www.cholyknight.com
BALL
Cut 3 from black fleece
Cut 1 from red fleece
¼” seam allowance
Chain Chomp Plush
P A T T E R N
www.cholyknight.com
BASE SIDES
Cut 1 from gray fleece
¼” seam allowance