SlideShare una empresa de Scribd logo
1 de 24
Descargar para leer sin conexión
Basic Electronic
Components
WWW.BUILD-ELECTRONIC-CIRCUITS.COM
A SIMPLE INTRODUCTION TO THE MOST COMMON COMPONENTS
USED IN ELECTRONICS
Basic Electronic Components Used in Circuits
www.build-electronic-circuits.com
2
Hi, I’m Oyvind!
Hey, I’m Oyvind Dahl and I run an electronics membership site for people like
you to get really good at electronics.
Everything is explained in simple ways and my students learn by doing - not
by being swamped with complicated jargon and maths.
Take a look at the course description here https://ohmify.com/join/
In the meantime, enjoy this introduction to the basic electronics compo-
nents!
Keep On Soldering!
Øyvind Nydal Dahl
Basic Electronic Components Used in Circuits
www.build-electronic-circuits.com
3
1. Light-Emitting Diode (LED) ..........................................................................4
2. The Resistor ........................................................................................................7
3. The Switch ........................................................................................................11
4. The Capacitor ..................................................................................................13
5. The Transistor ..................................................................................................15
6. The Inductor ....................................................................................................18
7. The Integrated Circuit ..................................................................................21
8. Learn Electronics Online .............................................................................24
Table Of Contents
Basic Electronic Components Used in Circuits
www.build-electronic-circuits.com
4
Light-Emitting Diode (LED)
Figure 1: A Light-Emitting Diode (LED)
A Light Emitting Diode – or LED for short – is a small component that lights up
when current flows through it.
Sometimes you use it for simple tasks like indicating that your circuit has power,
that the circuit is working or that the circuit has failed.
But you can also combine several LEDs to create simple 7-segment displays that
can display numbers or use them to make cool light decorations. If you combine
enough LEDs in a square, you can even use them to show images.
The LED exist in many different colors; Red, green, blue and many more.
There is also a special type of LED called RGB. This is an LED where a red, green and
blue LED has been combined into one package. The colors mix, so by controlling
the intensity of each of the three colors you can create a wide spectrum of diffe-
rent colors.
Basic Electronic Components Used in Circuits
www.build-electronic-circuits.com
5
Figure 2: The symbol used in circuit diagrams for a Light-Emitting Diode (LED)
Example
To use an LED, you need to connect it in a circuit with a resistor, as shown in Figure
3.
Figure 3: A simple LED circuit
Basic Electronic Components Used in Circuits
www.build-electronic-circuits.com
6
The reason you need the resistor is to make sure the LED does not burn up. A com-
mon LED can only handle a very low current. If you don’t use a resistor to control
the current, your LED will quickly die and become unusable.
But what is a resistor?
That’s next. Jump on over to the next page to learn what a resistor is.
Basic Electronic Components Used in Circuits
www.build-electronic-circuits.com
7
The Resistor
Figure 4: The resistor in a circuit
I didn’t understand the resistor in the beginning. It seemed like it didn’t do
anything! It was just there, consuming power.
But eventually, I learned that the resistor is actually extremely useful.
You’ll see resistors everywhere. And as the name suggests, they resist the current.
But you are probably wondering:
“What do I use it for?”
You use the resistor to control the voltages and the currents in your circuit.
Basic Electronic Components Used in Circuits
www.build-electronic-circuits.com
8
Figure 5: You always need a resistor with the LED
Let’s say you have a 9V battery and you want to turn on an LED. If you connect the
battery directly to the LED, LOTS of current will flow through the LED! Much more
than the LED can handle. So the LED will become very hot and burn out after a
short amount of time.
But – if you put a resistor in series with the LED, you can control how much current
is going through the LED.
Figure 6: A rectangle or a zigzag line is used as a symbol for the resistor
Basic Electronic Components Used in Circuits
www.build-electronic-circuits.com
9
Example
In Figure 7 you can see a common example of how a resistor is used to control the
current for protecting the LED.
Figure 7: A common way to use resistors is to control the current for an LED
A standard LED can only handle up to around 20-30 mA. If the current it much big-
ger than that, the LED will quickly die.
Let’s say the LED in the circuit above needs 15 mA to give a good light, and it has a
voltage drop of 2 volts. (These values should be specified by the supplier when you
buy an LED.)
If you have a 9 V battery that you would like to power it with, which resistor value
do you need?
The voltage specified for the LED is the voltage drop the LED will have under nor-
mal conditions. That means you know you will have 2V over the LED.
Basic Electronic Components Used in Circuits
www.build-electronic-circuits.com
10
To find the resistor value, we start by finding the voltage drop over the resistor.
Since there is a 2-volt drop over the LED, there will be a 7V drop over the resistor
(9V - 2V equals 7V).
You have 7V over the resistor, and whatever amount of current flows through it will
also flow through the LED. So by setting the resistor value to a value that gives you
15 mA, you’ll also get 15 mA through the LED.
To find the necessary resistor value we use Ohm’s law.
By placing your hand over the R in the Ohm’s law triangle, you get that Resistance
(R) equals voltage (V) divided by current (I). This means you get:
R = 7V / 0.015 A = 467Ω
470Ω is a standard value close enough, so by choosing this resistor value you deci-
de that the current flowing in your circuit is 15 mA.
Basic Electronic Components Used in Circuits
www.build-electronic-circuits.com
11
The Switch
Figure 8: The push-button is a popular switch
The switch is a component that connects one pin to another. For current to flow
through a circuit, there needs to be a path from the plus of the battery to the mi-
nus of the battery.
If you build a simple circuit with an LED and a resistor and connect this to a battery,
your LED will light up. If you disconnect the plus of the battery from the circuit, the
LED turns off.
The switch is nothing more than a way to connect and disconnect two or more
things. For example to make a light-switch. Or a keyboard.
Figure 9: The switch symbol comes in many forms. This is the pushbutton switch.
Basic Electronic Components Used in Circuits
www.build-electronic-circuits.com
12
Figure 10: In this circuit, the switch turns on the LED when pushed down
Example
In Figure 10, you can see how you can use a switch to turn on and off an LED.
Basic Electronic Components Used in Circuits
www.build-electronic-circuits.com
13
You can think of a capacitor as a battery with very low capacity. You can charge and
discharge it, just like a battery.
The capacitor is often used to introduce a time-delay in a circuit. For example to
blink a light (check out the example in the Integrated Circuit section). But it’s also
useful for removing noise in an audio signal, or make the power supply of a circuit
more stable.
Capacitors come as polarized and non-polarized capacitors. The biggest difference
is that with the polarized capacitor, you have a positive and a negative pin and you
need to make sure to connect them correctly. You can connect non-polarized capa-
citors any way you want.
So which one to choose?
You never need your capacitor to be polarized. But for larger values, the capacitors
are made with a material that makes them polarized. So, sometimes you don't
have any choice but to use a polarized one.
The Capacitor
Figure 11: Two capacitors (Non-polarized on left and polarized on right)
Basic Electronic Components Used in Circuits
www.build-electronic-circuits.com
14
Example
By connecting a capacitor in parallel with a resistor and an LED, the capacitor can
store energy and use the energy after the battery is disconnected. This creates a
“fading out”-effect of the LED.
In Figure 13 you can see such a circuit. To build this circuit, you'll need a capacitor
of at least 1000µF to see the effect.
Figure 13: A circuit where the LED fades out because of the energy stored in the capacitor
Figure 12: Three different variations of the capacitor symbol. If a plus is
shown, it means it’s a polarized capacitor.
Basic Electronic Components Used in Circuits
www.build-electronic-circuits.com
15
The Transistor
Figure 14: A transistor placed onto a breadboard
This is the component that seems to be the hardest to understand when starting
out. At least it was for me.
But don’t worry, it’s not that hard.
A transistor is like a switch that is controlled by an electrical signal.
Figure 15: A little bit of current flowing through the base of the transistor turns it ON
Basic Electronic Components Used in Circuits
www.build-electronic-circuits.com
16
Figure 16: The transistor symbol for a NPN transistor
In Figure 15, you can see an illustration of how the transistor works:
It has three pins named base, collector, and emitter. If you have a small current
flowing from base to emitter, you turn it on. With no current, it is off. To get current
flowing you need about 0.7V from base to emitter (for this type of transistor).
Unlike a normal switch that only has two states (ON or OFF), the transistor can also
be“partly on”by controlling the current that goes through its base. A bit of current
on the base produces a current of maybe 100 times more (depending on the tran-
sistor) through the Collector and Emitter. You can use this effect to build an ampli-
fier.
Example
A simple example of using a transistor is for building a touch-sensor, like in Figure
17.
In this example, the transistor does not let any current flow through the LED and
resistor if there is no current flowing through the base. That means there is no light
in the LED.
When you touch your finger to the touch-pad (for example two metal pins), your
finger acts as a resistor, and lets a little bit of current flow down through the
base of the transistor. The transistor“opens its gate”and lets about 100 times the
amount of current flow through the LED and resistor, which makes the LED light
up.
Basic Electronic Components Used in Circuits
www.build-electronic-circuits.com
17
Figure 17: A touch-sensor that turns on a light when you touch it.
Basic Electronic Components Used in Circuits
www.build-electronic-circuits.com
18
The Inductor
Figure 18: An inductor on a small circuit board
An inductor is just a coil of wire. If you take a wire and wind it up into a coil, you
have created an inductor. When you apply a current through the coil, a magnetic
field is created around it, and this field stores energy.
When the current through the inductor stays the same, the inductor does nothing.
It just lets the current pass through, just like it was a normal wire.
But when the current through the inductor changes, the built-up energy in the
magnetic field will resist this change by changing the resistance of the inductor.
Resistance to change is a good thing for example to create a filter to reduce noise.
Figure 19: The symbol used in circuit diagrams for an inductor
Basic Electronic Components Used in Circuits
www.build-electronic-circuits.com
19
If the wire is wound around a magnetic core (for example iron), the magnetic field
becomes much stronger. A transformer is a component made up of two inductors
wound around the same magnetic core.
The transformer is a classical component used to reduce the voltage in power su-
pplies. If you constantly change the current through one inductor (the input), the
change in magnetic field is picked up by the other inductor (the output).
If the input inductor has 1000 windings, and the other inductor has only 100, then
the resulting voltage on the output inductor is ten times less than the input volta-
ge.
Example
Inductors are often used in filters and oscillators, for example in radio equipment.
But it’s hard to find a practical circuit example that is both simple and really de-
monstrates how an inductor works, without going into mathematical explanations.
Instead, a fun example to demonstrate the magnetism that is created in an induc-
tor is to create an electromagnet!
Figure 20: A homemade electromagnet
Basic Electronic Components Used in Circuits
www.build-electronic-circuits.com
20
Figure 21: The electromagnet pulling some metallic objects
Here's how to do it:
1. Take some insulated wire.
2. Wind it around an iron screw, maybe about 50 times.
3. Connect a big 1.5 V flashlight battery (You can try a higher voltage, but then
be very careful as it gets hot really fast.)'
4. Place it over some small metallic objects to test it.
Note: Not all metals are magnetic. For example, copper coins won’t be attracted to the
magnet.
Basic Electronic Components Used in Circuits
www.build-electronic-circuits.com
21
The Integrated Circuit
Figure 22: An Integrated Circuit (IC) connected on a breadboard
An integrated circuit is any kind of circuit that is integrated onto a chip. It can be a
radio transmitter, a microcontroller, an audio amplifier or any other circuit you can
think of.
By making a circuit on a small chip, it’s much easier to make advanced projects.
Let’s say you want to make a tracking device for your car. You can find a GPS chip
for positioning, a GSM chip to send text messages, and a microcontroller chip to
control everything.
To figure out exactly what a specific IC does, you need to check its datasheet. The
datasheet is a document that comes with every IC. You can find the datasheet for
almost any IC by just searching for the chip name +“datasheet”in Google.
The datasheet explains what each of the pins does, how much voltage it needs,
and often contains an example circuit to show you how to connect it.
Basic Electronic Components Used in Circuits
www.build-electronic-circuits.com
22
Example
The 555 timer is a very useful and popular Integrated Circuit. You can use it to blink
a light, to create sound, to create a clock signal, add a countdown timer and a lot of
other things.
A simple example is to blink an LED. By carefully selecting the values of the capaci-
tor and resistors on the input side, you can control how fast the light should blink.
Figure 24: This circuit will make the LED blink
Figure 23: The symbol for an IC is often a box with pins. But it can also be the symbol of the func-
tion of the IC (like a logic gate or an operational amplifier).
Basic Electronic Components Used in Circuits
www.build-electronic-circuits.com
23
The circuit shown in Figure 24 will blink an LED about once per second.
The resistors R1 and R2, together with the capacitor C1, set the output frequency
of the output pin. The frequency is the number of times the output goes high per
second. So an output frequency of 5 Hz would mean the output goes high 5 times
per second.
You can find the output frequency of your circuit by using the following formula:
To find the frequency, just replace R1, R2, and C1 with the values you use, and put
it all into a calculator.
Let's say you have a circuit with the following component values:
R1 = 100 kΩ
R2 = 10 kΩ
C1 = 10 µF
The resistor values are in ohms, and the capacitance is in farads. That means R1 =
100 000Ω, R2 = 10 000Ω, and C1 = 0.00001 F.
Frequency = 1.44 / ((100 000Ω + 10 000Ω + 10 000Ω) * 0.00001 F)
Frequency = 1.44 / ((120 000Ω) * 0.00001 F)
Frequency = 1.2 Hz
According to this calculation, the output should turn on and off 1.2 times per se-
cond with those values.
Basic Electronic Components Used in Circuits
www.build-electronic-circuits.com
24
Learn Electronics Online
Join the online classes at Ohmify.com where Oyvind has taught hundreds of stu-
dents the secrets to building their own inventions with electronics. No previous
experience required!
Find out more here: https://ohmify.com/join/
What You’ll Learn
• How To Build Circuits
• How To Build A Simple Robot
• Understand How Circuits Work
• Microcontroller Programming
• How To Build An Audio Amplifier
• Soldering
• How To Choose Components
• How To Make Your Own Inventions
• Arduino
• How To Design Your Own Circuit Boards From Scratch
• How To Build A Mobile Phone Charger
• ...and much more!

Más contenido relacionado

Similar a Basic-Electronic-Components .pdf

How to Build Your Own Power Supply
How to Build Your Own Power SupplyHow to Build Your Own Power Supply
How to Build Your Own Power SupplyEng. Emad Al-Atoum
 
Dark sensor using LDR on breadboard
Dark sensor using LDR on breadboardDark sensor using LDR on breadboard
Dark sensor using LDR on breadboardSaqib Iqbal
 
Automatic IN/OUT Indicator with Doorbell Manual
Automatic IN/OUT Indicator with Doorbell ManualAutomatic IN/OUT Indicator with Doorbell Manual
Automatic IN/OUT Indicator with Doorbell ManualTezpur University
 
Microelectronics final project report
Microelectronics final project reportMicroelectronics final project report
Microelectronics final project reportAndrew Dilucia
 
Electronics 01
Electronics 01Electronics 01
Electronics 01snakeaye
 
Real Analog - Circuits 1Chapter 1 Lab WorksheetsReal Analog – .docx
Real Analog - Circuits 1Chapter 1 Lab WorksheetsReal Analog –  .docxReal Analog - Circuits 1Chapter 1 Lab WorksheetsReal Analog –  .docx
Real Analog - Circuits 1Chapter 1 Lab WorksheetsReal Analog – .docxcatheryncouper
 
WIRE BREAK CIRCUIT ALARAM
WIRE BREAK CIRCUIT ALARAMWIRE BREAK CIRCUIT ALARAM
WIRE BREAK CIRCUIT ALARAMrookiedope8326
 
Automatic sreet light شروع1 1
Automatic sreet light شروع1 1Automatic sreet light شروع1 1
Automatic sreet light شروع1 1moazalhosne
 
New microsoft office power point presentation (3)
New microsoft office power point presentation (3)New microsoft office power point presentation (3)
New microsoft office power point presentation (3)Oodit Jethwa
 
minorProject (1).pptx
minorProject (1).pptxminorProject (1).pptx
minorProject (1).pptxROCKINGSTYLE1
 
Elecronz_Chapter_1.pptx
Elecronz_Chapter_1.pptxElecronz_Chapter_1.pptx
Elecronz_Chapter_1.pptxMokete5
 
Ppt on interfacing led and 7 segmentwith 8951
Ppt on interfacing led  and 7 segmentwith 8951Ppt on interfacing led  and 7 segmentwith 8951
Ppt on interfacing led and 7 segmentwith 8951pooja jaiswal
 
Automatic street light using ldr and relay
Automatic street light using ldr and relayAutomatic street light using ldr and relay
Automatic street light using ldr and relayShivam Raidas
 
securedroomaccessproject-150718081732-lva1-app6892
securedroomaccessproject-150718081732-lva1-app6892securedroomaccessproject-150718081732-lva1-app6892
securedroomaccessproject-150718081732-lva1-app6892shreya sankrityayan
 
LED lighting - resistors
LED lighting - resistorsLED lighting - resistors
LED lighting - resistorsRiedon Inc.
 
Basic electronic components used in robotics
Basic electronic components used in roboticsBasic electronic components used in robotics
Basic electronic components used in roboticsKshitij Wagle
 
70 interesting circuits
70 interesting circuits70 interesting circuits
70 interesting circuitsivan ion
 

Similar a Basic-Electronic-Components .pdf (20)

How to Build Your Own Power Supply
How to Build Your Own Power SupplyHow to Build Your Own Power Supply
How to Build Your Own Power Supply
 
Dark sensor using LDR on breadboard
Dark sensor using LDR on breadboardDark sensor using LDR on breadboard
Dark sensor using LDR on breadboard
 
30 led projects
30 led projects30 led projects
30 led projects
 
Automatic IN/OUT Indicator with Doorbell Manual
Automatic IN/OUT Indicator with Doorbell ManualAutomatic IN/OUT Indicator with Doorbell Manual
Automatic IN/OUT Indicator with Doorbell Manual
 
Microelectronics final project report
Microelectronics final project reportMicroelectronics final project report
Microelectronics final project report
 
Electronics 01
Electronics 01Electronics 01
Electronics 01
 
Real Analog - Circuits 1Chapter 1 Lab WorksheetsReal Analog – .docx
Real Analog - Circuits 1Chapter 1 Lab WorksheetsReal Analog –  .docxReal Analog - Circuits 1Chapter 1 Lab WorksheetsReal Analog –  .docx
Real Analog - Circuits 1Chapter 1 Lab WorksheetsReal Analog – .docx
 
WIRE BREAK CIRCUIT ALARAM
WIRE BREAK CIRCUIT ALARAMWIRE BREAK CIRCUIT ALARAM
WIRE BREAK CIRCUIT ALARAM
 
Automatic sreet light شروع1 1
Automatic sreet light شروع1 1Automatic sreet light شروع1 1
Automatic sreet light شروع1 1
 
New microsoft office power point presentation (3)
New microsoft office power point presentation (3)New microsoft office power point presentation (3)
New microsoft office power point presentation (3)
 
minorProject (1).pptx
minorProject (1).pptxminorProject (1).pptx
minorProject (1).pptx
 
Elecronz_Chapter_1.pptx
Elecronz_Chapter_1.pptxElecronz_Chapter_1.pptx
Elecronz_Chapter_1.pptx
 
Ppt on interfacing led and 7 segmentwith 8951
Ppt on interfacing led  and 7 segmentwith 8951Ppt on interfacing led  and 7 segmentwith 8951
Ppt on interfacing led and 7 segmentwith 8951
 
DC power supply
DC power supplyDC power supply
DC power supply
 
Automatic street light using ldr and relay
Automatic street light using ldr and relayAutomatic street light using ldr and relay
Automatic street light using ldr and relay
 
securedroomaccessproject-150718081732-lva1-app6892
securedroomaccessproject-150718081732-lva1-app6892securedroomaccessproject-150718081732-lva1-app6892
securedroomaccessproject-150718081732-lva1-app6892
 
LED lighting - resistors
LED lighting - resistorsLED lighting - resistors
LED lighting - resistors
 
Design Project 3.pp (1)
Design Project 3.pp (1)Design Project 3.pp (1)
Design Project 3.pp (1)
 
Basic electronic components used in robotics
Basic electronic components used in roboticsBasic electronic components used in robotics
Basic electronic components used in robotics
 
70 interesting circuits
70 interesting circuits70 interesting circuits
70 interesting circuits
 

Más de Desalechali1

JIREENYA SALPHAA FI GAMMACHUU QABU JIRAACHUU
JIREENYA SALPHAA FI GAMMACHUU QABU JIRAACHUUJIREENYA SALPHAA FI GAMMACHUU QABU JIRAACHUU
JIREENYA SALPHAA FI GAMMACHUU QABU JIRAACHUUDesalechali1
 
Business Communication Chapter 3.pptx
Business Communication     Chapter 3.pptxBusiness Communication     Chapter 3.pptx
Business Communication Chapter 3.pptxDesalechali1
 
gatiin-namaa-meeqa .pdf
gatiin-namaa-meeqa                        .pdfgatiin-namaa-meeqa                        .pdf
gatiin-namaa-meeqa .pdfDesalechali1
 
DesaleChali Degebasa-Get Connected En-certificate.pdf
DesaleChali Degebasa-Get Connected En-certificate.pdfDesaleChali Degebasa-Get Connected En-certificate.pdf
DesaleChali Degebasa-Get Connected En-certificate.pdfDesalechali1
 
Dargaggummaa fi Kaadhimummaa! .pdf
Dargaggummaa fi Kaadhimummaa!       .pdfDargaggummaa fi Kaadhimummaa!       .pdf
Dargaggummaa fi Kaadhimummaa! .pdfDesalechali1
 
GALAA GANAMAA .pdf
GALAA GANAMAA                       .pdfGALAA GANAMAA                       .pdf
GALAA GANAMAA .pdfDesalechali1
 
yaada durooma .pdf
yaada durooma                       .pdfyaada durooma                       .pdf
yaada durooma .pdfDesalechali1
 
image Processing Fundamental Is .ppt
image Processing Fundamental Is     .pptimage Processing Fundamental Is     .ppt
image Processing Fundamental Is .pptDesalechali1
 
Image Processing Fundamentals .ppt
Image Processing Fundamentals        .pptImage Processing Fundamentals        .ppt
Image Processing Fundamentals .pptDesalechali1
 
Jedhi Malee (just do it).pdf
Jedhi Malee             (just do it).pdfJedhi Malee             (just do it).pdf
Jedhi Malee (just do it).pdfDesalechali1
 
Chapter-6-Random Variables & Probability distributions-3.doc
Chapter-6-Random Variables & Probability distributions-3.docChapter-6-Random Variables & Probability distributions-3.doc
Chapter-6-Random Variables & Probability distributions-3.docDesalechali1
 
Bule hora university for all users of digital library.pdf
Bule hora university for  all  users of digital library.pdfBule hora university for  all  users of digital library.pdf
Bule hora university for all users of digital library.pdfDesalechali1
 
then IT professionals .pptx
then IT professionals              .pptxthen IT professionals              .pptx
then IT professionals .pptxDesalechali1
 
Hin Sodaatiin By Dawit (1).pdf
Hin Sodaatiin By Dawit           (1).pdfHin Sodaatiin By Dawit           (1).pdf
Hin Sodaatiin By Dawit (1).pdfDesalechali1
 
BHU ew Structure RE.pdf
BHU ew Structure                    RE.pdfBHU ew Structure                    RE.pdf
BHU ew Structure RE.pdfDesalechali1
 
Video Processing (4).ppt
Video Processing                 (4).pptVideo Processing                 (4).ppt
Video Processing (4).pptDesalechali1
 
Image Enhancement in Frequency Domain (2).ppt
Image Enhancement in Frequency Domain (2).pptImage Enhancement in Frequency Domain (2).ppt
Image Enhancement in Frequency Domain (2).pptDesalechali1
 
Chapter 8 Introduction to Life Skills_270721091412.pptx
Chapter 8 Introduction to Life Skills_270721091412.pptxChapter 8 Introduction to Life Skills_270721091412.pptx
Chapter 8 Introduction to Life Skills_270721091412.pptxDesalechali1
 

Más de Desalechali1 (20)

JIREENYA SALPHAA FI GAMMACHUU QABU JIRAACHUU
JIREENYA SALPHAA FI GAMMACHUU QABU JIRAACHUUJIREENYA SALPHAA FI GAMMACHUU QABU JIRAACHUU
JIREENYA SALPHAA FI GAMMACHUU QABU JIRAACHUU
 
Business Communication Chapter 3.pptx
Business Communication     Chapter 3.pptxBusiness Communication     Chapter 3.pptx
Business Communication Chapter 3.pptx
 
MY PUBLISH. pdf.
MY PUBLISH.                                       pdf.MY PUBLISH.                                       pdf.
MY PUBLISH. pdf.
 
gatiin-namaa-meeqa .pdf
gatiin-namaa-meeqa                        .pdfgatiin-namaa-meeqa                        .pdf
gatiin-namaa-meeqa .pdf
 
DesaleChali Degebasa-Get Connected En-certificate.pdf
DesaleChali Degebasa-Get Connected En-certificate.pdfDesaleChali Degebasa-Get Connected En-certificate.pdf
DesaleChali Degebasa-Get Connected En-certificate.pdf
 
Dargaggummaa fi Kaadhimummaa! .pdf
Dargaggummaa fi Kaadhimummaa!       .pdfDargaggummaa fi Kaadhimummaa!       .pdf
Dargaggummaa fi Kaadhimummaa! .pdf
 
GALAA GANAMAA .pdf
GALAA GANAMAA                       .pdfGALAA GANAMAA                       .pdf
GALAA GANAMAA .pdf
 
yaada durooma .pdf
yaada durooma                       .pdfyaada durooma                       .pdf
yaada durooma .pdf
 
image Processing Fundamental Is .ppt
image Processing Fundamental Is     .pptimage Processing Fundamental Is     .ppt
image Processing Fundamental Is .ppt
 
Image Processing Fundamentals .ppt
Image Processing Fundamentals        .pptImage Processing Fundamentals        .ppt
Image Processing Fundamentals .ppt
 
Wireless SS.pptx
Wireless                                        SS.pptxWireless                                        SS.pptx
Wireless SS.pptx
 
Jedhi Malee (just do it).pdf
Jedhi Malee             (just do it).pdfJedhi Malee             (just do it).pdf
Jedhi Malee (just do it).pdf
 
Chapter-6-Random Variables & Probability distributions-3.doc
Chapter-6-Random Variables & Probability distributions-3.docChapter-6-Random Variables & Probability distributions-3.doc
Chapter-6-Random Variables & Probability distributions-3.doc
 
Bule hora university for all users of digital library.pdf
Bule hora university for  all  users of digital library.pdfBule hora university for  all  users of digital library.pdf
Bule hora university for all users of digital library.pdf
 
then IT professionals .pptx
then IT professionals              .pptxthen IT professionals              .pptx
then IT professionals .pptx
 
Hin Sodaatiin By Dawit (1).pdf
Hin Sodaatiin By Dawit           (1).pdfHin Sodaatiin By Dawit           (1).pdf
Hin Sodaatiin By Dawit (1).pdf
 
BHU ew Structure RE.pdf
BHU ew Structure                    RE.pdfBHU ew Structure                    RE.pdf
BHU ew Structure RE.pdf
 
Video Processing (4).ppt
Video Processing                 (4).pptVideo Processing                 (4).ppt
Video Processing (4).ppt
 
Image Enhancement in Frequency Domain (2).ppt
Image Enhancement in Frequency Domain (2).pptImage Enhancement in Frequency Domain (2).ppt
Image Enhancement in Frequency Domain (2).ppt
 
Chapter 8 Introduction to Life Skills_270721091412.pptx
Chapter 8 Introduction to Life Skills_270721091412.pptxChapter 8 Introduction to Life Skills_270721091412.pptx
Chapter 8 Introduction to Life Skills_270721091412.pptx
 

Último

Spring gala 2024 photo slideshow - Celebrating School-Community Partnerships
Spring gala 2024 photo slideshow - Celebrating School-Community PartnershipsSpring gala 2024 photo slideshow - Celebrating School-Community Partnerships
Spring gala 2024 photo slideshow - Celebrating School-Community Partnershipsexpandedwebsite
 
Sternal Fractures & Dislocations - EMGuidewire Radiology Reading Room
Sternal Fractures & Dislocations - EMGuidewire Radiology Reading RoomSternal Fractures & Dislocations - EMGuidewire Radiology Reading Room
Sternal Fractures & Dislocations - EMGuidewire Radiology Reading RoomSean M. Fox
 
The Liver & Gallbladder (Anatomy & Physiology).pptx
The Liver &  Gallbladder (Anatomy & Physiology).pptxThe Liver &  Gallbladder (Anatomy & Physiology).pptx
The Liver & Gallbladder (Anatomy & Physiology).pptxVishal Singh
 
Implanted Devices - VP Shunts: EMGuidewire's Radiology Reading Room
Implanted Devices - VP Shunts: EMGuidewire's Radiology Reading RoomImplanted Devices - VP Shunts: EMGuidewire's Radiology Reading Room
Implanted Devices - VP Shunts: EMGuidewire's Radiology Reading RoomSean M. Fox
 
Poster_density_driven_with_fracture_MLMC.pdf
Poster_density_driven_with_fracture_MLMC.pdfPoster_density_driven_with_fracture_MLMC.pdf
Poster_density_driven_with_fracture_MLMC.pdfAlexander Litvinenko
 
demyelinated disorder: multiple sclerosis.pptx
demyelinated disorder: multiple sclerosis.pptxdemyelinated disorder: multiple sclerosis.pptx
demyelinated disorder: multiple sclerosis.pptxMohamed Rizk Khodair
 
Chapter 7 Pharmacosy Traditional System of Medicine & Ayurvedic Preparations ...
Chapter 7 Pharmacosy Traditional System of Medicine & Ayurvedic Preparations ...Chapter 7 Pharmacosy Traditional System of Medicine & Ayurvedic Preparations ...
Chapter 7 Pharmacosy Traditional System of Medicine & Ayurvedic Preparations ...Sumit Tiwari
 
II BIOSENSOR PRINCIPLE APPLICATIONS AND WORKING II
II BIOSENSOR PRINCIPLE APPLICATIONS AND WORKING IIII BIOSENSOR PRINCIPLE APPLICATIONS AND WORKING II
II BIOSENSOR PRINCIPLE APPLICATIONS AND WORKING IIagpharmacy11
 
TỔNG HỢP HƠN 100 ĐỀ THI THỬ TỐT NGHIỆP THPT VẬT LÝ 2024 - TỪ CÁC TRƯỜNG, TRƯ...
TỔNG HỢP HƠN 100 ĐỀ THI THỬ TỐT NGHIỆP THPT VẬT LÝ 2024 - TỪ CÁC TRƯỜNG, TRƯ...TỔNG HỢP HƠN 100 ĐỀ THI THỬ TỐT NGHIỆP THPT VẬT LÝ 2024 - TỪ CÁC TRƯỜNG, TRƯ...
TỔNG HỢP HƠN 100 ĐỀ THI THỬ TỐT NGHIỆP THPT VẬT LÝ 2024 - TỪ CÁC TRƯỜNG, TRƯ...Nguyen Thanh Tu Collection
 
MSc Ag Genetics & Plant Breeding: Insights from Previous Year JNKVV Entrance ...
MSc Ag Genetics & Plant Breeding: Insights from Previous Year JNKVV Entrance ...MSc Ag Genetics & Plant Breeding: Insights from Previous Year JNKVV Entrance ...
MSc Ag Genetics & Plant Breeding: Insights from Previous Year JNKVV Entrance ...Krashi Coaching
 
Graduate Outcomes Presentation Slides - English (v3).pptx
Graduate Outcomes Presentation Slides - English (v3).pptxGraduate Outcomes Presentation Slides - English (v3).pptx
Graduate Outcomes Presentation Slides - English (v3).pptxneillewis46
 
Andreas Schleicher presents at the launch of What does child empowerment mean...
Andreas Schleicher presents at the launch of What does child empowerment mean...Andreas Schleicher presents at the launch of What does child empowerment mean...
Andreas Schleicher presents at the launch of What does child empowerment mean...EduSkills OECD
 
Removal Strategy _ FEFO _ Working with Perishable Products in Odoo 17
Removal Strategy _ FEFO _ Working with Perishable Products in Odoo 17Removal Strategy _ FEFO _ Working with Perishable Products in Odoo 17
Removal Strategy _ FEFO _ Working with Perishable Products in Odoo 17Celine George
 
philosophy and it's principles based on the life
philosophy and it's principles based on the lifephilosophy and it's principles based on the life
philosophy and it's principles based on the lifeNitinDeodare
 
MOOD STABLIZERS DRUGS.pptx
MOOD     STABLIZERS           DRUGS.pptxMOOD     STABLIZERS           DRUGS.pptx
MOOD STABLIZERS DRUGS.pptxPoojaSen20
 
PSYPACT- Practicing Over State Lines May 2024.pptx
PSYPACT- Practicing Over State Lines May 2024.pptxPSYPACT- Practicing Over State Lines May 2024.pptx
PSYPACT- Practicing Over State Lines May 2024.pptxMarlene Maheu
 
An overview of the various scriptures in Hinduism
An overview of the various scriptures in HinduismAn overview of the various scriptures in Hinduism
An overview of the various scriptures in HinduismDabee Kamal
 

Último (20)

Spring gala 2024 photo slideshow - Celebrating School-Community Partnerships
Spring gala 2024 photo slideshow - Celebrating School-Community PartnershipsSpring gala 2024 photo slideshow - Celebrating School-Community Partnerships
Spring gala 2024 photo slideshow - Celebrating School-Community Partnerships
 
Sternal Fractures & Dislocations - EMGuidewire Radiology Reading Room
Sternal Fractures & Dislocations - EMGuidewire Radiology Reading RoomSternal Fractures & Dislocations - EMGuidewire Radiology Reading Room
Sternal Fractures & Dislocations - EMGuidewire Radiology Reading Room
 
The Liver & Gallbladder (Anatomy & Physiology).pptx
The Liver &  Gallbladder (Anatomy & Physiology).pptxThe Liver &  Gallbladder (Anatomy & Physiology).pptx
The Liver & Gallbladder (Anatomy & Physiology).pptx
 
Implanted Devices - VP Shunts: EMGuidewire's Radiology Reading Room
Implanted Devices - VP Shunts: EMGuidewire's Radiology Reading RoomImplanted Devices - VP Shunts: EMGuidewire's Radiology Reading Room
Implanted Devices - VP Shunts: EMGuidewire's Radiology Reading Room
 
Poster_density_driven_with_fracture_MLMC.pdf
Poster_density_driven_with_fracture_MLMC.pdfPoster_density_driven_with_fracture_MLMC.pdf
Poster_density_driven_with_fracture_MLMC.pdf
 
demyelinated disorder: multiple sclerosis.pptx
demyelinated disorder: multiple sclerosis.pptxdemyelinated disorder: multiple sclerosis.pptx
demyelinated disorder: multiple sclerosis.pptx
 
Chapter 7 Pharmacosy Traditional System of Medicine & Ayurvedic Preparations ...
Chapter 7 Pharmacosy Traditional System of Medicine & Ayurvedic Preparations ...Chapter 7 Pharmacosy Traditional System of Medicine & Ayurvedic Preparations ...
Chapter 7 Pharmacosy Traditional System of Medicine & Ayurvedic Preparations ...
 
II BIOSENSOR PRINCIPLE APPLICATIONS AND WORKING II
II BIOSENSOR PRINCIPLE APPLICATIONS AND WORKING IIII BIOSENSOR PRINCIPLE APPLICATIONS AND WORKING II
II BIOSENSOR PRINCIPLE APPLICATIONS AND WORKING II
 
TỔNG HỢP HƠN 100 ĐỀ THI THỬ TỐT NGHIỆP THPT VẬT LÝ 2024 - TỪ CÁC TRƯỜNG, TRƯ...
TỔNG HỢP HƠN 100 ĐỀ THI THỬ TỐT NGHIỆP THPT VẬT LÝ 2024 - TỪ CÁC TRƯỜNG, TRƯ...TỔNG HỢP HƠN 100 ĐỀ THI THỬ TỐT NGHIỆP THPT VẬT LÝ 2024 - TỪ CÁC TRƯỜNG, TRƯ...
TỔNG HỢP HƠN 100 ĐỀ THI THỬ TỐT NGHIỆP THPT VẬT LÝ 2024 - TỪ CÁC TRƯỜNG, TRƯ...
 
IPL Online Quiz by Pragya; Question Set.
IPL Online Quiz by Pragya; Question Set.IPL Online Quiz by Pragya; Question Set.
IPL Online Quiz by Pragya; Question Set.
 
MSc Ag Genetics & Plant Breeding: Insights from Previous Year JNKVV Entrance ...
MSc Ag Genetics & Plant Breeding: Insights from Previous Year JNKVV Entrance ...MSc Ag Genetics & Plant Breeding: Insights from Previous Year JNKVV Entrance ...
MSc Ag Genetics & Plant Breeding: Insights from Previous Year JNKVV Entrance ...
 
Graduate Outcomes Presentation Slides - English (v3).pptx
Graduate Outcomes Presentation Slides - English (v3).pptxGraduate Outcomes Presentation Slides - English (v3).pptx
Graduate Outcomes Presentation Slides - English (v3).pptx
 
Andreas Schleicher presents at the launch of What does child empowerment mean...
Andreas Schleicher presents at the launch of What does child empowerment mean...Andreas Schleicher presents at the launch of What does child empowerment mean...
Andreas Schleicher presents at the launch of What does child empowerment mean...
 
Removal Strategy _ FEFO _ Working with Perishable Products in Odoo 17
Removal Strategy _ FEFO _ Working with Perishable Products in Odoo 17Removal Strategy _ FEFO _ Working with Perishable Products in Odoo 17
Removal Strategy _ FEFO _ Working with Perishable Products in Odoo 17
 
philosophy and it's principles based on the life
philosophy and it's principles based on the lifephilosophy and it's principles based on the life
philosophy and it's principles based on the life
 
MOOD STABLIZERS DRUGS.pptx
MOOD     STABLIZERS           DRUGS.pptxMOOD     STABLIZERS           DRUGS.pptx
MOOD STABLIZERS DRUGS.pptx
 
PSYPACT- Practicing Over State Lines May 2024.pptx
PSYPACT- Practicing Over State Lines May 2024.pptxPSYPACT- Practicing Over State Lines May 2024.pptx
PSYPACT- Practicing Over State Lines May 2024.pptx
 
Including Mental Health Support in Project Delivery, 14 May.pdf
Including Mental Health Support in Project Delivery, 14 May.pdfIncluding Mental Health Support in Project Delivery, 14 May.pdf
Including Mental Health Support in Project Delivery, 14 May.pdf
 
Word Stress rules esl .pptx
Word Stress rules esl               .pptxWord Stress rules esl               .pptx
Word Stress rules esl .pptx
 
An overview of the various scriptures in Hinduism
An overview of the various scriptures in HinduismAn overview of the various scriptures in Hinduism
An overview of the various scriptures in Hinduism
 

Basic-Electronic-Components .pdf

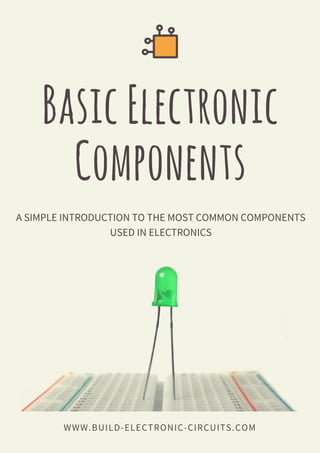
  • 1. Basic Electronic Components WWW.BUILD-ELECTRONIC-CIRCUITS.COM A SIMPLE INTRODUCTION TO THE MOST COMMON COMPONENTS USED IN ELECTRONICS
  • 2. Basic Electronic Components Used in Circuits www.build-electronic-circuits.com 2 Hi, I’m Oyvind! Hey, I’m Oyvind Dahl and I run an electronics membership site for people like you to get really good at electronics. Everything is explained in simple ways and my students learn by doing - not by being swamped with complicated jargon and maths. Take a look at the course description here https://ohmify.com/join/ In the meantime, enjoy this introduction to the basic electronics compo- nents! Keep On Soldering! Øyvind Nydal Dahl
  • 3. Basic Electronic Components Used in Circuits www.build-electronic-circuits.com 3 1. Light-Emitting Diode (LED) ..........................................................................4 2. The Resistor ........................................................................................................7 3. The Switch ........................................................................................................11 4. The Capacitor ..................................................................................................13 5. The Transistor ..................................................................................................15 6. The Inductor ....................................................................................................18 7. The Integrated Circuit ..................................................................................21 8. Learn Electronics Online .............................................................................24 Table Of Contents
  • 4. Basic Electronic Components Used in Circuits www.build-electronic-circuits.com 4 Light-Emitting Diode (LED) Figure 1: A Light-Emitting Diode (LED) A Light Emitting Diode – or LED for short – is a small component that lights up when current flows through it. Sometimes you use it for simple tasks like indicating that your circuit has power, that the circuit is working or that the circuit has failed. But you can also combine several LEDs to create simple 7-segment displays that can display numbers or use them to make cool light decorations. If you combine enough LEDs in a square, you can even use them to show images. The LED exist in many different colors; Red, green, blue and many more. There is also a special type of LED called RGB. This is an LED where a red, green and blue LED has been combined into one package. The colors mix, so by controlling the intensity of each of the three colors you can create a wide spectrum of diffe- rent colors.
  • 5. Basic Electronic Components Used in Circuits www.build-electronic-circuits.com 5 Figure 2: The symbol used in circuit diagrams for a Light-Emitting Diode (LED) Example To use an LED, you need to connect it in a circuit with a resistor, as shown in Figure 3. Figure 3: A simple LED circuit
  • 6. Basic Electronic Components Used in Circuits www.build-electronic-circuits.com 6 The reason you need the resistor is to make sure the LED does not burn up. A com- mon LED can only handle a very low current. If you don’t use a resistor to control the current, your LED will quickly die and become unusable. But what is a resistor? That’s next. Jump on over to the next page to learn what a resistor is.
  • 7. Basic Electronic Components Used in Circuits www.build-electronic-circuits.com 7 The Resistor Figure 4: The resistor in a circuit I didn’t understand the resistor in the beginning. It seemed like it didn’t do anything! It was just there, consuming power. But eventually, I learned that the resistor is actually extremely useful. You’ll see resistors everywhere. And as the name suggests, they resist the current. But you are probably wondering: “What do I use it for?” You use the resistor to control the voltages and the currents in your circuit.
  • 8. Basic Electronic Components Used in Circuits www.build-electronic-circuits.com 8 Figure 5: You always need a resistor with the LED Let’s say you have a 9V battery and you want to turn on an LED. If you connect the battery directly to the LED, LOTS of current will flow through the LED! Much more than the LED can handle. So the LED will become very hot and burn out after a short amount of time. But – if you put a resistor in series with the LED, you can control how much current is going through the LED. Figure 6: A rectangle or a zigzag line is used as a symbol for the resistor
  • 9. Basic Electronic Components Used in Circuits www.build-electronic-circuits.com 9 Example In Figure 7 you can see a common example of how a resistor is used to control the current for protecting the LED. Figure 7: A common way to use resistors is to control the current for an LED A standard LED can only handle up to around 20-30 mA. If the current it much big- ger than that, the LED will quickly die. Let’s say the LED in the circuit above needs 15 mA to give a good light, and it has a voltage drop of 2 volts. (These values should be specified by the supplier when you buy an LED.) If you have a 9 V battery that you would like to power it with, which resistor value do you need? The voltage specified for the LED is the voltage drop the LED will have under nor- mal conditions. That means you know you will have 2V over the LED.
  • 10. Basic Electronic Components Used in Circuits www.build-electronic-circuits.com 10 To find the resistor value, we start by finding the voltage drop over the resistor. Since there is a 2-volt drop over the LED, there will be a 7V drop over the resistor (9V - 2V equals 7V). You have 7V over the resistor, and whatever amount of current flows through it will also flow through the LED. So by setting the resistor value to a value that gives you 15 mA, you’ll also get 15 mA through the LED. To find the necessary resistor value we use Ohm’s law. By placing your hand over the R in the Ohm’s law triangle, you get that Resistance (R) equals voltage (V) divided by current (I). This means you get: R = 7V / 0.015 A = 467Ω 470Ω is a standard value close enough, so by choosing this resistor value you deci- de that the current flowing in your circuit is 15 mA.
  • 11. Basic Electronic Components Used in Circuits www.build-electronic-circuits.com 11 The Switch Figure 8: The push-button is a popular switch The switch is a component that connects one pin to another. For current to flow through a circuit, there needs to be a path from the plus of the battery to the mi- nus of the battery. If you build a simple circuit with an LED and a resistor and connect this to a battery, your LED will light up. If you disconnect the plus of the battery from the circuit, the LED turns off. The switch is nothing more than a way to connect and disconnect two or more things. For example to make a light-switch. Or a keyboard. Figure 9: The switch symbol comes in many forms. This is the pushbutton switch.
  • 12. Basic Electronic Components Used in Circuits www.build-electronic-circuits.com 12 Figure 10: In this circuit, the switch turns on the LED when pushed down Example In Figure 10, you can see how you can use a switch to turn on and off an LED.
  • 13. Basic Electronic Components Used in Circuits www.build-electronic-circuits.com 13 You can think of a capacitor as a battery with very low capacity. You can charge and discharge it, just like a battery. The capacitor is often used to introduce a time-delay in a circuit. For example to blink a light (check out the example in the Integrated Circuit section). But it’s also useful for removing noise in an audio signal, or make the power supply of a circuit more stable. Capacitors come as polarized and non-polarized capacitors. The biggest difference is that with the polarized capacitor, you have a positive and a negative pin and you need to make sure to connect them correctly. You can connect non-polarized capa- citors any way you want. So which one to choose? You never need your capacitor to be polarized. But for larger values, the capacitors are made with a material that makes them polarized. So, sometimes you don't have any choice but to use a polarized one. The Capacitor Figure 11: Two capacitors (Non-polarized on left and polarized on right)
  • 14. Basic Electronic Components Used in Circuits www.build-electronic-circuits.com 14 Example By connecting a capacitor in parallel with a resistor and an LED, the capacitor can store energy and use the energy after the battery is disconnected. This creates a “fading out”-effect of the LED. In Figure 13 you can see such a circuit. To build this circuit, you'll need a capacitor of at least 1000µF to see the effect. Figure 13: A circuit where the LED fades out because of the energy stored in the capacitor Figure 12: Three different variations of the capacitor symbol. If a plus is shown, it means it’s a polarized capacitor.
  • 15. Basic Electronic Components Used in Circuits www.build-electronic-circuits.com 15 The Transistor Figure 14: A transistor placed onto a breadboard This is the component that seems to be the hardest to understand when starting out. At least it was for me. But don’t worry, it’s not that hard. A transistor is like a switch that is controlled by an electrical signal. Figure 15: A little bit of current flowing through the base of the transistor turns it ON
  • 16. Basic Electronic Components Used in Circuits www.build-electronic-circuits.com 16 Figure 16: The transistor symbol for a NPN transistor In Figure 15, you can see an illustration of how the transistor works: It has three pins named base, collector, and emitter. If you have a small current flowing from base to emitter, you turn it on. With no current, it is off. To get current flowing you need about 0.7V from base to emitter (for this type of transistor). Unlike a normal switch that only has two states (ON or OFF), the transistor can also be“partly on”by controlling the current that goes through its base. A bit of current on the base produces a current of maybe 100 times more (depending on the tran- sistor) through the Collector and Emitter. You can use this effect to build an ampli- fier. Example A simple example of using a transistor is for building a touch-sensor, like in Figure 17. In this example, the transistor does not let any current flow through the LED and resistor if there is no current flowing through the base. That means there is no light in the LED. When you touch your finger to the touch-pad (for example two metal pins), your finger acts as a resistor, and lets a little bit of current flow down through the base of the transistor. The transistor“opens its gate”and lets about 100 times the amount of current flow through the LED and resistor, which makes the LED light up.
  • 17. Basic Electronic Components Used in Circuits www.build-electronic-circuits.com 17 Figure 17: A touch-sensor that turns on a light when you touch it.
  • 18. Basic Electronic Components Used in Circuits www.build-electronic-circuits.com 18 The Inductor Figure 18: An inductor on a small circuit board An inductor is just a coil of wire. If you take a wire and wind it up into a coil, you have created an inductor. When you apply a current through the coil, a magnetic field is created around it, and this field stores energy. When the current through the inductor stays the same, the inductor does nothing. It just lets the current pass through, just like it was a normal wire. But when the current through the inductor changes, the built-up energy in the magnetic field will resist this change by changing the resistance of the inductor. Resistance to change is a good thing for example to create a filter to reduce noise. Figure 19: The symbol used in circuit diagrams for an inductor
  • 19. Basic Electronic Components Used in Circuits www.build-electronic-circuits.com 19 If the wire is wound around a magnetic core (for example iron), the magnetic field becomes much stronger. A transformer is a component made up of two inductors wound around the same magnetic core. The transformer is a classical component used to reduce the voltage in power su- pplies. If you constantly change the current through one inductor (the input), the change in magnetic field is picked up by the other inductor (the output). If the input inductor has 1000 windings, and the other inductor has only 100, then the resulting voltage on the output inductor is ten times less than the input volta- ge. Example Inductors are often used in filters and oscillators, for example in radio equipment. But it’s hard to find a practical circuit example that is both simple and really de- monstrates how an inductor works, without going into mathematical explanations. Instead, a fun example to demonstrate the magnetism that is created in an induc- tor is to create an electromagnet! Figure 20: A homemade electromagnet
  • 20. Basic Electronic Components Used in Circuits www.build-electronic-circuits.com 20 Figure 21: The electromagnet pulling some metallic objects Here's how to do it: 1. Take some insulated wire. 2. Wind it around an iron screw, maybe about 50 times. 3. Connect a big 1.5 V flashlight battery (You can try a higher voltage, but then be very careful as it gets hot really fast.)' 4. Place it over some small metallic objects to test it. Note: Not all metals are magnetic. For example, copper coins won’t be attracted to the magnet.
  • 21. Basic Electronic Components Used in Circuits www.build-electronic-circuits.com 21 The Integrated Circuit Figure 22: An Integrated Circuit (IC) connected on a breadboard An integrated circuit is any kind of circuit that is integrated onto a chip. It can be a radio transmitter, a microcontroller, an audio amplifier or any other circuit you can think of. By making a circuit on a small chip, it’s much easier to make advanced projects. Let’s say you want to make a tracking device for your car. You can find a GPS chip for positioning, a GSM chip to send text messages, and a microcontroller chip to control everything. To figure out exactly what a specific IC does, you need to check its datasheet. The datasheet is a document that comes with every IC. You can find the datasheet for almost any IC by just searching for the chip name +“datasheet”in Google. The datasheet explains what each of the pins does, how much voltage it needs, and often contains an example circuit to show you how to connect it.
  • 22. Basic Electronic Components Used in Circuits www.build-electronic-circuits.com 22 Example The 555 timer is a very useful and popular Integrated Circuit. You can use it to blink a light, to create sound, to create a clock signal, add a countdown timer and a lot of other things. A simple example is to blink an LED. By carefully selecting the values of the capaci- tor and resistors on the input side, you can control how fast the light should blink. Figure 24: This circuit will make the LED blink Figure 23: The symbol for an IC is often a box with pins. But it can also be the symbol of the func- tion of the IC (like a logic gate or an operational amplifier).
  • 23. Basic Electronic Components Used in Circuits www.build-electronic-circuits.com 23 The circuit shown in Figure 24 will blink an LED about once per second. The resistors R1 and R2, together with the capacitor C1, set the output frequency of the output pin. The frequency is the number of times the output goes high per second. So an output frequency of 5 Hz would mean the output goes high 5 times per second. You can find the output frequency of your circuit by using the following formula: To find the frequency, just replace R1, R2, and C1 with the values you use, and put it all into a calculator. Let's say you have a circuit with the following component values: R1 = 100 kΩ R2 = 10 kΩ C1 = 10 µF The resistor values are in ohms, and the capacitance is in farads. That means R1 = 100 000Ω, R2 = 10 000Ω, and C1 = 0.00001 F. Frequency = 1.44 / ((100 000Ω + 10 000Ω + 10 000Ω) * 0.00001 F) Frequency = 1.44 / ((120 000Ω) * 0.00001 F) Frequency = 1.2 Hz According to this calculation, the output should turn on and off 1.2 times per se- cond with those values.
  • 24. Basic Electronic Components Used in Circuits www.build-electronic-circuits.com 24 Learn Electronics Online Join the online classes at Ohmify.com where Oyvind has taught hundreds of stu- dents the secrets to building their own inventions with electronics. No previous experience required! Find out more here: https://ohmify.com/join/ What You’ll Learn • How To Build Circuits • How To Build A Simple Robot • Understand How Circuits Work • Microcontroller Programming • How To Build An Audio Amplifier • Soldering • How To Choose Components • How To Make Your Own Inventions • Arduino • How To Design Your Own Circuit Boards From Scratch • How To Build A Mobile Phone Charger • ...and much more!