SlideShare una empresa de Scribd logo
1 de 60
Descargar para leer sin conexión
CHALLENGER-15
BEDIENUNGSANLEITUNG
OPERATING MANUAL
MANUAL DE INSTRUCCIONES
MODE D‘EMPLOI
INSTRUKCJA OBSŁUGI
FASZINATION
WÄRMEBILDTECHNIK
Liebe Kunden,
aus unserem Anspruch heraus, Ihnen stets technisch und qualitativ
führende Wärmebildoptiken anzubieten, finden Sie in unserem
neuen Programm Produkte mit modernster Technologie und
herausragenden Leistungsparametern.
Mit unserem Serviceversprechen, Ihnen im Falle einer Einsendung
innerhalb von zehn Werktagen Ihre Optik wieder zu retournieren,
sowie einer Garantie auf unsere Produkte von bis zu drei Jahren
bedanken wir uns für Ihr Vertrauen und wünschen ein kräftiges
Waidmannsheil!
Ihr LIEMKE-Team!
CHALLENGER-15 · Bedienungsanleitung 03 / 2021
D
E
–
3
INHALT
01. TECHNISCHE DATEN������������������������4
02. EINZELTEILE UND BEDIENELEMENTE �����������4
03. LIEFERUMFANG�����������������������������5
04. SICHERHEITSHINWEISE�����������������������5
05. BETRIEB �����������������������������������5
06. EIN- UND AUSSCHALTEN ��������������������6
07. STANDBY-MODUS ��������������������������6
08. DIOPTRIENEINSTELLUNG ��������������������6
09. INFO-LEISTE ��������������������������������6
10. MENÜ-SYMBOLE ���������������������������7
11. UMSCHALTEN DES BILDMODUS ��������������7
12. DIGITALER ZOOM ��������������������������8
13. AUFNEHMEN VON BILDERN UND VIDEOS �����8
14. KALIBRIERFUNKTION (FCC) �����������������8
15. STADIAMETRISCHER ENTFERNUNGSMESSER���9
16. FEHLERPIXELKORREKTUR ������������������� 10
17. HOT-SPOT-TRACKING ���������������������� 10
18. AUFLADEN DES AKKUS���������������������� 10
19. ÜBERTRAGEN VON BILDERN UND VIDEOS ���� 10
20. WIFI-FUNKTION UND APP-VERBINDUNG����� 11
21. INSTANDHALTUNG ������������������������� 11
22. STÖRUNGSBESEITIGUNG ������������������� 11
CHALLENGER-15 · Bedienungsanleitung 03 / 2021
D
E
2
–
3
01.	TECHNISCHE DATEN*
MODELL CHALLENGER-15
Detektor­auflösung 384×288 px
Pixelgröße 17 µm
Bildfrequenz 50 Hz
Objektivlinse 15 mm, Fixfokus
Sehfeld
24,9° × 18,8°
44,1 m × 33,1 m(H × V)
Anzeige LCOS, 720 × 560
Vergrößerung 1,5
Digitaler Zoom 2x, 4x
Max. Batterie­lebensdauer** 6 h
Gewicht 270 g
Abmessungen 169 × 57 × 60 mm
Interner Speicher 8 GB
Aufnahmeformate JPG (Foto), MP4 (Video)
Betriebstemperatur −10 °C bis +50 °C
Wasserfestigkeit IP67
Entdeckungsreichweite
(Ziel: 1,8 m × 0,5 m, P (n) = 99%)
530 m
* Änderungen zur Verbesserung technischer Parameter des Geräts vorbehal-
ten. / ** Die tatsächliche Betriebszeit hängt von der Temperatur der Batterie
und der Intensität der Nutzung der WiFi-Funktion und des eingebauten
Videorecorders ab.
02.	EINZELTEILE UND BEDIENELEMENTE
01.	Objektiv
02.	Ein/Aus-Taste
03.	Foto-/Video-Taste
04.	Menü-Taste
05.	Zoom-Taste
06.	Okular
07.	Dioptrienausgleichsrad
08.	Stativgewinde
09.	USB-C-Anschluss
mit LED-Anzeige
01 02 03 04 05 06
08
07
09
CHALLENGER-15 · Bedienungsanleitung 03 / 2021
D
E
–
5
4
03.	LIEFERUMFANG
1x Challenger-15
1x Ladekabel
1x Bedienungsanleitung
04.	SICHERHEITSHINWEISE
Die Nennladespannung dieses Produkts beträgt 5 V.
	
 Bitte laden Sie rechtzeitig bei niedriger Leistung, um einen Verlust
der Lebensdauer durch Tiefentladung der Batterie zu vermei-
den.
Es wird nicht empfohlen, die Wärmebildkamera für längere Zeit in
einer Umgebung mit hohen Temperaturen zu verwenden. Wenn
die Temperatur zu hoch ist, geht die Wärmebildkamera in den
Hochtemperatur-Schutzstatus über und schaltet sich automatisch
ab.
Die empfohlene Betriebstemperatur liegt bei −10 °C bis +50 °C.
	
 Stellen Sie sicher, dass die Abdeckung des USB-C-Anschlusses an
der Unterseite der Wärmebildkamera bei Verwendung in feuch-
ten Umgebungen, z. B. an Regentagen, fest verschlossen ist.
•	 Wenn das Gerät über einen längeren Zeitraum nicht benutzt
wird, sollte es während der Lagerung mindestens alle 2 Monate
aufgeladen und in einer trockenen und belüfteten Umgebung
gelagert werden.
•	 Das Gerät sollte nicht in einer Umgebung über 40 °C aufgeladen
werden.
Entsorgung von Elektro-Altgeräten und Batterien
Elektro-Altgeräte und Batterien dürfen nicht im Hausmüll
entsorgt werden. Bitte geben Sie sie bei Ihrer lokalen Recyc­
ling-Annahmestelle ab. Batterien sollten bei der Entsorgung
vollständig entladen sein.
CE-Kennzeichnung Die Geräte sind konform mit den EU-Richtlinien:
EMV-Richtlinie 2014/35/EU
RoHS-Richtlinie RoHS 2011/65/EU
05.	BETRIEB
VORSICHT!
Das Objektiv des Geräts darf nicht auf intensive Ener-
giequellen gerichtet werden, wozu beispielsweise La-
sergeräte und die Sonne gehören. Ansonsten besteht
die Gefahr, dass elektronische Komponenten des
Geräts beschädigt werden. Der Schaden, der infolge
Nichtbeachtung der Betriebsanweisungen entsteht,
fällt nicht unter die Gewähr­
leistungsansprüche.
Vor dem Verwenden
Vor der Inbetriebnahme des Geräts empfehlen wir eine technische
Prüfung.
	
 
Prüfen Sie dabei den äußeren Zustand des Geräts: Das Gehäuse
darf keine Risse aufweisen.
	
 
Prüfen Sie den Zustand des Objektivs und des Okulars: Es darf
keine Risse, Fettflecke, Schmutz und andere Ablagerungen
aufweisen.
	
 
Prüfen Sie den Zustand des Akkus: Dieser sollte falls nötig gela-
den werden.
	
 Prüfen Sie alle elektrischen ­
Kontakte: Es dürfen keine Salze oder
oxidierten Stellen vorhanden sein.
06.	EIN- UND AUSSCHALTEN
	
 Schalten Sie das Gerät durch langes Drücken Ein/Aus-Taste ein.
Der Startbildschirm erscheint und nach einigen Sekunden wird das
Bild angezeigt.
	
 Schalten Sie das Gerät durch langes Drücken der Ein/Aus-Taste
aus.
07.	STANDBY-MODUS
Um die Laufzeit des Akkus zu erhöhen, kann das Gerät in den
Standby-Modus versetzt werden.
	
 Wenn das Gerät eingeschaltet ist, drücken Sie kurz auf die
Ein/Aus-Taste, um in den Standby-Modus zu gelangen.
Das Gerät geht in den Standby-Modus.
	
 Drücken Sie erneut kurz auf die Ein/Aus-Taste, um das Gerät aus
dem Standby-Modus zu wecken.
Das Aufwecken des Geräts erfolgt sofort, es gibt keine Wartezeit
wie beim Einschalten des Geräts, nachdem es vollständig ausge-
schaltet wurde.
08.	DIOPTRIENEINSTELLUNG
Mit der Dioptrieneinstellung wird das Okular des Geräts an das
individuelle Sehvermögen des Benutzers angepasst.
	
 Schließen Sie die Objektivklappe und drehen Sie das Dioptri-
enausgleichsrad im oder gegen den Uhrzeigersinn, bis sie die
Symbole im Display scharf sehen können.
09.	INFO-LEISTE
Die Info-Leiste in der oberen rechten
Bild­
ecke zeigt den eingestellten
Digitalzoom, den Speicherplatz (kein Balken = leer) und den
Ladezustand des eingebauten Akkus (drei Balken = voll) an. Bei
aktiviertem WiFi wird das WiFi-Symbol aus dem Menü ebenfalls in
der Info-Leiste angezeigt.
CHALLENGER-15 · Bedienungsanleitung 03 / 2021
D
E
–
7
6
10.	MENÜ-SYMBOLE
Die Menüleiste ist am linken Bildrand angeordnet.
	
 Drücken Sie die Foto-/Video-Taste bzw. die Zoom-Taste, um
zwischen den Menüpunkten zu wechseln.
	
 Drücken Sie die Menü-Taste zum Auswählen eines Menüpunkts.
	
 Drücken Sie die Menü-Taste lange, um das Menü wieder zu
verlassen.
SYMBOL Bedeutung
Auto-Standby (aus/5 min./15 min.)
Sichtbarkeit der Info-Leiste in der oberen rechten
Bildecke (an/aus)
Hot-Spot-Tracking/Anzeigen des wärmsten
Objekts (an/aus)
WiFi (an/aus)
Analoger Videoausgang (an/aus)
Stadiametrischer Entfernungsmesser
Helligkeit (Stufe 1 bis 5)
Kontrast (Stufe 1 bis 5)
Bildoptimierungsmodi für unterschiedliche
Umgebungsbedingungen (warm/kalt)
Kalibriermodus / FCC (auto/manuell,extern)
Fehlerpixelkorrektur
Systeminformation
Wiederherstellung der Werkseinstellungen
(und anschließender Neustart)
11.	UMSCHALTEN DES BILDMODUS
	
 Drücken Sie kurz auf die Menü-Taste, um den Bildmodus
zwischen den Modi White Hot, Black Hot, Fusion und Red Hot
umzuschalten.
01. 02. 03. 04.
01.	White Hot – ideal zum präzisen Ansprechen
02.	Black Hot – ideal zum schnellen Finden
03.	Fusion – zur Detektion im Nahbereich, z.B. Wärmebrücken
04.	Red Hot – zur schnellen Detektion von Wärmequellen
12.	DIGITALER ZOOM
	
 Drücken Sie kurz die Zoom-Taste, um das Bild von 1× auf 2×, 4×
und zurück auf 1× zu zoomen.
Der Digitalzoom-Faktor wird in der Info-Leiste angezeigt.
13.	AUFNEHMEN VON BILDERN UND
VIDEOS
	
 Drücken Sie im normalen Anzeigemodus kurz auf die Foto-/Vi-
deo-Taste, um ein Foto aufzunehmen.
Das Speichern der Fotoaufnahme wird in der Anzeige bestätigt.
	
 Drücken Sie die Foto-/Video-Taste lange, um eine Videoaufnah-
me zu starten.
Während der Videoaufnahme wird die Aufnahmezeit in der obe-
ren linken Ecke des Bildschirms angezeigt.
	
 Drücken Sie die Foto-/Video-Taste erneut lange, um die Aufnah-
me zu beenden und das Video zu speichern.
Das Speichern der Videoaufnahme wird in der Anzeige bestätigt.
Der verbleibende Platz im internen Speicher wird in der Info-Leiste
angezeigt.
14.	KALIBRIERFUNKTION (FCC)
Während der Verwendung verschlechtert sich das Bild allmählich
aufgrund der sich ändernden Hintergrundtemperatur des Sensors.
Dies muss durch periodisches Kalibrieren des Sensors ausgeglichen
werden. Zur Kalibrierung wird ein interner Verschluss betätigt, der
ein schwaches Klickgeräusch verursacht. Dabei friert das Bild kurz
ein, während der Verschluss geschlossen ist.
•	 Im FCC-Modus Auto wird die Kalibrierung in vom Gerät festge-
legten Zeitabständen automatisch durchgeführt.
•	 Im FCC-Modus Manuell wird keine automatische Kalibrierung
durchgeführt. Der manuelle Modus erlaubt es dem Nutzer, den
Zeitpunkt des kurzen Einfrierens des Bilds selbst zu bestimmen.
	
 Starten Sie die manuelle Kalibrierung durch langen Druck auf
die Zoom-Taste, wenn Sie bei der Nutzung eine verschlechterte
Bildqualität feststellen.
•	 Im FCC-Modus Extern wird ebenfalls keine automatische
Kalibrierung durchgeführt. Die Kalibrierung erfolgt ohne den in-
ternen Verschluss und damit völlig geräuschlos. Dazu muss wäh-
rend des Kalibrierens die Objektivkappe geschlossen werden
(dies ersetzt den internen Verschluss). Wird die Objektivkappe
beim Durchführen der externen Kalibrierung versehentlich nicht
geschlossen, wird das angezeigte Bild von einem Standbild der
beim Kalibrieren angezeigten Szene überlagert. Dies kann durch
nochmaliges ordnungsgemäßes Kalibrieren mit geschlossener
Objektivkappe korrigiert werden.
CHALLENGER-15 · Bedienungsanleitung 03 / 2021
D
E
–
9
8
15.	STADIAMETRISCHER
ENTFERNUNGSMESSER
Für die stadiametrische Entfernungsermittlung müssen Sie zunächst
die Zielgröße (Höhe) des Ziels einstellen, zu dem Sie die Entfernung
messen wollen. Dazu gehen Sie wie folgt vor:
	
 Wählen Sie im Menü den Menüpunkt Stadiametrischer Entfer-
nungsmesser an und bestätigen Sie ihn mit der Menü-Taste.
	
 Drücken Sie die Zoom-Taste, um in das Untermenü Parameter zu
gelangen.
Hier können Sie mit der Foto-/Video-Taste bzw. der Zoom-Taste
zwischen vier verschiedenen Zielgrößen „Wolf“, „Bär“, „Reh“ und
„individuell“ auswählen.
	
 Bestätigen Sie Ihre Auswahl mit der Menü-Taste.
Im Unterpunkt „individuell“ können Sie mit der Foto-/Video-Taste
bzw. der Zoom-Taste eine individuelle Zielgröße im Bereich von 0,1
bis 9,9 m Höhe definieren.
	
 Bestätigen Sie den eingestellten Wert mit der Menü-Taste.
Zum Messen der Entfernung gehen Sie wie folgt vor:
	
 Wählen Sie im Menü den Menüpunkt Stadiametrischer Entfer-
nungsmesser an und bestätigen Sie ihn mit der Menü-Taste.
Im Anzeigebild erscheint ein langer waagerechter Strich mit einem
nach oben zeigenden kurzen senkrechten Strich.
	
 Platzieren Sie den Schnittpunkt der beiden Striche an der Ober-
kante des zu messenden Ziels und drücken Sie die Menü-Taste
(Schritt 1).
Der senkrechte Strich blinkt kurz und wechselt dann zur Unterseite
des waagerechten Strichs.
	
 Platzieren Sie nun den Schnittpunkt der beiden Striche an der
Unterkante des zu messenden Ziels und drücken Sie erneut die
Menü-Taste (Schritt 2).
Daraufhin wird in der linken oberen Bildecke die Entfernung zum
Ziel angezeigt.
Schritt 1 Schritt 2
Bitte beachten Sie: Die Genauigkeit der Entfernungsermittlung
hängt wesentlich von der Übereinstimmung der definierten mit der
tatsächlichen Zielgröße und von der Handruhe beim Messvorgang
ab. Die Größen der vorkonfigurierten Ziele sind lediglich Anhalts-
werte und können variieren.
16.	FEHLERPIXELKORREKTUR
Sollte dauerhaft trotz Kalibrierung und Neustart ein Pixelfehler auf-
treten, lässt dieser sich wie folgt beheben:
	
 Wählen Sie den Menüpunkt Fehlerpixelkorrektur aus und öffnen
Sie diese.
	
 Drücken Sie die Menü-Taste, um die Schrittweite der Cursorver-
stellung zur Anwahl des fehlerhaften Pixels einzustellen (Schritt-
weite 1, 5 oder 10 Pixel).
	
 Drücken Sie die Menü- oder Foto-/Video-Taste, um die Bewe-
gungsrichtung des Cursors zu wählen (links, rechts, oben, unten).
	
 Bewegen Sie den Cursor mit der Menü-Taste schrittweise auf
den Fehlpixel.
Eine vergrößerte Darstellung des angewählten Pixels wird in der
unteren rechten Displayecke angezeigt. Falls der fehlerhafte Pixel
durch die Menü-Anzeige verdeckt wird, kann die Anzeige durch
langen Druck auf die Foto-/Video-Taste gespiegelt werden.
	
 Wenn der Pixel angewählt ist, korrigieren Sie ihn durch einen
langen Druck auf die Foto-/Video-Taste.
Am unteren Bildrand wird Ihnen die Anzahl der korrigierten Pixel
angezeigt.
	
 Mit einem langen Druck der Menü-Taste schließen Sie das Menü.
17.	HOT-SPOT-TRACKING
Bei aktivierter Hot-Spot-Tracking-Funktion erscheint ein grünes Fa-
denkreuz, das das heißeste Objekt auf dem Bildschirm verfolgt.
18.	AUFLADEN DES AKKUS
Das Gerät ist mit einem internen, wieder aufladbaren Akku
ausgestattet, der über den USB-C-Anschluss an der Unterseite des
Gehäuses aufgeladen wird. Die Batterieanzeige in der oberen
rechten Ecke des Bildschirms zeigt den Ladestand des Akkus an.
	
 Bitte laden Sie den Akku spätestens dann auf, wenn eine nied­
rige Akkuladung (rotes Batteriesymbol) angezeigt wird.
Sie können den Akku mit dem mitgelieferten Netzteil oder einem
tragbaren Netzteil wie z.B. einer USB-Powerbank aufladen. Eine
Powerbank mit 4000 mAh Kapazität kann die Laufzeit verdoppeln.
Die LED-Anzeige neben dem USB-C-Anschluss leuchtet beim Aufla-
den rot und wechselt auf grün, wenn der Akku vollständig aufgela-
den ist. Das Gerät kann während des Betriebs aufgeladen werden.
Es lädt schneller als für den laufenden Betrieb benötigt wird.
19.	ÜBERTRAGEN VON BILDERN UND
VIDEOS
	
 Aktivieren Sie im Menü die WiFi-Funktion.
Nachdem Sie das Gerät über ein USB-Kabel an Ihren Computer
angeschlossen und das Gerät eingeschaltet haben, fungiert es als
Massenspeichergerät, sodass Sie Ihre Bilder und Videos auf dem
Computer ansehen, kopieren oder löschen können.
CHALLENGER-15 · Bedienungsanleitung 03 / 2021
D
E
–
11
10
20.	WIFI-FUNKTION UND
APP-VERBINDUNG
Die App und Informationen zur App-Verbindung finden Sie unter:
https://liemke.shop/medien
21.	INSTANDHALTUNG
Instandhaltungsarbeiten sollten mindestens zweimal im Jahr durch-
geführt werden und beinhalten folgende Arbeiten.
	
 Wischen Sie die äußeren Oberflächen mit einem Baumwolllap-
pen ab, um Metall- und Kunststoffteile staub- und schmutzfrei zu
halten. Dafür kann Silikonfett verwendet werden.
	
 Reinigen Sie die Kontakte des Geräts mit einem nicht fettenden
organischen Lösungsmittel.
	
 Prüfen Sie die Glasoberflächen des Okulars und des Objek-
tivs. Falls erforderlich, entfernen Sie Staub und Sand von den
Linsen (vorzugsweise ohne die Glasoberflächen zu berühren).
Das Reinigen der äußeren Oberflächen der Optik darf nur mit
Hilfsmitteln vorgenommen werden, die speziell für diesen Zweck
bestimmt sind.
22.	STÖRUNGSBESEITIGUNG
Diese Tabelle führt sämtliche Probleme auf, die bei der Benutzung
des Geräts auftreten können. Führen Sie alle empfohlenen Prüfun-
gen und Reparaturen wie in der Tabelle beschrieben durch.
Falls ein Fehler auftritt, der nicht in der Tabelle ­
aufgeführt ist oder
Sie einen Fehler nicht selbst beheben können, sollte das Gerät zur
Reparatur an die zuständige Servicestelle übergeben werden.
Fehlfunktion Möglicher Grund Korrektur
Die Wärmebildkamera
lässt sich nicht einschal-
ten.
Der Akku ist komplett
entladen.
Laden Sie den Akku.
Kann nicht über eine
externe Stromquelle
betrieben werden.
USB-Kabel ist beschädigt USB-Kabel ersetzen.
Die externe Stromquelle
ist entladen
Laden Sie die externe
Stromquelle (falls erfor-
derlich).
Das Bild ist unscharf, mit
senkrechten Linien und
unebenem Hintergrund.
Kalibrierung erforderlich Führen Sie die Bildkali-
brierung durch wie in
Abschnitt 14. „Kalibrie-
rungsfunktion (FCC)“
beschrieben.
Das Bild ist zu dunkel. Die Helligkeitseinstellung
ist zu gering.
Einstellung der
Display-Helligkeit
Farbige Linien erschei-
nen auf dem Display
oder es wird kein Bild
angezeigt.
Das Gerät wurde
während dem Betrieb
statischer Elektrizität
ausgesetzt.
Nachdem das Gerät
statischer Elektrizität
ausgesetzt wurde, startet
sich das Gerät entweder
automatisch neu oder
Sie müssen es manuell
aus- und wieder ein-
schalten.
Geringe Bildqualität/
verringerte Erkennungs-
reichweite.
Diese Probleme können dann eintreten, wenn
eine Beobachtung an einem Tag mit schwierigen
Wetterbedingungen durchgeführt wird (hohe Luft-
feuchtigkeit, Schneefall, Regen, Nebel usw.).
Das Smartphone oder
der Tablet-PC können
nicht am Gerät ange-
schlossen werden.
Das Passwort des Geräts
wurde geändert.
Löschen Sie das Netz
und stellen Sie die
Verbindung erneut her,
indem Sie das bestehen-
de Passwort benutzen.
Das Gerät befindet sich
in einem Bereich mit
einer großen Anzahl von
WLAN-Netzen, die Inter-
ferenzen verursachen
können.
Um einen stabilen
WLAN-Betrieb zu ge-
währleisten, ist das Gerät
an einem anderen Ort
mit weniger oder gar
keinem WLAN-Netz zu
platzieren.
Kein WLAN-Signal
vorhanden oder unter-
brochen.
Das Gerät befindet
sich außerhalb der
WLAN-Reichweite.Es sind
Hindernisse zwischen
dem Gerät und dem
Empfänger vorhanden
(z. B. Betonwände)
Platzieren Sie das Gerät
in Sichtlinie und Reich-
weite des WLAN-Signals.
Beim Einsatz bei gerin-
gen Temperaturen ist
die Bildqualität der Um-
gebungen schlechter
als bei Temperaturen
über dem Gefrierpunkt.
Bei Temperaturen über dem Gefrierpunkt, sind die
beobachteten Objekte (Umgebung und Hinter-
grund) aufgrund der Wärmeleitfähigkeit
unterschiedlich warm, sodass ein hoher Tempe-
raturkontrast die Folge ist. Demzufolge ist die vom
Gerät erreichte Bildqualität höher.
Bei tiefen Außentemperaturen kühlen die beob-
achteten Objekte (Hintergrund) in der Regel un-
gefähr auf die gleiche Temperatur ab, sodass der
Temperaturkontrast erheblich reduziert wird und
die Bildqualität (Einzelheiten) dadurch geringer ist.
Das ist eine Eigenschaft von Wärmebildkameras.
CHALLENGER-15 · Bedienungsanleitung 03 / 2021
D
E
–
13
12
FASCINATION
THERMAL IMAGING
Dear Customers,
Our mission to always offer you thermal imaging optics that are at
the forefront of technology and quality means that you will find
products with state-of-the-art technology and outstanding
performance parameters in our new range.
With our service promise to return any optics you have sent in to
you within ten working days, as well as a guarantee on our
products of up to three years, we would like to thank you for your
trust and wish you good hunting!
Your LIEMKE team!
CHALLENGER-15 · Operating Manual 03 / 2021
E
N
–
15
CONTENT
CHALLENGER-15 · Operating manual 03 / 2021
E
N
14
–
15
01. TECHNICAL DATA ������������������������� 16
02. COMPONENTS AND CONTROLS������������� 16
03. SCOPE OF SUPPLY ������������������������� 17
04. SAFETY INSTRUCTIONS���������������������� 17
05. OPERATION������������������������������� 17
06. SWITCHING ON AND OFF������������������� 18
07. STANDBY MODE���������������������������� 18
08. DIOPTRE ADJUSTMENT���������������������� 18
09. INFO BAR���������������������������������� 18
10. MENU ICONS����������������������������� 18
11. SWITCHING THE IMAGE MODE ������������� 19
12. DIGITAL ZOOM ���������������������������� 19
13. TAKING PICTURES AND VIDEOS ������������� 19
14. CALIBRATION FUNCTION (FCC) ������������� 20
15. STADIAMETRIC RANGEFINDER ������������� 20
16. BLIND PIXEL CORRECTION ����������������� 21
17. HOT SPOT TRACKING ���������������������� 21
18. CHARGING THE BATTERY ������������������� 22
19. TRANSFERRING PICTURES AND VIDEOS������� 22
20. WIFI FUNCTION AND APP CONNECTION ���� 22
21. MAINTENANCE ���������������������������� 22
22. TROUBLESHOOTING����������������������� 23
01.	TECHNICAL DATA*
MODEL CHALLENGER-15
Detector resolution 384×288 px
Pixel size 17 µm
Frame rate 50 Hz
Eyepiece lens 15 mm, fixed focus
Field of vision
24.9 ° × 18.8 °
44.1 m × 33.1 m (H × V)
Display LCOS, 720 × 560
Magnification 1.5
Digital zoom 2x, 4x
Max. battery life** 6 h
Weight 270 g
Dimensions 169 × 57 × 60 mm
Internal memory 8 GB
Recording formats JPG (picture), MP4 (video)
Operating temperature −10°C to +50°C
Water resistance IP67
Detection range
(Target: 1.8 m × 0.5 m, P (n) = 99%)
530 m
* We reserve the right to make changes to improve the technical parameters
of the unit. / ** The actual operating time depends on the temperature of
the battery and the intensity of use of the WiFi function and the built-in video
recorder.
02.	COMPONENTS AND CONTROLS
01.	Lens
02.	Power button
03.	Picture/video button
04.	Menu button
05.	Zoom button
06.	Eyepiece
07.	Dioptre adjustment wheel
08.	Tripod thread
09.	USB-C interface
with LED display
01 02 03 04 05 06
08
07
09
CHALLENGER-15 · Operating Manual 03 / 2021
E
N
–
17
16
03.	SCOPE OF SUPPLY
1x Challenger-15
1x charging cable
1x Operating Manual
04.	SAFETY INSTRUCTIONS
The nominal charging voltage of this product is 5 V.
	
 Please charge in good time when the battery is low to avoid a
decreased service life due to deep discharge of the battery.
The thermal imager is not recommended to be used in high
temperature environment for a long time. If the temperature is too
high, the imager will enter the high-temperature protection state,
and automatically shut down.
The recommended temperature for use is −10°C to +50°C.
	
 Ensure that the USB-C interface cover on the bottom of the
thermal imager is tightly closed when used in humid environ-
ments, e.g. on rainy days.
•	 If the unit is not used for a long period of time, it should be
charged at least every 2 months during storage and kept in a
dry and ventilated environment.
•	 The unit should not be charged in an environment above 40 °C.
Disposal of waste electrical equipment and batteries
Do not dispose of waste electrical equipment and batteries
in the household waste. Please hand them in to your local
recycling centre. Batteries should be fully discharged when
disposed of.
CE marking The devices are in conformity with the EU
directives:
EMC Directive 2014/35/EU
RoHS Directive 2011/65/EU
05.	OPERATION
CAUTION!
Do not point the lens of the unit at intense energy
sources, including laser units and the sun. Otherwise,
there is a risk of damaging electronic components
of the unit. Damage resulting from non-compliance
with the operating instructions is not covered by the
warranty.
Before use
A technical inspection of the device is recommended before use.
	
 Check the external appearance of the device: There should be
no cracks in the casing.
	
 Check the condition of the lens and eyepiece: There should be
no cracks, greasy spots, dirt or other deposits.
	
 
Check the condition of the battery: It should be charged if
necessary.
	
 Check all electrical contacts: There must be no salts or oxidised
spots.
06.	SWITCHING ON AND OFF
	
 Switch on the unit by pressing and holding the Power button.
The start screen appears and after a few seconds the image is
displayed.
	
 Switch off the unit by pressing and holding the Power button.
07.	STANDBY MODE
To increase the battery life, the unit can be set to standby mode.
	
 When the unit is switched on, briefly press the Power button to
enter standby mode.
The unit goes into standby mode.
	
 Briefly press the Power button again to wake the unit from
standby mode.
The unit wakes up immediately; there is no waiting time as is the
case when the unit is switched on after it has been switched off
completely.
08.	DIOPTRE ADJUSTMENT
The dioptre adjustment adjusts the eyepiece of the unit to the
individual vision of the user.
	
 Close the lens cover and turn the dioptre adjustment wheel
clockwise or anticlockwise until you can see the symbols in the
display clearly.
09.	INFO BAR
The info bar in the upper right-hand
image corner shows the digital zoom
setting, the memory capacity (no bar = empty) and the charge
status of the built-in battery (three bars = full). If WiFi is activated,
the WiFi symbol from the menu is also displayed in the info bar.
10.	MENU ICONS
The menu bar is located on the left edge of the screen.
	
 Press the picture/video button or the zoom button to switch
between the menu items.
	
 Press the menu button to select a menu item.
	
 Long press the menu button to exit the menu again.
CHALLENGER-15 · Operating Manual 03 / 2021
E
N
–
19
18
SYMBOL Meaning
Auto standby (off/5 min./15 min.)
Visibility of the info bar in the upper right corner
of the picture (on/off)
Hot spot tracking/displaying the warmest object (on/off)
WiFi (on/off)
Analogue video output (on/off)
Stadiametric rangefinder
Brightness (level 1 to 5)
Contrast (level 1 to 5)
Image optimisation modes for different environmental
conditions (warm/cold)
Calibration mode / FCC (auto/manual, external)
Blind pixel correction
System information
Restoring the factory settings
(and subsequent restart)
11.	SWITCHING THE IMAGE MODE
	
 Press the menu button briefly to switch the image mode
between White Hot, Black Hot, Fusion and Red Hot modes.
01. 02. 03. 04.
01.	White Hot - ideal for precise response
02.	Black Hot - ideal for quick finding
03.	Fusion - for detection at close range, e.g. thermal bridges
04.	Red Hot - for rapid detection of heat sources
12.	DIGITAL ZOOM
	
 Briefly press the zoom button to zoom the picture to 1× to 2×, 4×
and back to 1x.
The digital zoom factor is displayed in the info bar.
13.	TAKING PICTURES AND VIDEOS
	
 In normal display mode, briefly press the picture/video button to
take a picture.
The display indicates that the picture has been saved.
	
 Long press the picture/video button to start recording a video.
During video recording, the recording time is displayed in the
upper left corner of the screen.
Long press the picture/video button again to stop recording
and save the video.
The display indicates that the video has been saved.
The remaining space in the internal memory is displayed in the info
bar.
14.	CALIBRATION FUNCTION (FCC)
During use, the image gradually deteriorates due to the changing
background temperature of the sensor. This must be compensated
for by periodically calibrating the sensor. For calibration, an inter-
nal shutter is actuated, which makes a faint clicking sound. The
image briefly freezes while the shutter is closed.
•	 In FCC Auto mode, calibration is performed automatically at
intervals set by the unit.
•	 In FCC Manual mode, no automatic calibration is performed.
The manual mode allows the user to determine the time when
the image briefly freezes.
	
 If you notice a deterioration in picture quality during use, start
manual calibration by pressing and holding the zoom button.
•	 In FCC External mode, no automatic calibration is performed
either. Calibration takes place without the internal shutter and is
therefore completely silent. The lens cap must be closed during
calibration (this replaces the internal shutter). If the lens cap is
inadvertently not closed when performing external calibration,
the displayed image is overlapped by a still image of the scene
displayed during calibration. This can be corrected by properly
calibrating again with the lens cap closed.
15.	STADIAMETRIC RANGEFINDER
For stadiametric distance measurement, you must first set the
target size (height) of the target to which you want to measure the
distance. To do this, proceed as follows:
	
 Select the menu item Stadiametric Rangefinder in the menu
and confirm it with the menu button.
	
 Press the zoom button to enter the Parameters submenu.
Here you can choose between four different target sizes wolf,
bear, deer and individual using the picture/video button or the
zoom button.
	
 Confirm your selection with the menu button.
In the sub-item individual you can define a custom target size in
the range of 0.1 to 9.9 m height using the picture/video button or
the zoom button.
	
 Confirm the set value with the menu button.
To measure the distance, proceed as follows:
	
 Select the menu item Stadiametric Rangefinder in the menu
and confirm it with the menu button.
A long horizontal line with a short vertical line pointing upwards
appears in the display image.
	
 Place the intersection of the two lines at the top edge of the
target to be measured and press the menu button (step 1).
CHALLENGER-15 · Operating Manual 03 / 2021
E
N
–
21
20
The vertical line flashes briefly and then changes to the underside
of the horizontal line.
	
 Now place the intersection of the two lines at the lower edge
of the target to be measured and press the menu button again
(step 2).
The distance to the target is then displayed in the upper left corner
of the image.
Step 1 Step 2
Please note: The precision of the distance measurement depends
primarily on the correspondence between the defined and the
actual target size and on the smoothness of the hand during the
measuring process. The sizes of the pre-configured targets are only
indicative and may vary.
16.	BLIND PIXEL CORRECTION
If a pixel error occurs permanently despite calibration and restart,
it can be corrected as follows:
	
 Select the menu item Blind Pixel Correction and open it.
	
 Press the menu button to set the step size of the cursor adjust-
ment to select the faulty pixel (step size 1, 5 or 10 pixels).
	
 Press the menu or picture/video button to select the direction of
movement of the cursor (left, right, up, down).
	
 Move the cursor to the missing pixel step by step using the menu
button.
An enlarged view of the selected pixel is shown in the lower right
corner of the display. If the faulty pixel is covered by the menu
display, the display can be mirrored by pressing and holding the
picture/video button.
	
 When the pixel is selected, correct it by a pressing and holding
the picture/video button.
The number of corrected pixels is displayed at the bottom of the
image.
	
 Close the menu with a long press of the menu button.
17.	HOT SPOT TRACKING
When hot spot tracking is activated, a green crosshair appears
tracking the hottest object on the screen.
18.	CHARGING THE BATTERY
The device is equipped with an internal, rechargeable battery that
is charged via the USB-C interface on the underside of the hous-
ing. The battery indicator in the upper right corner of the screen
shows the charge level of the battery.
	
 Please charge the battery at the latest when a low battery
charge (red battery symbol) is displayed.
You can charge the battery with the supplied power supply unit
or a portable power supply unit such as a USB powerbank. A pow-
erbank with 4000 mAh capacity can double the operating time.
The LED indicator next to the USB-C interface lights up red during
charging and changes to green when the battery is fully charged.
The unit can be charged during operation. It charges faster than is
needed for ongoing operation.
19.	TRANSFERRING PICTURES AND
VIDEOS
Once you have connected the unit to your computer via a USB
cable and switched on the unit, it acts as a mass storage device
so that you can view, copy or delete your pictures and videos on
the computer.
20.	WIFI FUNCTION AND
APP CONNECTION
The app and information on the app connection can be found at:
https://liemke.shop/medien
21.	MAINTENANCE
	
 Activate the WiFi function in the menu.
Maintenance should be carried out at least twice a year and
consist of the following actions.
	
 Wipe the external surfaces of metal and plastic parts free of
dust and dirt with a cotton cloth. Silicone grease can be used
for this purpose.
	
 Clean the contacts of the unit with a non-greasy organic
solvent.
	
 Check the glass surfaces of the eyepiece and the lens. If neces-
sary, remove dust and sand from the lenses (preferably using a
non-contact method). Cleaning of the external surfaces of the
optic should be done with substances designed especially for
this purpose.
CHALLENGER-15 · Operating Manual 03 / 2021
E
N
–
23
22
22.	TROUBLESHOOTING
This table lists all the problems that can occur when using the unit.
Carry out all recommended checks and repairs as described in
the table.
If an error occurs that is not listed in the table or if you cannot
rectify an error yourself, the unit should be handed over to the
responsible service centre for repair.
Malfunction Possible reason Correction
The thermal imager
cannot be switched on.
The battery is complete-
ly discharged.
Charge the battery.
Can‘t be powered by an
external power source.
USB cable is damaged. Replace USB cable.
The external power
source is discharged
Charge the external
power source (if nec-
essary).
The image is blurred,
with vertical lines and
an uneven background.
Calibration needed. Perform image cali-
bration as described in
section 14. Calibration
Function (FCC).
The image is too dark. The brightness setting is
too low.
Set the
display brightness
Coloured lines appear
on the display or no
image is shown.
The unit has been
exposed to static elec-
tricity during operation.
After the unit has been
exposed to static elec-
tricity, the unit will either
restart automatically or
you will have to switch
it off and on again
manually.
Low image quality/re-
duced detection range.
These problems can occur when an observation is
carried out on a day with difficult weather condi-
tions (high humidity, snowfall, rain, fog etc.).
The smartphone or
tablet PC cannot be
connected to the unit.
The unit’s password has
been changed.
Delete the network and
reconnect using the
existing password.
The unit is located in an
area with a large num-
ber of WiFi networks that
may cause interference.
To ensure stable WiFi
operation, place the
unit in another location
with fewer or no WiFi
networks at all.
No WiFi signal available
or interrupted.
The unit is outside the
WiFi range. There are
obstacles between the
unit and the receiver
(e.g. concrete walls).
Place the unit within line
of sight and range of the
WiFi signal.
When the unit is used at
low temperatures, the
image quality of the
surroundings is worse
than at temperatures
above freezing.
At temperatures above freezing, the observed
objects (surroundings and background) are dif-
ferent temperatures due to thermal conductivity,
resulting in a high temperature contrast. Thus, the
picture quality achieved by the unit is higher.
At low outdoor temperatures, the observed
objects (background) usually cool down to about
the same temperature, so that the temperature
contrast is considerably reduced and the image
quality (details) is lower as a result. This is a property
of thermal imagers.
FASCINACIÓN
TERMOGRAFÍA
Estimados clientes,
basándonos en nuestra filosofía de ofrecerles constantemente
óptica termográfica de calidad y tecnología punteras, en nuestro
nuevo programa incluimos productos con la más moderna
tecnología y extraordinarias prestaciones.
Con la promesa de nuestro servicio técnico de devolverle su
óptica en diez días laborables en caso de que nos la remita, así
como una garantía de hasta tres años sobre nuestros productos,
agradecemos su confianza y le deseamos una buena caza.
El equipo de LIEMKE.
CHALLENGER-15 · Manual de instrucciones 03 / 2021
E
S
–
25
ÍNDICE
CHALLENGER-15 · Manual de instrucciones 03 / 2021
E
S
24
–
25
01. DATOS TÉCNICOS ������������������������� 26
02. PIEZAS Y ELEMENTOS DE CONTROL���������� 26
03. VOLUMEN DE SUMINISTRO ���������������� 27
04. INSTRUCCIONES DE SEGURIDAD������������� 27
05. FUNCIONAMIENTO������������������������� 27
06. ENCENDER Y APAGAR���������������������� 28
07. MODO DE ESPERA ������������������������� 28
08. AJUSTE DE DIOPTRÍAS���������������������� 28
09. BARRA DE INFORMACIÓN����������������� 28
10. SÍMBOLOS DEL MENÚ ���������������������� 29
11. CAMBIO DEL MODO DE PANTALLA ���������� 29
12. ZOOM DIGITAL ���������������������������� 30
13. GRABACIÓN DE IMÁGENES Y VÍDEOS ������� 30
14. FUNCIÓN DE CALIBRACIÓN (FCC) ���������� 30
15. MEDIDOR ESTADIAMÉTRICO
DE LA DISTANCIA ������������������������� 31
16. CORRECCIÓN DE PÍXELES DEFECTUOSOS ���� 32
17. SEGUIMIENTO DE PUNTOS CALIENTES ������� 32
18. CARGA DE LA BATERÍA�������������������� 32
19. TRANSMISIÓN DE IMÁGENES Y VÍDEOS������� 33
20. FUNCIÓN WI-FI Y CONEXIÓN
DE LA APLICACIÓN����������������������� 33
21. MANTENIMIENTO ������������������������� 33
22. SOLUCIÓN DE PROBLEMAS ���������������� 33
01.	DATOS TÉCNICOS*
MODELO CHALLENGER-15
Resolución del detector 384×288 px
Tamaño de píxel 17 µm
Frecuencia de imagen 50 Hz
Lente del objetivo 15 mm, enfoque fijo
Campo de visión
24,9 ° × 18,8 °
44,1 m × 33,1 m (Alt. × V)
Indicador LCOS, 720 × 560
Aumento 1,5
Zoom digital 2x, 4x
Duración máxima de la batería** 6 h
Peso 270 g
Dimensiones 169 × 57 × 60 mm
Memoria interna 8 GB
Formato de grabación JPG (foto), MP4 (vídeo)
Temperatura de servicio De −10 °C a +50 °C
Resistencia al agua IP67
Alcance de la detección
(Objeto: 1,8 m × 0,5 m, P (n) = 99%)
530 m
* Reservadas las modificaciones con el fin de mejorar los parámetros
técnicos del aparato. / ** El tiempo de funcionamiento real depende de la
temperatura de la batería y de la intensidad de uso de la función Wi-Fi y de
la cámara de vídeo integrada.
02.	PIEZAS Y ELEMENTOS DE CONTROL
01.	Objetivo
02.	Botón de
encendido/apagado
03.	Botón de foto/vídeo
04.	Botón del menú
05.	Botón de zoom
06.	Ocular
07.	Rueda de compensación
de dioptrías
08.	Rosca para trípode
09.	Conexión USB-C
con indicador LED
01 02 03 04 05 06
08
07
09
CHALLENGER-15 · Manual de instrucciones 03 / 2021
E
S
–
27
26
03.	VOLUMEN DE SUMINISTRO
1x Challenger-15
1x cable de carga
1x manual de instrucciones
04.	INSTRUCCIONES DE SEGURIDAD
La tensión de carga nominal de este producto es de 5 V.
	
 Si baja el rendimiento, cargue a tiempo para evitar que se
reduzca la vida útil debido a una descarga profunda de la
batería.
No se recomienda emplear la cámara termográfica durante
mucho tiempo en un entorno con temperaturas elevadas. Si la
temperatura es demasiado alta, la cámara termográfica pasa
al estado de protección contra la sobretemperatura y se apaga
automáticamente.
La temperatura de servicio recomendada está entre −10 °C y
+50 °C.
	
 Asegúrese de que la tapa de la conexión USB-C en la parte
inferior de la cámara termográfica esté bien cerrada si se usa
en entornos con humedad, por ejemplo, en días lluviosos.
•	 Si va a pasar mucho tiempo sin usar el aparato, durante el
almacenamiento se debe cargar cada 2 meses, como mínimo,
y se guardará en un entorno seco y ventilado.
•	 No cargue el aparato en un entorno por encima de 40 °C.
Eliminación de dispositivos eléctricos usados y baterías
Los dispositivos eléctricos usados y las baterías no se deben
desechar como basura doméstica. Debe depositarlos en su
centro de reciclaje local. Las baterías deben estar comple-
tamente descargadas cuando se desechen.
Marcado CE Los dispositivos cumplen las directivas de la
UE:
Directiva EMC 2014/35/UE
Directiva RoHS 2011/65/UE
05.	FUNCIONAMIENTO
¡PRECAUCIÓN!
El objetivo del aparato no se debe orientar a fuentes
de energía intensas, incluyendo, por ejemplo, dispo-
sitivos de láser y el sol. De lo contrario, existe riesgo
de dañar los componentes electrónicos del aparato.
Los daños originados como consecuencia de la no
observancia de las instrucciones no están cubiertos
por la garantía.
Antes de usar el producto
Antes de poner el aparato en funcionamiento, recomendamos
una inspección técnica.
	
 Compruebe el estado exterior del aparato: La carcasa no
debe presentar grietas.
	
 Compruebe el estado del objetivo y del ocular: No debe pre-
sentar grietas, manchas de grasa, suciedad ni otros depósitos.
	
 Compruebe el estado de la batería: Se debe cargar, si es
necesario.
	
 Compruebe todos los contactos eléctricos: No debe haber
sales ni puntos oxidados.
06.	ENCENDER Y APAGAR
	
 Encienda el aparato pulsando prolongadamente el botón de
encendido/apagado.
Aparecerá la pantalla de inicio y, pasados unos segundos, se
mostrará la imagen.
	
 Apague el aparato pulsando prolongadamente el botón de
encendido/apagado.
07.	MODO DE ESPERA
Para aumentar el tiempo de funcionamiento de la batería, el
aparato puede pasar al modo en espera.
	
 Con el aparato encendido, pulse brevemente el botón de
encendido/apagado para acceder al modo en espera.
El aparato pasará a modo de espera.
	
 Pulse de nuevo brevemente el botón de encendido/apaga-
do para reactivar el aparato que se encuentra en modo de
espera.
El aparato se reactiva inmediatamente, no hay tiempo de espera
como al encenderlo después de apagarlo por completo.
08.	AJUSTE DE DIOPTRÍAS
Con el ajuste de dioptrías, el ocular del aparato se adapta a la
capacidad visual individual del usuario.
	
 Cierre la tapa del objetivo y gire la rueda de compensación
de dioptrías en sentido horario o antihorario hasta que vea con
nitidez los símbolos en la pantalla.
09.	BARRA DE INFORMACIÓN
La barra de información, en la
esquina superior derecha de la
pantalla, muestra el zoom digital
configurado, el espacio en la
memoria (no hay barra = vacío) y el estado de carga de la
batería integrada (tres barras = completo). Si la Wi-Fi está
activada, en la barra de información también aparece el símbolo
Wi-Fi del menú.
CHALLENGER-15 · Manual de instrucciones 03 / 2021
E
S
–
29
28
10.	SÍMBOLOS DEL MENÚ
La barra del menú está situada en el margen izquierdo de la
pantalla.
	
 Pulse el botón de foto/vídeo o el botón de zoom para pasar de
una opción del menú a otra.
	
 Pulse el botón del menú para seleccionar una opción.
	
 Pulse el botón de zoom prolongadamente para volver a salir
del menú.
SÍMBOLO Significado
Modo de espera automático (apagado/5 min./15 min.)
Visibilidad de la barra de información en la esquina
superior derecha de la pantalla (encendida/apagada)
Seguimiento de puntos calientes/visualización del
objeto más cálido (encendido/apagado)
Wi-Fi (encendida/apagada)
Salida analógica de vídeo (encendida/apagada)
Medidor estadiamétrico de la distancia
Brillo (niveles 1 a 5)
Contraste (niveles 1 a 5)
Modos de optimización de la imagen para distintas
condiciones ambientales (calor/frío)
Modo de calibración / FCC (automática/manual,
externa)
Corrección de píxeles defectuosos
Información del sistema
Restablecimiento de los ajustes de fábrica
(y consiguiente reinicio)
11.	CAMBIO DEL MODO DE PANTALLA
	
 Pulse brevemente el botón de menú para cambiar entre los
modos de pantalla Blanco caliente (White Hot), Negro caliente
(Black Hot), Fusión y Rojo caliente (Red Hot).
01. 02. 03. 04.
01.	Blanco caliente - ideal para una dirección precisa
02.	Negro caliente – ideal para la detección rápida
03.	Fusión - para la detección cercana, por ejemplo, de puentes
térmicos
04.	Rojo caliente – para detectar rápidamente fuentes de calor
12.	ZOOM DIGITAL
	
 Pulse brevemente el botón de zoom para acercar la imagen 1
vez, 2 veces, 4 veces y, de nuevo, 1 vez.
El factor de aumento del zoom digital se muestra en la barra de
información.
13.	GRABACIÓN DE IMÁGENES Y
VÍDEOS
	
 En el modo de visualización normal, pulse brevemente el botón
de foto/vídeo para hacer una foto.
En el indicador se confirma que se ha hecho la foto.
	
 Pulse prolongadamente el botón de foto/vídeo para iniciar una
grabación de vídeo.
Durante la grabación de vídeo, el tiempo de grabación aparece
en la esquina superior izquierda de la pantalla.
	
 Vuelva a pulsar prolongadamente el botón de foto/vídeo para
finalizar la grabación y guardar el vídeo.
En el indicador se confirma que se ha realizado la grabación de
vídeo.
El espacio restante en la memoria interna se muestra en la barra
de información.
14.	FUNCIÓN DE CALIBRACIÓN
(FCC)
Durante el uso, la imagen empeora gradualmente debido a los
cambios en la temperatura de fondo del sensor. Esto se debe
compensar mediante la calibración periódica del sensor. Para la
calibración se activa un cierre interno que emite un débil «clic».
Con ello, la imagen se congela brevemente mientras el cierre
permanece cerrado.
•	 En el modo de FCC automático, la calibración se realiza auto-
máticamente a intervalos establecidos por el aparato.
•	 En el modo de FCC manual, no se ejecuta ninguna calibración
automática. El modo manual permite al usuario determinar el
momento de breve congelación de la imagen.
	
 Inicie la calibración manual pulsando prolongadamente en el
botón de zoom, si detecta una reducción de la calidad de la
imagen durante el uso.
•	 En el modo de FCC externo tampoco se ejecuta ninguna cali-
bración automática. La calibración se lleva a cabo sin el cierre
interno y, por tanto, es totalmente silenciosa. Para ello, durante
la calibración debe estar cerrada la tapa del objetivo (en susti-
tución del cierre interno). Si sospecha que la tapa del objetivo
no está cerrada durante la ejecución de la calibración externa,
la imagen visualizada tendrá superpuesta la imagen tomada
durante la calibración. Esto se puede corregir mediante una
nueva calibración adecuada con la tapa del objetivo cerrada.
CHALLENGER-15 · Manual de instrucciones 03 / 2021
E
S
–
31
30
15.	MEDIDOR ESTADIAMÉTRICO
DE LA DISTANCIA
Para el cálculo estadiamétrico de la distancia, primero debe ajus-
tar el tamaño (altura) del objeto cuya separación desea medir.
Para ello, proceda del siguiente modo:
	
 En el menú, seleccione la opción Medidor estadiamétrico de la
distancia y confirme pulsando el botón del menú.
	
 Pulse el botón de zoom para acceder al submenú Parámetros.
Aquí puede emplear el botón de foto/vídeo o el de zoom para
elegir entre cuatro tamaños distintos: «lobo», «oso», «ciervo» y
«personalizado».
	
 Pulse el botón de menú para confirmar su selección.
En el punto «Personalizado», puede definir un tamaño de objeto
personalizado en el rango de 0,1 a 9,9 m de altura, usando el
botón de foto/vídeo o el de zoom.
	
 Pulse el botón de menú para confirmar el valor introducido.
Para medir la distancia, proceda del siguiente modo:
	
 En el menú, seleccione la opción Medidor estadiamétrico de la
distancia y confirme pulsando el botón del menú.
En la pantalla aparece una larga línea horizontal con una pe-
queña línea vertical que apunta hacia arriba.
	
 Coloque el punto donde coinciden ambas líneas en el borde
superior del objeto que desea medir y pulse el botón del menú
(paso 1).
La línea vertical parpadeará brevemente y después pasará al
lado inferior de la línea horizontal.
	
 Coloque el punto donde coinciden ambas líneas en el borde
inferior del objeto que desea medir y pulse el botón del menú
(paso 2).
En la esquina superior izquierda de la pantalla aparecerá la dis-
tancia con el objeto.
Paso 1 Paso 2
Importante: La exactitud del cálculo de la distancia depende en
gran medida de que el tamaño definido para el objeto coincida
con el real, además de la estabilidad durante la medición. Los
tamaños de los objetivos preconfigurados son únicamente valores
indicativos y pueden variar.
16.	CORRECCIÓN DE PÍXELES
DEFECTUOSOS
Si a pesar de la calibración y el reinicio aparece constantemente
un error de píxel, éste puede corregirse de la siguiente manera:
	
 Seleccione la opción del menú Corrección de píxeles defec-
tuosos y ábrala.
	
 Pulse el botón del menú para configurar la amplitud de los
pasos de ajuste del cursor, para seleccionar el píxel defectuoso
(amplitud de pasos: 1, 5 o 10 píxeles).
	
 Pulse el botón de menú o de foto/vídeo para seleccionar la
dirección de movimiento del cursor (izquierda, derecha, arriba,
abajo).
	
 Mueva el cursor paso a paso mediante el botón del menú
hasta el píxel defectuoso.
En la esquina inferior derecha de la pantalla aparecerá una
imagen ampliada del píxel seleccionado. Si el menú tapa el píxel
defectuoso, se puede desplazar pulsando prolongadamente el
botón de foto/vídeo.
	
 Cuando se haya seleccionado el píxel, corríjalo pulsando pro-
longadamente el botón de foto/vídeo.
En la parte inferior de la pantalla se muestra el número de píxeles
corregidos.
	
 Una pulsación más larga del botón del menú cierra el menú.
17.	SEGUIMIENTO DE PUNTOS
CALIENTES
Si la función de seguimiento de puntos calientes está activada,
aparece un punto de mira verde que sigue al objeto más caliente
en la pantalla.
18.	CARGA DE LA BATERÍA
El aparato incluye una batería interna recargable, que se carga
a través de la conexión USB-C situada en la parte inferior de la
carcasa. El indicador de la batería en la esquina superior derecha
de la pantalla muestra el nivel de carga de la batería.
	
 Cargue la batería, como muy tarde, cuando aparezca un nivel
de carga bajo (símbolo de la batería rojo).
Puede cargar la batería con la fuente de alimentación suministra-
da o con una portátil, por ejemplo, una batería portátil por USB.
Una batería portátil con 4000 mAh de capacidad puede duplicar
el tiempo de funcionamiento. El indicador LED situado junto a la
conexión USB-C se enciende en rojo durante la carga y cambia a
verde cuando la batería está totalmente cargada. El aparato se
puede cargar durante el funcionamiento. Se carga más rápida-
mente de lo necesario para el funcionamiento actual.
CHALLENGER-15 · Manual de instrucciones 03 / 2021
E
S
–
33
32
19.	TRANSMISIÓN DE IMÁGENES Y
VÍDEOS
	
 Active la función WiFi en el menú.
Después de conectar el aparato a su ordenador mediante un
cable USB y encender el aparato, funciona como dispositivo
de almacenamiento masivo, de modo que puede ver, copiar o
borrar sus fotos y vídeos en el ordenador.
20.	FUNCIÓN WI-FI Y CONEXIÓN DE
LA APLICACIÓN
La aplicación y la información sobre la conexión de la aplicación
se pueden encontrar en: https://liemke.shop/medien
21.	MANTENIMIENTO
Los trabajos de conservación se deben realizar dos veces al año,
como mínimo, incluyendo las siguientes operaciones.
	
 Limpie las superficies exteriores con un paño de algodón para
mantener las piezas metálicas y de plástico libres de polvo y
suciedad. Para ello se puede usar grasa de silicona.
	
 Limpie los contactos del aparato con un disolvente orgánico no
engrasante.
	
 Compruebe las superficies de cristal del ocular y del objetivo.
Si es necesario, elimine el polvo y la arena de las lentes (prefe-
rentemente, sin tocar las superficies de cristal). Las superficies
exteriores de la óptica solo se pueden limpiar con elementos
destinados especialmente a ese fin.
22.	SOLUCIÓN DE PROBLEMAS
En esta tabla se recogen todos los problemas que pueden apare-
cer durante el uso del aparato. Realice todas las comprobaciones
y reparaciones recomendadas del modo descrito en la tabla.
Si se produce un fallo no recogido en la tabla o si no puede solu-
cionar un fallo por sus medios, lleve el aparato al servicio técnico
pertinente para su reparación.
Mal funcionamiento Posible causa Corrección
La cámara termográfi-
ca no se enciende.
La batería está comple-
tamente agotada.
Cargue la batería.
No se puede operar a
través de una fuente de
corriente externa.
El cable USB está
dañado
Cambiar el cable USB.
La fuente de corriente
externa está agotada
Cargue la fuente de
corriente externa (si es
necesario).
La imagen no es nítida,
presenta líneas vertica-
les y un fondo irregular.
Calibración requerida Proceda a calibrar la
imagen del modo des-
crito en el apartado 14
«Función de calibración
(FCC)».
La imagen es demasia-
do oscura.
El ajuste del brillo es
insuficiente.
Ajuste del
brillo de la pantalla
Aparecen líneas de
color en la pantalla o
no se observa ninguna
imagen.
El aparato ha estado
expuesto a electricidad
estática durante su uso.
Después de que haber
estado expuesto a la
electricidad estática,
el aparato se reinicia
automáticamente, o
bien debe apagarlo
y volver a encenderlo
manualmente.
Baja calidad de la
imagen/alcance de
detección reducido.
Estos problemas pueden aparecer cuando se rea-
liza una observación en un día con condiciones
meteorológicas adversas (elevada humedad del
aire, nieve, lluvia, niebla, etc.).
No se puede conectar
el smartphone o la
tableta al aparato.
Se ha cambiado la con-
traseña del aparato.
Borre la red y restablez-
ca la conexión usando
la contraseña existente.
El aparato está en
un área con un gran
número de redes WLAN
que pueden causar
interferencias.
Para garantizar un
funcionamiento estable
de la WLAN (Wi-Fi), el
aparato se debe colo-
car en otro lugar con
una menor red WLAN o
sin ninguna.
No hay señal WLAN (Wi-
Fi) o se ha interrumpido.
El aparato está fuera
del alcance de la WLAN
(Wi-Fi). Hay obstáculos
entre el aparato y el
receptor (p. ej., paredes
de hormigón)
Coloque el aparato al
alcance de la señal
de la WLAN (Wi-Fi), sin
obstáculos.
Si el aparato se usa a
bajas temperaturas, la
calidad de la imagen
del entorno es peor que
con temperaturas
por encima del punto
de congelación.
A temperaturas por encima del punto de
congelación, los objetos observados (entorno y
fondo) tienen distintas temperaturas debido a la
conductividad térmica,
por lo que se produce un mayor contraste de
temperatura. En consecuencia, la calidad de la
imagen que logra el aparato es mayor.
Con temperaturas exteriores muy bajas, los objetos
observados (fondo) se suelen enfriar hasta una
misma temperatura, con lo que se reduce consi-
derablemente el contraste de temperaturas y la
calidad de la imagen (detalles) es menor. Es una
propiedad de las cámaras termográficas.
CHALLENGER-15 · Manual de instrucciones 03 / 2021
E
S
–
35
34
FASCINATION
TECHNOLOGIE D’IMAGERIE
THERMIQUE
Chers clients,
Conformément à notre volonté de toujours vous offrir des optiques
d'imagerie thermique de pointe sur le plan technique et qualitatif,
vous trouverez dans notre nouvelle gamme des produits dotés
d'une technologie des plus avancées et de paramètres
de performance exceptionnels.
Avec notre engagement du service après-vente de vous retourner
vos optiques en cas d’expédition dans les dix jours ouvrables, ainsi
qu'une garantie sur nos produits allant jusqu'à trois ans, nous vous
remercions de votre confiance et vous souhaitons une bonne
saison de chasse !
Votre équipe LIEMKE !
CHALLENGER-15 · Mode d’emploi 03 / 2021
F
R
–
37
SOMMAIRE
CHALLENGER-15 · Mode d'emploi 03 / 2021
F
R
36
–
37
01. CARACTÉRISTIQUES TECHNIQUES����������� 38
02. PIÈCES DÉTACHÉES ET ÉLÉMENTS
DE COMMANDE ������������������������� 38
03. CONTENU DE LA LIVRAISON���������������� 39
04. CONSIGNES DE SÉCURITÉ������������������� 39
05. UTILISATION ������������������������������� 39
06. MISE EN MARCHE ET ARRÊT ���������������� 40
07. MODE VEILLE����������������������������� 40
08. RÉGLAGE DIOPTRIQUE�������������������� 40
09. BARRE D'INFORMATIONS ������������������� 40
10. SYMBOLES DE MENU ���������������������� 41
11. PASSAGE AU MODE IMAGE ���������������� 41
12. ZOOM NUMÉRIQUE ����������������������� 42
13. ENREGISTREMENT D’ IMAGES ET DE VIDÉOS � 42
14. FONCTION D'ÉTALONNAGE (FCC) ���������� 42
15. TÉLÉMÈTRE STADIAMÉTRIQUE���������������� 43
16. CORRECTION DES PIXELS DÉFECTUEUX������� 44
17. SUIVI DES POINTS CHAUDS
(HOT-SPOT-TRACKING)���������������������� 44
18. CHARGEMENT DE LA BATTERIE ������������� 44
19. TRANSFER DE PHOTOS ET DE VIDÉOS�������� 45
20. FONCTION WIFI ET CONNEXION
À L’APPLICATION ������������������������� 45
21. ENTRETIEN�������������������������������� 45
22. DEPANNAGE ����������������������������� 45
08
07
09
02 03 04 05 06
01
01.	CARACTÉRISTIQUES TECHNIQUES*
MODÈLE CHALLENGER-15
Résolution du détecteur 384×288 px
Taille des pixels 17 µm
Fréquence de balayage 50 Hz
Lentille d’objectif 15 mm, focalisation fixe
Champ de vision
24,9 ° × 18,8 °
44,1 m × 33,1 m (H × V)
Affichage LCOS, 720 × 560
Grossissement 1,5
Zoom numérique 2x, 4x
Durée de vie max. des piles** 6 h
Poids 270 g
Dimensions 169 × 57 × 60 mm
Mémoire interne 8 GB
Formats d'enregistrement JPG (photo), MP4 (vidéo)
Température de service -10 °C à +50 °C
Résistance à l'eau IP67
Portée de détection
(Cible : 1,8 m × 0,5 m, P (n) = 99%)
530 m
* Sous réserves de modifications visant à améliorer les paramètres techniques
de l’appareil. / ** La durée de fonctionnement réelle dépend de la tem-
pérature de la batterie et de l'intensité d'utilisation de la fonction WiFi et de
l'enregistreur vidéo intégré.
02.	PIÈCES DÉTACHÉES ET ÉLÉMENTS
DE COMMANDE
01.	Objectif
02.	Touche Marche / Arrêt
03.	Touche Photo/Vidéo
04.	Touche Menu
05.	Touche Zoom
06.	Oculaire
07.	Roue de compensation
dioptrique
08.	Filetage tripode
09.	Port USB-C avec affichage
à LED
CHALLENGER-15 · Mode d’emploi 03 / 2021
F
R
–
39
38
03.	CONTENU DE LA LIVRAISON
1x Challenger-15
1x câble de recharge
1x mode d'emploi
04.	CONSIGNES DE SÉCURITÉ
La tension de charge nominale du présent produit est de 5V.
	
 Veuillez recharger à temps lorsque la puissance est faible pour
éviter une perte de la durée de vie due à une décharge pro-
fonde de la batterie.
Il n’est pas recommandé d’utiliser la caméra d’imagerie ther-
mique pendant une longue période dans un environnement
ayant des températures élevées. Si la température est trop haute,
la caméra d’imagerie thermique entre dans le statut de protec-
tion contre les températures élevées et s'éteint automatiquement.
La température de service recommandée se situe entre −10 °C et
+50 °C.
	
 Assurez-vous que le couvercle du connecteur USB-C situé sous
la caméra thermique est bien fermé lorsqu'il est utilisé dans un
environnement humide, par exemple les jours de pluie.
•	 Si l’appareil n’est pas utilisé sur une période plus longue, il doit
être rechargé au moins tous les 2 mois pendant le stockage et
stocké dans un environnement sec et ventilé.
•	 L’appareil ne doit pas être rechargé dans un environnement
ayant une température supérieure à 40 °C.
Élimination des déchets d'équipements électriques et
électroniques et des piles
Les équipements électriques et électroniques ainsi que les
piles ne doivent pas être jetés avec les ordures ménagères.
Veuillez les remettre à votre point de collecte local pour leur
recyclage. Les piles doivent être complètement déchargées
au moment de leur élimination.
Marquage CE Les appareils sont conformes aux directives
de l'UE :
Directive CEM 2014/35/UE
Directive sur la restriction de certaines substances
dangereuses RoHS 2011/65/EU
05.	UTILISATION
ATTENTION !
L’objectif de l’appareil ne doit pas être dirigé vers des
sources d'énergie intensives, telles que les appareils
laser et le soleil. Sinon, il y a le risque que les com-
posants électroniques de l'appareil soient endom-
magés. Les dommages résultant du non-respect des
instructions de service ne sont pas couverts par la
garantie.
Avant l'utilisation
Avant de mettre l'appareil en service, nous recommandons d’ef-
fectuer un contrôle technique.
	
 Vérifiez l'état extérieur de l'appareil : Le boîtier ne doit présenter
aucune fissure.
	
 Vérifier l’état de l’objectif et de l’oculaire : Il ne doit présenter
aucune fissure, tache de graisse, saleté ou autre dépôt.
	
 Vérifier l’état de la batterie : Celle-ci doit être chargée si néces-
saire.
	
 Vérifier tous les contacts électriques : Il ne doit pas y avoir de sels
ni de taches d’oxydation.
06.	MISE EN MARCHE ET ARRÊT
	
 Mettre l’appareil à l’arrêt en appuyant longtemps sur la touche
Marche/Arrêt.
L’écran d’accueil apparaît et après quelques secondes, l’image
s’affiche.
	
 Mettre l’appareil à l’arrêt en appuyant longtemps sur la touche
Marche/Arrêt.
07.	MODE VEILLE
Pour augmenter la durée de vie de la batterie, l’appareil peut être
mis en mode veille.
	
 Lorsque l’appareil est allumé, appuyer brièvement sur la touche
Marche/Arrêt pour accéder au mode veille.
L'appareil passe en mode veille.
	
 Appuyer à nouveau brièvement sur la touche Marche/Arrêt
pour sortir l’appareil du mode veille.
La réactivation de l’appareil survient immédiatement, il n’y a
aucun temps d’attente comme lors de la mise en marche de
l’appareil après qu’il a été complètement mis à l’arrêt.
08.	RÉGLAGE DIOPTRIQUE
Avec le réglage dioptrique, l'oculaire de l'appareil est ajusté à la
vision individuelle de l'utilisateur.
	
 Fermer le couvercle de l’objectif et tourner le réglage de la
roue de compensation dioptrique dans le sens horaire ou
anti-horaire jusqu'à ce que vous puissiez voir clairement les
symboles sur l'écran.
09.	BARRE D'INFORMATIONS
La barre d'informations dans le coin
en haut à droite de l'image montre
le réglage du zoom numérique, la
capacité de la mémoire (aucune
barre = non chargée) et l'état de recharge de la batterie intégrée
(trois barres = pleinement chargée). Lorsque le Wi-Fi est activé, le
symbole Wi-Fi du menu est également affiché dans la barre d'infor-
mations.
CHALLENGER-15 · Mode d’emploi 03 / 2021
F
R
–
41
40
10.	SYMBOLES DE MENU
La barre de menu est située sur le bord gauche de l'écran.
	
 Appuyez sur la touche Photo/Vidéo ou sur la touche Zoom pour
passer d'un élément de menu à l'autre.
	
 Appuyez sur la touche Menu pour sélectionner un élément de
menu.
	
 Appuyez longuement sur la touche Menu pour quitter à nou-
veau le menu.
SYMBOLE Signification
Veille automatique (arrêt/5 min./15 min.)
Visibilité de la barre d'informations dans le
coin en haut à droite (marche/arrêt)
Suivi de hotspot/affichage de l'objet
le plus chaud (marche/arrêt)
Wi-Fi (marche/arrêt)
Sortie vidéo analogique (marche/arrêt)
Télémètre stadiamétrique
Luminosité (niveau 1 à 5)
Contraste (niveau 1 à 5)
Modes d'optimisation des images pour différentes
conditions environnementales (chaud/froid)
Mode d'étalonnage / FCC (auto/manuel, externe)
Correction des pixels défectueux
Informations sur le système
Restauration des paramètres d'usine
(et redémarrage ultérieur)
11.	PASSAGE AU MODE IMAGE
	
 Appuyez brièvement sur la touche Menu pour basculer entre les
modes White Hot (blanc chaud), Black Hot (noir chaud), Fusion
et Red Hot (rouge chaud).
01. 02. 03. 04.
01.	White Hot – idéal pour une réponse précise
02.	Black Hot – idéal pour trouver rapidement
03.	Fusion – pour la détection à courte distance, p. ex. les ponts
thermiques
04.	Red Hot – pour détecter rapidement les sources de chaleur
12.	ZOOM NUMÉRIQUE
	
 Appuyer brièvement sur la touche de zoom pour zoomer
l’image de 1× à 2x, 4× et revenir à 1x.
Le facteur de zoom numérique est affiché dans la barre d'informa-
tions.
13.	ENREGISTREMENT D’ IMAGES ET
DE VIDÉOS
	
 En mode d'affichage normal, appuyez brièvement sur la touche
Photo/Vidéo pour prendre une photo.
La sauvegarde de la photo est confirmée à l'écran.
	
 Appuyez longuement sur la touche Photo/Vidéo pour lancer un
enregistrement vidéo.
Pendant l'enregistrement vidéo, la durée d'enregistrement est
affichée dans le coin supérieur gauche de l'écran.
	
 Appuyer à nouveau longuement sur la touche Photo/Vidéo
pour arrêter l'enregistrement et sauvegarder la vidéo.
La sauvegarde de la vidéo est confirmée à l'écran.
L'espace restant dans la mémoire interne est affiché dans la barre
d'informations.
14.	FONCTION D'ÉTALONNAGE (FCC)
Pendant l’utilisation, l'image se détériore progressivement en
raison de la variation de la température de l’arrière-plan du cap-
teur. Ceci doit être compensé par un étalonnage périodique du
capteur. Pour l'étalonnage, un obturateur interne est actionné, qui
provoque un léger bruit de clic. L'image est congelée brièvement
pendant que l'obturateur est fermé.
•	 En mode FCC Automatique, l'étalonnage est effectué automati-
quement à des intervalles spécifiés par l'appareil.
•	 Aucun étalonnage automatique n'est effectué en mode FCC
Manuel. Le mode manuel permet à l'utilisateur de déterminer
lui-même le moment de la courte congélation de l'image.
	
 Lancez l'étalonnage manuel en appuyant longuement sur la
touche Zoom si vous remarquez une détérioration de la qualité
de l'image pendant l'utilisation.
•	 Aucun étalonnage automatique n'est non plus effectué en
mode FCC Manuel. L'étalonnage a lieu sans l'obturateur interne
et est donc totalement silencieux. Pour cela, le cache-ob-
jectif doit être fermé pendant l'étalonnage (cela remplace
l'obturateur interne). Si le cache-objectif n'est pas fermé par
inadvertance lors de l'étalonnage externe, l'image affichée
est recouverte d'une image fixe de la scène affichée pendant
l'étalonnage. Ceci peut aussi être corrigé à l’aide d’un autre
étalonnage correct avec le cache-objectif fermé.
CHALLENGER-15 · Mode d’emploi 03 / 2021
F
R
–
43
42
15.	TÉLÉMÈTRE STADIAMÉTRIQUE
Pour la détermination de la distance stadiamétrique, vous devez
d'abord définir la valeur cible (hauteur) de la cible à laquelle vous
voulez mesurer la distance. Pour ce faire, procédez comme suit :
	
 Sélectionnez l'élément de menu Télémètre stadiamétrique dans
le menu et confirmez avec la touche Menu.
	
 Appuyez sur la touche Zoom pour accéder au sous-menu
Paramètres.
Ici, vous pouvez choisir entre quatre valeurs cibles différentes
« loup », « ours », « cerf » et « individuel » avec la touche Photo/
Vidéo ou la touche Zoom.
	
 Confirmez votre sélection avec la touche Menu.
Dans la sous-rubrique « individuel », vous pouvez définir une valeur
cible individuelle dans la plage de 0,1 à 9,9 m de hauteur avec la
touche Photo/Vidéo ou la touche Zoom.
	
 Confirmez la valeur définie à l'aide de la touche Menu.
Pour mesurer la distance, procédez comme suit :
	
 Sélectionnez l'élément de menu Télémètre stadiamétrique dans
le menu et confirmez avec la touche Menu.
Une longue ligne horizontale avec une courte ligne verticale
pointant vers le haut apparaît sur l'image affichée.
	
 Placez l'intersection des deux lignes sur le bord supérieur de la
cible à mesurer et appuyez sur la touche Menu (étape 1).
La ligne verticale clignote brièvement, puis passe en bas de la
ligne horizontale.
	
 Placez l'intersection des deux lignes sur le bord inférieur de la
cible à mesurer et appuyez de nouveau sur la touche Menu
(étape 2).
La distance à la cible est alors affichée dans le coin supérieur
gauche de l'écran.
Étape 1 Étape 2
Veuillez noter : la précision de la détermination de la distance
dépend essentiellement de la concordance entre la valeur cible
définie et la valeur cible réelle et de la douceur de la main pen-
dant le processus de mesure. Les valeurs des cibles préconfigurées
ne sont qu'indicatives et peuvent varier.
16.	CORRECTION DES PIXELS
DÉFECTUEUX
Si une erreur de pixel se produit continuellement malgré l’étalon-
nage et le redémarrage, vous pouvez la corriger comme suit :
	
 Sélectionnez l'élément de menu Correction des pixels défec-
tueux et ouvrez-le.
	
 Appuyez sur la touche Menu pour régler le pas du mouvement
du curseur afin de sélectionner le pixel défectueux (pas 1, 5 ou
10 pixels).
	
 Appuyez sur la touche Menu ou Photo/Vidéo pour sélectionner
la direction de déplacement du curseur (gauche, droite, haut,
bas).
	
 Déplacez le curseur sur le pixel défectueux, pas à pas, en utili-
sant la touche Menu.
Une vue agrandie du pixel sélectionné est affichée dans le coin
inférieur droit de l'écran. Si le pixel défectueux est masqué par
l'affichage du menu, l'affichage peut être miroitée par une longue
pression sur la touche Photo/Vidéo.
	
 Lorsque le pixel est sélectionné, corrigez-le par une longue
pression sur la touche Photo/Vidéo.
Sur le bord inférieur de l'image, le nombre de pixels corrigés est
affiché.
	
 Une pression longue sur la touche Menu permet de fermer le
menu.
17.	SUIVI DES POINTS CHAUDS
(HOT-SPOT-TRACKING)
Lorsque la fonction Suivi de hotspot est activé, un réticule vert
apparaît pour suivre l'objet le plus chaud à l'écran.
18.	CHARGEMENT DE LA BATTERIE
L’appareil est équipé d'une batterie interne rechargeable, qui se
charge via le port USB-C situé sur l’arrière-plan du boîtier. L'indica-
teur de batterie dans le coin supérieur droite de l'écran indique le
niveau de charge de la batterie.
	
 Veuillez recharger la batterie au plus tard lorsqu'une charge de
batterie faible (icône de batterie rouge) est affichée.
Vous pouvez charger la batterie en utilisant l'adaptateur secteur
fourni ou un adaptateur secteur portable tel qu'une banque
d'alimentation USB. Une banque d’alimentation d'une capacité
de 4000 mAh peut doubler la durée d'exécution. L'affichage à
LED à côté du port USB-C s'allume en rouge pendant la recharge
et passe au vert lorsque la batterie est complètement chargée.
L'appareil peut être chargé en cours de fonctionnement. Il se
charge plus rapidement qu'il n'est nécessaire pour un fonctionne-
ment normal.
CHALLENGER-15 · Mode d’emploi 03 / 2021
F
R
–
45
44
19.	TRANSFER DE PHOTOS ET
DE VIDÉOS
	
 Activez la fonction WiFi dans le menu.
Une fois l'appareil connecté à votre ordinateur avec un câble
USB et mis en marche, il agit comme un dispositif de stockage de
masse afin que vous puissiez visualiser, copier ou supprimer vos
photos et vidéos sur votre ordinateur.
20.	FONCTION WIFI ET CONNEXION
À L’APPLICATION
L’application et les informations sur la connexion de l’application
se trouvent sur: https://liemke.shop/medien
21.	ENTRETIEN
Les travaux d’entretien doivent être effectués au moins deux fois
par an et comprennent les travaux suivants.
	
 Essuyer les surfaces extérieures avec un chiffon en coton pour
garder les parties métalliques et plastiques exemptes de pous-
sière et de saleté. Pour cela, il est possible d’utiliser de la graisse
de silicone.
	
 Nettoyer les contacts de l'appareil avec un solvant organique
non gras.
	
 Vérifier les surfaces en verre de l'oculaire et de l'objectif. Si
nécessaire, enlever la poussière et le sable des lentilles (de
préférence sans toucher les surfaces en verre). Les surfaces
extérieures des optiques ne doivent être nettoyées qu'avec des
outils spécialement conçus à cet effet.
22.	DEPANNAGE
Le présent tableau répertorie tous les problèmes que vous pouvez
rencontrer en utilisant l'appareil. Effectuer toutes les vérifications et
réparations recommandées comme décrit dans le tableau.
Si une erreur ne figurant pas dans le tableau survient ou si vous ne
pouvez pas la corriger vous-même, l'appareil doit être remis au
centre de service responsable pour réparation.
Dysfonctionnement Cause possible Correction
La caméra thermique
ne peut pas être mise
en marche.
La batterie est complè-
tement déchargée.
Charger la batterie.
Ne peut pas être
exploitée à partir
d’une source d’énergie
externe.
Le câble USB est endom-
magé.
Remplacer le câble USB.
La source de courant
externe est déchargée
Charger la source de
courant externe (si
nécessaire).
L’image est floue, avec
des lignes verticales et
un arrière-plan irrégulier.
Etalonnage nécessaire Effectuer l’étalonnage
de l'image comme
décrit dans la section 14
« Fonction d'étalonnage
(FCC) ».
L’image est trop sombre. Le réglage de la lumino-
sité est trop faible.
Réglage de la luminosité
de l’écran
Des lignes colorées
apparaissent sur l'écran
ou aucune image n'est
affichée.
L'appareil a été exposé
à de l'électricité statique
pendant son fonctionne-
ment.
Une fois l’appareil expo-
sé à l’électricité statique,
soit l'appareil redémarre
automatiquement, soit il
faut l'éteindre et le rallu-
mer manuellement.
Faible qualité d’image/
portée de détection
réduite.
Ces problèmes peuvent ensuite survenir si l’obser-
vation a lieu un jour où les conditions météoro-
logiques sont difficiles (forte humidité, chute de
neige, pluie, brouillard, etc.).
Le smartphone ou la
tablette du PC ne
peuvent pas être
raccordés au niveau de
l’appareil.
Le mot de passe de
l’appareil a été modifié.
Supprimer le réseau et
rétablir la connexion en
utilisant le mot de passe
existant.
L’appareil se trouve
dans une zone avec
un grand nombre de
réseaux WLAN sus-
ceptibles de créer des
interférences.
Pour garantir un fonc-
tionnement stable du
WLAN, l’appareil doit
être placé dans un autre
endroit ayant moins de
réseau ou même pas de
réseau WLAN du tout.
Aucun signal WLAN pré-
sent ou interrompu.
L’appareil se trouve en
dehors de la portée du
WLAN. Il existe des
obstacles entre l’équi-
pement et le récepteur
(par exemple des murs
en béton)
Placer l'appareil dans la
ligne de vue et la portée
du signal WLAN.
Lorsqu'elle est utilisée
à basse température,
la qualité de l'image
des environs est moins
bonne qu'à des tempé-
ratures supérieuresau
point de congélation.
À des températures supérieures au point de
congélation, les objets observés (environnement
et arrière-plan) sont différemment chauds en
raison de la conductivité thermique, de sorte qu'il
en résulte un contraste de température élevé. En
conséquence, la qualité d'image obtenue par
l'appareil est meilleure.
Lorsque les températures extérieures sont basses,
les objets observés (arrière-plan) se refroidissent
généralement à peu près à la même tempéra-
ture, de sorte que le contraste de température
est considérablement réduit et que la qualité de
l'image (détails) est donc plus faible. C'est une
caractéristique des caméras thermiques.
CHALLENGER-15 · Mode d’emploi 03 / 2021
F
R
–
47
46
FASCYNACJA
TECHNIKĄ TERMOWIZYJNĄ
Drodzy Klienci,
Opierając się na tym, aby zawsze oferować Państwu wiodące
pod względem technicznym i jakościowym rozwiązania optyki
termowizyjnej, w ramach naszego nowego asortymentu
proponujemy produkty o najnowocześniejszych rozwiązaniach
technologicznych i najlepszych z możliwych parametrach
wydajnościowych.
Składając obietnicę zwrotu urządzenia optycznego w ciągu
dziesięciu dni roboczych od momentu jego otrzymania, jak
również oferując nawet 3-letnią gwarancję na nasze produkty,
dziękujemy Państwu za zaufanie i życzymy udanych łowów!
Zespół LIEMKE.
CHALLENGER-15 · Instrukcja obsługi 03 / 2021
P
L
–
49
SPIS TREŚCI
CHALLENGER-15 · Instrukcja obsługi 03 / 2021
P
L
48
–
49
01. DANE TECHNICZNE������������������������� 50
02. ELEMENTY SKŁADOWE I OBSŁUGOWE ������� 50
03. ZAKRES DOSTAWY ������������������������� 51
04. INFORMACJE DOTYCZĄCE
BEZPIECZEŃSTWA ������������������������� 51
05. EKSPLOATACJA���������������������������� 51
06. WŁĄCZANIE I WYŁĄCZANIE ���������������� 52
07. TRYB CZUWANIA �������������������������� 52
08. REGULATOR DIOPTRII ���������������������� 52
09. PASEK INFORMACJI����������������������� 52
10. SYMBOLE W MENU������������������������� 53
11. PRZEŁĄCZANIE TRYBU OBRAZU ������������� 53
12. ZOOM CYFROWY ������������������������� 54
13. WYKONYWANIE ZDJĘĆ I
NAGRYWANIE FILMÓW�������������������� 54
14. FUNKCJA KALIBRACJI (FCC)���������������� 54
15. DALMIERZ STADIAMETRYCZNY ������������� 55
16. KOREKTA BŁĘDU PIKSELI ������������������� 56
17. FUNKCJA ŚLEDZENIA GORĄCEGO PUNKTU �� 56
18. ŁADOWANIE AKUMULATORA �������������� 56
19. TRANSFER ZDJĘĆ I FILMÓW ���������������� 57
20. FUNKCJA WIFI I POŁĄCZENIE APLIKACJI ���� 57
21. KONSERWACJA���������������������������� 57
22. USUWANIE USTEREK ����������������������� 57
01.	DANE TECHNICZNE*
MODEL CHALLENGER-15
Rozdzielczość detektora 384×288 p
Rozmiar piksela 17 µm
Częstotliwość wyświetlania 50 Hz
Soczewka obiektywu 15 mm, stała ogniskowa
Pole widzenia
24,9 ° × 18,8 °
44,1 m × 33,1 m(poz. × pion.)
Wyświetlacz LCOS, 720 × 560
Powiększenie 1,5
Zoom cyfrowy 2x, 4x
Maks. czas pracy akumulatora** 6 h
Waga 270 g
Wymiary 169 × 57 × 60 mm
Pamięć wewnętrzna 8 GB
Formaty rejestracji JPG (zdjęcia), MP4 (wideo)
Temperatura pracy −10°C do +50°C
Wodoodporność IP67
Zasięg detekcji
(Cel: 1,8 m × 0,5 m, P (n) = 99%)
530 m
* Zastrzegamy sobie prawo do wprowadzania zmian w celu poprawy
parametrów technicznych urządzenia. / ** Rzeczywisty czas pracy zależy
od temperatury akumulatora oraz intensywności korzystania z funkcji WiFi i
wbudowanego rejestratora wideo.
02.	ELEMENTY SKŁADOWE I
OBSŁUGOWE
01.	Obiektyw
02.	Przycisk
włączania/wyłączania
03.	Przycisk foto/wideo
04.	Przycisk menu
05.	Przycisk zoom
06.	Okular
07.	Regulator dioptrii
08.	Gwint statywu
09.	Przyłącze USB-C
ze wskaźnikiem LED
08
07
09
02 03 04 05 06
01
CHALLENGER-15 · Instrukcja obsługi 03 / 2021
P
L
–
51
50
03.	ZAKRES DOSTAWY
1x Challenger-15
1x przewód ładujący
1 × instrukcja obsługi
04.	INFORMACJE DOTYCZĄCE
BEZPIECZEŃSTWA
Nominalna wartość napięcia ładowania dla tego produktu wynosi
5 V.
	
 Aby zapobiec skróceniu żywotności akumulatora na skutek
głębokiego rozładowania, należy w odpowiednim czasie go
ładować z zachowaniem niskiej mocy.
Nie zaleca się długotrwałego użytkowania kamery termowizyjnej
w środowisku o wysokiej temperaturze. W przypadku zbyt wysokiej
temperatury kamera termowizyjna przejdzie w stan zabezpiecze-
nia przed wysoką temperaturą i zostanie automatycznie wyłączo-
na.
Zalecana temperatura pracy wynosi od −10°C do +50°C.
	
 W przypadku używania kamery w wilgotnym środowisku, np. w
deszczowe dni, należy się upewnić, że osłona przyłącza USB-C
w dolnej części kamery termowizyjnej jest szczelnie zamknięta.
•	 W przypadku gdy urządzenie nie jest używane przez dłuższy
czas, należy je przechowywać w suchym i wentylowanym po-
mieszczeniu, a także co najmniej co 2 miesiące ładować.
•	 Urządzenia nie należy ładować w środowisku o temperaturze
powyżej 40°C.
Utylizacja zużytych urządzeń elektrycznych i akumulatorów
Zużytych urządzeń elektrycznych i akumulatorów nie wolno
wyrzucać wraz z odpadami domowymi. Należy je oddać do
lokalnego punktu zbiórki odpadów. Przy utylizacji akumulato-
ry powinny być całkowicie rozładowane.
Oznaczenie CE Urządzenia są zgodne z dyrektywami UE:
Dyrektywa EMC 2014/35/UE
Dyrektywa RoHS 2011/65/UE
05.	EKSPLOATACJA
PRZESTROGA!
Obiektywu urządzenia nie należy kierować na źródła
energii o dużej intensywności, takie jak lasery i słoń-
ce. W przeciwnym razie istnieje ryzyko uszkodzenia
elektronicznych podzespołów urządzenia. Uszkodze-
nia powstałe na skutek nieprzestrzegania instrukcji
obsługi nie są objęte gwarancją.
Przed użyciem
Przed uruchomieniem urządzenia zaleca się przeprowadzenie
kontroli technicznej.
	
 Sprawdzić stan zewnętrzny urządzenia: obudowa nie może mieć
żadnych pęknięć.
	
 Sprawdzić stan obiektywu i okularu: nie mogą występować
żadne pęknięcia, tłuste plamy, zabrudzenia ani osady.
	
 Sprawdzić stan akumulatora: w razie potrzeby należy go nała-
dować.
	
 Sprawdzić wszystkie styki elektryczne: nie mogą występować na
nich sól ani utlenione plamy.
06.	WŁĄCZANIE I WYŁĄCZANIE
	
 Włączyć urządzenie poprzez naciśnięcie i przytrzymanie przyci-
sku włączania/wyłączania.
Pojawi się ekran początkowy, a po kilku sekundach zostanie wy-
świetlony obraz.
	
 Wyłączyć urządzenie poprzez naciśnięcie i przytrzymanie przyci-
sku włączania/wyłączania.
07.	TRYB CZUWANIA
Aby wydłużyć czas pracy akumulatora, urządzenie można przełą-
czyć w tryb czuwania.
	
 Gdy urządzenie jest włączone, należy nacisnąć
przycisk włączania/wyłączania, aby przejść do trybu czuwania.
Urządzenie przechodzi w tryb czuwania.
	
 Ponownie nacisnąć przycisk włączania/wyłączania, aby wybu-
dzić urządzenie z trybu czuwania.
Urządzenie zostaje wybudzone w sposób natychmiastowy – nie
ma czasu oczekiwania, jak przy włączaniu urządzenia po jego
całkowitym wyłączeniu.
08.	REGULATOR DIOPTRII
Regulator dioptrii umożliwia dostosowanie okularu urządzenia do
wzroku danego użytkownika.
	
 Założyć osłonę obiektywu i obracać regulator dioptrii w lewo
lub prawo, aż symbole na wyświetlaczu staną się dobrze
widoczne.
09.	PASEK INFORMACJI
Pasek informacji w prawym górnym
rogu ekranu wskazuje ustawiony
zoom cyfrowy, miejsce w pamięci
(brak paska = pamięć pusta)
i poziom naładowania wbudowanego akumulatora (trzy paski =
pełny). Przy aktywnym WiFi na pasku informacji wyświetlany jest
również symbol WiFi z menu.
CHALLENGER-15 · Instrukcja obsługi 03 / 2021
P
L
–
53
52
10.	SYMBOLE W MENU
Pasek menu znajduje się na lewej krawędzi ekranu.
	
 Naciskać przycisk foto/wideo lub zoom, aby przełączać między
punktami menu.
	
 W celu wybrania punktu menu nacisnąć przycisk menu.
	
 Nacisnąć i przytrzymać przycisk menu, aby wyjść z menu.
SYMBOL Znaczenie
Automatyczny tryb czuwania (wył./5 min./15 min.)
Widoczność paska informacji w prawym górnym
rogu ekranu (wł./wył.)
Funkcja śledzenia gorącego punktu/wyświetlanie naj-
cieplejszego obiektu (wł./wył.)
WiFi (wł./wył.)
Analogowe wyjście wideo (wł./wył.)
Dalmierz stadiametryczny
Jasność (poziom 1 do 5)
Kontrast (poziom 1 do 5)
Tryby optymalizacji obrazu dla różnych
warunków otoczenia (ciepłe/zimne)
Tryb kalibracji / FCC (auto/ręcznie, zewnętrzne)
Korekta błędu pikseli
Informacje systemowe
Przywracanie ustawień domyślnych
(i ponowne uruchomienie)
11.	PRZEŁĄCZANIE TRYBU OBRAZU
	
 Krótko nacisnąć przycisk menu, aby przełączać między trybami
obrazu: White Hot, Black Hot, Fusion i Red Hot.
01. 02. 03. 04.
01.	White Hot – idealny do precyzyjnego reagowania
02.	Black Hot – idealny do szybkiego wyszukiwania
03.	Fusion – do detekcji w bliskiej odległości, np. mostków termicz-
nych
04.	Red Hot – do szybkiej detekcji źródeł ciepła
12.	ZOOM CYFROWY
	
 Nacisnąć przycisk powiększania/pomniejszania, aby powiększyć
obraz z 1× do 2×, 4× i z powrotem pomniejszyć do 1×.
Współczynnik zoomu cyfrowego jest wyświetlany na pasku infor-
macji.
13.	WYKONYWANIE ZDJĘĆ I
NAGRYWANIE FILMÓW
	
 Aby zrobić zdjęcie, w normalnym trybie wyświetlania krótko
nacisnąć przycisk foto/wideo.
Zapisanie wykonanego zdjęcia zostanie potwierdzone na wyświe-
tlaczu.
	
 Aby rozpocząć nagrywanie filmu, nacisnąć i przytrzymać przy-
cisk foto/wideo.
Podczas nagrywania filmu w lewym górnym rogu wyświetlacza
pokazywany jest czas nagrywania.
	
 Ponownie nacisnąć i przytrzymać przycisk foto/wideo, aby
zakończyć nagrywanie i zapisać film.
Zapisanie nagranego filmu zostanie potwierdzone na wyświetla-
czu.
Pozostałe miejsce w pamięci wewnętrznej zostanie wyświetlone na
pasku informacji.
14.	FUNKCJA KALIBRACJI (FCC)
Podczas użytkowania obraz ulega stopniowemu pogorszeniu na
skutek zmieniającej się temperatury tła czujnika. Należy to skom-
pensować poprzez okresową kalibrację czujnika. W celu kalibracji
uruchamiana jest wewnętrzna migawka, słychać wówczas ciche
kliknięcie. Wyświetlany obraz jest przez chwilę zatrzymywany, gdy
migawka jest zamknięta.
•	 W trybie FCC Auto kalibracja jest automatycznie przeprowadza-
na przez urządzenie w określonych odstępach czasu.
•	 W trybie FCC Ręcznym automatyczna kalibracja nie jest wy-
konywana. Tryb ręczny umożliwia użytkownikowi samodzielne
określenie momentu chwilowego zatrzymania obrazu.
	
 Jeśli podczas korzystania z urządzenia wystąpi pogorszona
jakość obrazu, należy uruchomić kalibrację ręczną, naciskając
i przytrzymując przycisk zoom.
•	 W trybie FCC Zewnętrznym automatyczna kalibracja również nie
jest wykonywana. Kalibracja następuje bez użycia wewnętrznej
migawki, dlatego jest całkowicie bezgłośna. Podczas kalibracji
nasadka obiektywu musi być zamknięta (zastępuje ona we-
wnętrzną migawkę). Jeśli podczas przeprowadzania kalibracji
zewnętrznej nasadka obiektywu nie będzie zamknięta, na
wyświetlany obraz będzie po niej nałożony kadr sceny widocz-
nej podczas kalibracji. Można to skorygować poprzez ponowną,
prawidłową kalibrację z zamkniętą nasadką obiektywu.
CHALLENGER-15 · Instrukcja obsługi 03 / 2021
P
L
–
55
54
15.	DALMIERZ STADIAMETRYCZNY
W celu stadiametrycznego pomiaru odległości należy najpierw
ustawić wielkość docelową (wysokość) celu, od którego odległość
chce się zmierzyć. W tym celu należy postępować w następujący
sposób:
	
 W menu wybrać punkt Dalmierz stadiametryczny i potwierdzić
przyciskiem menu.
	
 Nacisnąć przycisk zoom, aby przejść do podmenu Parametry.
Można w nim za pomocą przycisku foto/wideo lub zoom przełą-
czać między czterema wielkościami docelowymi „wilk”, „niedź-
wiedź”, „jeleń” i „indywidualna”.
	
 Potwierdzić wybór za pomocą przycisku menu.
W podpunkcie „indywidualna” można za pomocą przycisku foto/
wideo lub zoom zdefiniować indywidualną wysokość docelową
w zakresie od 0,1 do 9,9 m.
	
 Potwierdzić ustawioną wartość za pomocą przycisku menu.
W celu pomiaru odległości należy postępować w następujący
sposób:
	
 W menu wybrać punkt Dalmierz stadiametryczny i potwierdzić
przyciskiem menu.
Na wyświetlanym obrazie pojawi się długa, pozioma linia z odcho-
dzącą od niej do góry krótszą, pionową linia.
	
 Umieścić punkt przecięcia obu linii na górnej krawędzi mierzone-
go celu i nacisnąć przycisk menu (krok 1).
Pionowa linia krótko miga, a następnie przesuwa się na dolną
stronę linii poziomej.
	
 Teraz należy umieścić punkt przecięcia obu linii na dolnej
krawędzi mierzonego celu i ponownie nacisnąć przycisk menu
(krok 2).
W lewej górnej krawędzi ekranu zostanie wyświetlona odległość
od celu.
Krok 1 Krok 2
Należy uwzględnić: Dokładność pomiaru odległości zależy
w znacznej mierze od zgodności zdefiniowanej i faktycznej wysoko-
ści celu oraz od stabilności trzymania urządzenia podczas pomiaru.
Rozmiary wstępnie skonfigurowanych celów są jedynie wartościa-
mi orientacyjnymi i mogą się różnić od wartości rzeczywistych.
16.	KOREKTA BŁĘDU PIKSELI
Jeśli mimo kalibracji i ponownego uruchomienia występuje błąd
pikseli, można go usunąć w następujący sposób:
	
 Wybrać punkt menu Korekta błędu pikseli i otworzyć go.
	
 Nacisnąć przycisk menu, aby ustawić wartość krokową prze-
sunięcia kursora podczas wyboru błędnych pikseli (wartości
krokowe 1, 5 i 10 pikseli).
	
 Nacisnąć przycisk menu lub foto/wideo, aby wybrać kierunek
ruchu kursora (w lewo, w prawo, do góry, na dół).
	
 Za pomocą przycisku menu krokowo przesunąć przycisk menu
na błędny piksel.
Wybrany piksel będzie wyświetlany w powiększeniu w prawym
dolnym rogu wyświetlacza. Jeśli błędny piksel jest zakrywany przez
symbole menu, wskazania można odbić lustrzanie poprzez długie
naciśnięcie przycisku foto/wideo.
	
 Po wybraniu piksela należy go skorygować poprzez naciśnięcie
i przytrzymanie przycisku foto/wideo.
W dolnej części ekranu zostaje wyświetlona liczba skorygowanych
pikseli.
	
 Długie naciśnięcie przycisku menu zamyka menu.
17.	FUNKCJA ŚLEDZENIA
GORĄCEGO PUNKTU
Gdy funkcja śledzenia gorącego punktu jest aktywna, pojawia
się zielony celownik, który podąża za najcieplejszym punktem na
ekranie.
18.	ŁADOWANIE AKUMULATORA
Urządzenie jest wyposażone w wewnętrzny akumulator, który
ładuje się za pośrednictwem przyłącza USB-C znajdującego się
w spodniej części obudowy. Wskaźnik akumulatora w prawym
górnym rogu wyświetlacza dostarcza informacji na temat poziomu
naładowania.
	
 Ładowanie akumulatora należy przeprowadzić najpóźniej wte-
dy, gdy wskaźnik pokaże niski poziom naładowania (czerwony
symbol baterii).
Akumulator można ładować za pomocą dołączonego zasilacza
sieciowego lub przenośnego źródła zasilania, np. powerban-
ku USB. Powerbank o pojemności 4000 mAh może dwukrotnie
wydłużyć czas pracy. Wskaźnik LED obok przyłącza USB C świeci
na czerwono podczas ładowania i zmienia kolor na zielony, gdy
akumulator zostanie w pełni naładowany. Urządzenie można łado-
wać podczas pracy. Ładuje się ono szybciej niż jest to wymagane
do normalnej pracy.
CHALLENGER-15 · Instrukcja obsługi 03 / 2021
P
L
–
57
56
19.	TRANSFER ZDJĘĆ I FILMÓW
	
 Aktywuj funkcję WiFi w menu.
Po podłączeniu urządzenia do komputera za pomocą przewodu
USB i włączeniu urządzenia jest ono wykrywane jako urządzenie
pamięci masowej, dzięki czemu można przeglądać, kopiować lub
usuwać zdjęcia i filmy na komputerze.
20.	FUNKCJA WIFI I POŁĄCZENIE
APLIKACJI
Aplikację i informacje o połączeniu z aplikacją można znaleźć pod
adresem: https://liemke.shop/medien
21.	KONSERWACJA
Prace konserwacyjne należy przeprowadzać co najmniej dwa razy
w roku. Obejmują one następujące czynności.
	
 Powierzchnie zewnętrzne części metalowych i z tworzywa
sztucznego oczyścić z pyłu i zabrudzeń bawełnianą ściereczką.
Można do tego celu użyć oleju silikonowego.
	
 Styki urządzenia należy czyścić za pomocą nietłustego rozpusz-
czalnika organicznego.
	
 Sprawdzić szklane powierzchnie okularu i obiektywu. W razie
potrzeby usunąć pył i piasek z soczewek (najlepiej bez doty-
kania szklanych powierzchni). Zewnętrzne powierzchnie optyki
można czyścić wyłącznie za pomocą środków przeznaczonych
specjalnie do tego celu.
22.	USUWANIE USTEREK
Poniższa tabela zawiera listę wszystkich usterek, które mogą wy-
stąpić podczas korzystania z urządzenia. Przeprowadzić wszystkie
zalecane kontrole i naprawy zgodnie z opisem w tabeli.
W przypadku wystąpienia usterki, której nie ma w tabeli, lub w
przypadku niemożności samodzielnego usunięcia usterki, urzą-
dzenie należy przekazać do naprawy do odpowiedniego punktu
serwisowego.
Usterka Możliwa przyczyna Środek zaradczy
Kamery termowizyjnej
nie można włączyć.
Akumulator jest całkowi-
cie rozładowany.
Naładować akumulator.
Urządzenie nie działa
po podłączeniu do
zewnętrznego źródła
zasilania.
Przewód USB jest uszko-
dzony.
Wymienić przewód USB.
Zewnętrzne źródło zasila-
nia jest rozładowane.
Naładować zewnętrzne
źródło zasilania (w razie
potrzeby).
Obraz jest niewyraźny,
z pionowymi liniami i
nierównym tłem.
Wymagana kalibracja Przeprowadzić kalibrację
obrazu zgodnie z opisem
w rozdziale 14. „Funkcja
kalibracji (FCC)”.
Obraz jest ciemny. Zbyt niskie ustawienie
jasności.
Wyregulować poziom
jasności wyświetlacza.
Na wyświetlaczu widocz-
ne są kolorowe linie lub
obraz w ogóle nie jest
wyświetlany.
Podczas eksploata-
cji urządzenie było
wystawione na działanie
ładunków elektrosta-
tycznych.
W przypadku wysta-
wienia urządzenia na
działanie ładunków
elektrostatycznych
nastąpi albo automa-
tyczne ponowne uru-
chomienie urządzenia,
albo konieczne będzie
jego ręczne wyłączenie i
ponowne włączenie.
Niska jakość obrazu
/ zmniejszony zasięg
detekcji.
Usterki te mogą wystąpić w przypadku przepro-
wadzania obserwacji w trudnych warunkach
pogodowych (duża wilgotność powietrza, opady
śniegu, deszczu, mgła itp.).
Do urządzenia nie moż-
na podłączyć smartfona
ani tabletu.
Hasło urządzenia zostało
zmienione.
Usunąć sieć i ponownie
nawiązać połączenie
przy użyciu istniejącego
hasła.
Urządzenie znajduje
się na obszarze, na
którym występuje duża
liczba sieci WLAN, które
mogą powodować
zakłócenia.
Aby zapewnić stabilną
pracę w trybie WLAN,
urządzenie należy
przenieść w inne miejsce
z mniejszą liczbą lub
brakiem sieci WLAN.
Brak sygnału WLAN lub
został on przerwany.
Urządzenie znajduje się
poza zasięgiem sieci
WLAN. Pomiędzy urzą-
dzeniem a odbiornikiem
występują przeszkody
(np. betonowe ściany).
Umieścić urządzenie w
polu widzenia i w zasię-
gu sygnału WLAN.
W przypadku użytkowa-
nia w niskich tempera-
turach jakość obrazu
otoczenia jest gorsza niż
w temperaturach
powyżejzera.
W temperaturach powyżej zera obserwowane
obiekty (otoczenie i tło) mają różną ciepłotę ze
względu na przewodność cieplną, co
skutkuje wysokim kontrastem temperaturowym. W
rezultacie jakość obrazu uzyskiwana przez urządze-
nie jest wyższa.
W niskich temperaturach zewnętrznych obser-
wowane obiekty (tło) schładzają się zazwyczaj
do mniej więcej tej samej temperatury, przez co
kontrast temperaturowy ulega znacznemu zmniej-
szeniu, a tym samym jakość obrazu (szczegóły) jest
niższa. Jest to cecha charakterystyczna dla kamer
termowizyjnych.
Liemke Challenger 15 Instruction Manual - Optics Trade

Más contenido relacionado

Similar a Liemke Challenger 15 Instruction Manual - Optics Trade

Profesor Elver Chaparro _ Presentación sobre equipo fotográfico Programa de A...
Profesor Elver Chaparro _ Presentación sobre equipo fotográfico Programa de A...Profesor Elver Chaparro _ Presentación sobre equipo fotográfico Programa de A...
Profesor Elver Chaparro _ Presentación sobre equipo fotográfico Programa de A...ElverChaparroCardozo
 
Manual De Una CáMara Digital
Manual De Una CáMara DigitalManual De Una CáMara Digital
Manual De Una CáMara DigitalJorge Marulanda
 
Instruction Manual | Alpen Optics Apex Thermal Monoculars | Optics Trade
Instruction Manual | Alpen Optics Apex Thermal Monoculars | Optics TradeInstruction Manual | Alpen Optics Apex Thermal Monoculars | Optics Trade
Instruction Manual | Alpen Optics Apex Thermal Monoculars | Optics TradeOptics-Trade
 
Manual instrucciones ferroli divatech micro ln f32
Manual instrucciones ferroli divatech micro ln f32Manual instrucciones ferroli divatech micro ln f32
Manual instrucciones ferroli divatech micro ln f32Precio Calderas
 
8b5fea84a7 gt i9505-qsg_ltn_spa_d02_130402
8b5fea84a7 gt i9505-qsg_ltn_spa_d02_1304028b5fea84a7 gt i9505-qsg_ltn_spa_d02_130402
8b5fea84a7 gt i9505-qsg_ltn_spa_d02_130402Jx Hunt
 
Manual de osciloscopio Velleman en pdf
Manual  de osciloscopio Velleman en  pdfManual  de osciloscopio Velleman en  pdf
Manual de osciloscopio Velleman en pdfAndoni Aperribai
 
Guia rapida es qg es
Guia rapida es qg esGuia rapida es qg es
Guia rapida es qg esEDWIN SIERRA
 
Componentesdecmarafotogrficacompacta 090704184359-phpapp01
Componentesdecmarafotogrficacompacta 090704184359-phpapp01Componentesdecmarafotogrficacompacta 090704184359-phpapp01
Componentesdecmarafotogrficacompacta 090704184359-phpapp01NewAgeCamera
 
Cámara FotográFica Digital Compacta
Cámara FotográFica Digital CompactaCámara FotográFica Digital Compacta
Cámara FotográFica Digital CompactaJuliana Villamonte
 
Componentes de la Cámara FotográFica Compacta
Componentes de la Cámara FotográFica CompactaComponentes de la Cámara FotográFica Compacta
Componentes de la Cámara FotográFica Compactagueste07e2e
 
Steren+rm 7+y+rm-8
Steren+rm 7+y+rm-8Steren+rm 7+y+rm-8
Steren+rm 7+y+rm-8emhir
 
Manual sky a pjr cremoto
Manual sky a pjr cremotoManual sky a pjr cremoto
Manual sky a pjr cremotoAlxxx2
 
Pundit lab operating instructions spanish_high (1)
Pundit lab operating instructions spanish_high (1)Pundit lab operating instructions spanish_high (1)
Pundit lab operating instructions spanish_high (1)SERGIOROMERO787063
 

Similar a Liemke Challenger 15 Instruction Manual - Optics Trade (20)

Profesor Elver Chaparro _ Presentación sobre equipo fotográfico Programa de A...
Profesor Elver Chaparro _ Presentación sobre equipo fotográfico Programa de A...Profesor Elver Chaparro _ Presentación sobre equipo fotográfico Programa de A...
Profesor Elver Chaparro _ Presentación sobre equipo fotográfico Programa de A...
 
Manual De Una CáMara Digital
Manual De Una CáMara DigitalManual De Una CáMara Digital
Manual De Una CáMara Digital
 
Instruction Manual | Alpen Optics Apex Thermal Monoculars | Optics Trade
Instruction Manual | Alpen Optics Apex Thermal Monoculars | Optics TradeInstruction Manual | Alpen Optics Apex Thermal Monoculars | Optics Trade
Instruction Manual | Alpen Optics Apex Thermal Monoculars | Optics Trade
 
Mini Dv Spy Cam
Mini Dv Spy CamMini Dv Spy Cam
Mini Dv Spy Cam
 
Manual h400 pt
Manual h400 ptManual h400 pt
Manual h400 pt
 
Manual espanol yongnuo yn 622n-tx
Manual espanol yongnuo yn 622n-txManual espanol yongnuo yn 622n-tx
Manual espanol yongnuo yn 622n-tx
 
Manual instrucciones ferroli divatech micro ln f32
Manual instrucciones ferroli divatech micro ln f32Manual instrucciones ferroli divatech micro ln f32
Manual instrucciones ferroli divatech micro ln f32
 
8b5fea84a7 gt i9505-qsg_ltn_spa_d02_130402
8b5fea84a7 gt i9505-qsg_ltn_spa_d02_1304028b5fea84a7 gt i9505-qsg_ltn_spa_d02_130402
8b5fea84a7 gt i9505-qsg_ltn_spa_d02_130402
 
Manual de osciloscopio Velleman en pdf
Manual  de osciloscopio Velleman en  pdfManual  de osciloscopio Velleman en  pdf
Manual de osciloscopio Velleman en pdf
 
Baofeng uv5r manual
Baofeng uv5r manualBaofeng uv5r manual
Baofeng uv5r manual
 
Gopro manual
Gopro manualGopro manual
Gopro manual
 
Ppt laptop classmate 2017.pptx v2
Ppt laptop classmate 2017.pptx v2Ppt laptop classmate 2017.pptx v2
Ppt laptop classmate 2017.pptx v2
 
Guia rapida es qg es
Guia rapida es qg esGuia rapida es qg es
Guia rapida es qg es
 
Componentesdecmarafotogrficacompacta 090704184359-phpapp01
Componentesdecmarafotogrficacompacta 090704184359-phpapp01Componentesdecmarafotogrficacompacta 090704184359-phpapp01
Componentesdecmarafotogrficacompacta 090704184359-phpapp01
 
Cámara FotográFica Digital Compacta
Cámara FotográFica Digital CompactaCámara FotográFica Digital Compacta
Cámara FotográFica Digital Compacta
 
Componentes de la Cámara FotográFica Compacta
Componentes de la Cámara FotográFica CompactaComponentes de la Cámara FotográFica Compacta
Componentes de la Cámara FotográFica Compacta
 
Steren+rm 7+y+rm-8
Steren+rm 7+y+rm-8Steren+rm 7+y+rm-8
Steren+rm 7+y+rm-8
 
Manual sky a pjr cremoto
Manual sky a pjr cremotoManual sky a pjr cremoto
Manual sky a pjr cremoto
 
Pundit lab operating instructions spanish_high (1)
Pundit lab operating instructions spanish_high (1)Pundit lab operating instructions spanish_high (1)
Pundit lab operating instructions spanish_high (1)
 
Manual usuario
Manual usuarioManual usuario
Manual usuario
 

Más de Optics-Trade

Technical Data | Sig Sauer Easy6 BDX 1-6x24 | Optics Trade
Technical Data | Sig Sauer Easy6 BDX 1-6x24 | Optics TradeTechnical Data | Sig Sauer Easy6 BDX 1-6x24 | Optics Trade
Technical Data | Sig Sauer Easy6 BDX 1-6x24 | Optics TradeOptics-Trade
 
Technical Data | ThermTec Wild 650L | Optics Trade
Technical Data | ThermTec Wild 650L | Optics TradeTechnical Data | ThermTec Wild 650L | Optics Trade
Technical Data | ThermTec Wild 650L | Optics TradeOptics-Trade
 
Technical Data | ThermTec Wild 635L | Optics Trade
Technical Data | ThermTec Wild 635L | Optics TradeTechnical Data | ThermTec Wild 635L | Optics Trade
Technical Data | ThermTec Wild 635L | Optics TradeOptics-Trade
 
Technical Data | ThermTec Wild 650 | Optics Trade
Technical Data | ThermTec Wild 650 | Optics TradeTechnical Data | ThermTec Wild 650 | Optics Trade
Technical Data | ThermTec Wild 650 | Optics TradeOptics-Trade
 
Technical Data | ThermTec Wild 635 | Optics Trade
Technical Data | ThermTec Wild 635 | Optics TradeTechnical Data | ThermTec Wild 635 | Optics Trade
Technical Data | ThermTec Wild 635 | Optics TradeOptics-Trade
 
Technical Data | ThermTec Wild 335 | Optics Trade
Technical Data | ThermTec Wild 335 | Optics TradeTechnical Data | ThermTec Wild 335 | Optics Trade
Technical Data | ThermTec Wild 335 | Optics TradeOptics-Trade
 
Technical Data | ThermTec Wild 325 | Optics Trade
Technical Data | ThermTec Wild 325 | Optics TradeTechnical Data | ThermTec Wild 325 | Optics Trade
Technical Data | ThermTec Wild 325 | Optics TradeOptics-Trade
 
Instruction Manual | ThermTec Wild Thermal Monoculars | Optics Trade
Instruction Manual | ThermTec Wild Thermal Monoculars | Optics TradeInstruction Manual | ThermTec Wild Thermal Monoculars | Optics Trade
Instruction Manual | ThermTec Wild Thermal Monoculars | Optics TradeOptics-Trade
 
Technical Data | ThermTec Hunt 335 | Optics Trade
Technical Data | ThermTec Hunt 335 | Optics TradeTechnical Data | ThermTec Hunt 335 | Optics Trade
Technical Data | ThermTec Hunt 335 | Optics TradeOptics-Trade
 
Instruction Manual | ThermTec Hunt Thermal Clip-On Series | Optics Trade
Instruction Manual | ThermTec Hunt Thermal Clip-On Series | Optics TradeInstruction Manual | ThermTec Hunt Thermal Clip-On Series | Optics Trade
Instruction Manual | ThermTec Hunt Thermal Clip-On Series | Optics TradeOptics-Trade
 
Instruction Manual | Steiner eRanger LRF 10x42 | Optics Trade
Instruction Manual | Steiner eRanger LRF 10x42 | Optics TradeInstruction Manual | Steiner eRanger LRF 10x42 | Optics Trade
Instruction Manual | Steiner eRanger LRF 10x42 | Optics TradeOptics-Trade
 
Flyer | Guide DN Series Handheld Digital Binoculars | Optics Trade
Flyer | Guide DN Series Handheld Digital Binoculars | Optics TradeFlyer | Guide DN Series Handheld Digital Binoculars | Optics Trade
Flyer | Guide DN Series Handheld Digital Binoculars | Optics TradeOptics-Trade
 
Quick Start Guide | Guide TB Series | Optics Trade
Quick Start Guide | Guide TB Series | Optics TradeQuick Start Guide | Guide TB Series | Optics Trade
Quick Start Guide | Guide TB Series | Optics TradeOptics-Trade
 
Instruction Manual | Pard FD1 Digital NV Front Attachment | Optics Trade
Instruction Manual | Pard FD1 Digital NV Front Attachment | Optics TradeInstruction Manual | Pard FD1 Digital NV Front Attachment | Optics Trade
Instruction Manual | Pard FD1 Digital NV Front Attachment | Optics TradeOptics-Trade
 
Instruction Manual | EOTech Vudu X 2-12x40 | Optics Trade
Instruction Manual | EOTech Vudu X 2-12x40 | Optics TradeInstruction Manual | EOTech Vudu X 2-12x40 | Optics Trade
Instruction Manual | EOTech Vudu X 2-12x40 | Optics TradeOptics-Trade
 
Instruction Manual | EOTech Vudu X 1-6x24 | Optics Trade
Instruction Manual | EOTech Vudu X 1-6x24 | Optics TradeInstruction Manual | EOTech Vudu X 1-6x24 | Optics Trade
Instruction Manual | EOTech Vudu X 1-6x24 | Optics TradeOptics-Trade
 
Instruction Manual | Nightforce CFS 6-36x50 F1 | Optics Trade
Instruction Manual | Nightforce CFS 6-36x50 F1 | Optics TradeInstruction Manual | Nightforce CFS 6-36x50 F1 | Optics Trade
Instruction Manual | Nightforce CFS 6-36x50 F1 | Optics TradeOptics-Trade
 
Instruction Manual | Athlon Cronus Tactical G2 ED 7-42x60 | Optics Trade
Instruction Manual | Athlon Cronus Tactical G2 ED 7-42x60 | Optics TradeInstruction Manual | Athlon Cronus Tactical G2 ED 7-42x60 | Optics Trade
Instruction Manual | Athlon Cronus Tactical G2 ED 7-42x60 | Optics TradeOptics-Trade
 
Insrtuction Manual | Swarovski CL Companion Habicht | Optics Trade
Insrtuction Manual | Swarovski CL Companion Habicht | Optics TradeInsrtuction Manual | Swarovski CL Companion Habicht | Optics Trade
Insrtuction Manual | Swarovski CL Companion Habicht | Optics TradeOptics-Trade
 
Technical Data | Swarovski CL Companion Habicht | Optics Trade
Technical Data | Swarovski CL Companion Habicht | Optics TradeTechnical Data | Swarovski CL Companion Habicht | Optics Trade
Technical Data | Swarovski CL Companion Habicht | Optics TradeOptics-Trade
 

Más de Optics-Trade (20)

Technical Data | Sig Sauer Easy6 BDX 1-6x24 | Optics Trade
Technical Data | Sig Sauer Easy6 BDX 1-6x24 | Optics TradeTechnical Data | Sig Sauer Easy6 BDX 1-6x24 | Optics Trade
Technical Data | Sig Sauer Easy6 BDX 1-6x24 | Optics Trade
 
Technical Data | ThermTec Wild 650L | Optics Trade
Technical Data | ThermTec Wild 650L | Optics TradeTechnical Data | ThermTec Wild 650L | Optics Trade
Technical Data | ThermTec Wild 650L | Optics Trade
 
Technical Data | ThermTec Wild 635L | Optics Trade
Technical Data | ThermTec Wild 635L | Optics TradeTechnical Data | ThermTec Wild 635L | Optics Trade
Technical Data | ThermTec Wild 635L | Optics Trade
 
Technical Data | ThermTec Wild 650 | Optics Trade
Technical Data | ThermTec Wild 650 | Optics TradeTechnical Data | ThermTec Wild 650 | Optics Trade
Technical Data | ThermTec Wild 650 | Optics Trade
 
Technical Data | ThermTec Wild 635 | Optics Trade
Technical Data | ThermTec Wild 635 | Optics TradeTechnical Data | ThermTec Wild 635 | Optics Trade
Technical Data | ThermTec Wild 635 | Optics Trade
 
Technical Data | ThermTec Wild 335 | Optics Trade
Technical Data | ThermTec Wild 335 | Optics TradeTechnical Data | ThermTec Wild 335 | Optics Trade
Technical Data | ThermTec Wild 335 | Optics Trade
 
Technical Data | ThermTec Wild 325 | Optics Trade
Technical Data | ThermTec Wild 325 | Optics TradeTechnical Data | ThermTec Wild 325 | Optics Trade
Technical Data | ThermTec Wild 325 | Optics Trade
 
Instruction Manual | ThermTec Wild Thermal Monoculars | Optics Trade
Instruction Manual | ThermTec Wild Thermal Monoculars | Optics TradeInstruction Manual | ThermTec Wild Thermal Monoculars | Optics Trade
Instruction Manual | ThermTec Wild Thermal Monoculars | Optics Trade
 
Technical Data | ThermTec Hunt 335 | Optics Trade
Technical Data | ThermTec Hunt 335 | Optics TradeTechnical Data | ThermTec Hunt 335 | Optics Trade
Technical Data | ThermTec Hunt 335 | Optics Trade
 
Instruction Manual | ThermTec Hunt Thermal Clip-On Series | Optics Trade
Instruction Manual | ThermTec Hunt Thermal Clip-On Series | Optics TradeInstruction Manual | ThermTec Hunt Thermal Clip-On Series | Optics Trade
Instruction Manual | ThermTec Hunt Thermal Clip-On Series | Optics Trade
 
Instruction Manual | Steiner eRanger LRF 10x42 | Optics Trade
Instruction Manual | Steiner eRanger LRF 10x42 | Optics TradeInstruction Manual | Steiner eRanger LRF 10x42 | Optics Trade
Instruction Manual | Steiner eRanger LRF 10x42 | Optics Trade
 
Flyer | Guide DN Series Handheld Digital Binoculars | Optics Trade
Flyer | Guide DN Series Handheld Digital Binoculars | Optics TradeFlyer | Guide DN Series Handheld Digital Binoculars | Optics Trade
Flyer | Guide DN Series Handheld Digital Binoculars | Optics Trade
 
Quick Start Guide | Guide TB Series | Optics Trade
Quick Start Guide | Guide TB Series | Optics TradeQuick Start Guide | Guide TB Series | Optics Trade
Quick Start Guide | Guide TB Series | Optics Trade
 
Instruction Manual | Pard FD1 Digital NV Front Attachment | Optics Trade
Instruction Manual | Pard FD1 Digital NV Front Attachment | Optics TradeInstruction Manual | Pard FD1 Digital NV Front Attachment | Optics Trade
Instruction Manual | Pard FD1 Digital NV Front Attachment | Optics Trade
 
Instruction Manual | EOTech Vudu X 2-12x40 | Optics Trade
Instruction Manual | EOTech Vudu X 2-12x40 | Optics TradeInstruction Manual | EOTech Vudu X 2-12x40 | Optics Trade
Instruction Manual | EOTech Vudu X 2-12x40 | Optics Trade
 
Instruction Manual | EOTech Vudu X 1-6x24 | Optics Trade
Instruction Manual | EOTech Vudu X 1-6x24 | Optics TradeInstruction Manual | EOTech Vudu X 1-6x24 | Optics Trade
Instruction Manual | EOTech Vudu X 1-6x24 | Optics Trade
 
Instruction Manual | Nightforce CFS 6-36x50 F1 | Optics Trade
Instruction Manual | Nightforce CFS 6-36x50 F1 | Optics TradeInstruction Manual | Nightforce CFS 6-36x50 F1 | Optics Trade
Instruction Manual | Nightforce CFS 6-36x50 F1 | Optics Trade
 
Instruction Manual | Athlon Cronus Tactical G2 ED 7-42x60 | Optics Trade
Instruction Manual | Athlon Cronus Tactical G2 ED 7-42x60 | Optics TradeInstruction Manual | Athlon Cronus Tactical G2 ED 7-42x60 | Optics Trade
Instruction Manual | Athlon Cronus Tactical G2 ED 7-42x60 | Optics Trade
 
Insrtuction Manual | Swarovski CL Companion Habicht | Optics Trade
Insrtuction Manual | Swarovski CL Companion Habicht | Optics TradeInsrtuction Manual | Swarovski CL Companion Habicht | Optics Trade
Insrtuction Manual | Swarovski CL Companion Habicht | Optics Trade
 
Technical Data | Swarovski CL Companion Habicht | Optics Trade
Technical Data | Swarovski CL Companion Habicht | Optics TradeTechnical Data | Swarovski CL Companion Habicht | Optics Trade
Technical Data | Swarovski CL Companion Habicht | Optics Trade
 

Último

POWER POINT YUCRAElabore una PRESENTACIÓN CORTA sobre el video película: La C...
POWER POINT YUCRAElabore una PRESENTACIÓN CORTA sobre el video película: La C...POWER POINT YUCRAElabore una PRESENTACIÓN CORTA sobre el video película: La C...
POWER POINT YUCRAElabore una PRESENTACIÓN CORTA sobre el video película: La C...silviayucra2
 
La era de la educación digital y sus desafios
La era de la educación digital y sus desafiosLa era de la educación digital y sus desafios
La era de la educación digital y sus desafiosFundación YOD YOD
 
guía de registro de slideshare por Brayan Joseph
guía de registro de slideshare por Brayan Josephguía de registro de slideshare por Brayan Joseph
guía de registro de slideshare por Brayan JosephBRAYANJOSEPHPEREZGOM
 
Redes direccionamiento y subredes ipv4 2024 .pdf
Redes direccionamiento y subredes ipv4 2024 .pdfRedes direccionamiento y subredes ipv4 2024 .pdf
Redes direccionamiento y subredes ipv4 2024 .pdfsoporteupcology
 
Proyecto integrador. Las TIC en la sociedad S4.pptx
Proyecto integrador. Las TIC en la sociedad S4.pptxProyecto integrador. Las TIC en la sociedad S4.pptx
Proyecto integrador. Las TIC en la sociedad S4.pptx241521559
 
Trabajo Mas Completo De Excel en clase tecnología
Trabajo Mas Completo De Excel en clase tecnologíaTrabajo Mas Completo De Excel en clase tecnología
Trabajo Mas Completo De Excel en clase tecnologíassuserf18419
 
CLASE DE TECNOLOGIA E INFORMATICA PRIMARIA
CLASE  DE TECNOLOGIA E INFORMATICA PRIMARIACLASE  DE TECNOLOGIA E INFORMATICA PRIMARIA
CLASE DE TECNOLOGIA E INFORMATICA PRIMARIAWilbisVega
 
EPA-pdf resultado da prova presencial Uninove
EPA-pdf resultado da prova presencial UninoveEPA-pdf resultado da prova presencial Uninove
EPA-pdf resultado da prova presencial UninoveFagnerLisboa3
 
Hernandez_Hernandez_Practica web de la sesion 12.pptx
Hernandez_Hernandez_Practica web de la sesion 12.pptxHernandez_Hernandez_Practica web de la sesion 12.pptx
Hernandez_Hernandez_Practica web de la sesion 12.pptxJOSEMANUELHERNANDEZH11
 
trabajotecologiaisabella-240424003133-8f126965.pdf
trabajotecologiaisabella-240424003133-8f126965.pdftrabajotecologiaisabella-240424003133-8f126965.pdf
trabajotecologiaisabella-240424003133-8f126965.pdfIsabellaMontaomurill
 
International Women's Day Sucre 2024 (IWD)
International Women's Day Sucre 2024 (IWD)International Women's Day Sucre 2024 (IWD)
International Women's Day Sucre 2024 (IWD)GDGSucre
 
KELA Presentacion Costa Rica 2024 - evento Protégeles
KELA Presentacion Costa Rica 2024 - evento ProtégelesKELA Presentacion Costa Rica 2024 - evento Protégeles
KELA Presentacion Costa Rica 2024 - evento ProtégelesFundación YOD YOD
 
Cortes-24-de-abril-Tungurahua-3 año 2024
Cortes-24-de-abril-Tungurahua-3 año 2024Cortes-24-de-abril-Tungurahua-3 año 2024
Cortes-24-de-abril-Tungurahua-3 año 2024GiovanniJavierHidalg
 
Global Azure Lima 2024 - Integración de Datos con Microsoft Fabric
Global Azure Lima 2024 - Integración de Datos con Microsoft FabricGlobal Azure Lima 2024 - Integración de Datos con Microsoft Fabric
Global Azure Lima 2024 - Integración de Datos con Microsoft FabricKeyla Dolores Méndez
 
Plan de aula informatica segundo periodo.docx
Plan de aula informatica segundo periodo.docxPlan de aula informatica segundo periodo.docx
Plan de aula informatica segundo periodo.docxpabonheidy28
 
9egb-lengua y Literatura.pdf_texto del estudiante
9egb-lengua y Literatura.pdf_texto del estudiante9egb-lengua y Literatura.pdf_texto del estudiante
9egb-lengua y Literatura.pdf_texto del estudianteAndreaHuertas24
 

Último (16)

POWER POINT YUCRAElabore una PRESENTACIÓN CORTA sobre el video película: La C...
POWER POINT YUCRAElabore una PRESENTACIÓN CORTA sobre el video película: La C...POWER POINT YUCRAElabore una PRESENTACIÓN CORTA sobre el video película: La C...
POWER POINT YUCRAElabore una PRESENTACIÓN CORTA sobre el video película: La C...
 
La era de la educación digital y sus desafios
La era de la educación digital y sus desafiosLa era de la educación digital y sus desafios
La era de la educación digital y sus desafios
 
guía de registro de slideshare por Brayan Joseph
guía de registro de slideshare por Brayan Josephguía de registro de slideshare por Brayan Joseph
guía de registro de slideshare por Brayan Joseph
 
Redes direccionamiento y subredes ipv4 2024 .pdf
Redes direccionamiento y subredes ipv4 2024 .pdfRedes direccionamiento y subredes ipv4 2024 .pdf
Redes direccionamiento y subredes ipv4 2024 .pdf
 
Proyecto integrador. Las TIC en la sociedad S4.pptx
Proyecto integrador. Las TIC en la sociedad S4.pptxProyecto integrador. Las TIC en la sociedad S4.pptx
Proyecto integrador. Las TIC en la sociedad S4.pptx
 
Trabajo Mas Completo De Excel en clase tecnología
Trabajo Mas Completo De Excel en clase tecnologíaTrabajo Mas Completo De Excel en clase tecnología
Trabajo Mas Completo De Excel en clase tecnología
 
CLASE DE TECNOLOGIA E INFORMATICA PRIMARIA
CLASE  DE TECNOLOGIA E INFORMATICA PRIMARIACLASE  DE TECNOLOGIA E INFORMATICA PRIMARIA
CLASE DE TECNOLOGIA E INFORMATICA PRIMARIA
 
EPA-pdf resultado da prova presencial Uninove
EPA-pdf resultado da prova presencial UninoveEPA-pdf resultado da prova presencial Uninove
EPA-pdf resultado da prova presencial Uninove
 
Hernandez_Hernandez_Practica web de la sesion 12.pptx
Hernandez_Hernandez_Practica web de la sesion 12.pptxHernandez_Hernandez_Practica web de la sesion 12.pptx
Hernandez_Hernandez_Practica web de la sesion 12.pptx
 
trabajotecologiaisabella-240424003133-8f126965.pdf
trabajotecologiaisabella-240424003133-8f126965.pdftrabajotecologiaisabella-240424003133-8f126965.pdf
trabajotecologiaisabella-240424003133-8f126965.pdf
 
International Women's Day Sucre 2024 (IWD)
International Women's Day Sucre 2024 (IWD)International Women's Day Sucre 2024 (IWD)
International Women's Day Sucre 2024 (IWD)
 
KELA Presentacion Costa Rica 2024 - evento Protégeles
KELA Presentacion Costa Rica 2024 - evento ProtégelesKELA Presentacion Costa Rica 2024 - evento Protégeles
KELA Presentacion Costa Rica 2024 - evento Protégeles
 
Cortes-24-de-abril-Tungurahua-3 año 2024
Cortes-24-de-abril-Tungurahua-3 año 2024Cortes-24-de-abril-Tungurahua-3 año 2024
Cortes-24-de-abril-Tungurahua-3 año 2024
 
Global Azure Lima 2024 - Integración de Datos con Microsoft Fabric
Global Azure Lima 2024 - Integración de Datos con Microsoft FabricGlobal Azure Lima 2024 - Integración de Datos con Microsoft Fabric
Global Azure Lima 2024 - Integración de Datos con Microsoft Fabric
 
Plan de aula informatica segundo periodo.docx
Plan de aula informatica segundo periodo.docxPlan de aula informatica segundo periodo.docx
Plan de aula informatica segundo periodo.docx
 
9egb-lengua y Literatura.pdf_texto del estudiante
9egb-lengua y Literatura.pdf_texto del estudiante9egb-lengua y Literatura.pdf_texto del estudiante
9egb-lengua y Literatura.pdf_texto del estudiante
 

Liemke Challenger 15 Instruction Manual - Optics Trade

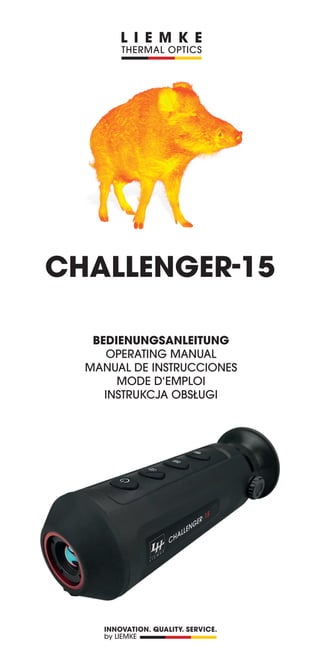
  • 1. CHALLENGER-15 BEDIENUNGSANLEITUNG OPERATING MANUAL MANUAL DE INSTRUCCIONES MODE D‘EMPLOI INSTRUKCJA OBSŁUGI
  • 2. FASZINATION WÄRMEBILDTECHNIK Liebe Kunden, aus unserem Anspruch heraus, Ihnen stets technisch und qualitativ führende Wärmebildoptiken anzubieten, finden Sie in unserem neuen Programm Produkte mit modernster Technologie und herausragenden Leistungsparametern. Mit unserem Serviceversprechen, Ihnen im Falle einer Einsendung innerhalb von zehn Werktagen Ihre Optik wieder zu retournieren, sowie einer Garantie auf unsere Produkte von bis zu drei Jahren bedanken wir uns für Ihr Vertrauen und wünschen ein kräftiges Waidmannsheil! Ihr LIEMKE-Team!
  • 3. CHALLENGER-15 · Bedienungsanleitung 03 / 2021 D E – 3 INHALT 01. TECHNISCHE DATEN������������������������4 02. EINZELTEILE UND BEDIENELEMENTE �����������4 03. LIEFERUMFANG�����������������������������5 04. SICHERHEITSHINWEISE�����������������������5 05. BETRIEB �����������������������������������5 06. EIN- UND AUSSCHALTEN ��������������������6 07. STANDBY-MODUS ��������������������������6 08. DIOPTRIENEINSTELLUNG ��������������������6 09. INFO-LEISTE ��������������������������������6 10. MENÜ-SYMBOLE ���������������������������7 11. UMSCHALTEN DES BILDMODUS ��������������7 12. DIGITALER ZOOM ��������������������������8 13. AUFNEHMEN VON BILDERN UND VIDEOS �����8 14. KALIBRIERFUNKTION (FCC) �����������������8 15. STADIAMETRISCHER ENTFERNUNGSMESSER���9 16. FEHLERPIXELKORREKTUR ������������������� 10 17. HOT-SPOT-TRACKING ���������������������� 10 18. AUFLADEN DES AKKUS���������������������� 10 19. ÜBERTRAGEN VON BILDERN UND VIDEOS ���� 10 20. WIFI-FUNKTION UND APP-VERBINDUNG����� 11 21. INSTANDHALTUNG ������������������������� 11 22. STÖRUNGSBESEITIGUNG ������������������� 11 CHALLENGER-15 · Bedienungsanleitung 03 / 2021 D E 2 – 3
  • 4. 01. TECHNISCHE DATEN* MODELL CHALLENGER-15 Detektor­auflösung 384×288 px Pixelgröße 17 µm Bildfrequenz 50 Hz Objektivlinse 15 mm, Fixfokus Sehfeld 24,9° × 18,8° 44,1 m × 33,1 m(H × V) Anzeige LCOS, 720 × 560 Vergrößerung 1,5 Digitaler Zoom 2x, 4x Max. Batterie­lebensdauer** 6 h Gewicht 270 g Abmessungen 169 × 57 × 60 mm Interner Speicher 8 GB Aufnahmeformate JPG (Foto), MP4 (Video) Betriebstemperatur −10 °C bis +50 °C Wasserfestigkeit IP67 Entdeckungsreichweite (Ziel: 1,8 m × 0,5 m, P (n) = 99%) 530 m * Änderungen zur Verbesserung technischer Parameter des Geräts vorbehal- ten. / ** Die tatsächliche Betriebszeit hängt von der Temperatur der Batterie und der Intensität der Nutzung der WiFi-Funktion und des eingebauten Videorecorders ab. 02. EINZELTEILE UND BEDIENELEMENTE 01. Objektiv 02. Ein/Aus-Taste 03. Foto-/Video-Taste 04. Menü-Taste 05. Zoom-Taste 06. Okular 07. Dioptrienausgleichsrad 08. Stativgewinde 09. USB-C-Anschluss mit LED-Anzeige 01 02 03 04 05 06 08 07 09
  • 5. CHALLENGER-15 · Bedienungsanleitung 03 / 2021 D E – 5 4 03. LIEFERUMFANG 1x Challenger-15 1x Ladekabel 1x Bedienungsanleitung 04. SICHERHEITSHINWEISE Die Nennladespannung dieses Produkts beträgt 5 V. Bitte laden Sie rechtzeitig bei niedriger Leistung, um einen Verlust der Lebensdauer durch Tiefentladung der Batterie zu vermei- den. Es wird nicht empfohlen, die Wärmebildkamera für längere Zeit in einer Umgebung mit hohen Temperaturen zu verwenden. Wenn die Temperatur zu hoch ist, geht die Wärmebildkamera in den Hochtemperatur-Schutzstatus über und schaltet sich automatisch ab. Die empfohlene Betriebstemperatur liegt bei −10 °C bis +50 °C. Stellen Sie sicher, dass die Abdeckung des USB-C-Anschlusses an der Unterseite der Wärmebildkamera bei Verwendung in feuch- ten Umgebungen, z. B. an Regentagen, fest verschlossen ist. • Wenn das Gerät über einen längeren Zeitraum nicht benutzt wird, sollte es während der Lagerung mindestens alle 2 Monate aufgeladen und in einer trockenen und belüfteten Umgebung gelagert werden. • Das Gerät sollte nicht in einer Umgebung über 40 °C aufgeladen werden. Entsorgung von Elektro-Altgeräten und Batterien Elektro-Altgeräte und Batterien dürfen nicht im Hausmüll entsorgt werden. Bitte geben Sie sie bei Ihrer lokalen Recyc­ ling-Annahmestelle ab. Batterien sollten bei der Entsorgung vollständig entladen sein. CE-Kennzeichnung Die Geräte sind konform mit den EU-Richtlinien: EMV-Richtlinie 2014/35/EU RoHS-Richtlinie RoHS 2011/65/EU 05. BETRIEB VORSICHT! Das Objektiv des Geräts darf nicht auf intensive Ener- giequellen gerichtet werden, wozu beispielsweise La- sergeräte und die Sonne gehören. Ansonsten besteht die Gefahr, dass elektronische Komponenten des Geräts beschädigt werden. Der Schaden, der infolge Nichtbeachtung der Betriebsanweisungen entsteht, fällt nicht unter die Gewähr­ leistungsansprüche.
  • 6. Vor dem Verwenden Vor der Inbetriebnahme des Geräts empfehlen wir eine technische Prüfung. Prüfen Sie dabei den äußeren Zustand des Geräts: Das Gehäuse darf keine Risse aufweisen. Prüfen Sie den Zustand des Objektivs und des Okulars: Es darf keine Risse, Fettflecke, Schmutz und andere Ablagerungen aufweisen. Prüfen Sie den Zustand des Akkus: Dieser sollte falls nötig gela- den werden. Prüfen Sie alle elektrischen ­ Kontakte: Es dürfen keine Salze oder oxidierten Stellen vorhanden sein. 06. EIN- UND AUSSCHALTEN Schalten Sie das Gerät durch langes Drücken Ein/Aus-Taste ein. Der Startbildschirm erscheint und nach einigen Sekunden wird das Bild angezeigt. Schalten Sie das Gerät durch langes Drücken der Ein/Aus-Taste aus. 07. STANDBY-MODUS Um die Laufzeit des Akkus zu erhöhen, kann das Gerät in den Standby-Modus versetzt werden. Wenn das Gerät eingeschaltet ist, drücken Sie kurz auf die Ein/Aus-Taste, um in den Standby-Modus zu gelangen. Das Gerät geht in den Standby-Modus. Drücken Sie erneut kurz auf die Ein/Aus-Taste, um das Gerät aus dem Standby-Modus zu wecken. Das Aufwecken des Geräts erfolgt sofort, es gibt keine Wartezeit wie beim Einschalten des Geräts, nachdem es vollständig ausge- schaltet wurde. 08. DIOPTRIENEINSTELLUNG Mit der Dioptrieneinstellung wird das Okular des Geräts an das individuelle Sehvermögen des Benutzers angepasst. Schließen Sie die Objektivklappe und drehen Sie das Dioptri- enausgleichsrad im oder gegen den Uhrzeigersinn, bis sie die Symbole im Display scharf sehen können. 09. INFO-LEISTE Die Info-Leiste in der oberen rechten Bild­ ecke zeigt den eingestellten Digitalzoom, den Speicherplatz (kein Balken = leer) und den Ladezustand des eingebauten Akkus (drei Balken = voll) an. Bei aktiviertem WiFi wird das WiFi-Symbol aus dem Menü ebenfalls in der Info-Leiste angezeigt.
  • 7. CHALLENGER-15 · Bedienungsanleitung 03 / 2021 D E – 7 6 10. MENÜ-SYMBOLE Die Menüleiste ist am linken Bildrand angeordnet. Drücken Sie die Foto-/Video-Taste bzw. die Zoom-Taste, um zwischen den Menüpunkten zu wechseln. Drücken Sie die Menü-Taste zum Auswählen eines Menüpunkts. Drücken Sie die Menü-Taste lange, um das Menü wieder zu verlassen. SYMBOL Bedeutung Auto-Standby (aus/5 min./15 min.) Sichtbarkeit der Info-Leiste in der oberen rechten Bildecke (an/aus) Hot-Spot-Tracking/Anzeigen des wärmsten Objekts (an/aus) WiFi (an/aus) Analoger Videoausgang (an/aus) Stadiametrischer Entfernungsmesser Helligkeit (Stufe 1 bis 5) Kontrast (Stufe 1 bis 5) Bildoptimierungsmodi für unterschiedliche Umgebungsbedingungen (warm/kalt) Kalibriermodus / FCC (auto/manuell,extern) Fehlerpixelkorrektur Systeminformation Wiederherstellung der Werkseinstellungen (und anschließender Neustart) 11. UMSCHALTEN DES BILDMODUS Drücken Sie kurz auf die Menü-Taste, um den Bildmodus zwischen den Modi White Hot, Black Hot, Fusion und Red Hot umzuschalten. 01. 02. 03. 04. 01. White Hot – ideal zum präzisen Ansprechen 02. Black Hot – ideal zum schnellen Finden 03. Fusion – zur Detektion im Nahbereich, z.B. Wärmebrücken 04. Red Hot – zur schnellen Detektion von Wärmequellen
  • 8. 12. DIGITALER ZOOM Drücken Sie kurz die Zoom-Taste, um das Bild von 1× auf 2×, 4× und zurück auf 1× zu zoomen. Der Digitalzoom-Faktor wird in der Info-Leiste angezeigt. 13. AUFNEHMEN VON BILDERN UND VIDEOS Drücken Sie im normalen Anzeigemodus kurz auf die Foto-/Vi- deo-Taste, um ein Foto aufzunehmen. Das Speichern der Fotoaufnahme wird in der Anzeige bestätigt. Drücken Sie die Foto-/Video-Taste lange, um eine Videoaufnah- me zu starten. Während der Videoaufnahme wird die Aufnahmezeit in der obe- ren linken Ecke des Bildschirms angezeigt. Drücken Sie die Foto-/Video-Taste erneut lange, um die Aufnah- me zu beenden und das Video zu speichern. Das Speichern der Videoaufnahme wird in der Anzeige bestätigt. Der verbleibende Platz im internen Speicher wird in der Info-Leiste angezeigt. 14. KALIBRIERFUNKTION (FCC) Während der Verwendung verschlechtert sich das Bild allmählich aufgrund der sich ändernden Hintergrundtemperatur des Sensors. Dies muss durch periodisches Kalibrieren des Sensors ausgeglichen werden. Zur Kalibrierung wird ein interner Verschluss betätigt, der ein schwaches Klickgeräusch verursacht. Dabei friert das Bild kurz ein, während der Verschluss geschlossen ist. • Im FCC-Modus Auto wird die Kalibrierung in vom Gerät festge- legten Zeitabständen automatisch durchgeführt. • Im FCC-Modus Manuell wird keine automatische Kalibrierung durchgeführt. Der manuelle Modus erlaubt es dem Nutzer, den Zeitpunkt des kurzen Einfrierens des Bilds selbst zu bestimmen. Starten Sie die manuelle Kalibrierung durch langen Druck auf die Zoom-Taste, wenn Sie bei der Nutzung eine verschlechterte Bildqualität feststellen. • Im FCC-Modus Extern wird ebenfalls keine automatische Kalibrierung durchgeführt. Die Kalibrierung erfolgt ohne den in- ternen Verschluss und damit völlig geräuschlos. Dazu muss wäh- rend des Kalibrierens die Objektivkappe geschlossen werden (dies ersetzt den internen Verschluss). Wird die Objektivkappe beim Durchführen der externen Kalibrierung versehentlich nicht geschlossen, wird das angezeigte Bild von einem Standbild der beim Kalibrieren angezeigten Szene überlagert. Dies kann durch nochmaliges ordnungsgemäßes Kalibrieren mit geschlossener Objektivkappe korrigiert werden.
  • 9. CHALLENGER-15 · Bedienungsanleitung 03 / 2021 D E – 9 8 15. STADIAMETRISCHER ENTFERNUNGSMESSER Für die stadiametrische Entfernungsermittlung müssen Sie zunächst die Zielgröße (Höhe) des Ziels einstellen, zu dem Sie die Entfernung messen wollen. Dazu gehen Sie wie folgt vor: Wählen Sie im Menü den Menüpunkt Stadiametrischer Entfer- nungsmesser an und bestätigen Sie ihn mit der Menü-Taste. Drücken Sie die Zoom-Taste, um in das Untermenü Parameter zu gelangen. Hier können Sie mit der Foto-/Video-Taste bzw. der Zoom-Taste zwischen vier verschiedenen Zielgrößen „Wolf“, „Bär“, „Reh“ und „individuell“ auswählen. Bestätigen Sie Ihre Auswahl mit der Menü-Taste. Im Unterpunkt „individuell“ können Sie mit der Foto-/Video-Taste bzw. der Zoom-Taste eine individuelle Zielgröße im Bereich von 0,1 bis 9,9 m Höhe definieren. Bestätigen Sie den eingestellten Wert mit der Menü-Taste. Zum Messen der Entfernung gehen Sie wie folgt vor: Wählen Sie im Menü den Menüpunkt Stadiametrischer Entfer- nungsmesser an und bestätigen Sie ihn mit der Menü-Taste. Im Anzeigebild erscheint ein langer waagerechter Strich mit einem nach oben zeigenden kurzen senkrechten Strich. Platzieren Sie den Schnittpunkt der beiden Striche an der Ober- kante des zu messenden Ziels und drücken Sie die Menü-Taste (Schritt 1). Der senkrechte Strich blinkt kurz und wechselt dann zur Unterseite des waagerechten Strichs. Platzieren Sie nun den Schnittpunkt der beiden Striche an der Unterkante des zu messenden Ziels und drücken Sie erneut die Menü-Taste (Schritt 2). Daraufhin wird in der linken oberen Bildecke die Entfernung zum Ziel angezeigt. Schritt 1 Schritt 2 Bitte beachten Sie: Die Genauigkeit der Entfernungsermittlung hängt wesentlich von der Übereinstimmung der definierten mit der tatsächlichen Zielgröße und von der Handruhe beim Messvorgang ab. Die Größen der vorkonfigurierten Ziele sind lediglich Anhalts- werte und können variieren.
  • 10. 16. FEHLERPIXELKORREKTUR Sollte dauerhaft trotz Kalibrierung und Neustart ein Pixelfehler auf- treten, lässt dieser sich wie folgt beheben: Wählen Sie den Menüpunkt Fehlerpixelkorrektur aus und öffnen Sie diese. Drücken Sie die Menü-Taste, um die Schrittweite der Cursorver- stellung zur Anwahl des fehlerhaften Pixels einzustellen (Schritt- weite 1, 5 oder 10 Pixel). Drücken Sie die Menü- oder Foto-/Video-Taste, um die Bewe- gungsrichtung des Cursors zu wählen (links, rechts, oben, unten). Bewegen Sie den Cursor mit der Menü-Taste schrittweise auf den Fehlpixel. Eine vergrößerte Darstellung des angewählten Pixels wird in der unteren rechten Displayecke angezeigt. Falls der fehlerhafte Pixel durch die Menü-Anzeige verdeckt wird, kann die Anzeige durch langen Druck auf die Foto-/Video-Taste gespiegelt werden. Wenn der Pixel angewählt ist, korrigieren Sie ihn durch einen langen Druck auf die Foto-/Video-Taste. Am unteren Bildrand wird Ihnen die Anzahl der korrigierten Pixel angezeigt. Mit einem langen Druck der Menü-Taste schließen Sie das Menü. 17. HOT-SPOT-TRACKING Bei aktivierter Hot-Spot-Tracking-Funktion erscheint ein grünes Fa- denkreuz, das das heißeste Objekt auf dem Bildschirm verfolgt. 18. AUFLADEN DES AKKUS Das Gerät ist mit einem internen, wieder aufladbaren Akku ausgestattet, der über den USB-C-Anschluss an der Unterseite des Gehäuses aufgeladen wird. Die Batterieanzeige in der oberen rechten Ecke des Bildschirms zeigt den Ladestand des Akkus an. Bitte laden Sie den Akku spätestens dann auf, wenn eine nied­ rige Akkuladung (rotes Batteriesymbol) angezeigt wird. Sie können den Akku mit dem mitgelieferten Netzteil oder einem tragbaren Netzteil wie z.B. einer USB-Powerbank aufladen. Eine Powerbank mit 4000 mAh Kapazität kann die Laufzeit verdoppeln. Die LED-Anzeige neben dem USB-C-Anschluss leuchtet beim Aufla- den rot und wechselt auf grün, wenn der Akku vollständig aufgela- den ist. Das Gerät kann während des Betriebs aufgeladen werden. Es lädt schneller als für den laufenden Betrieb benötigt wird. 19. ÜBERTRAGEN VON BILDERN UND VIDEOS Aktivieren Sie im Menü die WiFi-Funktion. Nachdem Sie das Gerät über ein USB-Kabel an Ihren Computer angeschlossen und das Gerät eingeschaltet haben, fungiert es als Massenspeichergerät, sodass Sie Ihre Bilder und Videos auf dem Computer ansehen, kopieren oder löschen können.
  • 11. CHALLENGER-15 · Bedienungsanleitung 03 / 2021 D E – 11 10 20. WIFI-FUNKTION UND APP-VERBINDUNG Die App und Informationen zur App-Verbindung finden Sie unter: https://liemke.shop/medien 21. INSTANDHALTUNG Instandhaltungsarbeiten sollten mindestens zweimal im Jahr durch- geführt werden und beinhalten folgende Arbeiten. Wischen Sie die äußeren Oberflächen mit einem Baumwolllap- pen ab, um Metall- und Kunststoffteile staub- und schmutzfrei zu halten. Dafür kann Silikonfett verwendet werden. Reinigen Sie die Kontakte des Geräts mit einem nicht fettenden organischen Lösungsmittel. Prüfen Sie die Glasoberflächen des Okulars und des Objek- tivs. Falls erforderlich, entfernen Sie Staub und Sand von den Linsen (vorzugsweise ohne die Glasoberflächen zu berühren). Das Reinigen der äußeren Oberflächen der Optik darf nur mit Hilfsmitteln vorgenommen werden, die speziell für diesen Zweck bestimmt sind. 22. STÖRUNGSBESEITIGUNG Diese Tabelle führt sämtliche Probleme auf, die bei der Benutzung des Geräts auftreten können. Führen Sie alle empfohlenen Prüfun- gen und Reparaturen wie in der Tabelle beschrieben durch. Falls ein Fehler auftritt, der nicht in der Tabelle ­ aufgeführt ist oder Sie einen Fehler nicht selbst beheben können, sollte das Gerät zur Reparatur an die zuständige Servicestelle übergeben werden.
  • 12. Fehlfunktion Möglicher Grund Korrektur Die Wärmebildkamera lässt sich nicht einschal- ten. Der Akku ist komplett entladen. Laden Sie den Akku. Kann nicht über eine externe Stromquelle betrieben werden. USB-Kabel ist beschädigt USB-Kabel ersetzen. Die externe Stromquelle ist entladen Laden Sie die externe Stromquelle (falls erfor- derlich). Das Bild ist unscharf, mit senkrechten Linien und unebenem Hintergrund. Kalibrierung erforderlich Führen Sie die Bildkali- brierung durch wie in Abschnitt 14. „Kalibrie- rungsfunktion (FCC)“ beschrieben. Das Bild ist zu dunkel. Die Helligkeitseinstellung ist zu gering. Einstellung der Display-Helligkeit Farbige Linien erschei- nen auf dem Display oder es wird kein Bild angezeigt. Das Gerät wurde während dem Betrieb statischer Elektrizität ausgesetzt. Nachdem das Gerät statischer Elektrizität ausgesetzt wurde, startet sich das Gerät entweder automatisch neu oder Sie müssen es manuell aus- und wieder ein- schalten. Geringe Bildqualität/ verringerte Erkennungs- reichweite. Diese Probleme können dann eintreten, wenn eine Beobachtung an einem Tag mit schwierigen Wetterbedingungen durchgeführt wird (hohe Luft- feuchtigkeit, Schneefall, Regen, Nebel usw.). Das Smartphone oder der Tablet-PC können nicht am Gerät ange- schlossen werden. Das Passwort des Geräts wurde geändert. Löschen Sie das Netz und stellen Sie die Verbindung erneut her, indem Sie das bestehen- de Passwort benutzen. Das Gerät befindet sich in einem Bereich mit einer großen Anzahl von WLAN-Netzen, die Inter- ferenzen verursachen können. Um einen stabilen WLAN-Betrieb zu ge- währleisten, ist das Gerät an einem anderen Ort mit weniger oder gar keinem WLAN-Netz zu platzieren. Kein WLAN-Signal vorhanden oder unter- brochen. Das Gerät befindet sich außerhalb der WLAN-Reichweite.Es sind Hindernisse zwischen dem Gerät und dem Empfänger vorhanden (z. B. Betonwände) Platzieren Sie das Gerät in Sichtlinie und Reich- weite des WLAN-Signals. Beim Einsatz bei gerin- gen Temperaturen ist die Bildqualität der Um- gebungen schlechter als bei Temperaturen über dem Gefrierpunkt. Bei Temperaturen über dem Gefrierpunkt, sind die beobachteten Objekte (Umgebung und Hinter- grund) aufgrund der Wärmeleitfähigkeit unterschiedlich warm, sodass ein hoher Tempe- raturkontrast die Folge ist. Demzufolge ist die vom Gerät erreichte Bildqualität höher. Bei tiefen Außentemperaturen kühlen die beob- achteten Objekte (Hintergrund) in der Regel un- gefähr auf die gleiche Temperatur ab, sodass der Temperaturkontrast erheblich reduziert wird und die Bildqualität (Einzelheiten) dadurch geringer ist. Das ist eine Eigenschaft von Wärmebildkameras.
  • 13. CHALLENGER-15 · Bedienungsanleitung 03 / 2021 D E – 13 12
  • 14. FASCINATION THERMAL IMAGING Dear Customers, Our mission to always offer you thermal imaging optics that are at the forefront of technology and quality means that you will find products with state-of-the-art technology and outstanding performance parameters in our new range. With our service promise to return any optics you have sent in to you within ten working days, as well as a guarantee on our products of up to three years, we would like to thank you for your trust and wish you good hunting! Your LIEMKE team!
  • 15. CHALLENGER-15 · Operating Manual 03 / 2021 E N – 15 CONTENT CHALLENGER-15 · Operating manual 03 / 2021 E N 14 – 15 01. TECHNICAL DATA ������������������������� 16 02. COMPONENTS AND CONTROLS������������� 16 03. SCOPE OF SUPPLY ������������������������� 17 04. SAFETY INSTRUCTIONS���������������������� 17 05. OPERATION������������������������������� 17 06. SWITCHING ON AND OFF������������������� 18 07. STANDBY MODE���������������������������� 18 08. DIOPTRE ADJUSTMENT���������������������� 18 09. INFO BAR���������������������������������� 18 10. MENU ICONS����������������������������� 18 11. SWITCHING THE IMAGE MODE ������������� 19 12. DIGITAL ZOOM ���������������������������� 19 13. TAKING PICTURES AND VIDEOS ������������� 19 14. CALIBRATION FUNCTION (FCC) ������������� 20 15. STADIAMETRIC RANGEFINDER ������������� 20 16. BLIND PIXEL CORRECTION ����������������� 21 17. HOT SPOT TRACKING ���������������������� 21 18. CHARGING THE BATTERY ������������������� 22 19. TRANSFERRING PICTURES AND VIDEOS������� 22 20. WIFI FUNCTION AND APP CONNECTION ���� 22 21. MAINTENANCE ���������������������������� 22 22. TROUBLESHOOTING����������������������� 23
  • 16. 01. TECHNICAL DATA* MODEL CHALLENGER-15 Detector resolution 384×288 px Pixel size 17 µm Frame rate 50 Hz Eyepiece lens 15 mm, fixed focus Field of vision 24.9 ° × 18.8 ° 44.1 m × 33.1 m (H × V) Display LCOS, 720 × 560 Magnification 1.5 Digital zoom 2x, 4x Max. battery life** 6 h Weight 270 g Dimensions 169 × 57 × 60 mm Internal memory 8 GB Recording formats JPG (picture), MP4 (video) Operating temperature −10°C to +50°C Water resistance IP67 Detection range (Target: 1.8 m × 0.5 m, P (n) = 99%) 530 m * We reserve the right to make changes to improve the technical parameters of the unit. / ** The actual operating time depends on the temperature of the battery and the intensity of use of the WiFi function and the built-in video recorder. 02. COMPONENTS AND CONTROLS 01. Lens 02. Power button 03. Picture/video button 04. Menu button 05. Zoom button 06. Eyepiece 07. Dioptre adjustment wheel 08. Tripod thread 09. USB-C interface with LED display 01 02 03 04 05 06 08 07 09
  • 17. CHALLENGER-15 · Operating Manual 03 / 2021 E N – 17 16 03. SCOPE OF SUPPLY 1x Challenger-15 1x charging cable 1x Operating Manual 04. SAFETY INSTRUCTIONS The nominal charging voltage of this product is 5 V. Please charge in good time when the battery is low to avoid a decreased service life due to deep discharge of the battery. The thermal imager is not recommended to be used in high temperature environment for a long time. If the temperature is too high, the imager will enter the high-temperature protection state, and automatically shut down. The recommended temperature for use is −10°C to +50°C. Ensure that the USB-C interface cover on the bottom of the thermal imager is tightly closed when used in humid environ- ments, e.g. on rainy days. • If the unit is not used for a long period of time, it should be charged at least every 2 months during storage and kept in a dry and ventilated environment. • The unit should not be charged in an environment above 40 °C. Disposal of waste electrical equipment and batteries Do not dispose of waste electrical equipment and batteries in the household waste. Please hand them in to your local recycling centre. Batteries should be fully discharged when disposed of. CE marking The devices are in conformity with the EU directives: EMC Directive 2014/35/EU RoHS Directive 2011/65/EU 05. OPERATION CAUTION! Do not point the lens of the unit at intense energy sources, including laser units and the sun. Otherwise, there is a risk of damaging electronic components of the unit. Damage resulting from non-compliance with the operating instructions is not covered by the warranty.
  • 18. Before use A technical inspection of the device is recommended before use. Check the external appearance of the device: There should be no cracks in the casing. Check the condition of the lens and eyepiece: There should be no cracks, greasy spots, dirt or other deposits. Check the condition of the battery: It should be charged if necessary. Check all electrical contacts: There must be no salts or oxidised spots. 06. SWITCHING ON AND OFF Switch on the unit by pressing and holding the Power button. The start screen appears and after a few seconds the image is displayed. Switch off the unit by pressing and holding the Power button. 07. STANDBY MODE To increase the battery life, the unit can be set to standby mode. When the unit is switched on, briefly press the Power button to enter standby mode. The unit goes into standby mode. Briefly press the Power button again to wake the unit from standby mode. The unit wakes up immediately; there is no waiting time as is the case when the unit is switched on after it has been switched off completely. 08. DIOPTRE ADJUSTMENT The dioptre adjustment adjusts the eyepiece of the unit to the individual vision of the user. Close the lens cover and turn the dioptre adjustment wheel clockwise or anticlockwise until you can see the symbols in the display clearly. 09. INFO BAR The info bar in the upper right-hand image corner shows the digital zoom setting, the memory capacity (no bar = empty) and the charge status of the built-in battery (three bars = full). If WiFi is activated, the WiFi symbol from the menu is also displayed in the info bar. 10. MENU ICONS The menu bar is located on the left edge of the screen. Press the picture/video button or the zoom button to switch between the menu items. Press the menu button to select a menu item. Long press the menu button to exit the menu again.
  • 19. CHALLENGER-15 · Operating Manual 03 / 2021 E N – 19 18 SYMBOL Meaning Auto standby (off/5 min./15 min.) Visibility of the info bar in the upper right corner of the picture (on/off) Hot spot tracking/displaying the warmest object (on/off) WiFi (on/off) Analogue video output (on/off) Stadiametric rangefinder Brightness (level 1 to 5) Contrast (level 1 to 5) Image optimisation modes for different environmental conditions (warm/cold) Calibration mode / FCC (auto/manual, external) Blind pixel correction System information Restoring the factory settings (and subsequent restart) 11. SWITCHING THE IMAGE MODE Press the menu button briefly to switch the image mode between White Hot, Black Hot, Fusion and Red Hot modes. 01. 02. 03. 04. 01. White Hot - ideal for precise response 02. Black Hot - ideal for quick finding 03. Fusion - for detection at close range, e.g. thermal bridges 04. Red Hot - for rapid detection of heat sources 12. DIGITAL ZOOM Briefly press the zoom button to zoom the picture to 1× to 2×, 4× and back to 1x. The digital zoom factor is displayed in the info bar. 13. TAKING PICTURES AND VIDEOS In normal display mode, briefly press the picture/video button to take a picture. The display indicates that the picture has been saved. Long press the picture/video button to start recording a video. During video recording, the recording time is displayed in the upper left corner of the screen.
  • 20. Long press the picture/video button again to stop recording and save the video. The display indicates that the video has been saved. The remaining space in the internal memory is displayed in the info bar. 14. CALIBRATION FUNCTION (FCC) During use, the image gradually deteriorates due to the changing background temperature of the sensor. This must be compensated for by periodically calibrating the sensor. For calibration, an inter- nal shutter is actuated, which makes a faint clicking sound. The image briefly freezes while the shutter is closed. • In FCC Auto mode, calibration is performed automatically at intervals set by the unit. • In FCC Manual mode, no automatic calibration is performed. The manual mode allows the user to determine the time when the image briefly freezes. If you notice a deterioration in picture quality during use, start manual calibration by pressing and holding the zoom button. • In FCC External mode, no automatic calibration is performed either. Calibration takes place without the internal shutter and is therefore completely silent. The lens cap must be closed during calibration (this replaces the internal shutter). If the lens cap is inadvertently not closed when performing external calibration, the displayed image is overlapped by a still image of the scene displayed during calibration. This can be corrected by properly calibrating again with the lens cap closed. 15. STADIAMETRIC RANGEFINDER For stadiametric distance measurement, you must first set the target size (height) of the target to which you want to measure the distance. To do this, proceed as follows: Select the menu item Stadiametric Rangefinder in the menu and confirm it with the menu button. Press the zoom button to enter the Parameters submenu. Here you can choose between four different target sizes wolf, bear, deer and individual using the picture/video button or the zoom button. Confirm your selection with the menu button. In the sub-item individual you can define a custom target size in the range of 0.1 to 9.9 m height using the picture/video button or the zoom button. Confirm the set value with the menu button. To measure the distance, proceed as follows: Select the menu item Stadiametric Rangefinder in the menu and confirm it with the menu button. A long horizontal line with a short vertical line pointing upwards appears in the display image. Place the intersection of the two lines at the top edge of the target to be measured and press the menu button (step 1).
  • 21. CHALLENGER-15 · Operating Manual 03 / 2021 E N – 21 20 The vertical line flashes briefly and then changes to the underside of the horizontal line. Now place the intersection of the two lines at the lower edge of the target to be measured and press the menu button again (step 2). The distance to the target is then displayed in the upper left corner of the image. Step 1 Step 2 Please note: The precision of the distance measurement depends primarily on the correspondence between the defined and the actual target size and on the smoothness of the hand during the measuring process. The sizes of the pre-configured targets are only indicative and may vary. 16. BLIND PIXEL CORRECTION If a pixel error occurs permanently despite calibration and restart, it can be corrected as follows: Select the menu item Blind Pixel Correction and open it. Press the menu button to set the step size of the cursor adjust- ment to select the faulty pixel (step size 1, 5 or 10 pixels). Press the menu or picture/video button to select the direction of movement of the cursor (left, right, up, down). Move the cursor to the missing pixel step by step using the menu button. An enlarged view of the selected pixel is shown in the lower right corner of the display. If the faulty pixel is covered by the menu display, the display can be mirrored by pressing and holding the picture/video button. When the pixel is selected, correct it by a pressing and holding the picture/video button. The number of corrected pixels is displayed at the bottom of the image. Close the menu with a long press of the menu button. 17. HOT SPOT TRACKING When hot spot tracking is activated, a green crosshair appears tracking the hottest object on the screen.
  • 22. 18. CHARGING THE BATTERY The device is equipped with an internal, rechargeable battery that is charged via the USB-C interface on the underside of the hous- ing. The battery indicator in the upper right corner of the screen shows the charge level of the battery. Please charge the battery at the latest when a low battery charge (red battery symbol) is displayed. You can charge the battery with the supplied power supply unit or a portable power supply unit such as a USB powerbank. A pow- erbank with 4000 mAh capacity can double the operating time. The LED indicator next to the USB-C interface lights up red during charging and changes to green when the battery is fully charged. The unit can be charged during operation. It charges faster than is needed for ongoing operation. 19. TRANSFERRING PICTURES AND VIDEOS Once you have connected the unit to your computer via a USB cable and switched on the unit, it acts as a mass storage device so that you can view, copy or delete your pictures and videos on the computer. 20. WIFI FUNCTION AND APP CONNECTION The app and information on the app connection can be found at: https://liemke.shop/medien 21. MAINTENANCE Activate the WiFi function in the menu. Maintenance should be carried out at least twice a year and consist of the following actions. Wipe the external surfaces of metal and plastic parts free of dust and dirt with a cotton cloth. Silicone grease can be used for this purpose. Clean the contacts of the unit with a non-greasy organic solvent. Check the glass surfaces of the eyepiece and the lens. If neces- sary, remove dust and sand from the lenses (preferably using a non-contact method). Cleaning of the external surfaces of the optic should be done with substances designed especially for this purpose.
  • 23. CHALLENGER-15 · Operating Manual 03 / 2021 E N – 23 22 22. TROUBLESHOOTING This table lists all the problems that can occur when using the unit. Carry out all recommended checks and repairs as described in the table. If an error occurs that is not listed in the table or if you cannot rectify an error yourself, the unit should be handed over to the responsible service centre for repair. Malfunction Possible reason Correction The thermal imager cannot be switched on. The battery is complete- ly discharged. Charge the battery. Can‘t be powered by an external power source. USB cable is damaged. Replace USB cable. The external power source is discharged Charge the external power source (if nec- essary). The image is blurred, with vertical lines and an uneven background. Calibration needed. Perform image cali- bration as described in section 14. Calibration Function (FCC). The image is too dark. The brightness setting is too low. Set the display brightness Coloured lines appear on the display or no image is shown. The unit has been exposed to static elec- tricity during operation. After the unit has been exposed to static elec- tricity, the unit will either restart automatically or you will have to switch it off and on again manually. Low image quality/re- duced detection range. These problems can occur when an observation is carried out on a day with difficult weather condi- tions (high humidity, snowfall, rain, fog etc.). The smartphone or tablet PC cannot be connected to the unit. The unit’s password has been changed. Delete the network and reconnect using the existing password. The unit is located in an area with a large num- ber of WiFi networks that may cause interference. To ensure stable WiFi operation, place the unit in another location with fewer or no WiFi networks at all. No WiFi signal available or interrupted. The unit is outside the WiFi range. There are obstacles between the unit and the receiver (e.g. concrete walls). Place the unit within line of sight and range of the WiFi signal. When the unit is used at low temperatures, the image quality of the surroundings is worse than at temperatures above freezing. At temperatures above freezing, the observed objects (surroundings and background) are dif- ferent temperatures due to thermal conductivity, resulting in a high temperature contrast. Thus, the picture quality achieved by the unit is higher. At low outdoor temperatures, the observed objects (background) usually cool down to about the same temperature, so that the temperature contrast is considerably reduced and the image quality (details) is lower as a result. This is a property of thermal imagers.
  • 24. FASCINACIÓN TERMOGRAFÍA Estimados clientes, basándonos en nuestra filosofía de ofrecerles constantemente óptica termográfica de calidad y tecnología punteras, en nuestro nuevo programa incluimos productos con la más moderna tecnología y extraordinarias prestaciones. Con la promesa de nuestro servicio técnico de devolverle su óptica en diez días laborables en caso de que nos la remita, así como una garantía de hasta tres años sobre nuestros productos, agradecemos su confianza y le deseamos una buena caza. El equipo de LIEMKE.
  • 25. CHALLENGER-15 · Manual de instrucciones 03 / 2021 E S – 25 ÍNDICE CHALLENGER-15 · Manual de instrucciones 03 / 2021 E S 24 – 25 01. DATOS TÉCNICOS ������������������������� 26 02. PIEZAS Y ELEMENTOS DE CONTROL���������� 26 03. VOLUMEN DE SUMINISTRO ���������������� 27 04. INSTRUCCIONES DE SEGURIDAD������������� 27 05. FUNCIONAMIENTO������������������������� 27 06. ENCENDER Y APAGAR���������������������� 28 07. MODO DE ESPERA ������������������������� 28 08. AJUSTE DE DIOPTRÍAS���������������������� 28 09. BARRA DE INFORMACIÓN����������������� 28 10. SÍMBOLOS DEL MENÚ ���������������������� 29 11. CAMBIO DEL MODO DE PANTALLA ���������� 29 12. ZOOM DIGITAL ���������������������������� 30 13. GRABACIÓN DE IMÁGENES Y VÍDEOS ������� 30 14. FUNCIÓN DE CALIBRACIÓN (FCC) ���������� 30 15. MEDIDOR ESTADIAMÉTRICO DE LA DISTANCIA ������������������������� 31 16. CORRECCIÓN DE PÍXELES DEFECTUOSOS ���� 32 17. SEGUIMIENTO DE PUNTOS CALIENTES ������� 32 18. CARGA DE LA BATERÍA�������������������� 32 19. TRANSMISIÓN DE IMÁGENES Y VÍDEOS������� 33 20. FUNCIÓN WI-FI Y CONEXIÓN DE LA APLICACIÓN����������������������� 33 21. MANTENIMIENTO ������������������������� 33 22. SOLUCIÓN DE PROBLEMAS ���������������� 33
  • 26. 01. DATOS TÉCNICOS* MODELO CHALLENGER-15 Resolución del detector 384×288 px Tamaño de píxel 17 µm Frecuencia de imagen 50 Hz Lente del objetivo 15 mm, enfoque fijo Campo de visión 24,9 ° × 18,8 ° 44,1 m × 33,1 m (Alt. × V) Indicador LCOS, 720 × 560 Aumento 1,5 Zoom digital 2x, 4x Duración máxima de la batería** 6 h Peso 270 g Dimensiones 169 × 57 × 60 mm Memoria interna 8 GB Formato de grabación JPG (foto), MP4 (vídeo) Temperatura de servicio De −10 °C a +50 °C Resistencia al agua IP67 Alcance de la detección (Objeto: 1,8 m × 0,5 m, P (n) = 99%) 530 m * Reservadas las modificaciones con el fin de mejorar los parámetros técnicos del aparato. / ** El tiempo de funcionamiento real depende de la temperatura de la batería y de la intensidad de uso de la función Wi-Fi y de la cámara de vídeo integrada. 02. PIEZAS Y ELEMENTOS DE CONTROL 01. Objetivo 02. Botón de encendido/apagado 03. Botón de foto/vídeo 04. Botón del menú 05. Botón de zoom 06. Ocular 07. Rueda de compensación de dioptrías 08. Rosca para trípode 09. Conexión USB-C con indicador LED 01 02 03 04 05 06 08 07 09
  • 27. CHALLENGER-15 · Manual de instrucciones 03 / 2021 E S – 27 26 03. VOLUMEN DE SUMINISTRO 1x Challenger-15 1x cable de carga 1x manual de instrucciones 04. INSTRUCCIONES DE SEGURIDAD La tensión de carga nominal de este producto es de 5 V. Si baja el rendimiento, cargue a tiempo para evitar que se reduzca la vida útil debido a una descarga profunda de la batería. No se recomienda emplear la cámara termográfica durante mucho tiempo en un entorno con temperaturas elevadas. Si la temperatura es demasiado alta, la cámara termográfica pasa al estado de protección contra la sobretemperatura y se apaga automáticamente. La temperatura de servicio recomendada está entre −10 °C y +50 °C. Asegúrese de que la tapa de la conexión USB-C en la parte inferior de la cámara termográfica esté bien cerrada si se usa en entornos con humedad, por ejemplo, en días lluviosos. • Si va a pasar mucho tiempo sin usar el aparato, durante el almacenamiento se debe cargar cada 2 meses, como mínimo, y se guardará en un entorno seco y ventilado. • No cargue el aparato en un entorno por encima de 40 °C. Eliminación de dispositivos eléctricos usados y baterías Los dispositivos eléctricos usados y las baterías no se deben desechar como basura doméstica. Debe depositarlos en su centro de reciclaje local. Las baterías deben estar comple- tamente descargadas cuando se desechen. Marcado CE Los dispositivos cumplen las directivas de la UE: Directiva EMC 2014/35/UE Directiva RoHS 2011/65/UE 05. FUNCIONAMIENTO ¡PRECAUCIÓN! El objetivo del aparato no se debe orientar a fuentes de energía intensas, incluyendo, por ejemplo, dispo- sitivos de láser y el sol. De lo contrario, existe riesgo de dañar los componentes electrónicos del aparato. Los daños originados como consecuencia de la no observancia de las instrucciones no están cubiertos por la garantía.
  • 28. Antes de usar el producto Antes de poner el aparato en funcionamiento, recomendamos una inspección técnica. Compruebe el estado exterior del aparato: La carcasa no debe presentar grietas. Compruebe el estado del objetivo y del ocular: No debe pre- sentar grietas, manchas de grasa, suciedad ni otros depósitos. Compruebe el estado de la batería: Se debe cargar, si es necesario. Compruebe todos los contactos eléctricos: No debe haber sales ni puntos oxidados. 06. ENCENDER Y APAGAR Encienda el aparato pulsando prolongadamente el botón de encendido/apagado. Aparecerá la pantalla de inicio y, pasados unos segundos, se mostrará la imagen. Apague el aparato pulsando prolongadamente el botón de encendido/apagado. 07. MODO DE ESPERA Para aumentar el tiempo de funcionamiento de la batería, el aparato puede pasar al modo en espera. Con el aparato encendido, pulse brevemente el botón de encendido/apagado para acceder al modo en espera. El aparato pasará a modo de espera. Pulse de nuevo brevemente el botón de encendido/apaga- do para reactivar el aparato que se encuentra en modo de espera. El aparato se reactiva inmediatamente, no hay tiempo de espera como al encenderlo después de apagarlo por completo. 08. AJUSTE DE DIOPTRÍAS Con el ajuste de dioptrías, el ocular del aparato se adapta a la capacidad visual individual del usuario. Cierre la tapa del objetivo y gire la rueda de compensación de dioptrías en sentido horario o antihorario hasta que vea con nitidez los símbolos en la pantalla. 09. BARRA DE INFORMACIÓN La barra de información, en la esquina superior derecha de la pantalla, muestra el zoom digital configurado, el espacio en la memoria (no hay barra = vacío) y el estado de carga de la batería integrada (tres barras = completo). Si la Wi-Fi está activada, en la barra de información también aparece el símbolo Wi-Fi del menú.
  • 29. CHALLENGER-15 · Manual de instrucciones 03 / 2021 E S – 29 28 10. SÍMBOLOS DEL MENÚ La barra del menú está situada en el margen izquierdo de la pantalla. Pulse el botón de foto/vídeo o el botón de zoom para pasar de una opción del menú a otra. Pulse el botón del menú para seleccionar una opción. Pulse el botón de zoom prolongadamente para volver a salir del menú. SÍMBOLO Significado Modo de espera automático (apagado/5 min./15 min.) Visibilidad de la barra de información en la esquina superior derecha de la pantalla (encendida/apagada) Seguimiento de puntos calientes/visualización del objeto más cálido (encendido/apagado) Wi-Fi (encendida/apagada) Salida analógica de vídeo (encendida/apagada) Medidor estadiamétrico de la distancia Brillo (niveles 1 a 5) Contraste (niveles 1 a 5) Modos de optimización de la imagen para distintas condiciones ambientales (calor/frío) Modo de calibración / FCC (automática/manual, externa) Corrección de píxeles defectuosos Información del sistema Restablecimiento de los ajustes de fábrica (y consiguiente reinicio) 11. CAMBIO DEL MODO DE PANTALLA Pulse brevemente el botón de menú para cambiar entre los modos de pantalla Blanco caliente (White Hot), Negro caliente (Black Hot), Fusión y Rojo caliente (Red Hot). 01. 02. 03. 04. 01. Blanco caliente - ideal para una dirección precisa 02. Negro caliente – ideal para la detección rápida 03. Fusión - para la detección cercana, por ejemplo, de puentes térmicos 04. Rojo caliente – para detectar rápidamente fuentes de calor
  • 30. 12. ZOOM DIGITAL Pulse brevemente el botón de zoom para acercar la imagen 1 vez, 2 veces, 4 veces y, de nuevo, 1 vez. El factor de aumento del zoom digital se muestra en la barra de información. 13. GRABACIÓN DE IMÁGENES Y VÍDEOS En el modo de visualización normal, pulse brevemente el botón de foto/vídeo para hacer una foto. En el indicador se confirma que se ha hecho la foto. Pulse prolongadamente el botón de foto/vídeo para iniciar una grabación de vídeo. Durante la grabación de vídeo, el tiempo de grabación aparece en la esquina superior izquierda de la pantalla. Vuelva a pulsar prolongadamente el botón de foto/vídeo para finalizar la grabación y guardar el vídeo. En el indicador se confirma que se ha realizado la grabación de vídeo. El espacio restante en la memoria interna se muestra en la barra de información. 14. FUNCIÓN DE CALIBRACIÓN (FCC) Durante el uso, la imagen empeora gradualmente debido a los cambios en la temperatura de fondo del sensor. Esto se debe compensar mediante la calibración periódica del sensor. Para la calibración se activa un cierre interno que emite un débil «clic». Con ello, la imagen se congela brevemente mientras el cierre permanece cerrado. • En el modo de FCC automático, la calibración se realiza auto- máticamente a intervalos establecidos por el aparato. • En el modo de FCC manual, no se ejecuta ninguna calibración automática. El modo manual permite al usuario determinar el momento de breve congelación de la imagen. Inicie la calibración manual pulsando prolongadamente en el botón de zoom, si detecta una reducción de la calidad de la imagen durante el uso. • En el modo de FCC externo tampoco se ejecuta ninguna cali- bración automática. La calibración se lleva a cabo sin el cierre interno y, por tanto, es totalmente silenciosa. Para ello, durante la calibración debe estar cerrada la tapa del objetivo (en susti- tución del cierre interno). Si sospecha que la tapa del objetivo no está cerrada durante la ejecución de la calibración externa, la imagen visualizada tendrá superpuesta la imagen tomada durante la calibración. Esto se puede corregir mediante una nueva calibración adecuada con la tapa del objetivo cerrada.
  • 31. CHALLENGER-15 · Manual de instrucciones 03 / 2021 E S – 31 30 15. MEDIDOR ESTADIAMÉTRICO DE LA DISTANCIA Para el cálculo estadiamétrico de la distancia, primero debe ajus- tar el tamaño (altura) del objeto cuya separación desea medir. Para ello, proceda del siguiente modo: En el menú, seleccione la opción Medidor estadiamétrico de la distancia y confirme pulsando el botón del menú. Pulse el botón de zoom para acceder al submenú Parámetros. Aquí puede emplear el botón de foto/vídeo o el de zoom para elegir entre cuatro tamaños distintos: «lobo», «oso», «ciervo» y «personalizado». Pulse el botón de menú para confirmar su selección. En el punto «Personalizado», puede definir un tamaño de objeto personalizado en el rango de 0,1 a 9,9 m de altura, usando el botón de foto/vídeo o el de zoom. Pulse el botón de menú para confirmar el valor introducido. Para medir la distancia, proceda del siguiente modo: En el menú, seleccione la opción Medidor estadiamétrico de la distancia y confirme pulsando el botón del menú. En la pantalla aparece una larga línea horizontal con una pe- queña línea vertical que apunta hacia arriba. Coloque el punto donde coinciden ambas líneas en el borde superior del objeto que desea medir y pulse el botón del menú (paso 1). La línea vertical parpadeará brevemente y después pasará al lado inferior de la línea horizontal. Coloque el punto donde coinciden ambas líneas en el borde inferior del objeto que desea medir y pulse el botón del menú (paso 2). En la esquina superior izquierda de la pantalla aparecerá la dis- tancia con el objeto. Paso 1 Paso 2 Importante: La exactitud del cálculo de la distancia depende en gran medida de que el tamaño definido para el objeto coincida con el real, además de la estabilidad durante la medición. Los tamaños de los objetivos preconfigurados son únicamente valores indicativos y pueden variar.
  • 32. 16. CORRECCIÓN DE PÍXELES DEFECTUOSOS Si a pesar de la calibración y el reinicio aparece constantemente un error de píxel, éste puede corregirse de la siguiente manera: Seleccione la opción del menú Corrección de píxeles defec- tuosos y ábrala. Pulse el botón del menú para configurar la amplitud de los pasos de ajuste del cursor, para seleccionar el píxel defectuoso (amplitud de pasos: 1, 5 o 10 píxeles). Pulse el botón de menú o de foto/vídeo para seleccionar la dirección de movimiento del cursor (izquierda, derecha, arriba, abajo). Mueva el cursor paso a paso mediante el botón del menú hasta el píxel defectuoso. En la esquina inferior derecha de la pantalla aparecerá una imagen ampliada del píxel seleccionado. Si el menú tapa el píxel defectuoso, se puede desplazar pulsando prolongadamente el botón de foto/vídeo. Cuando se haya seleccionado el píxel, corríjalo pulsando pro- longadamente el botón de foto/vídeo. En la parte inferior de la pantalla se muestra el número de píxeles corregidos. Una pulsación más larga del botón del menú cierra el menú. 17. SEGUIMIENTO DE PUNTOS CALIENTES Si la función de seguimiento de puntos calientes está activada, aparece un punto de mira verde que sigue al objeto más caliente en la pantalla. 18. CARGA DE LA BATERÍA El aparato incluye una batería interna recargable, que se carga a través de la conexión USB-C situada en la parte inferior de la carcasa. El indicador de la batería en la esquina superior derecha de la pantalla muestra el nivel de carga de la batería. Cargue la batería, como muy tarde, cuando aparezca un nivel de carga bajo (símbolo de la batería rojo). Puede cargar la batería con la fuente de alimentación suministra- da o con una portátil, por ejemplo, una batería portátil por USB. Una batería portátil con 4000 mAh de capacidad puede duplicar el tiempo de funcionamiento. El indicador LED situado junto a la conexión USB-C se enciende en rojo durante la carga y cambia a verde cuando la batería está totalmente cargada. El aparato se puede cargar durante el funcionamiento. Se carga más rápida- mente de lo necesario para el funcionamiento actual.
  • 33. CHALLENGER-15 · Manual de instrucciones 03 / 2021 E S – 33 32 19. TRANSMISIÓN DE IMÁGENES Y VÍDEOS Active la función WiFi en el menú. Después de conectar el aparato a su ordenador mediante un cable USB y encender el aparato, funciona como dispositivo de almacenamiento masivo, de modo que puede ver, copiar o borrar sus fotos y vídeos en el ordenador. 20. FUNCIÓN WI-FI Y CONEXIÓN DE LA APLICACIÓN La aplicación y la información sobre la conexión de la aplicación se pueden encontrar en: https://liemke.shop/medien 21. MANTENIMIENTO Los trabajos de conservación se deben realizar dos veces al año, como mínimo, incluyendo las siguientes operaciones. Limpie las superficies exteriores con un paño de algodón para mantener las piezas metálicas y de plástico libres de polvo y suciedad. Para ello se puede usar grasa de silicona. Limpie los contactos del aparato con un disolvente orgánico no engrasante. Compruebe las superficies de cristal del ocular y del objetivo. Si es necesario, elimine el polvo y la arena de las lentes (prefe- rentemente, sin tocar las superficies de cristal). Las superficies exteriores de la óptica solo se pueden limpiar con elementos destinados especialmente a ese fin. 22. SOLUCIÓN DE PROBLEMAS En esta tabla se recogen todos los problemas que pueden apare- cer durante el uso del aparato. Realice todas las comprobaciones y reparaciones recomendadas del modo descrito en la tabla. Si se produce un fallo no recogido en la tabla o si no puede solu- cionar un fallo por sus medios, lleve el aparato al servicio técnico pertinente para su reparación.
  • 34. Mal funcionamiento Posible causa Corrección La cámara termográfi- ca no se enciende. La batería está comple- tamente agotada. Cargue la batería. No se puede operar a través de una fuente de corriente externa. El cable USB está dañado Cambiar el cable USB. La fuente de corriente externa está agotada Cargue la fuente de corriente externa (si es necesario). La imagen no es nítida, presenta líneas vertica- les y un fondo irregular. Calibración requerida Proceda a calibrar la imagen del modo des- crito en el apartado 14 «Función de calibración (FCC)». La imagen es demasia- do oscura. El ajuste del brillo es insuficiente. Ajuste del brillo de la pantalla Aparecen líneas de color en la pantalla o no se observa ninguna imagen. El aparato ha estado expuesto a electricidad estática durante su uso. Después de que haber estado expuesto a la electricidad estática, el aparato se reinicia automáticamente, o bien debe apagarlo y volver a encenderlo manualmente. Baja calidad de la imagen/alcance de detección reducido. Estos problemas pueden aparecer cuando se rea- liza una observación en un día con condiciones meteorológicas adversas (elevada humedad del aire, nieve, lluvia, niebla, etc.). No se puede conectar el smartphone o la tableta al aparato. Se ha cambiado la con- traseña del aparato. Borre la red y restablez- ca la conexión usando la contraseña existente. El aparato está en un área con un gran número de redes WLAN que pueden causar interferencias. Para garantizar un funcionamiento estable de la WLAN (Wi-Fi), el aparato se debe colo- car en otro lugar con una menor red WLAN o sin ninguna. No hay señal WLAN (Wi- Fi) o se ha interrumpido. El aparato está fuera del alcance de la WLAN (Wi-Fi). Hay obstáculos entre el aparato y el receptor (p. ej., paredes de hormigón) Coloque el aparato al alcance de la señal de la WLAN (Wi-Fi), sin obstáculos. Si el aparato se usa a bajas temperaturas, la calidad de la imagen del entorno es peor que con temperaturas por encima del punto de congelación. A temperaturas por encima del punto de congelación, los objetos observados (entorno y fondo) tienen distintas temperaturas debido a la conductividad térmica, por lo que se produce un mayor contraste de temperatura. En consecuencia, la calidad de la imagen que logra el aparato es mayor. Con temperaturas exteriores muy bajas, los objetos observados (fondo) se suelen enfriar hasta una misma temperatura, con lo que se reduce consi- derablemente el contraste de temperaturas y la calidad de la imagen (detalles) es menor. Es una propiedad de las cámaras termográficas.
  • 35. CHALLENGER-15 · Manual de instrucciones 03 / 2021 E S – 35 34
  • 36. FASCINATION TECHNOLOGIE D’IMAGERIE THERMIQUE Chers clients, Conformément à notre volonté de toujours vous offrir des optiques d'imagerie thermique de pointe sur le plan technique et qualitatif, vous trouverez dans notre nouvelle gamme des produits dotés d'une technologie des plus avancées et de paramètres de performance exceptionnels. Avec notre engagement du service après-vente de vous retourner vos optiques en cas d’expédition dans les dix jours ouvrables, ainsi qu'une garantie sur nos produits allant jusqu'à trois ans, nous vous remercions de votre confiance et vous souhaitons une bonne saison de chasse ! Votre équipe LIEMKE !
  • 37. CHALLENGER-15 · Mode d’emploi 03 / 2021 F R – 37 SOMMAIRE CHALLENGER-15 · Mode d'emploi 03 / 2021 F R 36 – 37 01. CARACTÉRISTIQUES TECHNIQUES����������� 38 02. PIÈCES DÉTACHÉES ET ÉLÉMENTS DE COMMANDE ������������������������� 38 03. CONTENU DE LA LIVRAISON���������������� 39 04. CONSIGNES DE SÉCURITÉ������������������� 39 05. UTILISATION ������������������������������� 39 06. MISE EN MARCHE ET ARRÊT ���������������� 40 07. MODE VEILLE����������������������������� 40 08. RÉGLAGE DIOPTRIQUE�������������������� 40 09. BARRE D'INFORMATIONS ������������������� 40 10. SYMBOLES DE MENU ���������������������� 41 11. PASSAGE AU MODE IMAGE ���������������� 41 12. ZOOM NUMÉRIQUE ����������������������� 42 13. ENREGISTREMENT D’ IMAGES ET DE VIDÉOS � 42 14. FONCTION D'ÉTALONNAGE (FCC) ���������� 42 15. TÉLÉMÈTRE STADIAMÉTRIQUE���������������� 43 16. CORRECTION DES PIXELS DÉFECTUEUX������� 44 17. SUIVI DES POINTS CHAUDS (HOT-SPOT-TRACKING)���������������������� 44 18. CHARGEMENT DE LA BATTERIE ������������� 44 19. TRANSFER DE PHOTOS ET DE VIDÉOS�������� 45 20. FONCTION WIFI ET CONNEXION À L’APPLICATION ������������������������� 45 21. ENTRETIEN�������������������������������� 45 22. DEPANNAGE ����������������������������� 45
  • 38. 08 07 09 02 03 04 05 06 01 01. CARACTÉRISTIQUES TECHNIQUES* MODÈLE CHALLENGER-15 Résolution du détecteur 384×288 px Taille des pixels 17 µm Fréquence de balayage 50 Hz Lentille d’objectif 15 mm, focalisation fixe Champ de vision 24,9 ° × 18,8 ° 44,1 m × 33,1 m (H × V) Affichage LCOS, 720 × 560 Grossissement 1,5 Zoom numérique 2x, 4x Durée de vie max. des piles** 6 h Poids 270 g Dimensions 169 × 57 × 60 mm Mémoire interne 8 GB Formats d'enregistrement JPG (photo), MP4 (vidéo) Température de service -10 °C à +50 °C Résistance à l'eau IP67 Portée de détection (Cible : 1,8 m × 0,5 m, P (n) = 99%) 530 m * Sous réserves de modifications visant à améliorer les paramètres techniques de l’appareil. / ** La durée de fonctionnement réelle dépend de la tem- pérature de la batterie et de l'intensité d'utilisation de la fonction WiFi et de l'enregistreur vidéo intégré. 02. PIÈCES DÉTACHÉES ET ÉLÉMENTS DE COMMANDE 01. Objectif 02. Touche Marche / Arrêt 03. Touche Photo/Vidéo 04. Touche Menu 05. Touche Zoom 06. Oculaire 07. Roue de compensation dioptrique 08. Filetage tripode 09. Port USB-C avec affichage à LED
  • 39. CHALLENGER-15 · Mode d’emploi 03 / 2021 F R – 39 38 03. CONTENU DE LA LIVRAISON 1x Challenger-15 1x câble de recharge 1x mode d'emploi 04. CONSIGNES DE SÉCURITÉ La tension de charge nominale du présent produit est de 5V. Veuillez recharger à temps lorsque la puissance est faible pour éviter une perte de la durée de vie due à une décharge pro- fonde de la batterie. Il n’est pas recommandé d’utiliser la caméra d’imagerie ther- mique pendant une longue période dans un environnement ayant des températures élevées. Si la température est trop haute, la caméra d’imagerie thermique entre dans le statut de protec- tion contre les températures élevées et s'éteint automatiquement. La température de service recommandée se situe entre −10 °C et +50 °C. Assurez-vous que le couvercle du connecteur USB-C situé sous la caméra thermique est bien fermé lorsqu'il est utilisé dans un environnement humide, par exemple les jours de pluie. • Si l’appareil n’est pas utilisé sur une période plus longue, il doit être rechargé au moins tous les 2 mois pendant le stockage et stocké dans un environnement sec et ventilé. • L’appareil ne doit pas être rechargé dans un environnement ayant une température supérieure à 40 °C. Élimination des déchets d'équipements électriques et électroniques et des piles Les équipements électriques et électroniques ainsi que les piles ne doivent pas être jetés avec les ordures ménagères. Veuillez les remettre à votre point de collecte local pour leur recyclage. Les piles doivent être complètement déchargées au moment de leur élimination. Marquage CE Les appareils sont conformes aux directives de l'UE : Directive CEM 2014/35/UE Directive sur la restriction de certaines substances dangereuses RoHS 2011/65/EU 05. UTILISATION ATTENTION ! L’objectif de l’appareil ne doit pas être dirigé vers des sources d'énergie intensives, telles que les appareils laser et le soleil. Sinon, il y a le risque que les com- posants électroniques de l'appareil soient endom- magés. Les dommages résultant du non-respect des instructions de service ne sont pas couverts par la garantie.
  • 40. Avant l'utilisation Avant de mettre l'appareil en service, nous recommandons d’ef- fectuer un contrôle technique. Vérifiez l'état extérieur de l'appareil : Le boîtier ne doit présenter aucune fissure. Vérifier l’état de l’objectif et de l’oculaire : Il ne doit présenter aucune fissure, tache de graisse, saleté ou autre dépôt. Vérifier l’état de la batterie : Celle-ci doit être chargée si néces- saire. Vérifier tous les contacts électriques : Il ne doit pas y avoir de sels ni de taches d’oxydation. 06. MISE EN MARCHE ET ARRÊT Mettre l’appareil à l’arrêt en appuyant longtemps sur la touche Marche/Arrêt. L’écran d’accueil apparaît et après quelques secondes, l’image s’affiche. Mettre l’appareil à l’arrêt en appuyant longtemps sur la touche Marche/Arrêt. 07. MODE VEILLE Pour augmenter la durée de vie de la batterie, l’appareil peut être mis en mode veille. Lorsque l’appareil est allumé, appuyer brièvement sur la touche Marche/Arrêt pour accéder au mode veille. L'appareil passe en mode veille. Appuyer à nouveau brièvement sur la touche Marche/Arrêt pour sortir l’appareil du mode veille. La réactivation de l’appareil survient immédiatement, il n’y a aucun temps d’attente comme lors de la mise en marche de l’appareil après qu’il a été complètement mis à l’arrêt. 08. RÉGLAGE DIOPTRIQUE Avec le réglage dioptrique, l'oculaire de l'appareil est ajusté à la vision individuelle de l'utilisateur. Fermer le couvercle de l’objectif et tourner le réglage de la roue de compensation dioptrique dans le sens horaire ou anti-horaire jusqu'à ce que vous puissiez voir clairement les symboles sur l'écran. 09. BARRE D'INFORMATIONS La barre d'informations dans le coin en haut à droite de l'image montre le réglage du zoom numérique, la capacité de la mémoire (aucune barre = non chargée) et l'état de recharge de la batterie intégrée (trois barres = pleinement chargée). Lorsque le Wi-Fi est activé, le symbole Wi-Fi du menu est également affiché dans la barre d'infor- mations.
  • 41. CHALLENGER-15 · Mode d’emploi 03 / 2021 F R – 41 40 10. SYMBOLES DE MENU La barre de menu est située sur le bord gauche de l'écran. Appuyez sur la touche Photo/Vidéo ou sur la touche Zoom pour passer d'un élément de menu à l'autre. Appuyez sur la touche Menu pour sélectionner un élément de menu. Appuyez longuement sur la touche Menu pour quitter à nou- veau le menu. SYMBOLE Signification Veille automatique (arrêt/5 min./15 min.) Visibilité de la barre d'informations dans le coin en haut à droite (marche/arrêt) Suivi de hotspot/affichage de l'objet le plus chaud (marche/arrêt) Wi-Fi (marche/arrêt) Sortie vidéo analogique (marche/arrêt) Télémètre stadiamétrique Luminosité (niveau 1 à 5) Contraste (niveau 1 à 5) Modes d'optimisation des images pour différentes conditions environnementales (chaud/froid) Mode d'étalonnage / FCC (auto/manuel, externe) Correction des pixels défectueux Informations sur le système Restauration des paramètres d'usine (et redémarrage ultérieur) 11. PASSAGE AU MODE IMAGE Appuyez brièvement sur la touche Menu pour basculer entre les modes White Hot (blanc chaud), Black Hot (noir chaud), Fusion et Red Hot (rouge chaud). 01. 02. 03. 04. 01. White Hot – idéal pour une réponse précise 02. Black Hot – idéal pour trouver rapidement 03. Fusion – pour la détection à courte distance, p. ex. les ponts thermiques 04. Red Hot – pour détecter rapidement les sources de chaleur
  • 42. 12. ZOOM NUMÉRIQUE Appuyer brièvement sur la touche de zoom pour zoomer l’image de 1× à 2x, 4× et revenir à 1x. Le facteur de zoom numérique est affiché dans la barre d'informa- tions. 13. ENREGISTREMENT D’ IMAGES ET DE VIDÉOS En mode d'affichage normal, appuyez brièvement sur la touche Photo/Vidéo pour prendre une photo. La sauvegarde de la photo est confirmée à l'écran. Appuyez longuement sur la touche Photo/Vidéo pour lancer un enregistrement vidéo. Pendant l'enregistrement vidéo, la durée d'enregistrement est affichée dans le coin supérieur gauche de l'écran. Appuyer à nouveau longuement sur la touche Photo/Vidéo pour arrêter l'enregistrement et sauvegarder la vidéo. La sauvegarde de la vidéo est confirmée à l'écran. L'espace restant dans la mémoire interne est affiché dans la barre d'informations. 14. FONCTION D'ÉTALONNAGE (FCC) Pendant l’utilisation, l'image se détériore progressivement en raison de la variation de la température de l’arrière-plan du cap- teur. Ceci doit être compensé par un étalonnage périodique du capteur. Pour l'étalonnage, un obturateur interne est actionné, qui provoque un léger bruit de clic. L'image est congelée brièvement pendant que l'obturateur est fermé. • En mode FCC Automatique, l'étalonnage est effectué automati- quement à des intervalles spécifiés par l'appareil. • Aucun étalonnage automatique n'est effectué en mode FCC Manuel. Le mode manuel permet à l'utilisateur de déterminer lui-même le moment de la courte congélation de l'image. Lancez l'étalonnage manuel en appuyant longuement sur la touche Zoom si vous remarquez une détérioration de la qualité de l'image pendant l'utilisation. • Aucun étalonnage automatique n'est non plus effectué en mode FCC Manuel. L'étalonnage a lieu sans l'obturateur interne et est donc totalement silencieux. Pour cela, le cache-ob- jectif doit être fermé pendant l'étalonnage (cela remplace l'obturateur interne). Si le cache-objectif n'est pas fermé par inadvertance lors de l'étalonnage externe, l'image affichée est recouverte d'une image fixe de la scène affichée pendant l'étalonnage. Ceci peut aussi être corrigé à l’aide d’un autre étalonnage correct avec le cache-objectif fermé.
  • 43. CHALLENGER-15 · Mode d’emploi 03 / 2021 F R – 43 42 15. TÉLÉMÈTRE STADIAMÉTRIQUE Pour la détermination de la distance stadiamétrique, vous devez d'abord définir la valeur cible (hauteur) de la cible à laquelle vous voulez mesurer la distance. Pour ce faire, procédez comme suit : Sélectionnez l'élément de menu Télémètre stadiamétrique dans le menu et confirmez avec la touche Menu. Appuyez sur la touche Zoom pour accéder au sous-menu Paramètres. Ici, vous pouvez choisir entre quatre valeurs cibles différentes « loup », « ours », « cerf » et « individuel » avec la touche Photo/ Vidéo ou la touche Zoom. Confirmez votre sélection avec la touche Menu. Dans la sous-rubrique « individuel », vous pouvez définir une valeur cible individuelle dans la plage de 0,1 à 9,9 m de hauteur avec la touche Photo/Vidéo ou la touche Zoom. Confirmez la valeur définie à l'aide de la touche Menu. Pour mesurer la distance, procédez comme suit : Sélectionnez l'élément de menu Télémètre stadiamétrique dans le menu et confirmez avec la touche Menu. Une longue ligne horizontale avec une courte ligne verticale pointant vers le haut apparaît sur l'image affichée. Placez l'intersection des deux lignes sur le bord supérieur de la cible à mesurer et appuyez sur la touche Menu (étape 1). La ligne verticale clignote brièvement, puis passe en bas de la ligne horizontale. Placez l'intersection des deux lignes sur le bord inférieur de la cible à mesurer et appuyez de nouveau sur la touche Menu (étape 2). La distance à la cible est alors affichée dans le coin supérieur gauche de l'écran. Étape 1 Étape 2 Veuillez noter : la précision de la détermination de la distance dépend essentiellement de la concordance entre la valeur cible définie et la valeur cible réelle et de la douceur de la main pen- dant le processus de mesure. Les valeurs des cibles préconfigurées ne sont qu'indicatives et peuvent varier.
  • 44. 16. CORRECTION DES PIXELS DÉFECTUEUX Si une erreur de pixel se produit continuellement malgré l’étalon- nage et le redémarrage, vous pouvez la corriger comme suit : Sélectionnez l'élément de menu Correction des pixels défec- tueux et ouvrez-le. Appuyez sur la touche Menu pour régler le pas du mouvement du curseur afin de sélectionner le pixel défectueux (pas 1, 5 ou 10 pixels). Appuyez sur la touche Menu ou Photo/Vidéo pour sélectionner la direction de déplacement du curseur (gauche, droite, haut, bas). Déplacez le curseur sur le pixel défectueux, pas à pas, en utili- sant la touche Menu. Une vue agrandie du pixel sélectionné est affichée dans le coin inférieur droit de l'écran. Si le pixel défectueux est masqué par l'affichage du menu, l'affichage peut être miroitée par une longue pression sur la touche Photo/Vidéo. Lorsque le pixel est sélectionné, corrigez-le par une longue pression sur la touche Photo/Vidéo. Sur le bord inférieur de l'image, le nombre de pixels corrigés est affiché. Une pression longue sur la touche Menu permet de fermer le menu. 17. SUIVI DES POINTS CHAUDS (HOT-SPOT-TRACKING) Lorsque la fonction Suivi de hotspot est activé, un réticule vert apparaît pour suivre l'objet le plus chaud à l'écran. 18. CHARGEMENT DE LA BATTERIE L’appareil est équipé d'une batterie interne rechargeable, qui se charge via le port USB-C situé sur l’arrière-plan du boîtier. L'indica- teur de batterie dans le coin supérieur droite de l'écran indique le niveau de charge de la batterie. Veuillez recharger la batterie au plus tard lorsqu'une charge de batterie faible (icône de batterie rouge) est affichée. Vous pouvez charger la batterie en utilisant l'adaptateur secteur fourni ou un adaptateur secteur portable tel qu'une banque d'alimentation USB. Une banque d’alimentation d'une capacité de 4000 mAh peut doubler la durée d'exécution. L'affichage à LED à côté du port USB-C s'allume en rouge pendant la recharge et passe au vert lorsque la batterie est complètement chargée. L'appareil peut être chargé en cours de fonctionnement. Il se charge plus rapidement qu'il n'est nécessaire pour un fonctionne- ment normal.
  • 45. CHALLENGER-15 · Mode d’emploi 03 / 2021 F R – 45 44 19. TRANSFER DE PHOTOS ET DE VIDÉOS Activez la fonction WiFi dans le menu. Une fois l'appareil connecté à votre ordinateur avec un câble USB et mis en marche, il agit comme un dispositif de stockage de masse afin que vous puissiez visualiser, copier ou supprimer vos photos et vidéos sur votre ordinateur. 20. FONCTION WIFI ET CONNEXION À L’APPLICATION L’application et les informations sur la connexion de l’application se trouvent sur: https://liemke.shop/medien 21. ENTRETIEN Les travaux d’entretien doivent être effectués au moins deux fois par an et comprennent les travaux suivants. Essuyer les surfaces extérieures avec un chiffon en coton pour garder les parties métalliques et plastiques exemptes de pous- sière et de saleté. Pour cela, il est possible d’utiliser de la graisse de silicone. Nettoyer les contacts de l'appareil avec un solvant organique non gras. Vérifier les surfaces en verre de l'oculaire et de l'objectif. Si nécessaire, enlever la poussière et le sable des lentilles (de préférence sans toucher les surfaces en verre). Les surfaces extérieures des optiques ne doivent être nettoyées qu'avec des outils spécialement conçus à cet effet. 22. DEPANNAGE Le présent tableau répertorie tous les problèmes que vous pouvez rencontrer en utilisant l'appareil. Effectuer toutes les vérifications et réparations recommandées comme décrit dans le tableau. Si une erreur ne figurant pas dans le tableau survient ou si vous ne pouvez pas la corriger vous-même, l'appareil doit être remis au centre de service responsable pour réparation.
  • 46. Dysfonctionnement Cause possible Correction La caméra thermique ne peut pas être mise en marche. La batterie est complè- tement déchargée. Charger la batterie. Ne peut pas être exploitée à partir d’une source d’énergie externe. Le câble USB est endom- magé. Remplacer le câble USB. La source de courant externe est déchargée Charger la source de courant externe (si nécessaire). L’image est floue, avec des lignes verticales et un arrière-plan irrégulier. Etalonnage nécessaire Effectuer l’étalonnage de l'image comme décrit dans la section 14 « Fonction d'étalonnage (FCC) ». L’image est trop sombre. Le réglage de la lumino- sité est trop faible. Réglage de la luminosité de l’écran Des lignes colorées apparaissent sur l'écran ou aucune image n'est affichée. L'appareil a été exposé à de l'électricité statique pendant son fonctionne- ment. Une fois l’appareil expo- sé à l’électricité statique, soit l'appareil redémarre automatiquement, soit il faut l'éteindre et le rallu- mer manuellement. Faible qualité d’image/ portée de détection réduite. Ces problèmes peuvent ensuite survenir si l’obser- vation a lieu un jour où les conditions météoro- logiques sont difficiles (forte humidité, chute de neige, pluie, brouillard, etc.). Le smartphone ou la tablette du PC ne peuvent pas être raccordés au niveau de l’appareil. Le mot de passe de l’appareil a été modifié. Supprimer le réseau et rétablir la connexion en utilisant le mot de passe existant. L’appareil se trouve dans une zone avec un grand nombre de réseaux WLAN sus- ceptibles de créer des interférences. Pour garantir un fonc- tionnement stable du WLAN, l’appareil doit être placé dans un autre endroit ayant moins de réseau ou même pas de réseau WLAN du tout. Aucun signal WLAN pré- sent ou interrompu. L’appareil se trouve en dehors de la portée du WLAN. Il existe des obstacles entre l’équi- pement et le récepteur (par exemple des murs en béton) Placer l'appareil dans la ligne de vue et la portée du signal WLAN. Lorsqu'elle est utilisée à basse température, la qualité de l'image des environs est moins bonne qu'à des tempé- ratures supérieuresau point de congélation. À des températures supérieures au point de congélation, les objets observés (environnement et arrière-plan) sont différemment chauds en raison de la conductivité thermique, de sorte qu'il en résulte un contraste de température élevé. En conséquence, la qualité d'image obtenue par l'appareil est meilleure. Lorsque les températures extérieures sont basses, les objets observés (arrière-plan) se refroidissent généralement à peu près à la même tempéra- ture, de sorte que le contraste de température est considérablement réduit et que la qualité de l'image (détails) est donc plus faible. C'est une caractéristique des caméras thermiques.
  • 47. CHALLENGER-15 · Mode d’emploi 03 / 2021 F R – 47 46
  • 48. FASCYNACJA TECHNIKĄ TERMOWIZYJNĄ Drodzy Klienci, Opierając się na tym, aby zawsze oferować Państwu wiodące pod względem technicznym i jakościowym rozwiązania optyki termowizyjnej, w ramach naszego nowego asortymentu proponujemy produkty o najnowocześniejszych rozwiązaniach technologicznych i najlepszych z możliwych parametrach wydajnościowych. Składając obietnicę zwrotu urządzenia optycznego w ciągu dziesięciu dni roboczych od momentu jego otrzymania, jak również oferując nawet 3-letnią gwarancję na nasze produkty, dziękujemy Państwu za zaufanie i życzymy udanych łowów! Zespół LIEMKE.
  • 49. CHALLENGER-15 · Instrukcja obsługi 03 / 2021 P L – 49 SPIS TREŚCI CHALLENGER-15 · Instrukcja obsługi 03 / 2021 P L 48 – 49 01. DANE TECHNICZNE������������������������� 50 02. ELEMENTY SKŁADOWE I OBSŁUGOWE ������� 50 03. ZAKRES DOSTAWY ������������������������� 51 04. INFORMACJE DOTYCZĄCE BEZPIECZEŃSTWA ������������������������� 51 05. EKSPLOATACJA���������������������������� 51 06. WŁĄCZANIE I WYŁĄCZANIE ���������������� 52 07. TRYB CZUWANIA �������������������������� 52 08. REGULATOR DIOPTRII ���������������������� 52 09. PASEK INFORMACJI����������������������� 52 10. SYMBOLE W MENU������������������������� 53 11. PRZEŁĄCZANIE TRYBU OBRAZU ������������� 53 12. ZOOM CYFROWY ������������������������� 54 13. WYKONYWANIE ZDJĘĆ I NAGRYWANIE FILMÓW�������������������� 54 14. FUNKCJA KALIBRACJI (FCC)���������������� 54 15. DALMIERZ STADIAMETRYCZNY ������������� 55 16. KOREKTA BŁĘDU PIKSELI ������������������� 56 17. FUNKCJA ŚLEDZENIA GORĄCEGO PUNKTU �� 56 18. ŁADOWANIE AKUMULATORA �������������� 56 19. TRANSFER ZDJĘĆ I FILMÓW ���������������� 57 20. FUNKCJA WIFI I POŁĄCZENIE APLIKACJI ���� 57 21. KONSERWACJA���������������������������� 57 22. USUWANIE USTEREK ����������������������� 57
  • 50. 01. DANE TECHNICZNE* MODEL CHALLENGER-15 Rozdzielczość detektora 384×288 p Rozmiar piksela 17 µm Częstotliwość wyświetlania 50 Hz Soczewka obiektywu 15 mm, stała ogniskowa Pole widzenia 24,9 ° × 18,8 ° 44,1 m × 33,1 m(poz. × pion.) Wyświetlacz LCOS, 720 × 560 Powiększenie 1,5 Zoom cyfrowy 2x, 4x Maks. czas pracy akumulatora** 6 h Waga 270 g Wymiary 169 × 57 × 60 mm Pamięć wewnętrzna 8 GB Formaty rejestracji JPG (zdjęcia), MP4 (wideo) Temperatura pracy −10°C do +50°C Wodoodporność IP67 Zasięg detekcji (Cel: 1,8 m × 0,5 m, P (n) = 99%) 530 m * Zastrzegamy sobie prawo do wprowadzania zmian w celu poprawy parametrów technicznych urządzenia. / ** Rzeczywisty czas pracy zależy od temperatury akumulatora oraz intensywności korzystania z funkcji WiFi i wbudowanego rejestratora wideo. 02. ELEMENTY SKŁADOWE I OBSŁUGOWE 01. Obiektyw 02. Przycisk włączania/wyłączania 03. Przycisk foto/wideo 04. Przycisk menu 05. Przycisk zoom 06. Okular 07. Regulator dioptrii 08. Gwint statywu 09. Przyłącze USB-C ze wskaźnikiem LED 08 07 09 02 03 04 05 06 01
  • 51. CHALLENGER-15 · Instrukcja obsługi 03 / 2021 P L – 51 50 03. ZAKRES DOSTAWY 1x Challenger-15 1x przewód ładujący 1 × instrukcja obsługi 04. INFORMACJE DOTYCZĄCE BEZPIECZEŃSTWA Nominalna wartość napięcia ładowania dla tego produktu wynosi 5 V. Aby zapobiec skróceniu żywotności akumulatora na skutek głębokiego rozładowania, należy w odpowiednim czasie go ładować z zachowaniem niskiej mocy. Nie zaleca się długotrwałego użytkowania kamery termowizyjnej w środowisku o wysokiej temperaturze. W przypadku zbyt wysokiej temperatury kamera termowizyjna przejdzie w stan zabezpiecze- nia przed wysoką temperaturą i zostanie automatycznie wyłączo- na. Zalecana temperatura pracy wynosi od −10°C do +50°C. W przypadku używania kamery w wilgotnym środowisku, np. w deszczowe dni, należy się upewnić, że osłona przyłącza USB-C w dolnej części kamery termowizyjnej jest szczelnie zamknięta. • W przypadku gdy urządzenie nie jest używane przez dłuższy czas, należy je przechowywać w suchym i wentylowanym po- mieszczeniu, a także co najmniej co 2 miesiące ładować. • Urządzenia nie należy ładować w środowisku o temperaturze powyżej 40°C. Utylizacja zużytych urządzeń elektrycznych i akumulatorów Zużytych urządzeń elektrycznych i akumulatorów nie wolno wyrzucać wraz z odpadami domowymi. Należy je oddać do lokalnego punktu zbiórki odpadów. Przy utylizacji akumulato- ry powinny być całkowicie rozładowane. Oznaczenie CE Urządzenia są zgodne z dyrektywami UE: Dyrektywa EMC 2014/35/UE Dyrektywa RoHS 2011/65/UE 05. EKSPLOATACJA PRZESTROGA! Obiektywu urządzenia nie należy kierować na źródła energii o dużej intensywności, takie jak lasery i słoń- ce. W przeciwnym razie istnieje ryzyko uszkodzenia elektronicznych podzespołów urządzenia. Uszkodze- nia powstałe na skutek nieprzestrzegania instrukcji obsługi nie są objęte gwarancją.
  • 52. Przed użyciem Przed uruchomieniem urządzenia zaleca się przeprowadzenie kontroli technicznej. Sprawdzić stan zewnętrzny urządzenia: obudowa nie może mieć żadnych pęknięć. Sprawdzić stan obiektywu i okularu: nie mogą występować żadne pęknięcia, tłuste plamy, zabrudzenia ani osady. Sprawdzić stan akumulatora: w razie potrzeby należy go nała- dować. Sprawdzić wszystkie styki elektryczne: nie mogą występować na nich sól ani utlenione plamy. 06. WŁĄCZANIE I WYŁĄCZANIE Włączyć urządzenie poprzez naciśnięcie i przytrzymanie przyci- sku włączania/wyłączania. Pojawi się ekran początkowy, a po kilku sekundach zostanie wy- świetlony obraz. Wyłączyć urządzenie poprzez naciśnięcie i przytrzymanie przyci- sku włączania/wyłączania. 07. TRYB CZUWANIA Aby wydłużyć czas pracy akumulatora, urządzenie można przełą- czyć w tryb czuwania. Gdy urządzenie jest włączone, należy nacisnąć przycisk włączania/wyłączania, aby przejść do trybu czuwania. Urządzenie przechodzi w tryb czuwania. Ponownie nacisnąć przycisk włączania/wyłączania, aby wybu- dzić urządzenie z trybu czuwania. Urządzenie zostaje wybudzone w sposób natychmiastowy – nie ma czasu oczekiwania, jak przy włączaniu urządzenia po jego całkowitym wyłączeniu. 08. REGULATOR DIOPTRII Regulator dioptrii umożliwia dostosowanie okularu urządzenia do wzroku danego użytkownika. Założyć osłonę obiektywu i obracać regulator dioptrii w lewo lub prawo, aż symbole na wyświetlaczu staną się dobrze widoczne. 09. PASEK INFORMACJI Pasek informacji w prawym górnym rogu ekranu wskazuje ustawiony zoom cyfrowy, miejsce w pamięci (brak paska = pamięć pusta) i poziom naładowania wbudowanego akumulatora (trzy paski = pełny). Przy aktywnym WiFi na pasku informacji wyświetlany jest również symbol WiFi z menu.
  • 53. CHALLENGER-15 · Instrukcja obsługi 03 / 2021 P L – 53 52 10. SYMBOLE W MENU Pasek menu znajduje się na lewej krawędzi ekranu. Naciskać przycisk foto/wideo lub zoom, aby przełączać między punktami menu. W celu wybrania punktu menu nacisnąć przycisk menu. Nacisnąć i przytrzymać przycisk menu, aby wyjść z menu. SYMBOL Znaczenie Automatyczny tryb czuwania (wył./5 min./15 min.) Widoczność paska informacji w prawym górnym rogu ekranu (wł./wył.) Funkcja śledzenia gorącego punktu/wyświetlanie naj- cieplejszego obiektu (wł./wył.) WiFi (wł./wył.) Analogowe wyjście wideo (wł./wył.) Dalmierz stadiametryczny Jasność (poziom 1 do 5) Kontrast (poziom 1 do 5) Tryby optymalizacji obrazu dla różnych warunków otoczenia (ciepłe/zimne) Tryb kalibracji / FCC (auto/ręcznie, zewnętrzne) Korekta błędu pikseli Informacje systemowe Przywracanie ustawień domyślnych (i ponowne uruchomienie) 11. PRZEŁĄCZANIE TRYBU OBRAZU Krótko nacisnąć przycisk menu, aby przełączać między trybami obrazu: White Hot, Black Hot, Fusion i Red Hot. 01. 02. 03. 04. 01. White Hot – idealny do precyzyjnego reagowania 02. Black Hot – idealny do szybkiego wyszukiwania 03. Fusion – do detekcji w bliskiej odległości, np. mostków termicz- nych 04. Red Hot – do szybkiej detekcji źródeł ciepła
  • 54. 12. ZOOM CYFROWY Nacisnąć przycisk powiększania/pomniejszania, aby powiększyć obraz z 1× do 2×, 4× i z powrotem pomniejszyć do 1×. Współczynnik zoomu cyfrowego jest wyświetlany na pasku infor- macji. 13. WYKONYWANIE ZDJĘĆ I NAGRYWANIE FILMÓW Aby zrobić zdjęcie, w normalnym trybie wyświetlania krótko nacisnąć przycisk foto/wideo. Zapisanie wykonanego zdjęcia zostanie potwierdzone na wyświe- tlaczu. Aby rozpocząć nagrywanie filmu, nacisnąć i przytrzymać przy- cisk foto/wideo. Podczas nagrywania filmu w lewym górnym rogu wyświetlacza pokazywany jest czas nagrywania. Ponownie nacisnąć i przytrzymać przycisk foto/wideo, aby zakończyć nagrywanie i zapisać film. Zapisanie nagranego filmu zostanie potwierdzone na wyświetla- czu. Pozostałe miejsce w pamięci wewnętrznej zostanie wyświetlone na pasku informacji. 14. FUNKCJA KALIBRACJI (FCC) Podczas użytkowania obraz ulega stopniowemu pogorszeniu na skutek zmieniającej się temperatury tła czujnika. Należy to skom- pensować poprzez okresową kalibrację czujnika. W celu kalibracji uruchamiana jest wewnętrzna migawka, słychać wówczas ciche kliknięcie. Wyświetlany obraz jest przez chwilę zatrzymywany, gdy migawka jest zamknięta. • W trybie FCC Auto kalibracja jest automatycznie przeprowadza- na przez urządzenie w określonych odstępach czasu. • W trybie FCC Ręcznym automatyczna kalibracja nie jest wy- konywana. Tryb ręczny umożliwia użytkownikowi samodzielne określenie momentu chwilowego zatrzymania obrazu. Jeśli podczas korzystania z urządzenia wystąpi pogorszona jakość obrazu, należy uruchomić kalibrację ręczną, naciskając i przytrzymując przycisk zoom. • W trybie FCC Zewnętrznym automatyczna kalibracja również nie jest wykonywana. Kalibracja następuje bez użycia wewnętrznej migawki, dlatego jest całkowicie bezgłośna. Podczas kalibracji nasadka obiektywu musi być zamknięta (zastępuje ona we- wnętrzną migawkę). Jeśli podczas przeprowadzania kalibracji zewnętrznej nasadka obiektywu nie będzie zamknięta, na wyświetlany obraz będzie po niej nałożony kadr sceny widocz- nej podczas kalibracji. Można to skorygować poprzez ponowną, prawidłową kalibrację z zamkniętą nasadką obiektywu.
  • 55. CHALLENGER-15 · Instrukcja obsługi 03 / 2021 P L – 55 54 15. DALMIERZ STADIAMETRYCZNY W celu stadiametrycznego pomiaru odległości należy najpierw ustawić wielkość docelową (wysokość) celu, od którego odległość chce się zmierzyć. W tym celu należy postępować w następujący sposób: W menu wybrać punkt Dalmierz stadiametryczny i potwierdzić przyciskiem menu. Nacisnąć przycisk zoom, aby przejść do podmenu Parametry. Można w nim za pomocą przycisku foto/wideo lub zoom przełą- czać między czterema wielkościami docelowymi „wilk”, „niedź- wiedź”, „jeleń” i „indywidualna”. Potwierdzić wybór za pomocą przycisku menu. W podpunkcie „indywidualna” można za pomocą przycisku foto/ wideo lub zoom zdefiniować indywidualną wysokość docelową w zakresie od 0,1 do 9,9 m. Potwierdzić ustawioną wartość za pomocą przycisku menu. W celu pomiaru odległości należy postępować w następujący sposób: W menu wybrać punkt Dalmierz stadiametryczny i potwierdzić przyciskiem menu. Na wyświetlanym obrazie pojawi się długa, pozioma linia z odcho- dzącą od niej do góry krótszą, pionową linia. Umieścić punkt przecięcia obu linii na górnej krawędzi mierzone- go celu i nacisnąć przycisk menu (krok 1). Pionowa linia krótko miga, a następnie przesuwa się na dolną stronę linii poziomej. Teraz należy umieścić punkt przecięcia obu linii na dolnej krawędzi mierzonego celu i ponownie nacisnąć przycisk menu (krok 2). W lewej górnej krawędzi ekranu zostanie wyświetlona odległość od celu. Krok 1 Krok 2 Należy uwzględnić: Dokładność pomiaru odległości zależy w znacznej mierze od zgodności zdefiniowanej i faktycznej wysoko- ści celu oraz od stabilności trzymania urządzenia podczas pomiaru. Rozmiary wstępnie skonfigurowanych celów są jedynie wartościa- mi orientacyjnymi i mogą się różnić od wartości rzeczywistych.
  • 56. 16. KOREKTA BŁĘDU PIKSELI Jeśli mimo kalibracji i ponownego uruchomienia występuje błąd pikseli, można go usunąć w następujący sposób: Wybrać punkt menu Korekta błędu pikseli i otworzyć go. Nacisnąć przycisk menu, aby ustawić wartość krokową prze- sunięcia kursora podczas wyboru błędnych pikseli (wartości krokowe 1, 5 i 10 pikseli). Nacisnąć przycisk menu lub foto/wideo, aby wybrać kierunek ruchu kursora (w lewo, w prawo, do góry, na dół). Za pomocą przycisku menu krokowo przesunąć przycisk menu na błędny piksel. Wybrany piksel będzie wyświetlany w powiększeniu w prawym dolnym rogu wyświetlacza. Jeśli błędny piksel jest zakrywany przez symbole menu, wskazania można odbić lustrzanie poprzez długie naciśnięcie przycisku foto/wideo. Po wybraniu piksela należy go skorygować poprzez naciśnięcie i przytrzymanie przycisku foto/wideo. W dolnej części ekranu zostaje wyświetlona liczba skorygowanych pikseli. Długie naciśnięcie przycisku menu zamyka menu. 17. FUNKCJA ŚLEDZENIA GORĄCEGO PUNKTU Gdy funkcja śledzenia gorącego punktu jest aktywna, pojawia się zielony celownik, który podąża za najcieplejszym punktem na ekranie. 18. ŁADOWANIE AKUMULATORA Urządzenie jest wyposażone w wewnętrzny akumulator, który ładuje się za pośrednictwem przyłącza USB-C znajdującego się w spodniej części obudowy. Wskaźnik akumulatora w prawym górnym rogu wyświetlacza dostarcza informacji na temat poziomu naładowania. Ładowanie akumulatora należy przeprowadzić najpóźniej wte- dy, gdy wskaźnik pokaże niski poziom naładowania (czerwony symbol baterii). Akumulator można ładować za pomocą dołączonego zasilacza sieciowego lub przenośnego źródła zasilania, np. powerban- ku USB. Powerbank o pojemności 4000 mAh może dwukrotnie wydłużyć czas pracy. Wskaźnik LED obok przyłącza USB C świeci na czerwono podczas ładowania i zmienia kolor na zielony, gdy akumulator zostanie w pełni naładowany. Urządzenie można łado- wać podczas pracy. Ładuje się ono szybciej niż jest to wymagane do normalnej pracy.
  • 57. CHALLENGER-15 · Instrukcja obsługi 03 / 2021 P L – 57 56 19. TRANSFER ZDJĘĆ I FILMÓW Aktywuj funkcję WiFi w menu. Po podłączeniu urządzenia do komputera za pomocą przewodu USB i włączeniu urządzenia jest ono wykrywane jako urządzenie pamięci masowej, dzięki czemu można przeglądać, kopiować lub usuwać zdjęcia i filmy na komputerze. 20. FUNKCJA WIFI I POŁĄCZENIE APLIKACJI Aplikację i informacje o połączeniu z aplikacją można znaleźć pod adresem: https://liemke.shop/medien 21. KONSERWACJA Prace konserwacyjne należy przeprowadzać co najmniej dwa razy w roku. Obejmują one następujące czynności. Powierzchnie zewnętrzne części metalowych i z tworzywa sztucznego oczyścić z pyłu i zabrudzeń bawełnianą ściereczką. Można do tego celu użyć oleju silikonowego. Styki urządzenia należy czyścić za pomocą nietłustego rozpusz- czalnika organicznego. Sprawdzić szklane powierzchnie okularu i obiektywu. W razie potrzeby usunąć pył i piasek z soczewek (najlepiej bez doty- kania szklanych powierzchni). Zewnętrzne powierzchnie optyki można czyścić wyłącznie za pomocą środków przeznaczonych specjalnie do tego celu. 22. USUWANIE USTEREK Poniższa tabela zawiera listę wszystkich usterek, które mogą wy- stąpić podczas korzystania z urządzenia. Przeprowadzić wszystkie zalecane kontrole i naprawy zgodnie z opisem w tabeli. W przypadku wystąpienia usterki, której nie ma w tabeli, lub w przypadku niemożności samodzielnego usunięcia usterki, urzą- dzenie należy przekazać do naprawy do odpowiedniego punktu serwisowego.
  • 58. Usterka Możliwa przyczyna Środek zaradczy Kamery termowizyjnej nie można włączyć. Akumulator jest całkowi- cie rozładowany. Naładować akumulator. Urządzenie nie działa po podłączeniu do zewnętrznego źródła zasilania. Przewód USB jest uszko- dzony. Wymienić przewód USB. Zewnętrzne źródło zasila- nia jest rozładowane. Naładować zewnętrzne źródło zasilania (w razie potrzeby). Obraz jest niewyraźny, z pionowymi liniami i nierównym tłem. Wymagana kalibracja Przeprowadzić kalibrację obrazu zgodnie z opisem w rozdziale 14. „Funkcja kalibracji (FCC)”. Obraz jest ciemny. Zbyt niskie ustawienie jasności. Wyregulować poziom jasności wyświetlacza. Na wyświetlaczu widocz- ne są kolorowe linie lub obraz w ogóle nie jest wyświetlany. Podczas eksploata- cji urządzenie było wystawione na działanie ładunków elektrosta- tycznych. W przypadku wysta- wienia urządzenia na działanie ładunków elektrostatycznych nastąpi albo automa- tyczne ponowne uru- chomienie urządzenia, albo konieczne będzie jego ręczne wyłączenie i ponowne włączenie. Niska jakość obrazu / zmniejszony zasięg detekcji. Usterki te mogą wystąpić w przypadku przepro- wadzania obserwacji w trudnych warunkach pogodowych (duża wilgotność powietrza, opady śniegu, deszczu, mgła itp.). Do urządzenia nie moż- na podłączyć smartfona ani tabletu. Hasło urządzenia zostało zmienione. Usunąć sieć i ponownie nawiązać połączenie przy użyciu istniejącego hasła. Urządzenie znajduje się na obszarze, na którym występuje duża liczba sieci WLAN, które mogą powodować zakłócenia. Aby zapewnić stabilną pracę w trybie WLAN, urządzenie należy przenieść w inne miejsce z mniejszą liczbą lub brakiem sieci WLAN. Brak sygnału WLAN lub został on przerwany. Urządzenie znajduje się poza zasięgiem sieci WLAN. Pomiędzy urzą- dzeniem a odbiornikiem występują przeszkody (np. betonowe ściany). Umieścić urządzenie w polu widzenia i w zasię- gu sygnału WLAN. W przypadku użytkowa- nia w niskich tempera- turach jakość obrazu otoczenia jest gorsza niż w temperaturach powyżejzera. W temperaturach powyżej zera obserwowane obiekty (otoczenie i tło) mają różną ciepłotę ze względu na przewodność cieplną, co skutkuje wysokim kontrastem temperaturowym. W rezultacie jakość obrazu uzyskiwana przez urządze- nie jest wyższa. W niskich temperaturach zewnętrznych obser- wowane obiekty (tło) schładzają się zazwyczaj do mniej więcej tej samej temperatury, przez co kontrast temperaturowy ulega znacznemu zmniej- szeniu, a tym samym jakość obrazu (szczegóły) jest niższa. Jest to cecha charakterystyczna dla kamer termowizyjnych.