SlideShare una empresa de Scribd logo
1 de 259
Descargar para leer sin conexión
1. osCommerce Online Merchant v2.3 . . . . . . . . . . . . . . . . . . . . . . . . . . . . . . . . . . . . . . . . . . . . . . . . . . . . . . . . . . . . . . . . . . . . . . . . . . 4
1.1 Introduction . . . . . . . . . . . . . . . . . . . . . . . . . . . . . . . . . . . . . . . . . . . . . . . . . . . . . . . . . . . . . . . . . . . . . . . . . . . . . . . . . . . . . . . . 4
1.2 New Installation . . . . . . . . . . . . . . . . . . . . . . . . . . . . . . . . . . . . . . . . . . . . . . . . . . . . . . . . . . . . . . . . . . . . . . . . . . . . . . . . . . . . . 4
1.2.1 Requirements . . . . . . . . . . . . . . . . . . . . . . . . . . . . . . . . . . . . . . . . . . . . . . . . . . . . . . . . . . . . . . . . . . . . . . . . . . . . . . . . . . 4
1.2.2 Pre-Installation Steps . . . . . . . . . . . . . . . . . . . . . . . . . . . . . . . . . . . . . . . . . . . . . . . . . . . . . . . . . . . . . . . . . . . . . . . . . . . . 5
1.2.3 Installation Procedure . . . . . . . . . . . . . . . . . . . . . . . . . . . . . . . . . . . . . . . . . . . . . . . . . . . . . . . . . . . . . . . . . . . . . . . . . . . 7
1.2.4 Post-Installation Steps . . . . . . . . . . . . . . . . . . . . . . . . . . . . . . . . . . . . . . . . . . . . . . . . . . . . . . . . . . . . . . . . . . . . . . . . . . . 11
1.3 Catalog (Frontend) . . . . . . . . . . . . . . . . . . . . . . . . . . . . . . . . . . . . . . . . . . . . . . . . . . . . . . . . . . . . . . . . . . . . . . . . . . . . . . . . . . . 12
1.3.1 Template Layout and Header Tags . . . . . . . . . . . . . . . . . . . . . . . . . . . . . . . . . . . . . . . . . . . . . . . . . . . . . . . . . . . . . . . . . 12
1.4 Administration Tool (Backend) . . . . . . . . . . . . . . . . . . . . . . . . . . . . . . . . . . . . . . . . . . . . . . . . . . . . . . . . . . . . . . . . . . . . . . . . . . 14
1.4.1 Configuration . . . . . . . . . . . . . . . . . . . . . . . . . . . . . . . . . . . . . . . . . . . . . . . . . . . . . . . . . . . . . . . . . . . . . . . . . . . . . . . . . . 14
1.4.1.1 Administrators . . . . . . . . . . . . . . . . . . . . . . . . . . . . . . . . . . . . . . . . . . . . . . . . . . . . . . . . . . . . . . . . . . . . . . . . . . . . 14
1.4.1.2 My Store . . . . . . . . . . . . . . . . . . . . . . . . . . . . . . . . . . . . . . . . . . . . . . . . . . . . . . . . . . . . . . . . . . . . . . . . . . . . . . . . . 15
1.4.1.3 Minimum Values . . . . . . . . . . . . . . . . . . . . . . . . . . . . . . . . . . . . . . . . . . . . . . . . . . . . . . . . . . . . . . . . . . . . . . . . . . . 17
1.4.1.4 Maximum Values . . . . . . . . . . . . . . . . . . . . . . . . . . . . . . . . . . . . . . . . . . . . . . . . . . . . . . . . . . . . . . . . . . . . . . . . . . 18
1.4.1.5 Images . . . . . . . . . . . . . . . . . . . . . . . . . . . . . . . . . . . . . . . . . . . . . . . . . . . . . . . . . . . . . . . . . . . . . . . . . . . . . . . . . . 19
1.4.1.6 Customer Details . . . . . . . . . . . . . . . . . . . . . . . . . . . . . . . . . . . . . . . . . . . . . . . . . . . . . . . . . . . . . . . . . . . . . . . . . . 21
1.4.1.7 Shipping & Packaging . . . . . . . . . . . . . . . . . . . . . . . . . . . . . . . . . . . . . . . . . . . . . . . . . . . . . . . . . . . . . . . . . . . . . . 21
1.4.1.8 Product Listing . . . . . . . . . . . . . . . . . . . . . . . . . . . . . . . . . . . . . . . . . . . . . . . . . . . . . . . . . . . . . . . . . . . . . . . . . . . . 23
1.4.1.9 Stock . . . . . . . . . . . . . . . . . . . . . . . . . . . . . . . . . . . . . . . . . . . . . . . . . . . . . . . . . . . . . . . . . . . . . . . . . . . . . . . . . . . 24
1.4.1.10 Logging . . . . . . . . . . . . . . . . . . . . . . . . . . . . . . . . . . . . . . . . . . . . . . . . . . . . . . . . . . . . . . . . . . . . . . . . . . . . . . . . 25
1.4.1.11 Cache . . . . . . . . . . . . . . . . . . . . . . . . . . . . . . . . . . . . . . . . . . . . . . . . . . . . . . . . . . . . . . . . . . . . . . . . . . . . . . . . . . 25
1.4.1.12 Email Options . . . . . . . . . . . . . . . . . . . . . . . . . . . . . . . . . . . . . . . . . . . . . . . . . . . . . . . . . . . . . . . . . . . . . . . . . . . . 26
1.4.1.13 Download . . . . . . . . . . . . . . . . . . . . . . . . . . . . . . . . . . . . . . . . . . . . . . . . . . . . . . . . . . . . . . . . . . . . . . . . . . . . . . . 28
1.4.1.14 GZIP Compression . . . . . . . . . . . . . . . . . . . . . . . . . . . . . . . . . . . . . . . . . . . . . . . . . . . . . . . . . . . . . . . . . . . . . . . . 29
1.4.1.15 Sessions . . . . . . . . . . . . . . . . . . . . . . . . . . . . . . . . . . . . . . . . . . . . . . . . . . . . . . . . . . . . . . . . . . . . . . . . . . . . . . . . 30
1.4.2 Catalog . . . . . . . . . . . . . . . . . . . . . . . . . . . . . . . . . . . . . . . . . . . . . . . . . . . . . . . . . . . . . . . . . . . . . . . . . . . . . . . . . . . . . . . 31
1.4.2.1 Categories & Products . . . . . . . . . . . . . . . . . . . . . . . . . . . . . . . . . . . . . . . . . . . . . . . . . . . . . . . . . . . . . . . . . . . . . . 32
1.4.2.2 Product Attributes . . . . . . . . . . . . . . . . . . . . . . . . . . . . . . . . . . . . . . . . . . . . . . . . . . . . . . . . . . . . . . . . . . . . . . . . . . 37
1.4.2.3 Manufacturers . . . . . . . . . . . . . . . . . . . . . . . . . . . . . . . . . . . . . . . . . . . . . . . . . . . . . . . . . . . . . . . . . . . . . . . . . . . . 39
1.4.2.4 Reviews . . . . . . . . . . . . . . . . . . . . . . . . . . . . . . . . . . . . . . . . . . . . . . . . . . . . . . . . . . . . . . . . . . . . . . . . . . . . . . . . . 40
1.4.2.5 Specials . . . . . . . . . . . . . . . . . . . . . . . . . . . . . . . . . . . . . . . . . . . . . . . . . . . . . . . . . . . . . . . . . . . . . . . . . . . . . . . . . 42
1.4.2.6 Products Expected . . . . . . . . . . . . . . . . . . . . . . . . . . . . . . . . . . . . . . . . . . . . . . . . . . . . . . . . . . . . . . . . . . . . . . . . . 44
1.4.3 Customer Section . . . . . . . . . . . . . . . . . . . . . . . . . . . . . . . . . . . . . . . . . . . . . . . . . . . . . . . . . . . . . . . . . . . . . . . . . . . . . . 45
1.4.3.1 Customers . . . . . . . . . . . . . . . . . . . . . . . . . . . . . . . . . . . . . . . . . . . . . . . . . . . . . . . . . . . . . . . . . . . . . . . . . . . . . . . 45
1.4.3.2 Orders . . . . . . . . . . . . . . . . . . . . . . . . . . . . . . . . . . . . . . . . . . . . . . . . . . . . . . . . . . . . . . . . . . . . . . . . . . . . . . . . . . 49
1.4.4 Locations & Taxes . . . . . . . . . . . . . . . . . . . . . . . . . . . . . . . . . . . . . . . . . . . . . . . . . . . . . . . . . . . . . . . . . . . . . . . . . . . . . . 51
1.4.5 Localization . . . . . . . . . . . . . . . . . . . . . . . . . . . . . . . . . . . . . . . . . . . . . . . . . . . . . . . . . . . . . . . . . . . . . . . . . . . . . . . . . . . 55
1.4.5.1 Currencies . . . . . . . . . . . . . . . . . . . . . . . . . . . . . . . . . . . . . . . . . . . . . . . . . . . . . . . . . . . . . . . . . . . . . . . . . . . . . . . 55
1.4.5.2 Languages . . . . . . . . . . . . . . . . . . . . . . . . . . . . . . . . . . . . . . . . . . . . . . . . . . . . . . . . . . . . . . . . . . . . . . . . . . . . . . . 58
1.4.5.3 Orders Status . . . . . . . . . . . . . . . . . . . . . . . . . . . . . . . . . . . . . . . . . . . . . . . . . . . . . . . . . . . . . . . . . . . . . . . . . . . . . 59
1.4.6 Reports . . . . . . . . . . . . . . . . . . . . . . . . . . . . . . . . . . . . . . . . . . . . . . . . . . . . . . . . . . . . . . . . . . . . . . . . . . . . . . . . . . . . . . 62
1.4.7 Tools . . . . . . . . . . . . . . . . . . . . . . . . . . . . . . . . . . . . . . . . . . . . . . . . . . . . . . . . . . . . . . . . . . . . . . . . . . . . . . . . . . . . . . . . 63
1.4.7.1 Database Backup Manager . . . . . . . . . . . . . . . . . . . . . . . . . . . . . . . . . . . . . . . . . . . . . . . . . . . . . . . . . . . . . . . . . . 64
1.4.7.2 Banner Manager . . . . . . . . . . . . . . . . . . . . . . . . . . . . . . . . . . . . . . . . . . . . . . . . . . . . . . . . . . . . . . . . . . . . . . . . . . 66
1.4.7.3 Cache Control . . . . . . . . . . . . . . . . . . . . . . . . . . . . . . . . . . . . . . . . . . . . . . . . . . . . . . . . . . . . . . . . . . . . . . . . . . . . 69
1.4.7.4 Define Languages . . . . . . . . . . . . . . . . . . . . . . . . . . . . . . . . . . . . . . . . . . . . . . . . . . . . . . . . . . . . . . . . . . . . . . . . . 70
1.4.7.5 File Manager . . . . . . . . . . . . . . . . . . . . . . . . . . . . . . . . . . . . . . . . . . . . . . . . . . . . . . . . . . . . . . . . . . . . . . . . . . . . . 71
1.4.7.6 Send Email . . . . . . . . . . . . . . . . . . . . . . . . . . . . . . . . . . . . . . . . . . . . . . . . . . . . . . . . . . . . . . . . . . . . . . . . . . . . . . . 71
1.4.7.7 Newsletter Manager . . . . . . . . . . . . . . . . . . . . . . . . . . . . . . . . . . . . . . . . . . . . . . . . . . . . . . . . . . . . . . . . . . . . . . . . 72
1.4.7.8 Server Info . . . . . . . . . . . . . . . . . . . . . . . . . . . . . . . . . . . . . . . . . . . . . . . . . . . . . . . . . . . . . . . . . . . . . . . . . . . . . . . 74
1.4.7.9 Who's Online . . . . . . . . . . . . . . . . . . . . . . . . . . . . . . . . . . . . . . . . . . . . . . . . . . . . . . . . . . . . . . . . . . . . . . . . . . . . . 74
1.5 Tips . . . . . . . . . . . . . . . . . . . . . . . . . . . . . . . . . . . . . . . . . . . . . . . . . . . . . . . . . . . . . . . . . . . . . . . . . . . . . . . . . . . . . . . . . . . . . . 75
1.5.1 Tips for Admin . . . . . . . . . . . . . . . . . . . . . . . . . . . . . . . . . . . . . . . . . . . . . . . . . . . . . . . . . . . . . . . . . . . . . . . . . . . . . . . . . 75
1.5.1.1 Tip * Change Product Model Length . . . . . . . . . . . . . . . . . . . . . . . . . . . . . . . . . . . . . . . . . . . . . . . . . . . . . . . . . . . 75
1.5.1.2 Tip * Reset the Order ID . . . . . . . . . . . . . . . . . . . . . . . . . . . . . . . . . . . . . . . . . . . . . . . . . . . . . . . . . . . . . . . . . . . . . 76
1.5.1.3 Tip * Search Engine Optimization . . . . . . . . . . . . . . . . . . . . . . . . . . . . . . . . . . . . . . . . . . . . . . . . . . . . . . . . . . . . . 76
1.5.1.4 Tip * Upload Image to Own Folder . . . . . . . . . . . . . . . . . . . . . . . . . . . . . . . . . . . . . . . . . . . . . . . . . . . . . . . . . . . . . 78
1.5.2 Tips for Catalog . . . . . . . . . . . . . . . . . . . . . . . . . . . . . . . . . . . . . . . . . . . . . . . . . . . . . . . . . . . . . . . . . . . . . . . . . . . . . . . . 79
1.5.2.1 Tip * Add Back Button to product_info . . . . . . . . . . . . . . . . . . . . . . . . . . . . . . . . . . . . . . . . . . . . . . . . . . . . . . . . . . 79
1.5.2.2 Tip * Add Cart Contents to Each Page . . . . . . . . . . . . . . . . . . . . . . . . . . . . . . . . . . . . . . . . . . . . . . . . . . . . . . . . . . 79
1.5.2.3 Tip * Add Catagory Horizontal Rule . . . . . . . . . . . . . . . . . . . . . . . . . . . . . . . . . . . . . . . . . . . . . . . . . . . . . . . . . . . . 80
1.6 Errors & Fixes . . . . . . . . . . . . . . . . . . . . . . . . . . . . . . . . . . . . . . . . . . . . . . . . . . . . . . . . . . . . . . . . . . . . . . . . . . . . . . . . . . . . . . 80
1.6.1 Error * 1016 errno 145 . . . . . . . . . . . . . . . . . . . . . . . . . . . . . . . . . . . . . . . . . . . . . . . . . . . . . . . . . . . . . . . . . . . . . . . . . . . 81
1.6.2 Error * Cannot Add Header Information . . . . . . . . . . . . . . . . . . . . . . . . . . . . . . . . . . . . . . . . . . . . . . . . . . . . . . . . . . . . . . 81
1.6.3 Error * Failed Opening . . . . . . . . . . . . . . . . . . . . . . . . . . . . . . . . . . . . . . . . . . . . . . . . . . . . . . . . . . . . . . . . . . . . . . . . . . . 82
1.6.4 Error * Fatal Class . . . . . . . . . . . . . . . . . . . . . . . . . . . . . . . . . . . . . . . . . . . . . . . . . . . . . . . . . . . . . . . . . . . . . . . . . . . . . . 82
1.6.5 Error * Internal Server . . . . . . . . . . . . . . . . . . . . . . . . . . . . . . . . . . . . . . . . . . . . . . . . . . . . . . . . . . . . . . . . . . . . . . . . . . . 82
1.6.6 Error * Miss Argument . . . . . . . . . . . . . . . . . . . . . . . . . . . . . . . . . . . . . . . . . . . . . . . . . . . . . . . . . . . . . . . . . . . . . . . . . . . 82
1.6.7 Error * Multiple n Letters In Display . . . . . . . . . . . . . . . . . . . . . . . . . . . . . . . . . . . . . . . . . . . . . . . . . . . . . . . . . . . . . . . . . 82
1.6.8 Error * MYI 1016 . . . . . . . . . . . . . . . . . . . . . . . . . . . . . . . . . . . . . . . . . . . . . . . . . . . . . . . . . . . . . . . . . . . . . . . . . . . . . . . 83
1.6.9 Error * Mysql Access Denied for User . . . . . . . . . . . . . . . . . . . . . . . . . . . . . . . . . . . . . . . . . . . . . . . . . . . . . . . . . . . . . . . 84
1.6.10 Error * Mysql Too Many Connections . . . . . . . . . . . . . . . . . . . . . . . . . . . . . . . . . . . . . . . . . . . . . . . . . . . . . . . . . . . . . . 84
1.6.11 Error * Set Time . . . . . . . . . . . . . . . . . . . . . . . . . . . . . . . . . . . . . . . . . . . . . . . . . . . . . . . . . . . . . . . . . . . . . . . . . . . . . . . 84
1.6.12 Error * SSL - This page contains secure and non secure items . . . . . . . . . . . . . . . . . . . . . . . . . . . . . . . . . . . . . . . . . . 84
1.6.13 Error * Write to Config . . . . . . . . . . . . . . . . . . . . . . . . . . . . . . . . . . . . . . . . . . . . . . . . . . . . . . . . . . . . . . . . . . . . . . . . . . 87
1.7 Add-Ons . . . . . . . . . . . . . . . . . . . . . . . . . . . . . . . . . . . . . . . . . . . . . . . . . . . . . . . . . . . . . . . . . . . . . . . . . . . . . . . . . . . . . . . . . . . 88
1.7.1 Authentication . . . . . . . . . . . . . . . . . . . . . . . . . . . . . . . . . . . . . . . . . . . . . . . . . . . . . . . . . . . . . . . . . . . . . . . . . . . . . . . . . 88
1.7.1.1 Yubico . . . . . . . . . . . . . . . . . . . . . . . . . . . . . . . . . . . . . . . . . . . . . . . . . . . . . . . . . . . . . . . . . . . . . . . . . . . . . . . . . . 88
1.7.1.1.1 YubiKey . . . . . . . . . . . . . . . . . . . . . . . . . . . . . . . . . . . . . . . . . . . . . . . . . . . . . . . . . . . . . . . . . . . . . . . . . . . . 88
1.7.2 Payment Modules . . . . . . . . . . . . . . . . . . . . . . . . . . . . . . . . . . . . . . . . . . . . . . . . . . . . . . . . . . . . . . . . . . . . . . . . . . . . . . 93
1.7.2.1 2Checkout . . . . . . . . . . . . . . . . . . . . . . . . . . . . . . . . . . . . . . . . . . . . . . . . . . . . . . . . . . . . . . . . . . . . . . . . . . . . . . . 93
1.7.2.1.1 2Checkout Hosted Payment . . . . . . . . . . . . . . . . . . . . . . . . . . . . . . . . . . . . . . . . . . . . . . . . . . . . . . . . . . . . . 93
1.7.2.2 Authorize.net . . . . . . . . . . . . . . . . . . . . . . . . . . . . . . . . . . . . . . . . . . . . . . . . . . . . . . . . . . . . . . . . . . . . . . . . . . . . . 96
1.7.2.2.1 Advanced Integration Method (AIM) . . . . . . . . . . . . . . . . . . . . . . . . . . . . . . . . . . . . . . . . . . . . . . . . . . . . . . . 96
1.7.2.2.2 Simple Integration Method (SIM) . . . . . . . . . . . . . . . . . . . . . . . . . . . . . . . . . . . . . . . . . . . . . . . . . . . . . . . . . 98
1.7.2.3 ChronoPay . . . . . . . . . . . . . . . . . . . . . . . . . . . . . . . . . . . . . . . . . . . . . . . . . . . . . . . . . . . . . . . . . . . . . . . . . . . . . . . 99
1.7.2.3.1 ChronoPay Hosted Payment Page . . . . . . . . . . . . . . . . . . . . . . . . . . . . . . . . . . . . . . . . . . . . . . . . . . . . . . . 100
1.7.2.4 ClickandBuy . . . . . . . . . . . . . . . . . . . . . . . . . . . . . . . . . . . . . . . . . . . . . . . . . . . . . . . . . . . . . . . . . . . . . . . . . . . . . . 101
1.7.2.4.1 ClickandBuy E-Payment . . . . . . . . . . . . . . . . . . . . . . . . . . . . . . . . . . . . . . . . . . . . . . . . . . . . . . . . . . . . . . . . 102
1.7.2.5 ipayment . . . . . . . . . . . . . . . . . . . . . . . . . . . . . . . . . . . . . . . . . . . . . . . . . . . . . . . . . . . . . . . . . . . . . . . . . . . . . . . . . 104
1.7.2.5.1 ipayment Credit Card . . . . . . . . . . . . . . . . . . . . . . . . . . . . . . . . . . . . . . . . . . . . . . . . . . . . . . . . . . . . . . . . . . 104
1.7.2.6 PayPal . . . . . . . . . . . . . . . . . . . . . . . . . . . . . . . . . . . . . . . . . . . . . . . . . . . . . . . . . . . . . . . . . . . . . . . . . . . . . . . . . . 105
1.7.2.6.1 PayPal Express Checkout . . . . . . . . . . . . . . . . . . . . . . . . . . . . . . . . . . . . . . . . . . . . . . . . . . . . . . . . . . . . . . 107
1.7.2.6.2 PayPal Website Payments Pro (UK) Direct Payments . . . . . . . . . . . . . . . . . . . . . . . . . . . . . . . . . . . . . . . . . 109
1.7.2.6.3 PayPal Website Payments Pro (UK) Express Checkout . . . . . . . . . . . . . . . . . . . . . . . . . . . . . . . . . . . . . . . 111
1.7.2.6.4 PayPal Website Payments Pro (US) Direct Payments . . . . . . . . . . . . . . . . . . . . . . . . . . . . . . . . . . . . . . . . . 113
1.7.2.6.5 PayPal Website Payments Standard . . . . . . . . . . . . . . . . . . . . . . . . . . . . . . . . . . . . . . . . . . . . . . . . . . . . . . 114
1.7.2.7 Sage Pay . . . . . . . . . . . . . . . . . . . . . . . . . . . . . . . . . . . . . . . . . . . . . . . . . . . . . . . . . . . . . . . . . . . . . . . . . . . . . . . . 116
1.7.2.7.1 Sage Pay Form . . . . . . . . . . . . . . . . . . . . . . . . . . . . . . . . . . . . . . . . . . . . . . . . . . . . . . . . . . . . . . . . . . . . . . 118
1.7.2.7.2 Sage Pay Server . . . . . . . . . . . . . . . . . . . . . . . . . . . . . . . . . . . . . . . . . . . . . . . . . . . . . . . . . . . . . . . . . . . . . 121
1.7.2.7.3 Sage Pay Direct . . . . . . . . . . . . . . . . . . . . . . . . . . . . . . . . . . . . . . . . . . . . . . . . . . . . . . . . . . . . . . . . . . . . . . 123
1.7.2.8 WorldPay . . . . . . . . . . . . . . . . . . . . . . . . . . . . . . . . . . . . . . . . . . . . . . . . . . . . . . . . . . . . . . . . . . . . . . . . . . . . . . . . 127
1.7.2.8.1 WorldPay Select Junior . . . . . . . . . . . . . . . . . . . . . . . . . . . . . . . . . . . . . . . . . . . . . . . . . . . . . . . . . . . . . . . . 127
1.7.3 Shipping Modules . . . . . . . . . . . . . . . . . . . . . . . . . . . . . . . . . . . . . . . . . . . . . . . . . . . . . . . . . . . . . . . . . . . . . . . . . . . . . . 129
1.7.3.1 Flat Rate Shipping . . . . . . . . . . . . . . . . . . . . . . . . . . . . . . . . . . . . . . . . . . . . . . . . . . . . . . . . . . . . . . . . . . . . . . . . . 130
1.7.3.2 Per Item Shipping . . . . . . . . . . . . . . . . . . . . . . . . . . . . . . . . . . . . . . . . . . . . . . . . . . . . . . . . . . . . . . . . . . . . . . . . . . 131
1.7.3.3 Table Rate Shipping . . . . . . . . . . . . . . . . . . . . . . . . . . . . . . . . . . . . . . . . . . . . . . . . . . . . . . . . . . . . . . . . . . . . . . . . 132
1.7.3.4 United State Parcel Service (USPS) . . . . . . . . . . . . . . . . . . . . . . . . . . . . . . . . . . . . . . . . . . . . . . . . . . . . . . . . . . . 134
1.7.3.5 Zone Rates Shipping . . . . . . . . . . . . . . . . . . . . . . . . . . . . . . . . . . . . . . . . . . . . . . . . . . . . . . . . . . . . . . . . . . . . . . . 136
1.7.4 Order Total . . . . . . . . . . . . . . . . . . . . . . . . . . . . . . . . . . . . . . . . . . . . . . . . . . . . . . . . . . . . . . . . . . . . . . . . . . . . . . . . . . . . 137
1.8 Upgrade Guides . . . . . . . . . . . . . . . . . . . . . . . . . . . . . . . . . . . . . . . . . . . . . . . . . . . . . . . . . . . . . . . . . . . . . . . . . . . . . . . . . . . . . 138
1.8.1 v2.2 to v2.3.0 . . . . . . . . . . . . . . . . . . . . . . . . . . . . . . . . . . . . . . . . . . . . . . . . . . . . . . . . . . . . . . . . . . . . . . . . . . . . . . . . . . 138
1.8.1.1 (A) (SEC) Administration Tool Log-In Update . . . . . . . . . . . . . . . . . . . . . . . . . . . . . . . . . . . . . . . . . . . . . . . . . . . . 139
1.8.1.2 (SQL) (UP) Update Database Field Lengths . . . . . . . . . . . . . . . . . . . . . . . . . . . . . . . . . . . . . . . . . . . . . . . . . . . . . 140
1.8.1.3 (AC) (COMPAT) Fix Timezone Warning Messages for PHP v5.3 . . . . . . . . . . . . . . . . . . . . . . . . . . . . . . . . . . . . . 141
1.8.1.4 (AC) (COMPAT) Use Perl-Compatible Regular Expressions for PHP v5.3 . . . . . . . . . . . . . . . . . . . . . . . . . . . . . . 142
1.8.1.5 (C) (SEC) Add Customer Session Token to Forms . . . . . . . . . . . . . . . . . . . . . . . . . . . . . . . . . . . . . . . . . . . . . . . . 154
1.8.1.6 (C) (BUG) Validate Removal of Customer Address . . . . . . . . . . . . . . . . . . . . . . . . . . . . . . . . . . . . . . . . . . . . . . . . 163
1.8.1.7 (AC) (BUG) Sanitize Parameters . . . . . . . . . . . . . . . . . . . . . . . . . . . . . . . . . . . . . . . . . . . . . . . . . . . . . . . . . . . . . . 163
1.8.1.8 (A) (UP) Add Support for Basic HTTP Authentication . . . . . . . . . . . . . . . . . . . . . . . . . . . . . . . . . . . . . . . . . . . . . . 171
1.8.1.9 (C) (UP) Generate a New Shopping Cart ID When Restoring Products . . . . . . . . . . . . . . . . . . . . . . . . . . . . . . . . 180
1.8.1.10 (C) (BUG) Fix Navigation History Session Content . . . . . . . . . . . . . . . . . . . . . . . . . . . . . . . . . . . . . . . . . . . . . . . 181
1.8.1.11 (AC) (UP) Improve Validation of E-Mail Addresses . . . . . . . . . . . . . . . . . . . . . . . . . . . . . . . . . . . . . . . . . . . . . . . 181
1.8.1.12 (AC) (UP) Code Cleanup . . . . . . . . . . . . . . . . . . . . . . . . . . . . . . . . . . . . . . . . . . . . . . . . . . . . . . . . . . . . . . . . . . . 186
1.8.1.13 (A) (UP) Update Define Languages Page . . . . . . . . . . . . . . . . . . . . . . . . . . . . . . . . . . . . . . . . . . . . . . . . . . . . . . 187
1.8.1.14 (C) (BUG) Verify Shopping Cart Product Attribute Combinations . . . . . . . . . . . . . . . . . . . . . . . . . . . . . . . . . . . . 191
1.8.1.15 (AC) (UP) Remove PHP3 Compatibility Code . . . . . . . . . . . . . . . . . . . . . . . . . . . . . . . . . . . . . . . . . . . . . . . . . . . 192
1.8.1.16 (AC) (UP) Improve IP Address Detection . . . . . . . . . . . . . . . . . . . . . . . . . . . . . . . . . . . . . . . . . . . . . . . . . . . . . . . 200
1.8.1.17 (A) (BUG) Don't Show Empty Menu Entries . . . . . . . . . . . . . . . . . . . . . . . . . . . . . . . . . . . . . . . . . . . . . . . . . . . . . 204
1.8.1.18 (AC) (UP) Add htaccess Protection to the Images Directory . . . . . . . . . . . . . . . . . . . . . . . . . . . . . . . . . . . . . . . . 204
1.8.1.19 (C) (UP) Optimize Tax Calculations . . . . . . . . . . . . . . . . . . . . . . . . . . . . . . . . . . . . . . . . . . . . . . . . . . . . . . . . . . . 204
1.8.1.20 (AC) (UP) Improve Force Cookie Usage in Sessions . . . . . . . . . . . . . . . . . . . . . . . . . . . . . . . . . . . . . . . . . . . . . 207
1.8.1.21 (A) (BUG) Fix Automatic Removal of Manufacturer Images . . . . . . . . . . . . . . . . . . . . . . . . . . . . . . . . . . . . . . . . 207
1.8.1.22 (A) (UP) Add API Version Tag to Modules . . . . . . . . . . . . . . . . . . . . . . . . . . . . . . . . . . . . . . . . . . . . . . . . . . . . . . 208
1.8.1.23 (C) (UP) Hide Currencies and Languages Info Boxes for Single Currencies and Languages . . . . . . . . . . . . . . . 209
1.8.1.24 (A) (UP) Hide Language Selection if Only One Language is Installed . . . . . . . . . . . . . . . . . . . . . . . . . . . . . . . . . 210
1.8.1.25 (C) (BUG) Fix Retrieval of Special Product Prices . . . . . . . . . . . . . . . . . . . . . . . . . . . . . . . . . . . . . . . . . . . . . . . . 211
1.8.1.26 (A) (BUG) Fix HTML E-Mails . . . . . . . . . . . . . . . . . . . . . . . . . . . . . . . . . . . . . . . . . . . . . . . . . . . . . . . . . . . . . . . . 212
1.8.1.27 (A) (BUG) Improve Saving of Module Parameters . . . . . . . . . . . . . . . . . . . . . . . . . . . . . . . . . . . . . . . . . . . . . . . . 213
1.8.1.28 (AC) (UP) Add Pre-Populated List of Currencies . . . . . . . . . . . . . . . . . . . . . . . . . . . . . . . . . . . . . . . . . . . . . . . . . 214
1.8.1.29 (A) (SQL) (NEW) Introduce Security Directory Permissions Feature . . . . . . . . . . . . . . . . . . . . . . . . . . . . . . . . . . 217
1.8.1.30 (AC) (SQL) (NEW) Introduce Action Recorder Feature . . . . . . . . . . . . . . . . . . . . . . . . . . . . . . . . . . . . . . . . . . . . 219
1.8.1.31 (AC) (UP) Cleanup Language Definitions . . . . . . . . . . . . . . . . . . . . . . . . . . . . . . . . . . . . . . . . . . . . . . . . . . . . . . 227
1.8.1.32 (AC) (NEW) Move Installation Checks to New Security Checks Modules . . . . . . . . . . . . . . . . . . . . . . . . . . . . . . 230
1.8.1.33 (A) (UP) Introduce Windows Compatible is_writable() Function . . . . . . . . . . . . . . . . . . . . . . . . . . . . . . . . . . . . . 236
1.8.1.34 (A) (UP) Bypass HTTP Authentication for IIS Webservers . . . . . . . . . . . . . . . . . . . . . . . . . . . . . . . . . . . . . . . . . 242
1.8.1.35 (AC) (UP) Update PHP_SELF Value . . . . . . . . . . . . . . . . . . . . . . . . . . . . . . . . . . . . . . . . . . . . . . . . . . . . . . . . . . 243
1.8.1.36 (A) (NEW) Introduce Easy Store Logo Uploader . . . . . . . . . . . . . . . . . . . . . . . . . . . . . . . . . . . . . . . . . . . . . . . . . 244
1.8.1.37 (AC) (SQL) (UP) Update Password Hashing to Phpass . . . . . . . . . . . . . . . . . . . . . . . . . . . . . . . . . . . . . . . . . . . 245
1.8.1.38 (C) (BUG) Fix Length Check of Customer Passwords . . . . . . . . . . . . . . . . . . . . . . . . . . . . . . . . . . . . . . . . . . . . . 250
1.8.1.39 (C) (BUG) Fix Notice When Products Without Attributes are Added to the Shopping Cart . . . . . . . . . . . . . . . . . 251
1.8.1.40 (C) (BUG) Verify Languages Currency Exists . . . . . . . . . . . . . . . . . . . . . . . . . . . . . . . . . . . . . . . . . . . . . . . . . . . 252
1.8.1.41 (C) (BUG) Allow Quoted Words to be Searched . . . . . . . . . . . . . . . . . . . . . . . . . . . . . . . . . . . . . . . . . . . . . . . . . 252
1.8.2 v2.3.0 to v2.3.1 . . . . . . . . . . . . . . . . . . . . . . . . . . . . . . . . . . . . . . . . . . . . . . . . . . . . . . . . . . . . . . . . . . . . . . . . . . . . . . . . 253
1.8.2.1 (C) (UP) Confirm New Product Reviews . . . . . . . . . . . . . . . . . . . . . . . . . . . . . . . . . . . . . . . . . . . . . . . . . . . . . . . . 253
1.8.2.2 (C) (A) (BUG) Fix a PHP Notice in Phpass . . . . . . . . . . . . . . . . . . . . . . . . . . . . . . . . . . . . . . . . . . . . . . . . . . . . . . 254
1.8.2.3 (C) (BUG) Fix Reviews Box Language Definition . . . . . . . . . . . . . . . . . . . . . . . . . . . . . . . . . . . . . . . . . . . . . . . . . 255
1.8.2.4 (A) (BUG) Fix Pre-Defined Australian Dollar Currency Code . . . . . . . . . . . . . . . . . . . . . . . . . . . . . . . . . . . . . . . . . 256
1.8.2.5 (A) (UP) Label the HTML Content field for Large Product Images . . . . . . . . . . . . . . . . . . . . . . . . . . . . . . . . . . . . . 256
1.8.2.6 (C) (UP) XHTML Fixes for Popup Pages . . . . . . . . . . . . . . . . . . . . . . . . . . . . . . . . . . . . . . . . . . . . . . . . . . . . . . . . 257
1.8.2.7 (C) (UP) Update Version to v2.3.1 . . . . . . . . . . . . . . . . . . . . . . . . . . . . . . . . . . . . . . . . . . . . . . . . . . . . . . . . . . . . . 259
osCommerce Online Merchant v2.3
Copyright
Copyright (c) 2006-2010 osCommerce. All rights reserved. http://www.oscommerce.com
Authors
Harald Ponce de Leon
John Fitchett
Melinda Odom
Table of Contents
Introduction
New Installation
Catalog (Frontend)
Administration Tool (Backend)
Tips
Errors & Fixes
Add-Ons
Upgrade Guides
Introduction
Introduction
osCommerce Online Merchant is a free online shop e-commerce solution under continuous development by the open source community. Its
core features allows store owners to setup, run, and maintain their online stores with absolutely no software costs or license fees involved,
and with no programming or technical knowledge needed.
The success of osCommerce Online Merchant is secured by a dedicated team that focuses on the core features, and by an active
community of store owners and developers that focus on additional features. To date, the community has provided over 5,000 add-ons that
are available for free, that extend on the core features of osCommerce Online Merchant to meet the needs of individual store owners.
osCommerce Online Merchant is built with the powerful PHP web scriping language and uses the fast MySQL database server for the online
store data. The combination of PHP and MySQL allows osCommerce Online Merchant to run on any webserver environment that supports
PHP and MySQL, which includes Linux, Solaris, BSD, Mac OS X, and Microsoft Windows environments.
osCommerce was started in March 2000 and has since matured to a solution that is powering many thousands of live shops around the
world.
New Installation
New Installation
Requirements
Pre-Installation Steps
Installation Procedure
Post-Installation Steps
Requirements
Requirements
osCommerce Online Merchant can be installed on any PHP enabled web server that can connect to a MySQL database. This includes
shared servers, dedicated servers, and local installations running on Linux, Unix, BSD, Mac OS X, and Microsoft Windows operating
systems.
Web Server
PHP
MySQL Database Server
Web Server
The web server must support PHP either as a module or allow execution of CGI scripts. For performance reasons FastCGI is recommended
over CGI.
PHP
osCommerce Online Merchant is compatible with PHP 4 and PHP 5. For performance and security reasons it is recommended to use the
latest PHP 5 version on the web server.
The following PHP options are recommended to be set in the php.ini configuration file:
register_globals Off
magic_quotes_gpc Off
file_uploads On
session.auto_start Off
session.use_trans_sid Off
The following PHP extensions are mandatory:
MySQL MySQL database extension.
The following PHP extensions are recommended:
GD Image processing module.
cURL Network communication library.
OpenSSL Encryption library.
MySQL Database Server
The minimum MySQL version required is v3.23. It is recommended to use the latest MySQL 4 or MySQL 5 version on the database server.
The following MySQL storage engines are supported:
MyISAM Default storage engine.
Pre-Installation Steps
osCommerce Online Merchant is a web based solution that needs its relevant files to exist on the web server. The files can be copied to the
web server by extracting the download package on your computer and uploading its contents to the web server via FTP, or by copying the
download package to the web server directly and extracting its contents there.
Copying the Files to the Web Server
Using FTP to Copy the Download Package Contents to the Web Server
Directly Extracting the Download Package on the Web Server
File Permissions
Using FTP to Change File Permissions
Changing File Permissions Directly on the Server
Database
Web Server and Database Server Details
Web Server Details
Database Server Details
Copying the Files to the Web Server
The contents of the download package need to be copied to the public HTML directory the web server is serving from.
Examples of public HTML directories are:
/home/shinyredapples/public_html/
/srv/www/htdocs/
/usr/local/htdocs/
/var/www/vhosts/shinyredapples.com/httpdocs/
The contents of the download package once extracted is:
catalog (directory)
CHANGELOG
community_docs.pdf
documentation.pdf
extras (directory)
LICENSE
STANDARD
upgrade.html
Using FTP to Copy the Download Package Contents to the Web Server
The download package of osCommerce Online Merchant should be saved and extracted on your computer to reveal its contents. The
directory must be copied to the public HTML directory on the web server.catalog
This can be achieved on most FTP clients by dragging the directory from your local file browser panel to the remote panel listing thecatalog
files on the web server.
All PHP files must be uploaded in ASCII mode (not in Binary mode).
Directly Extracting the Download Package on the Web Server
The download package of osCommerce Online Merchant should be saved and extracted on the web server to reveal its contents. The
directory must be copied to the public HTML directory.catalog
This can be achieved with the following terminal command:
cp -R catalog /path/to/public/html/directory/
File Permissions
The following files need to be writable by the web server.
Files Web Server Writable
catalog/includes/configure.php
catalog/admin/includes/configure.php
The and files must have their web server writablecatalog/includes/configure.php catalog/admin/includes/configure.php
permission removed after the installation procedure has completed successfully. This is described in the Post-Installation
chapter.Steps
Please consult with your hosting provider for the correct permission flag to allow the web server to write to those files. This is commonly
defined with a permission flag of .755
In some cases a world write permission flag of 777 can be used but may lead to an insecure installation of osCommerce
Online Merchant.
Changing the file permissions can be performed by most FTP clients or directly on the web server.
Using FTP to Change File Permissions
Most FTP clients are capable of changing file permissions on the web server. This is commonly performed by right-clicking on the file and
selecting "Properties" or "Attributes" on the context menu.
The file permissions can be changed by allowing all users to read, write, and execute the file, or by manually entering the world readable and
world writable flag of .777
Changing File Permissions Directly on the Server
Changing file permissions directly on the web server can be performed with the following terminal command:
chmod -R 777 /path/to/public/html/directory/catalog/file
Database
A MySQL database on the web server or database server is required for the installation procedure to successfully import the database table
structure and required data settings.
Web Server and Database Server Details
The following web server and database server details are required during the installation procedure. Please consult your hosting provider if
these details are not known.
Web Server Details
Setting Description Possible Value
Server Address The web address to the online store. http://www.shinyredapples.com/catalog/
Root Directory The directory where the online store is installed on the web server. /home/shinyredapples/public_html/catalog/
Database Server Details
Setting Description Possible Value
Server Address The address of the database server in the form of a hostname or IP address. localhost
Username The username used to connect to the database server. shinyredapples
Password The password that is used together with the username to connect to the database server. securepassword
Database Name The name of the database to hold the data in. oscommerce
Installation Procedure
The web based installation procedure configures the online store and imports the configuration data into the database. This is necessary to
create a fully functional online store and to create an administrator that administrates the online store through the Administration Tool.
The configuration values provided by default are safe to use but may need to be changed depending on the environment of the web server.
Installing a New Online Store
Step 1: Welcome Page
Step 2: Database Server
Step 3: Web Server
Step 4: Online Store Settings
Step 5: Finished!
Please review the chapter before continuing with the installation procedure.Pre-Installation Steps
Installing a New Online Store
The web based installation procedure is automatically started when accessing the online store through a web browser. This can be achieved
by entering the WWW address of osCommerce Online Merchant installation in your browser.
For example:
http://www.shinyredapples.com/catalog/
osCommerce Online Merchant automatically detects if the installation has already been completed and redirects to the installation procedure
if it has not yet been performed.
Step 1: Welcome Page
The first step is the welcome page shown in which displays the current recommended configuration settings for PHP.Figure 1
Figure 1. Welcome Page
It is recommended to update a PHP configuration value, or to install and activate a PHP extension, if it is marked against the recommended
setting.
When making PHP configuration changes or when installing and activating a PHP extension, the web server service needs
to be restarted for the changes to take effect. Once restarted, refreshing the welcome installation page and viewing the
listing can confirm if the PHP configuration changes have taken place and if it meets the recommendedServer Capabilities
settings.
Step 2: Database Server
The second step shown in sets the database connection parameters to successfully connect to the database server, to import theFigure 2a
database table structure, and to import required data.
Figure 2a. Database Server Configuration
The installation procedure verifies the values entered before proceeding to the next step. If there is a problem connecting to the database
server an error message is shown similar to the message shown in .Figure 2b
Figure 2b. Database Server Connection Error Message
Check to make sure the correct username, password, and database name are listed.
Step 3: Web Server
The third step shown in sets the web server parameters to successfully serve the online store to users.Figure 3
Figure 3. Web Server Configuration
Step 4: Online Store Settings
The fourth step shown in sets the store owner and administrator settings for the online store.Figure 4
Figure 4. Store Owner Settings
It is important to keep note of the administrator username and password as these are used to login and to access the Administration Tool.
Additional administrators can be created in the Administration Tool after the installation procedure has been successfully
completed.
Step 5: Finished!
The last step in the installation procedure stores the database server and web server parameters to the configuration file on the web server.
On successfully saving the configuration file, the installation procedure is finalized and the online store is ready to be used as shown on
.Figure 5
Figure 5. Successful Installation Confirmation
Please review the chapter after the installation procedure has been successfully completed toPost-Installation Steps
secure the online store.
Post-Installation Steps
Upon successful installation of osCommerce Online Merchant, the following steps need to be performed to secure the installation of the
online store.
Remove Installation Files
Reset File and Directory Permissions
Configuration Files
Writable Directories
Extra Protection for the Administration Tool
Remove Installation Files
The directory must be removed from the web server otherwise a user could use the installation procedure and reconfigure thecatalog/install
online store to use another database server.
Reset File and Directory Permissions
Configuration Files
The file permissions on catalog/includes/configure.php and catalog/admin/includes/configure.php must be set to deny write access by the
web server service. This is commonly performed by setting the permission flag to a read only value of 644 or 444 depending on your server.
Writable Directories
The following directories must be set to allow the web server service to write to for the Administration Tool to function properly. This is
commonly performed by setting the permission flags to a world-writable value of .777
Directories Web Server Writable
catalog/images
1.
2.
3.
4.
5.
6.
7.
catalog/cache (create this folder)
catalog/admin/backups
catalog/admin/images/graphs
Extra Protection for the Administration Tool
The Administration Tool is secured by its own login routine but is still publicly accessible. It is recommended to further protect the
Administration Tool by setting a htaccess password on the directory.catalog/admin
If no extra protection is set for the Administration Tool, it is recommended to move the directorycatalog/admin/backups
outside the public html directory otherwise public access to the backup files would be possible. The location of the backup
directory must be correctly defined in .catalog/includes/configure.php
Catalog (Frontend)
Catalog (Frontend)
Template Layout and Header Tags
A basic template layout structure has been introduced in osCommerce Online Merchant v2.2 to simplify the process of customizing the
design of the catalog frontend.
Building the Template Layout
Header and Meta Tag Modules
Building the Template Layout
The template design layout is defined in and , with the page contentcatalog/includes/template_top.php catalog/includes/template_bottom.php
existing in the base catalog files.
The final template layout is built with the following procedure:
Base catalog file requested (eg, )catalog/index.php
Application initialization through catalog/includes/application_top.php
Control logic executed for actions performed
Template design layout initialization through catalog/includes/template_top.php
Page content loaded
Template design layout finalized through catalog/includes/template_bottom.php
Application finalized through catalog/includes/application_bottom.php
The outside structure of the design layout is specified in and ,catalog/includes/template_top.php catalog/includes/template_bottom.php
which, for compatibility to earlier osCommerce Online Merchant v2.2 releases, also utilizes ,catalog/includes/header.php
, , and .catalog/includes/footer.php catalog/includes/column_left.php catalog/includes/column_right.php
The default template layout is defined as:
catalog/includes/template_top.php
HTML doctype
Header/Meta tags
Page header ( )catalog/includes/header.php
Page left column ( )catalog/includes/column_left.php
Base catalog files (eg, )catalog/index.php
Page content
catalog/includes/template_bottom.php
Page right column ( )catalog/includes/column_right.php
Page footer ( )catalog/includes/footer.php
Header and Meta Tag Modules
As all base catalog files use the same file to define the HTML doctype, page title, and header tags, acatalog/includes/template_top.php
modular header and meta tags implementation complements the template layout structure that allows page specific modules to define the
page title and set additional header and meta tags.
The header and meta tag modules are located in inside sub-directories matching the name of thecatalog/includes/modules/header_tags
base catalog file (without the file extension), and are loaded in alphabetical order.
An example header and meta tag module is which adds the product name to thecatalog/includes/modules/header_tags/product_info/title.php
page title on the product information page.
If the base catalog file name is changed, the matching header and meta tag module sub-directory must also be renamed
otherwise the modules will no longer load together with the page.
The header and meta tag modules must follow the following format:
<?php
class ht_productInfo_title {
function parse() {
global $oscTemplate;
/* module specific code goes here */
$oscTemplate->setTitle('New Page Title Name, ' . $oscTemplate->getTitle());
}
}
?>
Module Class Name
The module class name must be defined as:
ht_productInfo_title
ht Short code for "Header Tag" to distinguish header and meta tag modules from other modules.
productInfo The name of the matching base catalog file in camel case form (without the file extension).
title The filename of the module (without the file extension).
Examples of modules include:
Filename Class Name
catalog/includes/modules/header_tags/create_account/module_name.php ht_createAccount_module_name
catalog/includes/modules/header_tags/index/module_name.php ht_index_module_name
catalog/includes/modules/header_tags/products_new/module_name.php ht_productsNew_module_name
Module parse() Method
The module must contain a static method which contains the main code for the module, and must define as a globalparse() $oscTemplate
variable to alter the header and meta tags for the page.
The class provides the following three methods to alter the tags for the page:oscTemplate
getTitle
Returns the current title of the page. By default the page title is defined by the language definition which is the name of the onlineTITLE
shop.
$title = $oscTemplate->getTitle();
setTitle
Sets a new title for the page.
$oscTemplate->setTitle('New Page Title');
addHeaderTag
Adds a new header tag to the page.
$oscTemplate->addHeaderTag('<link rel= type= href= />');"stylesheet" "text/css" "new_stylesheet.css"
Installing New Modules
New modules can be installed by copying the module files to the appropriate sub-directories in for thecatalog/includes/modules/header_tags
page they should be loaded for.
The modular implementation allows page specific header and meta tags to be altered without needing to edit core source code files.
Administration Tool (Backend)
The Administration Tool is used to configure the online store, insert products for sale, administrate customers, and process orders. The
Administration Tool is protected by a login mechanism which only allows verified administrators to login and to administrate the online store.
Configuration
Catalog
Customer Section
Locations & Taxes
Localization
Reports
Tools
Configuration
Configuration
The Configuration section will setup all the basic store configuration. To access the configuration section click on "Configuration" and a drop
down of text links will appear underneath. Clicking the "Configuration" link puts you on the "My Store" page. To edit any of these listings in
the center of the page click the "i" with the circle around it of each listing to highlight it and click on the "edit" button to the right.
Administrators
My Store
Minimum Values
Maximum Values
Images
Customer Details
Shipping & Packaging
Product Listing
Stock
Logging
Cache
Email Options
Download
GZIP Compression
Sessions
Administrators
Administrators
The store administrators login information was setup during installation of the store.
After you login with that information you can edit the username and password and add additional administrators.
My Store
My Store
My Store lists general information values for the store owner.
To edit any of these listings click the "i" with the circle around it on the line you want to edit and when that listing is
highlighted, click the "edit" button to the right of that listing.
Store Name
Store Owner
E-Mail Address
E-Mail From
Country
Zone
Expected Sort Order
Expected Sort Field
Switch To Default Language Currency
Send Extra Order Email to
Use Search-Engine Safe URLs
Display Cart After Adding Product
Allow Guest to Tell a Friend
Default Search Operator
Store Address and Phone
Show Category Counts
Tax Decimal Places
Display Prices with Tax
Figure 1 shows the My Store listing page under Admin -> Configuration -> My Store
Figure 1. My Store listing page under Admin > Configuration > My Store
Store Name
The name of your store that works in conjunction with the search engines. A 15-20 word sentence using some keywords is good.
Store Owner
The store owner's name, or can also be the name of the store. This value will be in the "from" field of any email that is sent from the website
when sent, such as one that is sent to the customer after purchasing.
E-Mail Address
The store general email address used for receiving. This will be the destination for any emails sent through the website, such as through the
feedback from or notification emails sent by the website as notification of new orders. This should be a SINGLE email address only.
E-Mail From
The email in the "from" field of any email that is sent from the website. It can be the same address as 'E-Mail Address'. This should be a
SINGLE email address only.
Country
Your country of residence for your store.
Zone
The state or zone of residence for the store. This is necessary to enter, as it is used in any tax or shipping cost calculations.
Expected Sort Order
When you setup a new product in the "Catalog" section of your store you can set a "Date Available:" for your product which is the "expected
sort order" in the expected products box. This value is ordered either ascending or descending order. A listing of all the "products expected"
is under "Catalog/Products Expected" in your store admin.
Expected Sort Field
The "expected sort field" is the column listings to sort by in the expected products box either by the "product name" or the "date expected".
Switch To Default Language Currency
If you have several currencies it will automatically switch currencies when the language is changed.
Send Extra Order Email to
The email address where you will receive orders. There can be several email addresses here for backups in this format: Name 1
<email@address1>, Name 2 <email@address2>. If the store owner's email is not in this listing the store owner will not be notified of an
order. Whereas the 'E-Mail Address' above is for only one entry, this is how to effectively add addresses to that function.
Use Search-Engine Safe URLs
Turn on for search-engine safe urls.
Display Cart After Adding Product
If set to "true" the shopping cart page will show when a product is put in the cart. The customer then must click on "continue" to go back to
their product page to continue shopping. The customer will also see their items in the shopping cart box.
If this is set to "false" then the customer will stay on the same page of the item they are putting in the cart and will be able to see their items
in the shopping cart box in the top right column box of your store. Customized stores may or may not have this feature.
Allow Guest to Tell a Friend
Enables a box for the customer, when shopping, to send an email about a specific product after accessing the product description area.
Default Search Operator
Gives you "and' or "or" to use to search with.
Store Address and Phone
The name of the store owner's store, phone, and other information that will be seen by the customer when they use check/money order to
checkout.
Show Category Counts
Set to "true" to show the counts of products in each main category folder.
Set to "false" if you do not want to show the number of products in each main category folder. A small arrow to the right of the folder will still
show.
Tax Decimal Places
Pad the tax value this amount of decimal places. For example, if the cost of tax was $2, this would display as $2.00
Display Prices with Tax
Set to "true" the prices will display including tax on the shopping cart before checking out and also shows the tax on the confirmation
checkout page not adding the tax again to the product total. If this setting is used then you need to set the "Display Tax" to "false" under
"Modules/Order Total" section.
Set to "false" the product prices will not display with tax and the tax will display on the confirmation checkout page adding the tax to the
product total.
Minimum Values
Minimum Values
The values set for Minimum values are any fields filled out by the store owner that will affect the minimum amount of text for the credit card
owner, credit card number, review text, best sellers, and the minimum number of products a customer has purchased.
The minimum values are any field that is filled out by the customer. Usually these are left as is but they can be changed if desired.
To edit any of these listings click the "i" with the circle around it on the line you want to edit and when that listing is
highlighted, click the "edit" button to the right of that listing.
Figure 1 shows the Minimum Values listing page under Admin -> Configuration -> Minimum Values
Figure 1. Minimum Values listing page under Admin -> Configuration -> Minimum Values
Maximum Values
Maximum Values
The Maximum Values are the values for the different module listings in the store.
To edit any of these listings click the "i" with the circle around it on the line you want to edit and when that listing is
highlighted, click the "edit" button to the right of that listing.
Figure 2 shows the Maximum Values listing page under Admin -> Configuration -> Maximum Values
Figure 2. Maximum Values listing page under Admin -> Configuration -> Maximum Values
Most of these are self-explanatory. There are just a few that sometimes can be confusing.
Address Book Entries
Maximum address book entries a customer is allowed to have.
Search Results
Number of products listed on the store product pages per page. This listing is also used for the admin searches.
Page Links
Navigation numbers at the bottom of the product listing before going to dots (ex: 5 ...).
Categories to List Per Row
How many categories to list per row.
New Products Listing
Maximum number of new products to display in new products page.
Order History
Maximum number of orders to display in the order history page.
Images
Images
The settings for all the image sizes in the store are listed and editable.
Small Image Width & Height
Heading Image Width & Height
Subcategory Image Width & Height
Calculate Image Size
Image Required
To edit any of these listings click the "i" with the circle around it on the line you want to edit and when that listing is
highlighted, click the "edit" button to the right of that listing.
Figure 1 shows the Images listing page under Admin -> Configuration -> Images
Figure 1. Images listing page under Admin -> Configuration -> Images
Small Image Width & Height
The "Small Image Width & Height" are the image sizes of the product thumbnails on the product listing page.
Heading Image Width & Height
The "Heading Image Width & Height" are the image sizes that are uploaded for each category folder that show in the upper right corner of
the text body after clicking on a category folder in your store.
Subcategory Image Width & Height
The "Subcategory Image Width & Height" are the image sizes for all subcategory folders listed in the text body after clicking on a
subcategory folder.
Calculate Image Size
Set to true to set your images.
Image Required
Image Required set to true will list all images in the store even if an image shows blank because of misnaming. Set to false all the images
that are valid will show and the blank ones because of misnaming will not show.
Note: If the images are going to be all different sizes a tip is to totally remove all the "width" measurements. Do not put a
"0" in the space, instead totally remove it and leave a blank space for the "width only" measurement. If left blank,
osCommerce will resize the images according to the "height" measurement and constrain the image so there is no
distortion.
Customer Details
Customer Details
Customer detail values are the values entered when a customer creates a new account. These can be turned off or on at the store owner's
discretion. Some listings (such as Newsletter) can only be set to only, and some listings (such as Gender) are set to oron or off required not
, and other listings give the option of a Minimum number of letters required for that listing.required
To edit any of these listings click the "i" with the circle around it on the line you want to edit and when that listing is
highlighted, click the "edit" button to the right of that listing.
Figure 1 shows the Customer Details listing page under Admin -> Configuration -> Customer Details
Figure 1. Customer Details listing page under Admin -> Configuration -> Customer Details
The minimum set of fields that can be required to create an account are:
First Name
Last Name
E-Mail Address
Password
Post Code
State
Shipping & Packaging
Shipping/Packaging allows the store owner to setup values for weight that are used by the shipping modules.
Country of Origin
Postal Code
Enter Maximum Package Weight You Will Ship
To edit any of these listings click the "i" with the circle around it on the line you want to edit and when that listing is
highlighted, click the "edit" button to the right of that listing.
Figure 1 shows the Shipping/Packaging listing page under Admin -> Configuration -> Shipping/Packaging
Figure 1. Shipping/Packaging listing page under Admin -> Configuration -> Shipping/Packaging
Country of Origin
The country of origin to be used in shipping quotes.
Postal Code
Postal code of the store to be used in shipping quotes.
Enter the Maximum Package Weight You Will Ship
Put your maximum weight here of a package you will ship, anything over this the packaging will be calculated as multiple smaller parcels.
Two values that are next in the list are used for the calculation of the number of packages: "Package Tare weight" (initially set at 3 weight
units) and "Larger packages - percentage increase" (standard set at 10%).
The shipping module estimates the weight of the packing material as whichever is larger: the fixed Tare weight ("Tare" comes from Arabic for
"throw-away"), or the percentage of the product weight. This overhead weight is added to the weight of the products when computing
postage.
For example, say Tare weight = 3 and Percentage = 10. Then a 1-pound package gets 4 pounds worth of postage (the fixed Tare weight is
larger). And 100 pounds of product gets 110 pounds worth of postage (the variable percentage is larger).
Product Listing
Product Listing
The Product Listing section is edited to list the various columns available for the product listings in the store. The columns are sorted from left
to right on the product listing page according to the "Value" that is set for each one in this section. If a value of "0" is set that column will be
turned completely off on the product listing page of the store.
Display Product Image
Display Product Manufacturer Name
Display Product Model
Display Product Name
Display Product Price
Display Product Quantity
Display Product Weight
Display Buy Now Column
Display Category/Manufacturer Filter
Location of Prev/Next Navigation Bar
To edit any of these listings click the "i" with the circle around it on the line you want to edit and when that listing is
highlighted, click the "edit" button to the right of that listing.
Figure 1 shows the Product Listing page under Admin -> Configuration -> Product Listing
Figure 1. Product Listing page under Admin -> Configuration -> Product Listing
Location of Prev/Next Navigation Bar
Location of Prev/Next Navigation Bar sets the location of the Prev/Next Navigation Bar, either top, bottom, or both.
The number of products listed on each product listing page in your store is set in Configuration -> Maximum Values -> Search Results.
If you are looking for a horizontal presentation of the products on the product listing page instead of the default vertical presentation please
look at:
Additional Contribution
Product Listing in Columns
Stock
Stock
Stock is a complete inventory control allowing the store owner to keep track of all inventory by setting a quantity available for each product.
Check Stock Level & Subtract Stock
Allow Checkout
Mark Product out of Stock
Stock Re-order Level
NOTE: To edit any of these listings click the "i" with the circle around it on the line you want to edit and when that listing is
highlighted, click the "edit" button to the right of that listing.
Figure 1 shows the Stock listing page under Admin -> Configuration -> Stock
Figure 1. Stock listing page under Admin -> Configuration -> Stock
Check Stock Level & Subtract Stock
Set Stock level and Subtract Stock to true and the ecommerce software will check your stock and substract from the product stock value you
have set on each product if used when items are purchased.
Allow Checkout
Allow Checkout allows customer to checkout even though your stock level is too low for a particular product.
Mark Product out of Stock
Mark Product out of Stock is a symbol you can use to mark a product on the checkout page when it is out of stock. The default osCommerce
store uses asterisks ***.
Stock Re-order Level
An amount is entered to define when stock needs to be reordered ... for the store owner's information only.
Logging
Logging
Set Logging features.
To edit any of these listings click the "i" with the circle around it on the line you want to edit and when that listing is
highlighted, click the "edit" button to the right of that listing.
Figure 1 shows the Logging page under Admin -> Configuration -> Logging
Figure 1. Logging page under Admin -> Configuration -> Logging
Cache
Cache
The cache control allows the store owner to save certain areas of the shopping cart to a cache folder. This allows for a performance increase
when users are browsing the store as the database is not queried again until the cache has expired or has been reset by the store owner.
The default value of using cache is "false". When you set it to true but the directory that is set under "Cache Directory" is not available you
get a pink error message at the top of the store screen like this when you go to Tools->Cache
Error: Cache directory does not exist. Please set this in Configuration -> Cache.
Leaving the default /tmp/ might work but when you are on a shared server other osC shops on the server might also write their cache to this
folder. The risk is that the catalog menu of another shop might be shown in yours!
Therefore you are better off creating a subdirectory folder named (for example) "cache" in the "catalog" folder or directly in your root folder
with your store files. Set the chmod permissions to 755 (the webserver should be able to write to this folder) or to 777 in some instances. You
can use an FTP program to change the permissions.
Click on Cache Directory and set the absolute directory path to the "cache" folder.
If there is any question or problem establishing the absolute path, it may be because of server redirects. Go to Tools/Database Backup and
see what path is listed by the Admin for the database 'backups' folder. Use that path and append 'catalog/cache/' to the end of it so that your
path might appear as:
/home/username/www/catalog/cache/
Pay close attention to case sensitivity so that the directory path exactly matches the "cache" folder created in FTP.
Go back to Tools/Cache Control, refresh if necessary, and the error message should be gone.
To edit any of these listings click the "i" with the circle around it on the line you want to edit and when that listing is
highlighted, click the "edit" button to the right of that listing.
Figure 1 shows the Cache page in Admin -> Configuration -> Cache
Figure 1. Cache page in Admin -> Configuration -> Cache
It is recommended that the cache directory is NOT in the same place for all stores hosted on the same server for security
reasons.
Blocks of cached pages from different store areas are shown in the admin under Tools/Cache Control. The cached pages can be deleted by
clicking the reset button under the "action" column which will remove the cached pages. These pages will be replaced automatically when
accessed again.
Email Options
Email Options
There are a number of configuration options available to control how the emails are sent to the customer. These have already been set when
installed. Only change if you have an understanding or email functions. The information below is for general understanding.
E-Mail Transport Method
Sendmail
SMTP
E-mail Linefeeds
Use MIME HTML When Sending Emails
Verifying E-mail Addresses through DNS
Send E-mails
To edit any of these listings click the "i" with the circle around it on the line you want to edit and when that listing is
highlighted, click the "edit" button to the right of that listing.
Figure 1 shows the E-Mail Options listing page under Admin -> Configuration -> E-Mail Options
Figure 1. E-Mail Options listing page under Admin -> Configuration -> E-Mail Options
E-Mail Transport Method
osCommerce is able to send emails containing HTML to the customer. Sendmail is a unix method of sending mails and smtp is used mostly
on windows/mac servers. If the webserver is a windows server use smtp and if the webserver is unix based then use sendmail.
Sendmail
To ensure the correct functioning of the emails to be sent to the customers the following settings need to be set.
E-Mail Transport Method = Sendmail
E-Mail Linefeeds = LF
SMTP
An SMTP mail server is most commonly used when hosting websites on Windows based servers.
To ensure the correct functioning of the emails to be sent to the customers the following settings need to be set.
E-Mail Transport Method = SMTP
E-Mail Linefeeds = CRLF
E-mail Linefeeds
Email Linefeeds defines the character sequence used to separate mail headers. Unix/Linux uses LF alone to separate lines (new line
character) but Windows uses a combination of CR & LF ( CRLF Line feed).
Set to LF if you are on a Unix/Linux server and set to CRLF if you are on a Windows server.
Use MIME HTML When Sending Emails
Sending MIME type determines the content of mail like txt/html, txt/xml, etc. Set to true for HTML emails and false for pure text emails.
This feature is still under development.
Verifying Email Addresses through DNS
osCommerce is able to verify email addresses by contacting the name server for a domain to ensure that it is setup to receive emails. This
gives a good check to ensure invalid email addresses cant be entered.
Since all the email addresses contain the domain name (@domain.com), the existence of the domain name can be verified to make sure to
some extent that the email id given by the user is valid. This is done through 'nslookup' command; however, this may not work on windows
so keep it false on windows based servers.
Some hosting companies disable this feature. If you are having problems when creating customer accounts set this option
to False.
Send Emails
It is possible to disable the sending out of all emails to the customer. This is useful during the development and testing phases.
Set to true to send emails to the customer when they register or checkout after purchasing and set to false to disable the sending of emails to
customers.
Download
Download
The "Download Section" needs to be enabled if you are going to allow customers to download products directly after purchasing from your
store ... examples are ebooks.
These downloadable products should be zipped up and uploaded to the "catalog/download" folder of your store. This is accomplished via
FTP or your server administration from your hosting company. It is best to use lower case letters to name your files.
The zipped products will be read from the "pub" folder.
Make sure /catalog/pub has permissions of 777 (chmod 777) and /catalog/download has permissions of 755 (chmod 755).
After install these files in catalog/includes/configure.php are shown:
define('DIR_FS_DOWNLOAD', DIR_FS_CATALOG . 'download/');
define('DIR_FS_DOWNLOAD_PUBLIC', DIR_FS_CATALOG . 'pub/');
Setup Downloads
Enable Download
Download by Redirect
Expiry Delay (Days)
Maximum Number of Downloads
To edit any of these listings click the "i" with the circle around it on the line you want to edit and when that listing is
highlighted, click the "edit" button to the right of that listing.
Figure 1 shows the Download listing page under Admin -> Configuration -> Download
Figure 1. Download listing page under Admin -> Configuration -> Download
Setup Downloads
1. Under configuration in the admin set up the downloads by turning on "Enable download" and "Download by redirect". Click each listing to
highlight and click the "edit" button.
Enable Download
Whether or not downloadable products are allowed.
Download by Redirect
Use browser redirection for download. Disable on non-Unix systems.
Expiry Delay (Days)
How many days the download will be available for before being deleted.
Maximum Number of Downloads
Maximum number of times the customer will be able to download the file before they are locked out.
2. Add the product in the admin under "catalog -> categories/products" into your category folder.
3. After you have added the product go to "Catalog -> Product Attributes" in the admin.
4. Choose the product in the center bottom "Product Attributes" box of this section.
When you have download enabled in the configuration section of your store a downloadable product can be added in the bottom center of
the "Catalog/Product Attributes" section. When putting a product in as a downloadable one you have the option to change how many
downloads and how many days a customer has to retrieve their downloads. When you list the zip file to be downloaded for that product be
sure the name is exactly like the name of the download in the downloads folder as it is "case sensitive".
GZIP Compression
GZIP Compression
When GZIP Compression is set to true each page that is accessed over the Internet is first completely constructed by the server and then
compressed using gzip before sending it to the browser (when the browser supports this, otherwise it will not be gzip'ed before sending).
Normal setting is 5. It helps customers on slow connections (remember that images are already compressed using gif or jpg, only the HTML
is compressed) but is an extra load to the server.
To edit any of these listings click the "i" with the circle around it on the line you want to edit and when that listing is
highlighted, click the "edit" button to the right of that listing.
Figure 1 shows the GZip page under Admin -> Configuration -> GZip Compression
Figure 1. GZip page under Admin -> Configuration -> GZip Compression
Sessions
Sessions
A session is a unique number assigned to a client (visitor). The unique number is also used as a filename in /tmp
Because the client has the number on his URL (or in a cookie) you can keep track of what he/she wants /does by writing data to the session
file. That data is also available in your scripts.
So in order for your sessions to work (file based) the php script (which is ran by the webserver) needs write access to a directory (like /tmp).
If this directory lives WITHIN your document root (remotely accessible by a browser) it is a security threat as people can actually read other
peoples' session files in their browser.
Consider this:
http://www.yoursite.com/sessions/
If you had directory listings on I would get a nice list of all current sessions on your site on that moment. If I would click one it would show me
the contents and if I would copy it and use it as my own session I could impersonate that specific user... (session hijacking)
If it lives OUTSIDE the doc root you can not reach it from the outside world. The webserver itself can.
So find out who your webserver runs as (linux is usually nobody from group nobody) and change ownership (chown) of the dir to that. Next
you chmod it 700 which makes it only accessible to that user/group.
It is up to you where you want to store your sessions, mysql or files. The mySQL option is offered for shared hosting accounts where loads of
people use the /tmp directory making the chance of session hijacking or session mistakes bigger.
To edit any of these listings click the "i" with the circle around it on the line you want to edit and when that listing is
highlighted, click the "edit" button to the right of that listing.
Figure 1 shows the Sessions page under Admin -> Configuration -> Sessions
Figure 1. Sessions page under Admin -> Configuration -> Sessions
You should set the configuration value for "Prevent Spider Sessions" to true. In the directory catalog/includes/ there is a file named spiders.txt
file which contains a list of search engine spiders and if "Prevent spider sessions" is set to true then those spiders are not allowed to create
session ids. This file is not up-to-date. There is a contribution called "Updated spiders.txt".
Additional Contribution
http://addons.oscommerce.com/info/2455
If you leave "Prevent Spider Sessions" on "false" your site will be indexed by search engines with links that contain session ids. People who
click on them arrive at your website with the same session id. If one person is already logged in and the new visitor arrives with the same
session id then there is crossover between their accounts, their carts etc.
If your site has SSL you can also set "Recreate session id" to true to force updating of session ids when people switch to ssl.
Customers on aol cannot use your store with these all set to "True". The only two that can be set to "True" for aol users are
"Force Cookie Use" and "Prevent Spider Sessions".
Catalog
Catalog
The "Catalog Section" is for adding main category listings, products, product attributes, manufacturers, and other functions necessary for a
well running eCommerce store.
Categories & Products
Product Attributes
Manufacturers
Reviews
Specials
Products Expected
Categories & Products
The categories are folders which house your products and are listed in the main "Top" dropdown section.
Add a New Category Folder
Edit a Category Folder
Delete a Category Folder
Move a Category Folder
Add a New Product
Ajax Attribute Manager (*additional contribution*)
Delete a New Product
Move a New Product
Copy a New Product
All products must be in a catalog -> category folder to be viewable in the osCommerce store.
Figure 1 shows the Category listing page under Admin -> Catalog -> Categories & Products
Figure 1. Category listing page under Admin -> Catalog -> Categories & Products
To edit any of the listings click the "i" with the circle around it on the line you want to edit and when that
listing is highlighted, click the "edit", "delete", or "move" button to the right of that listing.
Add a New Category Folder
Clicking on the "new category" button in the center section will make a new folder.
After you have made a new folder or product it will show on the main screen which is called "Top" which is the name in the drop-down box to
the upper right of the admin page. This drop-down box will eventually list all the folders in your store.
Each category folder is sorted alphabetically unless you attach a sort order to it. To attach a sort order to a category folder put a number in
the "sort order" box when making the folder. If you want to change or remove the sort order later, click the "i" with the circle around it to the
right of the folder you want to change to highlight it and then click the "edit", "delete", or "move" buttons.
Be aware that if you have products in a folder and you click the "delete" button all of the products in that folder will also be deleted. Clicking
the "edit" button will edit the category folder itself and clicking the "move" button and choosing a new place for the category folder in the drop
down box will move the entire folder with all products in it to another place.
To get inside the category folder to add products click the "yellow folder" to the left of the category folder name. This puts you inside the
category folder.
Edit a Category Folder
Figure 2 shows the Categories Edit listing page under Admin -> Catalog -> Categories -> Edit
Figure 2. Categories New Categories listing page under Admin -> Catalog -> Categories -> Edit
Category Name
The Category Name is limited to 32 characters which needs to be adhered to as the number of characters will effect the width of the left
column if increased too high. The characters can be increased in the categories_description database table in phpMyAdmin. If you have
other languages installed you would set a category name for all languages.
Category Image
A Category Image can be uploaded for that particular Category. The image size is set in the and is called theConfiguration -> Images
Subcategory Image. This image will show to the customer in the upper right corner of the body after clicking on the category.
Sort Order
The "Sort Order" is set by a number. If a sort order is left blank, the category folders will sort alphabetically.
Move a Category Folder
After a Category has been created it may be necessary to move it to another Category Folder.
Figure 3 shows the Categories Move listing page under Admin -> Catalog -> Categories -> Move
Figure 3. Categories Move listing page under Admin -> Catalog -> Categories -> Move
To move a Category, click the "i" with the circle around it to highlight the Category you want to move and click the "move"
button to the right of that listing. The next page text reads "Please select which category you wish "your main category
folder" to reside in." Choose a new location for the Category folder in the drop down menu and click "move".
Delete a Category Folder
Figure 4 shows the Category Delete listing page under Admin -> Catalog -> Categories -> Delete
Figure 4. Category Delete listing page under Admin -> Catalog -> Categories -> Delete
To delete a Category, click the "i" with the circle around it to highlight the Category you want to delete and click the "delete" button to the right
of that listing. The next page gives warnings about deleting a category.
Be aware that if you have products in a folder and you click the "delete" button all of the products in that folder will also be deleted. Clicking
the "edit" button will edit the category folder itself and clicking the "move" button and choosing a new place for the category folder in the
dropdown box will move the entire folder with all products in it to another place.
Add a New Product
Clicking on the "new product" button will create a new product. This screen shot will show the Ajax Attribute Manager and the WYSIWYG
Editor contributions if they are installed.
Figure 5 shows the Product page under Admin -> Catalog -> Categories & Products -> New Product
Figure 5. Category listing page under Admin -> Catalog -> Categories & Products -> New Product
When you are creating a new product you have the ability to:
show the product in or out of stock ... "in" or "turned on" will show a green dot highlighted in the "status" column of the product
listings and "out" or "turned off" will show a red highlighted dot in the "status" column of the product listings
set the date the product will be available which corresponds with the "Products Expected" module
set the product's manufacturer
set the product's name and description (if using different languages an editing box will be available for each language to be
translated)
set the product's quantity in stock (this corresponds with the "Configuration -> Stock" section, product's model number
upload the products's image
set a product's url if you need to link out to another site
set the product's price
set the tax class which is used to charge tax on each product
set products weight which, if you are using "weight" for your shipping schedule under "Modules/Shipping", each product will need to
have a weight listed
Note: The tax class must be setup first in the "Locations/Taxes" section in your store admin.
Ajax Attribute Manager ( )additional contribution
The ajax attribute manager is an easy way to add and assign attributes when adding your products. When you add a product to the store in
the product description area you can assign attributes to it which is an easier way to add them than using the Product Attributes as indicated
below. The more recent Ajax Attribute Manager will add downloadable products in the product description area.
Click to download the .AJAX Attribute Manager
WYSIWYG Editor for the Product description area ( ).additional contribution
The wysiwyg editor is an easy way to format your product descriptions.
Click to download the .WYSIWYG Editor
Delete a New Product
To delete a new product, click the "i" with the circle around it to highlight the product you want to delete and click the "delete" button on the
right. This will completely remove the product from your store database. If you want to keep the product in the store database to show at a
later time it is best to click the "red circle under the Status column" which just turns the product off in your store but leaves it in the database.
Move a New Product
To move a new product, click the "i" with the circle around it to highlight the product you want to move and click the "move" button on the
right. This works the same as moving a main category folder.
When you click the "move" button you will see this message:
"Move (name of product) to:". Choose a place to move it and click the "move" button.
Copy a New Product
To copy a new product, click the "i" with the circle around it to highlight the product you want to copy and click the "copy to" button on the
right. When you click the "copy to" button you will see this message:
Copy Method:
-Link product
-Duplicate product
Choose "Link product" if you want to link it only as one product that shows in your store but the product can be added to as many category
folders as you want.
Click "Duplicate product" if you want to add another separate product ... an example would be if you have a product with the same
description but a different name, picture, and price. Note that if you duplicate a product it's status will be set to "off" at first until you click the
green status icon that sets it to true ... on.
Product Attributes
Product Attributes
Attributes give the store owner an additional way to market products. For example, shirts are sold of different sizes and different colors. Sizes
and Colors are considered attributes. Product Attributes must be set up individually for each product. They are a great way to offer mutliple
options to a customer without needing to create many separate but similar products to choose from.
It is always best to setup as many of your attributes using this section as possible before adding your products.
Figure 1 shows the Categories listing page under Admin -> Catalog -> Product Attributes
Figure 1. Product Attributes listing page under Admin -> Catalog -> Product Attributes
Product Attributes
First, you would setup the "Option Name" (under "Product Options" at the top left). Using shirts as an example you would have at least 2
"Option Names", color and size.
Next, you will setup your "Option Values" (under "Option Values" at the top right). In this section you will see a box that shows the "Option
Names" that you have already setup. You have color setup as an "Option Name" so make sure color is in this box. Then, to the right of that
box is a blank box where you type in one of your colors. Do this for each color and then do this again for each size. Make sure you associate
and "Option Value" (red, white, blue) with an "Option Name" (color, size, etc.).
Now, you are ready to start adding options to your products.
Under the "Products Attributes" section at the bottom you will see a drop down box listing all of your products that you have already put into
your store. Choose a product in the drop down menu and add your attributes. A price either increased or decreased from the "base" price of
the product can be set by putting an amount in the "Value Price" box and choosing a "plus" or a "minus" sign in the "Price Prefix" drop down
menu. If the price stays the same on each attribute then leave the "Value Price" box blank.
For Example:
size = medium = 10.00 (this is the regular price so no need to put a price in the "price box"
size = small = 8.00 (put 2.00 - (this is $2 with a "minus" sign from the base price of $10.00)
size = large = 12.00 (put 2.00 + (this is $2 with a "plus" sign from the base price of $10.00)
The bottom "Products Attributes" section is the area to setup any downloadable products like eBooks, etc.
AJAX Attribute Manager
The easier way to install the contribution.AJAX Attribute Manager
Using the AJAX Attribute Manager check the boxes of the attributes you want to use for a particular product. A price either increased or
decreased from the "base" price of the product can be set by putting an amount in the "Value Price" box and choosing a "plus " or a
"minus in the "Price Prefix" drop down menu. If the price stays the same on each attribute then leave the "Value Price" box blank.
Manufacturers
Manufacturers
Manufacturer's Edits
Manufacturer's Name
Manufacturer's Image
Manufacturer's URL
Delete Manufacturer
A list of manufacturers can be added to the store, and which product was made by which manufacturer can also be set. This allows the
customer to search by manufacturers when shopping.
Figure 1 shows the Manufacturers listing page under Admin -> Catalog -> Manufacturers
Figure 1. Manufacturers listing page under Admin -> Catalog -> Manufacturers
To edit or delete any of these listings click the "i" with the circle around it on the line you want to
edit and when that listing is highlighted, click the "edit" or "delete" button to the right of that listing.
Add a manufacturer with its own image by clicking the "insert" button link. The "Manufacturers URL" link box can also be used as a direct link
to the manufacturer that shows only in the "Manufacturer Info" box in the right column if used.
Manufacturer's Edits
Figure 2 shows the Manufacturers edit page under Admin -> Catalog -> Manufacturers -> Edit
Figure 2. Manufacturers edit page under Admin -> Catalog -> Manufacturers -> Edit
Manufacturer's Name
This is the Manufacturer's name that will be displayed to the customer. It will be the same text displayed regardless of which language the
customer is using.
Manufacturer's Image
An image can be uploaded, typically the Manufacturer's logo, to represent the Manufacturer to the customer. This can be especially helpful if
the image is more recognizable than the actual name, especially if the customer doesn't recognize the name entered above due to language
differences.
Manufacturer's URL
The url can be entered to direct the customer to the Manufacturer's website, so the customer can go to the Manufacturer's website. This
website can be different for each of the installed languages.
Delete Manufacturer
After highlighting the Manufacturer you want to remove click the delete button to the right and follow the directions.
Reviews
Reviews
Reviews Listings
Reviews Edits
Delete Reviews
Reviews Listings
Each time a customer writes a review it is added to the store database and listed in the "Reviews" section. These reviews can be edited or
deleted by the store administrator.
To edit any of these listings click the "i" with the circle around it on the line you want to edit and when that listing is
highlighted, click the "edit" button to the right of that listing.
Figure 1 shows the Reviews listing page under Admin -> Catalog -> Reviews
Figure 1. Reviews listing page under Admin -> Catalog -> Reviews
Reviews Edits
Reviews can also be edited through the Administrative tool. The text of the review can be changed, as well as the rating for the review.
Figure 2 shows the Reviews edit page under Admin -> Catalog -> Reviews -> Edit
Figure 2. Reviews edit page under Admin -> Catalog -> Reviews -> Edit
Delete Reviews
To delete a review, click the "i" with the circle around it to highlight the review you want to delete and click the "delete" button to the right.
Specials
Specials
Specials Listings
Specials Edit
Product
Special Price
Expiry Date
Specials Delete
Specials are products that from time to time have a reduced cost to purchase. These are products that currently exist in the store so they
must be added through the normal section before setting a special price. The products set on special will be added toCategories & Products
the "Specials" box with the special price in your store. When a customer navigates to the product the special price will show and also on the
product listing page of your store.
Specials Listings
To edit any of these listings click the "i" with the circle around it on the line you want to edit and when that listing is
highlighted, click the "edit" button to the right of that listing.
Figure 1 shows the Specials listing page under Admin -> Catalog -> Specials
Figure 1. Specials listing page under Admin -> Catalog -> Specials
Specials Edit
To add a new special to the store, click on the "new product" button link.
Products can be listed as a special discount by a percentage or by an amount.
On the next screen choose your product from the drop-down box, put a special price. This can be a percentage (10%) off or it can be a
reduced set dollar amount like 10.00, and the expiration date if any.
If you enter a new price, the decimal separator must be a '.' (decimal-point), example: 49.99
Leave the expiry date empty for no expiration.
Figure 2 shows the Specials edit page under Admin -> Catalog -> Specials -> Edit
Figure 2. shows the Specials edit page under Admin -> Catalog -> Specials -> Edit
Product
This is the product that will be on special. It must be a product that already exists in the store.
Special Price
This is the price that will be advertised and used when the customer orders the product. The "original" price that was set through the
administrative tool will also be displayed with a strikethrough font, with this price displayed in red next to it.
Expiry Date
These are the dates that describe when the special price and status will be in effect. For example, a store owner might wish to make a
product a special for only a week, after which time it will return to normal. These dates allow the store owner to have this functionality without
having to return to the administrative tool exactly one week later.
Specials Delete
To delete a special, click the "i" with the circle around it to highlight the special you want to delete and click the "delete" button to the right.
Products Expected
Products Expected
The products expected section is the listing of products that will be expected to be in your store on a certain date. These product listings
originally are setup when adding a new product to the " " section by choosing a "Products Status" and a "DateCategories & Products
Available".
To edit any of these listings click the "i" with the circle around it on the line you want to edit and when that listing is
highlighted, click the "edit" button to the right of that listing.
Figure 1 shows the Products Expected listing page under Admin -> Catalog -> Products Expected
Figure 1. Products Expected listing page under Admin -> Catalog -> Products Expected
When putting a product into the store there is a "Date Available" calendar to setup a date the product will be available for purchase in the
store. This must be set when putting the product into the store.
The products expected can be edited from this section instead of going into each product in Categories/Products.
When a product has an expected date on it that product can be seen on the first page only of the store at the bottom center called "Upcoming
Products" and has the date to the right.
Customer Section
Customer Section
The customers section holds all of the customers and orders that have been placed. The customer information can be edited, deleted, see
orders, and emailed from this section. The "Search" box in the top of the page will enable you to search for a string of text in the fields last
name, first name and email address of customers.
The store owner can edit any customer details except the password.
Customers
Orders
Customers
Customers
Edit Customer
Customer Orders
Customer Email
Customer Delete
The names, details and orders of customers who have created accounts and/or purchased from the store are listed showing the date their
account was created. A number of options are available for the store owner.
To edit any of these listings click the "i" with the circle around it on the line you want to edit and when that listing is
highlighted, click the "edit" button to the right of that listing.
Figure 1 shows the Customers page under Admin -> Customers
Figure 1. Customers listing page under Admin -> Customers
Edit Customer
This option allows the store owner to edit the name and contact details relating to a particular customer.
Figure 2 shows the Customers edit page under Admin -> Customers -> Edit
Figure 2. Customers listing page under Admin -> Customers -> Edit
Note: The orders for this customer will not be removed when a customer is deleted.
Customer Orders
The orders option takes the store owner to the orders screen to review the orders for that customer.
Figure 3 shows the Customer orders page under Admin -> Customers -> Orders
Figure 3. Customer orders page under Admin -> Customers -> Orders
Customer Email
Figure 4 shows the Customer orders page under Admin -> Customers -> email
Figure 4. Customer orders page under Admin -> Customers -> email
Customer Delete
Inactive customers can be removed.
To delete a customer click the "i" with the circle around it on the customer you want to delete and when that listing is highlighted, click the
"delete" button to the right of that listing.
Orders
Orders
The Orders section are all the "pending" orders.
To edit click the "i" with the circle around it to highlight the order, and then click the "edit" button to see the order.
Figure 1 shows the Customer orders page under Admin -> Customers -> Orders
Figure 1. Customer orders page under Admin -> Customers -> Orders
Orders can be viewed and edited. Comments about the order can be added to notify the customer of the order progress or append the
comments. If the comments are sent to the customer the customer will be able to read and review them in their store account as long as the
order stays in the database.
You also have an invoice and packing slip that can be printed. It is always advisable to print out your order details of each order to keep a
hard copy.
Figure 2 shows the Customer orders page under Admin -> Customers -> Orders -> Edit
Figure 2. Customer orders page under Admin -> Customers -> Orders -> Edit
Locations & Taxes
Locations & Taxes
Tax Classes are required to group Tax Zones and Tax Rates together, and to allow products to be assigned a Tax Class which would inherit
the Tax Zone and Tax Rate relationships.
Taxes and zones are setup as follows:
Countries
A listing of all countries in your store.
Figure 1 shows the Customers page under Admin -> Locations / Taxes -> Countries
Figure 1. Customers listing page under Admin -> Locations / Taxes -> Countries
Zones
A listing of all zones in your store.
Figure 2 shows the Customers page under Admin -> Locations / Taxes -> Zones
Figure 2. Customers listing page under Admin -> Locations / Taxes -> Zones
Tax Zones
The state and tax description of your store.
Figure 3 shows the Customers page under Admin -> Locations / Taxes -> Tax Zones
Figure 3. Customers listing page under Admin -> Locations / Taxes -> Tax Zones
Tax Classes
The title of your tax class title like "taxable goods" and the description of that title.
Figure 4 shows the Customers page under Admin -> Locations / Taxes -> Tax Classes
Figure 4. Customers listing page under Admin -> Locations / Taxes -> Tax Classes
Tax Rates
The tax rate of the state your store is in.
Figure 5 shows the Customers page under Admin -> Locations / Taxes -> Tax Rates
Figure 5. Customers listing page under Admin -> Locations / Taxes -> Tax Rates
How to Setup Your Taxes
In admin, under Locations/Taxes, click on "Tax Zones"
Click on the "new zone" button. In the Zone Name: input field I enter "CA"
For Description I enter "California". Click on "insert"
After you click insert, you will see CA show up in the list. You think you're done, but not quite!
Click on the "CA" (or whatever name you have!) in the list and you will see the heading say "Geographical Zones / CA"
Here you see a "new zone" button again. Click on it!
Now you get to select a geographical zone. From Country, I Select United States
From Region, Select California. Click "update"
A few more steps to go! Now under "Locations/Taxes" click on "Tax Rates"
Click on "new tax rate" button
Select "Taxable Goods" from the Tax Class Title drop down menu
From the Zone menu, select CA (or whatever zone you created)
In the Tax Rate field enter the tax percentage
In the Description, enter the description, e.g. "California Sales Tax"
Now you're done!
Localization
Localization
Localizatin is seting up your default currency, language, and order status to notify and communicate with your customers.
Currencies
Languages
Orders Status
Currencies
Currencies
Two currencies are installed by default, the US Dollar and the EU Euro.
Although the exchange rates of the other currencies will be updated automatically when the update tool is used, if any products have been
entered in the Administration Tool, they will need to have the prices updated manually so be sure to install the default currency first, THEN
add products!
To edit click the "i" with the circle around it on the line you want to edit and when that listing is highlighted, click the "edit"
button to the right of that listing.
Figure 1 shows the Currencies listing page under Admin -> Localization -> Currencies
Figure 1. Currencies listing page under Admin -> Localization -> Currencies
Currencies are also editable.
Figure 2 shows the Currencies listing page under Admin -> Localization -> Currencies -> Edit
Oscom23 old
Oscom23 old
Oscom23 old
Oscom23 old
Oscom23 old
Oscom23 old
Oscom23 old
Oscom23 old
Oscom23 old
Oscom23 old
Oscom23 old
Oscom23 old
Oscom23 old
Oscom23 old
Oscom23 old
Oscom23 old
Oscom23 old
Oscom23 old
Oscom23 old
Oscom23 old
Oscom23 old
Oscom23 old
Oscom23 old
Oscom23 old
Oscom23 old
Oscom23 old
Oscom23 old
Oscom23 old
Oscom23 old
Oscom23 old
Oscom23 old
Oscom23 old
Oscom23 old
Oscom23 old
Oscom23 old
Oscom23 old
Oscom23 old
Oscom23 old
Oscom23 old
Oscom23 old
Oscom23 old
Oscom23 old
Oscom23 old
Oscom23 old
Oscom23 old
Oscom23 old
Oscom23 old
Oscom23 old
Oscom23 old
Oscom23 old
Oscom23 old
Oscom23 old
Oscom23 old
Oscom23 old
Oscom23 old
Oscom23 old
Oscom23 old
Oscom23 old
Oscom23 old
Oscom23 old
Oscom23 old
Oscom23 old
Oscom23 old
Oscom23 old
Oscom23 old
Oscom23 old
Oscom23 old
Oscom23 old
Oscom23 old
Oscom23 old
Oscom23 old
Oscom23 old
Oscom23 old
Oscom23 old
Oscom23 old
Oscom23 old
Oscom23 old
Oscom23 old
Oscom23 old
Oscom23 old
Oscom23 old
Oscom23 old
Oscom23 old
Oscom23 old
Oscom23 old
Oscom23 old
Oscom23 old
Oscom23 old
Oscom23 old
Oscom23 old
Oscom23 old
Oscom23 old
Oscom23 old
Oscom23 old
Oscom23 old
Oscom23 old
Oscom23 old
Oscom23 old
Oscom23 old
Oscom23 old
Oscom23 old
Oscom23 old
Oscom23 old
Oscom23 old
Oscom23 old
Oscom23 old
Oscom23 old
Oscom23 old
Oscom23 old
Oscom23 old
Oscom23 old
Oscom23 old
Oscom23 old
Oscom23 old
Oscom23 old
Oscom23 old
Oscom23 old
Oscom23 old
Oscom23 old
Oscom23 old
Oscom23 old
Oscom23 old
Oscom23 old
Oscom23 old
Oscom23 old
Oscom23 old
Oscom23 old
Oscom23 old
Oscom23 old
Oscom23 old
Oscom23 old
Oscom23 old
Oscom23 old
Oscom23 old
Oscom23 old
Oscom23 old
Oscom23 old
Oscom23 old
Oscom23 old
Oscom23 old
Oscom23 old
Oscom23 old
Oscom23 old
Oscom23 old
Oscom23 old
Oscom23 old
Oscom23 old
Oscom23 old
Oscom23 old
Oscom23 old
Oscom23 old
Oscom23 old
Oscom23 old
Oscom23 old
Oscom23 old
Oscom23 old
Oscom23 old
Oscom23 old
Oscom23 old
Oscom23 old
Oscom23 old
Oscom23 old
Oscom23 old
Oscom23 old
Oscom23 old
Oscom23 old
Oscom23 old
Oscom23 old
Oscom23 old
Oscom23 old
Oscom23 old
Oscom23 old
Oscom23 old
Oscom23 old
Oscom23 old
Oscom23 old
Oscom23 old
Oscom23 old
Oscom23 old
Oscom23 old
Oscom23 old
Oscom23 old
Oscom23 old
Oscom23 old
Oscom23 old
Oscom23 old
Oscom23 old
Oscom23 old
Oscom23 old
Oscom23 old
Oscom23 old
Oscom23 old
Oscom23 old
Oscom23 old
Oscom23 old
Oscom23 old
Oscom23 old
Oscom23 old
Oscom23 old
Oscom23 old
Oscom23 old
Oscom23 old
Oscom23 old

Más contenido relacionado

La actualidad más candente

ExTreM Expense Report Software
ExTreM Expense Report SoftwareExTreM Expense Report Software
ExTreM Expense Report SoftwareLantech-Soft
 
Invest plus user manual
Invest plus user manualInvest plus user manual
Invest plus user manualInvest Plus
 
Paladin Network Administrators Guide
Paladin Network Administrators GuidePaladin Network Administrators Guide
Paladin Network Administrators Guidehanniw79
 
Service tax pdf e book - 7th vces edn- ca pritam mahure
Service tax   pdf e book - 7th vces edn- ca pritam mahureService tax   pdf e book - 7th vces edn- ca pritam mahure
Service tax pdf e book - 7th vces edn- ca pritam mahureParag Jain
 
2008 biodiesel handling & use guidelines
2008 biodiesel handling & use guidelines2008 biodiesel handling & use guidelines
2008 biodiesel handling & use guidelinesBiodiesel Automotive
 
Tidy Up! User Manual
Tidy Up! User ManualTidy Up! User Manual
Tidy Up! User ManualRashid Rashid
 
Force dotcom apex code developers guide
Force dotcom apex code developers guideForce dotcom apex code developers guide
Force dotcom apex code developers guideslipnslideslideshare
 
M Daemon E Mail Server Manual
M Daemon E Mail Server ManualM Daemon E Mail Server Manual
M Daemon E Mail Server Manualguestcf19c83
 
Skripsi - Daftar Isi
Skripsi - Daftar IsiSkripsi - Daftar Isi
Skripsi - Daftar IsiRian Maulana
 
Java how to_program__7th_edition
Java how to_program__7th_editionJava how to_program__7th_edition
Java how to_program__7th_editionABDUmomo
 
G Streamer Apps Development Manual
G Streamer Apps Development   ManualG Streamer Apps Development   Manual
G Streamer Apps Development ManualCaglar Dursun
 
MarvelSoft Library Management Software Guide
MarvelSoft Library Management Software GuideMarvelSoft Library Management Software Guide
MarvelSoft Library Management Software GuideRanganath Shivaram
 
Artromick Ac Usersguide304 for Hospital Computing Solutions
Artromick Ac Usersguide304 for Hospital Computing SolutionsArtromick Ac Usersguide304 for Hospital Computing Solutions
Artromick Ac Usersguide304 for Hospital Computing SolutionsArtromick
 

La actualidad más candente (20)

ExTreM Expense Report Software
ExTreM Expense Report SoftwareExTreM Expense Report Software
ExTreM Expense Report Software
 
Invest plus user manual
Invest plus user manualInvest plus user manual
Invest plus user manual
 
C2675m c
C2675m cC2675m c
C2675m c
 
Paladin Network Administrators Guide
Paladin Network Administrators GuidePaladin Network Administrators Guide
Paladin Network Administrators Guide
 
Gemini Manual
Gemini ManualGemini Manual
Gemini Manual
 
Mirsal 2 manual BOE
Mirsal 2 manual BOEMirsal 2 manual BOE
Mirsal 2 manual BOE
 
SmartDraw VP User Guide
SmartDraw VP User GuideSmartDraw VP User Guide
SmartDraw VP User Guide
 
Service tax pdf e book - 7th vces edn- ca pritam mahure
Service tax   pdf e book - 7th vces edn- ca pritam mahureService tax   pdf e book - 7th vces edn- ca pritam mahure
Service tax pdf e book - 7th vces edn- ca pritam mahure
 
2008 biodiesel handling & use guidelines
2008 biodiesel handling & use guidelines2008 biodiesel handling & use guidelines
2008 biodiesel handling & use guidelines
 
Tidy Up! User Manual
Tidy Up! User ManualTidy Up! User Manual
Tidy Up! User Manual
 
Force dotcom apex code developers guide
Force dotcom apex code developers guideForce dotcom apex code developers guide
Force dotcom apex code developers guide
 
M Daemon E Mail Server Manual
M Daemon E Mail Server ManualM Daemon E Mail Server Manual
M Daemon E Mail Server Manual
 
Manual
ManualManual
Manual
 
Skripsi - Daftar Isi
Skripsi - Daftar IsiSkripsi - Daftar Isi
Skripsi - Daftar Isi
 
Derivatives
DerivativesDerivatives
Derivatives
 
Java how to_program__7th_edition
Java how to_program__7th_editionJava how to_program__7th_edition
Java how to_program__7th_edition
 
G Streamer Apps Development Manual
G Streamer Apps Development   ManualG Streamer Apps Development   Manual
G Streamer Apps Development Manual
 
Notebook PC User Manual
Notebook PC User ManualNotebook PC User Manual
Notebook PC User Manual
 
MarvelSoft Library Management Software Guide
MarvelSoft Library Management Software GuideMarvelSoft Library Management Software Guide
MarvelSoft Library Management Software Guide
 
Artromick Ac Usersguide304 for Hospital Computing Solutions
Artromick Ac Usersguide304 for Hospital Computing SolutionsArtromick Ac Usersguide304 for Hospital Computing Solutions
Artromick Ac Usersguide304 for Hospital Computing Solutions
 

Destacado

Imagenes y paisajes del mundo
Imagenes y paisajes del mundoImagenes y paisajes del mundo
Imagenes y paisajes del mundocamargo1963
 
Regular verbs webquest
Regular verbs webquestRegular verbs webquest
Regular verbs webquestTeachernan
 
Avanzado excel
Avanzado excelAvanzado excel
Avanzado excelrfms07
 
vBrownbag 2013 June 4th - Puppet and Razor - Jonas Rosland
vBrownbag 2013 June 4th - Puppet and Razor - Jonas RoslandvBrownbag 2013 June 4th - Puppet and Razor - Jonas Rosland
vBrownbag 2013 June 4th - Puppet and Razor - Jonas RoslandJonas Rosland
 
แปลโดยพยัญชนะเรื่องพราหมณ์ชื่อว่า จูเฬกสาฎก๒
แปลโดยพยัญชนะเรื่องพราหมณ์ชื่อว่า จูเฬกสาฎก๒แปลโดยพยัญชนะเรื่องพราหมณ์ชื่อว่า จูเฬกสาฎก๒
แปลโดยพยัญชนะเรื่องพราหมณ์ชื่อว่า จูเฬกสาฎก๒วัดดอนทอง กาฬสินธุ์
 
Digital Case Studies
Digital Case StudiesDigital Case Studies
Digital Case StudiesKhyati Bhatia
 
After civilization
After civilization After civilization
After civilization vgrinb
 
ios 5 arc完全指南
ios 5 arc完全指南ios 5 arc完全指南
ios 5 arc完全指南lambokini
 
DevOps at EMC NYC August 2015 - Modernize your apps to drive organizational e...
DevOps at EMC NYC August 2015 - Modernize your apps to drive organizational e...DevOps at EMC NYC August 2015 - Modernize your apps to drive organizational e...
DevOps at EMC NYC August 2015 - Modernize your apps to drive organizational e...Jonas Rosland
 
แปลโดยพยัญชนะเรื่องพราหมณ์ชื่อว่า จูเฬกสาฎก๒
แปลโดยพยัญชนะเรื่องพราหมณ์ชื่อว่า จูเฬกสาฎก๒แปลโดยพยัญชนะเรื่องพราหมณ์ชื่อว่า จูเฬกสาฎก๒
แปลโดยพยัญชนะเรื่องพราหมณ์ชื่อว่า จูเฬกสาฎก๒วัดดอนทอง กาฬสินธุ์
 
Actividad n°1 mapa conceptual tecnologia educativa
Actividad n°1 mapa conceptual tecnologia educativaActividad n°1 mapa conceptual tecnologia educativa
Actividad n°1 mapa conceptual tecnologia educativaEdwin Quintero Monsalve
 
Lecture about "The General in his Labyrinth"
Lecture about "The General in his Labyrinth"Lecture about "The General in his Labyrinth"
Lecture about "The General in his Labyrinth"vgrinb
 

Destacado (20)

Imagenes y paisajes del mundo
Imagenes y paisajes del mundoImagenes y paisajes del mundo
Imagenes y paisajes del mundo
 
Regular verbs webquest
Regular verbs webquestRegular verbs webquest
Regular verbs webquest
 
Avanzado excel
Avanzado excelAvanzado excel
Avanzado excel
 
vBrownbag 2013 June 4th - Puppet and Razor - Jonas Rosland
vBrownbag 2013 June 4th - Puppet and Razor - Jonas RoslandvBrownbag 2013 June 4th - Puppet and Razor - Jonas Rosland
vBrownbag 2013 June 4th - Puppet and Razor - Jonas Rosland
 
แปลโดยพยัญชนะเรื่องพราหมณ์ชื่อว่า จูเฬกสาฎก๒
แปลโดยพยัญชนะเรื่องพราหมณ์ชื่อว่า จูเฬกสาฎก๒แปลโดยพยัญชนะเรื่องพราหมณ์ชื่อว่า จูเฬกสาฎก๒
แปลโดยพยัญชนะเรื่องพราหมณ์ชื่อว่า จูเฬกสาฎก๒
 
mwoodcock_projectCpart2
mwoodcock_projectCpart2mwoodcock_projectCpart2
mwoodcock_projectCpart2
 
RAM
RAMRAM
RAM
 
Digital Case Studies
Digital Case StudiesDigital Case Studies
Digital Case Studies
 
Teamviewer
TeamviewerTeamviewer
Teamviewer
 
After civilization
After civilization After civilization
After civilization
 
Earthquakes
EarthquakesEarthquakes
Earthquakes
 
02essay
02essay02essay
02essay
 
ios 5 arc完全指南
ios 5 arc完全指南ios 5 arc完全指南
ios 5 arc完全指南
 
DevOps at EMC NYC August 2015 - Modernize your apps to drive organizational e...
DevOps at EMC NYC August 2015 - Modernize your apps to drive organizational e...DevOps at EMC NYC August 2015 - Modernize your apps to drive organizational e...
DevOps at EMC NYC August 2015 - Modernize your apps to drive organizational e...
 
แปลโดยพยัญชนะเรื่องพราหมณ์ชื่อว่า จูเฬกสาฎก๒
แปลโดยพยัญชนะเรื่องพราหมณ์ชื่อว่า จูเฬกสาฎก๒แปลโดยพยัญชนะเรื่องพราหมณ์ชื่อว่า จูเฬกสาฎก๒
แปลโดยพยัญชนะเรื่องพราหมณ์ชื่อว่า จูเฬกสาฎก๒
 
รายละเอียดวิชาพระไตรปิฎกศึกษา(2)
รายละเอียดวิชาพระไตรปิฎกศึกษา(2)รายละเอียดวิชาพระไตรปิฎกศึกษา(2)
รายละเอียดวิชาพระไตรปิฎกศึกษา(2)
 
Actividad n°1 mapa conceptual tecnologia educativa
Actividad n°1 mapa conceptual tecnologia educativaActividad n°1 mapa conceptual tecnologia educativa
Actividad n°1 mapa conceptual tecnologia educativa
 
03essay
03essay03essay
03essay
 
Tocopilla Norte: imágenes y memoria
Tocopilla Norte: imágenes y memoria Tocopilla Norte: imágenes y memoria
Tocopilla Norte: imágenes y memoria
 
Lecture about "The General in his Labyrinth"
Lecture about "The General in his Labyrinth"Lecture about "The General in his Labyrinth"
Lecture about "The General in his Labyrinth"
 

Similar a Oscom23 old

BizTalk Practical Course Preview
BizTalk Practical Course PreviewBizTalk Practical Course Preview
BizTalk Practical Course PreviewMoustafaRefaat
 
Laravel 4 Documentation
Laravel 4 DocumentationLaravel 4 Documentation
Laravel 4 DocumentationHoHoangKha
 
TRU_v29_Reference_Manual_EN_20140325.pdf
TRU_v29_Reference_Manual_EN_20140325.pdfTRU_v29_Reference_Manual_EN_20140325.pdf
TRU_v29_Reference_Manual_EN_20140325.pdfPEDRO MORALES HERNANDEZ
 
Grundfos Wincaps Manual Guide
Grundfos Wincaps Manual GuideGrundfos Wincaps Manual Guide
Grundfos Wincaps Manual GuideSERDAR BELBAĞ
 
SchoolAdmin - School Fees Collection & Accounting Software
SchoolAdmin - School Fees Collection & Accounting SoftwareSchoolAdmin - School Fees Collection & Accounting Software
SchoolAdmin - School Fees Collection & Accounting SoftwareRanganath Shivaram
 
Supplier-PPAP-Manual.pdf
Supplier-PPAP-Manual.pdfSupplier-PPAP-Manual.pdf
Supplier-PPAP-Manual.pdfPhanHngBin
 
Flutter Apprentice (First Edition) - Learn to Build Cross-Platform Apps.pdf
Flutter Apprentice (First Edition) - Learn to Build Cross-Platform Apps.pdfFlutter Apprentice (First Edition) - Learn to Build Cross-Platform Apps.pdf
Flutter Apprentice (First Edition) - Learn to Build Cross-Platform Apps.pdfSyeedTalha2
 
html-css-bootstrap-javascript-and-jquery
html-css-bootstrap-javascript-and-jqueryhtml-css-bootstrap-javascript-and-jquery
html-css-bootstrap-javascript-and-jqueryMD. NURUL ISLAM
 
spring-security-reference.pdf
spring-security-reference.pdfspring-security-reference.pdf
spring-security-reference.pdfhorica9300
 
Antaira catalog v131
Antaira catalog v131Antaira catalog v131
Antaira catalog v131Tom Larson
 

Similar a Oscom23 old (20)

Tortoise svn 1.7-en
Tortoise svn 1.7-enTortoise svn 1.7-en
Tortoise svn 1.7-en
 
Lesson 1...Guide
Lesson 1...GuideLesson 1...Guide
Lesson 1...Guide
 
LSI_SAS2008_Manual_v100.pdf
LSI_SAS2008_Manual_v100.pdfLSI_SAS2008_Manual_v100.pdf
LSI_SAS2008_Manual_v100.pdf
 
By d ui_styleguide_2012_fp35
By d ui_styleguide_2012_fp35By d ui_styleguide_2012_fp35
By d ui_styleguide_2012_fp35
 
R Ints
R IntsR Ints
R Ints
 
BizTalk Practical Course Preview
BizTalk Practical Course PreviewBizTalk Practical Course Preview
BizTalk Practical Course Preview
 
Laravel 4 Documentation
Laravel 4 DocumentationLaravel 4 Documentation
Laravel 4 Documentation
 
TRU_v29_Reference_Manual_EN_20140325.pdf
TRU_v29_Reference_Manual_EN_20140325.pdfTRU_v29_Reference_Manual_EN_20140325.pdf
TRU_v29_Reference_Manual_EN_20140325.pdf
 
Grundfos Wincaps Manual Guide
Grundfos Wincaps Manual GuideGrundfos Wincaps Manual Guide
Grundfos Wincaps Manual Guide
 
Ppm7.5 cmd tokval
Ppm7.5 cmd tokvalPpm7.5 cmd tokval
Ppm7.5 cmd tokval
 
E views 9 command ref
E views 9 command refE views 9 command ref
E views 9 command ref
 
SchoolAdmin - School Fees Collection & Accounting Software
SchoolAdmin - School Fees Collection & Accounting SoftwareSchoolAdmin - School Fees Collection & Accounting Software
SchoolAdmin - School Fees Collection & Accounting Software
 
Bwl red book
Bwl red bookBwl red book
Bwl red book
 
Red book Blueworks Live
Red book Blueworks LiveRed book Blueworks Live
Red book Blueworks Live
 
Supplier-PPAP-Manual.pdf
Supplier-PPAP-Manual.pdfSupplier-PPAP-Manual.pdf
Supplier-PPAP-Manual.pdf
 
Flutter Apprentice (First Edition) - Learn to Build Cross-Platform Apps.pdf
Flutter Apprentice (First Edition) - Learn to Build Cross-Platform Apps.pdfFlutter Apprentice (First Edition) - Learn to Build Cross-Platform Apps.pdf
Flutter Apprentice (First Edition) - Learn to Build Cross-Platform Apps.pdf
 
Tools Users Guide
Tools Users GuideTools Users Guide
Tools Users Guide
 
html-css-bootstrap-javascript-and-jquery
html-css-bootstrap-javascript-and-jqueryhtml-css-bootstrap-javascript-and-jquery
html-css-bootstrap-javascript-and-jquery
 
spring-security-reference.pdf
spring-security-reference.pdfspring-security-reference.pdf
spring-security-reference.pdf
 
Antaira catalog v131
Antaira catalog v131Antaira catalog v131
Antaira catalog v131
 

Más de Alexander Vilcapaza Chavez (7)

Java2
Java2Java2
Java2
 
Gestion de t.i. unfv
Gestion de t.i. unfvGestion de t.i. unfv
Gestion de t.i. unfv
 
Zachman framework
Zachman frameworkZachman framework
Zachman framework
 
Conexión de c# oracle
Conexión  de c# oracleConexión  de c# oracle
Conexión de c# oracle
 
[Si 2010-11]tema3 si
[Si 2010-11]tema3 si[Si 2010-11]tema3 si
[Si 2010-11]tema3 si
 
Metodologias de desarrollo[1]
Metodologias de desarrollo[1]Metodologias de desarrollo[1]
Metodologias de desarrollo[1]
 
Metodologias de desarrollo[1]
Metodologias de desarrollo[1]Metodologias de desarrollo[1]
Metodologias de desarrollo[1]
 

Último

"I see eyes in my soup": How Delivery Hero implemented the safety system for ...
"I see eyes in my soup": How Delivery Hero implemented the safety system for ..."I see eyes in my soup": How Delivery Hero implemented the safety system for ...
"I see eyes in my soup": How Delivery Hero implemented the safety system for ...Zilliz
 
Artificial Intelligence Chap.5 : Uncertainty
Artificial Intelligence Chap.5 : UncertaintyArtificial Intelligence Chap.5 : Uncertainty
Artificial Intelligence Chap.5 : UncertaintyKhushali Kathiriya
 
ICT role in 21st century education and its challenges
ICT role in 21st century education and its challengesICT role in 21st century education and its challenges
ICT role in 21st century education and its challengesrafiqahmad00786416
 
CNIC Information System with Pakdata Cf In Pakistan
CNIC Information System with Pakdata Cf In PakistanCNIC Information System with Pakdata Cf In Pakistan
CNIC Information System with Pakdata Cf In Pakistandanishmna97
 
presentation ICT roal in 21st century education
presentation ICT roal in 21st century educationpresentation ICT roal in 21st century education
presentation ICT roal in 21st century educationjfdjdjcjdnsjd
 
Apidays New York 2024 - Accelerating FinTech Innovation by Vasa Krishnan, Fin...
Apidays New York 2024 - Accelerating FinTech Innovation by Vasa Krishnan, Fin...Apidays New York 2024 - Accelerating FinTech Innovation by Vasa Krishnan, Fin...
Apidays New York 2024 - Accelerating FinTech Innovation by Vasa Krishnan, Fin...apidays
 
Spring Boot vs Quarkus the ultimate battle - DevoxxUK
Spring Boot vs Quarkus the ultimate battle - DevoxxUKSpring Boot vs Quarkus the ultimate battle - DevoxxUK
Spring Boot vs Quarkus the ultimate battle - DevoxxUKJago de Vreede
 
DBX First Quarter 2024 Investor Presentation
DBX First Quarter 2024 Investor PresentationDBX First Quarter 2024 Investor Presentation
DBX First Quarter 2024 Investor PresentationDropbox
 
Corporate and higher education May webinar.pptx
Corporate and higher education May webinar.pptxCorporate and higher education May webinar.pptx
Corporate and higher education May webinar.pptxRustici Software
 
Apidays New York 2024 - Scaling API-first by Ian Reasor and Radu Cotescu, Adobe
Apidays New York 2024 - Scaling API-first by Ian Reasor and Radu Cotescu, AdobeApidays New York 2024 - Scaling API-first by Ian Reasor and Radu Cotescu, Adobe
Apidays New York 2024 - Scaling API-first by Ian Reasor and Radu Cotescu, Adobeapidays
 
Polkadot JAM Slides - Token2049 - By Dr. Gavin Wood
Polkadot JAM Slides - Token2049 - By Dr. Gavin WoodPolkadot JAM Slides - Token2049 - By Dr. Gavin Wood
Polkadot JAM Slides - Token2049 - By Dr. Gavin WoodJuan lago vázquez
 
Modular Monolith - a Practical Alternative to Microservices @ Devoxx UK 2024
Modular Monolith - a Practical Alternative to Microservices @ Devoxx UK 2024Modular Monolith - a Practical Alternative to Microservices @ Devoxx UK 2024
Modular Monolith - a Practical Alternative to Microservices @ Devoxx UK 2024Victor Rentea
 
Cloud Frontiers: A Deep Dive into Serverless Spatial Data and FME
Cloud Frontiers:  A Deep Dive into Serverless Spatial Data and FMECloud Frontiers:  A Deep Dive into Serverless Spatial Data and FME
Cloud Frontiers: A Deep Dive into Serverless Spatial Data and FMESafe Software
 
Apidays New York 2024 - The Good, the Bad and the Governed by David O'Neill, ...
Apidays New York 2024 - The Good, the Bad and the Governed by David O'Neill, ...Apidays New York 2024 - The Good, the Bad and the Governed by David O'Neill, ...
Apidays New York 2024 - The Good, the Bad and the Governed by David O'Neill, ...apidays
 
Manulife - Insurer Transformation Award 2024
Manulife - Insurer Transformation Award 2024Manulife - Insurer Transformation Award 2024
Manulife - Insurer Transformation Award 2024The Digital Insurer
 
FWD Group - Insurer Innovation Award 2024
FWD Group - Insurer Innovation Award 2024FWD Group - Insurer Innovation Award 2024
FWD Group - Insurer Innovation Award 2024The Digital Insurer
 
AXA XL - Insurer Innovation Award Americas 2024
AXA XL - Insurer Innovation Award Americas 2024AXA XL - Insurer Innovation Award Americas 2024
AXA XL - Insurer Innovation Award Americas 2024The Digital Insurer
 
Apidays New York 2024 - Passkeys: Developing APIs to enable passwordless auth...
Apidays New York 2024 - Passkeys: Developing APIs to enable passwordless auth...Apidays New York 2024 - Passkeys: Developing APIs to enable passwordless auth...
Apidays New York 2024 - Passkeys: Developing APIs to enable passwordless auth...apidays
 
Boost Fertility New Invention Ups Success Rates.pdf
Boost Fertility New Invention Ups Success Rates.pdfBoost Fertility New Invention Ups Success Rates.pdf
Boost Fertility New Invention Ups Success Rates.pdfsudhanshuwaghmare1
 
[BuildWithAI] Introduction to Gemini.pdf
[BuildWithAI] Introduction to Gemini.pdf[BuildWithAI] Introduction to Gemini.pdf
[BuildWithAI] Introduction to Gemini.pdfSandro Moreira
 

Último (20)

"I see eyes in my soup": How Delivery Hero implemented the safety system for ...
"I see eyes in my soup": How Delivery Hero implemented the safety system for ..."I see eyes in my soup": How Delivery Hero implemented the safety system for ...
"I see eyes in my soup": How Delivery Hero implemented the safety system for ...
 
Artificial Intelligence Chap.5 : Uncertainty
Artificial Intelligence Chap.5 : UncertaintyArtificial Intelligence Chap.5 : Uncertainty
Artificial Intelligence Chap.5 : Uncertainty
 
ICT role in 21st century education and its challenges
ICT role in 21st century education and its challengesICT role in 21st century education and its challenges
ICT role in 21st century education and its challenges
 
CNIC Information System with Pakdata Cf In Pakistan
CNIC Information System with Pakdata Cf In PakistanCNIC Information System with Pakdata Cf In Pakistan
CNIC Information System with Pakdata Cf In Pakistan
 
presentation ICT roal in 21st century education
presentation ICT roal in 21st century educationpresentation ICT roal in 21st century education
presentation ICT roal in 21st century education
 
Apidays New York 2024 - Accelerating FinTech Innovation by Vasa Krishnan, Fin...
Apidays New York 2024 - Accelerating FinTech Innovation by Vasa Krishnan, Fin...Apidays New York 2024 - Accelerating FinTech Innovation by Vasa Krishnan, Fin...
Apidays New York 2024 - Accelerating FinTech Innovation by Vasa Krishnan, Fin...
 
Spring Boot vs Quarkus the ultimate battle - DevoxxUK
Spring Boot vs Quarkus the ultimate battle - DevoxxUKSpring Boot vs Quarkus the ultimate battle - DevoxxUK
Spring Boot vs Quarkus the ultimate battle - DevoxxUK
 
DBX First Quarter 2024 Investor Presentation
DBX First Quarter 2024 Investor PresentationDBX First Quarter 2024 Investor Presentation
DBX First Quarter 2024 Investor Presentation
 
Corporate and higher education May webinar.pptx
Corporate and higher education May webinar.pptxCorporate and higher education May webinar.pptx
Corporate and higher education May webinar.pptx
 
Apidays New York 2024 - Scaling API-first by Ian Reasor and Radu Cotescu, Adobe
Apidays New York 2024 - Scaling API-first by Ian Reasor and Radu Cotescu, AdobeApidays New York 2024 - Scaling API-first by Ian Reasor and Radu Cotescu, Adobe
Apidays New York 2024 - Scaling API-first by Ian Reasor and Radu Cotescu, Adobe
 
Polkadot JAM Slides - Token2049 - By Dr. Gavin Wood
Polkadot JAM Slides - Token2049 - By Dr. Gavin WoodPolkadot JAM Slides - Token2049 - By Dr. Gavin Wood
Polkadot JAM Slides - Token2049 - By Dr. Gavin Wood
 
Modular Monolith - a Practical Alternative to Microservices @ Devoxx UK 2024
Modular Monolith - a Practical Alternative to Microservices @ Devoxx UK 2024Modular Monolith - a Practical Alternative to Microservices @ Devoxx UK 2024
Modular Monolith - a Practical Alternative to Microservices @ Devoxx UK 2024
 
Cloud Frontiers: A Deep Dive into Serverless Spatial Data and FME
Cloud Frontiers:  A Deep Dive into Serverless Spatial Data and FMECloud Frontiers:  A Deep Dive into Serverless Spatial Data and FME
Cloud Frontiers: A Deep Dive into Serverless Spatial Data and FME
 
Apidays New York 2024 - The Good, the Bad and the Governed by David O'Neill, ...
Apidays New York 2024 - The Good, the Bad and the Governed by David O'Neill, ...Apidays New York 2024 - The Good, the Bad and the Governed by David O'Neill, ...
Apidays New York 2024 - The Good, the Bad and the Governed by David O'Neill, ...
 
Manulife - Insurer Transformation Award 2024
Manulife - Insurer Transformation Award 2024Manulife - Insurer Transformation Award 2024
Manulife - Insurer Transformation Award 2024
 
FWD Group - Insurer Innovation Award 2024
FWD Group - Insurer Innovation Award 2024FWD Group - Insurer Innovation Award 2024
FWD Group - Insurer Innovation Award 2024
 
AXA XL - Insurer Innovation Award Americas 2024
AXA XL - Insurer Innovation Award Americas 2024AXA XL - Insurer Innovation Award Americas 2024
AXA XL - Insurer Innovation Award Americas 2024
 
Apidays New York 2024 - Passkeys: Developing APIs to enable passwordless auth...
Apidays New York 2024 - Passkeys: Developing APIs to enable passwordless auth...Apidays New York 2024 - Passkeys: Developing APIs to enable passwordless auth...
Apidays New York 2024 - Passkeys: Developing APIs to enable passwordless auth...
 
Boost Fertility New Invention Ups Success Rates.pdf
Boost Fertility New Invention Ups Success Rates.pdfBoost Fertility New Invention Ups Success Rates.pdf
Boost Fertility New Invention Ups Success Rates.pdf
 
[BuildWithAI] Introduction to Gemini.pdf
[BuildWithAI] Introduction to Gemini.pdf[BuildWithAI] Introduction to Gemini.pdf
[BuildWithAI] Introduction to Gemini.pdf
 

Oscom23 old

  • 1. 1. osCommerce Online Merchant v2.3 . . . . . . . . . . . . . . . . . . . . . . . . . . . . . . . . . . . . . . . . . . . . . . . . . . . . . . . . . . . . . . . . . . . . . . . . . . 4 1.1 Introduction . . . . . . . . . . . . . . . . . . . . . . . . . . . . . . . . . . . . . . . . . . . . . . . . . . . . . . . . . . . . . . . . . . . . . . . . . . . . . . . . . . . . . . . . 4 1.2 New Installation . . . . . . . . . . . . . . . . . . . . . . . . . . . . . . . . . . . . . . . . . . . . . . . . . . . . . . . . . . . . . . . . . . . . . . . . . . . . . . . . . . . . . 4 1.2.1 Requirements . . . . . . . . . . . . . . . . . . . . . . . . . . . . . . . . . . . . . . . . . . . . . . . . . . . . . . . . . . . . . . . . . . . . . . . . . . . . . . . . . . 4 1.2.2 Pre-Installation Steps . . . . . . . . . . . . . . . . . . . . . . . . . . . . . . . . . . . . . . . . . . . . . . . . . . . . . . . . . . . . . . . . . . . . . . . . . . . . 5 1.2.3 Installation Procedure . . . . . . . . . . . . . . . . . . . . . . . . . . . . . . . . . . . . . . . . . . . . . . . . . . . . . . . . . . . . . . . . . . . . . . . . . . . 7 1.2.4 Post-Installation Steps . . . . . . . . . . . . . . . . . . . . . . . . . . . . . . . . . . . . . . . . . . . . . . . . . . . . . . . . . . . . . . . . . . . . . . . . . . . 11 1.3 Catalog (Frontend) . . . . . . . . . . . . . . . . . . . . . . . . . . . . . . . . . . . . . . . . . . . . . . . . . . . . . . . . . . . . . . . . . . . . . . . . . . . . . . . . . . . 12 1.3.1 Template Layout and Header Tags . . . . . . . . . . . . . . . . . . . . . . . . . . . . . . . . . . . . . . . . . . . . . . . . . . . . . . . . . . . . . . . . . 12 1.4 Administration Tool (Backend) . . . . . . . . . . . . . . . . . . . . . . . . . . . . . . . . . . . . . . . . . . . . . . . . . . . . . . . . . . . . . . . . . . . . . . . . . . 14 1.4.1 Configuration . . . . . . . . . . . . . . . . . . . . . . . . . . . . . . . . . . . . . . . . . . . . . . . . . . . . . . . . . . . . . . . . . . . . . . . . . . . . . . . . . . 14 1.4.1.1 Administrators . . . . . . . . . . . . . . . . . . . . . . . . . . . . . . . . . . . . . . . . . . . . . . . . . . . . . . . . . . . . . . . . . . . . . . . . . . . . 14 1.4.1.2 My Store . . . . . . . . . . . . . . . . . . . . . . . . . . . . . . . . . . . . . . . . . . . . . . . . . . . . . . . . . . . . . . . . . . . . . . . . . . . . . . . . . 15 1.4.1.3 Minimum Values . . . . . . . . . . . . . . . . . . . . . . . . . . . . . . . . . . . . . . . . . . . . . . . . . . . . . . . . . . . . . . . . . . . . . . . . . . . 17 1.4.1.4 Maximum Values . . . . . . . . . . . . . . . . . . . . . . . . . . . . . . . . . . . . . . . . . . . . . . . . . . . . . . . . . . . . . . . . . . . . . . . . . . 18 1.4.1.5 Images . . . . . . . . . . . . . . . . . . . . . . . . . . . . . . . . . . . . . . . . . . . . . . . . . . . . . . . . . . . . . . . . . . . . . . . . . . . . . . . . . . 19 1.4.1.6 Customer Details . . . . . . . . . . . . . . . . . . . . . . . . . . . . . . . . . . . . . . . . . . . . . . . . . . . . . . . . . . . . . . . . . . . . . . . . . . 21 1.4.1.7 Shipping & Packaging . . . . . . . . . . . . . . . . . . . . . . . . . . . . . . . . . . . . . . . . . . . . . . . . . . . . . . . . . . . . . . . . . . . . . . 21 1.4.1.8 Product Listing . . . . . . . . . . . . . . . . . . . . . . . . . . . . . . . . . . . . . . . . . . . . . . . . . . . . . . . . . . . . . . . . . . . . . . . . . . . . 23 1.4.1.9 Stock . . . . . . . . . . . . . . . . . . . . . . . . . . . . . . . . . . . . . . . . . . . . . . . . . . . . . . . . . . . . . . . . . . . . . . . . . . . . . . . . . . . 24 1.4.1.10 Logging . . . . . . . . . . . . . . . . . . . . . . . . . . . . . . . . . . . . . . . . . . . . . . . . . . . . . . . . . . . . . . . . . . . . . . . . . . . . . . . . 25 1.4.1.11 Cache . . . . . . . . . . . . . . . . . . . . . . . . . . . . . . . . . . . . . . . . . . . . . . . . . . . . . . . . . . . . . . . . . . . . . . . . . . . . . . . . . . 25 1.4.1.12 Email Options . . . . . . . . . . . . . . . . . . . . . . . . . . . . . . . . . . . . . . . . . . . . . . . . . . . . . . . . . . . . . . . . . . . . . . . . . . . . 26 1.4.1.13 Download . . . . . . . . . . . . . . . . . . . . . . . . . . . . . . . . . . . . . . . . . . . . . . . . . . . . . . . . . . . . . . . . . . . . . . . . . . . . . . . 28 1.4.1.14 GZIP Compression . . . . . . . . . . . . . . . . . . . . . . . . . . . . . . . . . . . . . . . . . . . . . . . . . . . . . . . . . . . . . . . . . . . . . . . . 29 1.4.1.15 Sessions . . . . . . . . . . . . . . . . . . . . . . . . . . . . . . . . . . . . . . . . . . . . . . . . . . . . . . . . . . . . . . . . . . . . . . . . . . . . . . . . 30 1.4.2 Catalog . . . . . . . . . . . . . . . . . . . . . . . . . . . . . . . . . . . . . . . . . . . . . . . . . . . . . . . . . . . . . . . . . . . . . . . . . . . . . . . . . . . . . . . 31 1.4.2.1 Categories & Products . . . . . . . . . . . . . . . . . . . . . . . . . . . . . . . . . . . . . . . . . . . . . . . . . . . . . . . . . . . . . . . . . . . . . . 32 1.4.2.2 Product Attributes . . . . . . . . . . . . . . . . . . . . . . . . . . . . . . . . . . . . . . . . . . . . . . . . . . . . . . . . . . . . . . . . . . . . . . . . . . 37 1.4.2.3 Manufacturers . . . . . . . . . . . . . . . . . . . . . . . . . . . . . . . . . . . . . . . . . . . . . . . . . . . . . . . . . . . . . . . . . . . . . . . . . . . . 39 1.4.2.4 Reviews . . . . . . . . . . . . . . . . . . . . . . . . . . . . . . . . . . . . . . . . . . . . . . . . . . . . . . . . . . . . . . . . . . . . . . . . . . . . . . . . . 40 1.4.2.5 Specials . . . . . . . . . . . . . . . . . . . . . . . . . . . . . . . . . . . . . . . . . . . . . . . . . . . . . . . . . . . . . . . . . . . . . . . . . . . . . . . . . 42 1.4.2.6 Products Expected . . . . . . . . . . . . . . . . . . . . . . . . . . . . . . . . . . . . . . . . . . . . . . . . . . . . . . . . . . . . . . . . . . . . . . . . . 44 1.4.3 Customer Section . . . . . . . . . . . . . . . . . . . . . . . . . . . . . . . . . . . . . . . . . . . . . . . . . . . . . . . . . . . . . . . . . . . . . . . . . . . . . . 45 1.4.3.1 Customers . . . . . . . . . . . . . . . . . . . . . . . . . . . . . . . . . . . . . . . . . . . . . . . . . . . . . . . . . . . . . . . . . . . . . . . . . . . . . . . 45 1.4.3.2 Orders . . . . . . . . . . . . . . . . . . . . . . . . . . . . . . . . . . . . . . . . . . . . . . . . . . . . . . . . . . . . . . . . . . . . . . . . . . . . . . . . . . 49 1.4.4 Locations & Taxes . . . . . . . . . . . . . . . . . . . . . . . . . . . . . . . . . . . . . . . . . . . . . . . . . . . . . . . . . . . . . . . . . . . . . . . . . . . . . . 51 1.4.5 Localization . . . . . . . . . . . . . . . . . . . . . . . . . . . . . . . . . . . . . . . . . . . . . . . . . . . . . . . . . . . . . . . . . . . . . . . . . . . . . . . . . . . 55 1.4.5.1 Currencies . . . . . . . . . . . . . . . . . . . . . . . . . . . . . . . . . . . . . . . . . . . . . . . . . . . . . . . . . . . . . . . . . . . . . . . . . . . . . . . 55 1.4.5.2 Languages . . . . . . . . . . . . . . . . . . . . . . . . . . . . . . . . . . . . . . . . . . . . . . . . . . . . . . . . . . . . . . . . . . . . . . . . . . . . . . . 58 1.4.5.3 Orders Status . . . . . . . . . . . . . . . . . . . . . . . . . . . . . . . . . . . . . . . . . . . . . . . . . . . . . . . . . . . . . . . . . . . . . . . . . . . . . 59 1.4.6 Reports . . . . . . . . . . . . . . . . . . . . . . . . . . . . . . . . . . . . . . . . . . . . . . . . . . . . . . . . . . . . . . . . . . . . . . . . . . . . . . . . . . . . . . 62 1.4.7 Tools . . . . . . . . . . . . . . . . . . . . . . . . . . . . . . . . . . . . . . . . . . . . . . . . . . . . . . . . . . . . . . . . . . . . . . . . . . . . . . . . . . . . . . . . 63 1.4.7.1 Database Backup Manager . . . . . . . . . . . . . . . . . . . . . . . . . . . . . . . . . . . . . . . . . . . . . . . . . . . . . . . . . . . . . . . . . . 64 1.4.7.2 Banner Manager . . . . . . . . . . . . . . . . . . . . . . . . . . . . . . . . . . . . . . . . . . . . . . . . . . . . . . . . . . . . . . . . . . . . . . . . . . 66 1.4.7.3 Cache Control . . . . . . . . . . . . . . . . . . . . . . . . . . . . . . . . . . . . . . . . . . . . . . . . . . . . . . . . . . . . . . . . . . . . . . . . . . . . 69 1.4.7.4 Define Languages . . . . . . . . . . . . . . . . . . . . . . . . . . . . . . . . . . . . . . . . . . . . . . . . . . . . . . . . . . . . . . . . . . . . . . . . . 70 1.4.7.5 File Manager . . . . . . . . . . . . . . . . . . . . . . . . . . . . . . . . . . . . . . . . . . . . . . . . . . . . . . . . . . . . . . . . . . . . . . . . . . . . . 71 1.4.7.6 Send Email . . . . . . . . . . . . . . . . . . . . . . . . . . . . . . . . . . . . . . . . . . . . . . . . . . . . . . . . . . . . . . . . . . . . . . . . . . . . . . . 71 1.4.7.7 Newsletter Manager . . . . . . . . . . . . . . . . . . . . . . . . . . . . . . . . . . . . . . . . . . . . . . . . . . . . . . . . . . . . . . . . . . . . . . . . 72 1.4.7.8 Server Info . . . . . . . . . . . . . . . . . . . . . . . . . . . . . . . . . . . . . . . . . . . . . . . . . . . . . . . . . . . . . . . . . . . . . . . . . . . . . . . 74 1.4.7.9 Who's Online . . . . . . . . . . . . . . . . . . . . . . . . . . . . . . . . . . . . . . . . . . . . . . . . . . . . . . . . . . . . . . . . . . . . . . . . . . . . . 74 1.5 Tips . . . . . . . . . . . . . . . . . . . . . . . . . . . . . . . . . . . . . . . . . . . . . . . . . . . . . . . . . . . . . . . . . . . . . . . . . . . . . . . . . . . . . . . . . . . . . . 75 1.5.1 Tips for Admin . . . . . . . . . . . . . . . . . . . . . . . . . . . . . . . . . . . . . . . . . . . . . . . . . . . . . . . . . . . . . . . . . . . . . . . . . . . . . . . . . 75 1.5.1.1 Tip * Change Product Model Length . . . . . . . . . . . . . . . . . . . . . . . . . . . . . . . . . . . . . . . . . . . . . . . . . . . . . . . . . . . 75 1.5.1.2 Tip * Reset the Order ID . . . . . . . . . . . . . . . . . . . . . . . . . . . . . . . . . . . . . . . . . . . . . . . . . . . . . . . . . . . . . . . . . . . . . 76 1.5.1.3 Tip * Search Engine Optimization . . . . . . . . . . . . . . . . . . . . . . . . . . . . . . . . . . . . . . . . . . . . . . . . . . . . . . . . . . . . . 76 1.5.1.4 Tip * Upload Image to Own Folder . . . . . . . . . . . . . . . . . . . . . . . . . . . . . . . . . . . . . . . . . . . . . . . . . . . . . . . . . . . . . 78 1.5.2 Tips for Catalog . . . . . . . . . . . . . . . . . . . . . . . . . . . . . . . . . . . . . . . . . . . . . . . . . . . . . . . . . . . . . . . . . . . . . . . . . . . . . . . . 79 1.5.2.1 Tip * Add Back Button to product_info . . . . . . . . . . . . . . . . . . . . . . . . . . . . . . . . . . . . . . . . . . . . . . . . . . . . . . . . . . 79 1.5.2.2 Tip * Add Cart Contents to Each Page . . . . . . . . . . . . . . . . . . . . . . . . . . . . . . . . . . . . . . . . . . . . . . . . . . . . . . . . . . 79 1.5.2.3 Tip * Add Catagory Horizontal Rule . . . . . . . . . . . . . . . . . . . . . . . . . . . . . . . . . . . . . . . . . . . . . . . . . . . . . . . . . . . . 80 1.6 Errors & Fixes . . . . . . . . . . . . . . . . . . . . . . . . . . . . . . . . . . . . . . . . . . . . . . . . . . . . . . . . . . . . . . . . . . . . . . . . . . . . . . . . . . . . . . 80 1.6.1 Error * 1016 errno 145 . . . . . . . . . . . . . . . . . . . . . . . . . . . . . . . . . . . . . . . . . . . . . . . . . . . . . . . . . . . . . . . . . . . . . . . . . . . 81 1.6.2 Error * Cannot Add Header Information . . . . . . . . . . . . . . . . . . . . . . . . . . . . . . . . . . . . . . . . . . . . . . . . . . . . . . . . . . . . . . 81 1.6.3 Error * Failed Opening . . . . . . . . . . . . . . . . . . . . . . . . . . . . . . . . . . . . . . . . . . . . . . . . . . . . . . . . . . . . . . . . . . . . . . . . . . . 82 1.6.4 Error * Fatal Class . . . . . . . . . . . . . . . . . . . . . . . . . . . . . . . . . . . . . . . . . . . . . . . . . . . . . . . . . . . . . . . . . . . . . . . . . . . . . . 82 1.6.5 Error * Internal Server . . . . . . . . . . . . . . . . . . . . . . . . . . . . . . . . . . . . . . . . . . . . . . . . . . . . . . . . . . . . . . . . . . . . . . . . . . . 82 1.6.6 Error * Miss Argument . . . . . . . . . . . . . . . . . . . . . . . . . . . . . . . . . . . . . . . . . . . . . . . . . . . . . . . . . . . . . . . . . . . . . . . . . . . 82 1.6.7 Error * Multiple n Letters In Display . . . . . . . . . . . . . . . . . . . . . . . . . . . . . . . . . . . . . . . . . . . . . . . . . . . . . . . . . . . . . . . . . 82 1.6.8 Error * MYI 1016 . . . . . . . . . . . . . . . . . . . . . . . . . . . . . . . . . . . . . . . . . . . . . . . . . . . . . . . . . . . . . . . . . . . . . . . . . . . . . . . 83 1.6.9 Error * Mysql Access Denied for User . . . . . . . . . . . . . . . . . . . . . . . . . . . . . . . . . . . . . . . . . . . . . . . . . . . . . . . . . . . . . . . 84 1.6.10 Error * Mysql Too Many Connections . . . . . . . . . . . . . . . . . . . . . . . . . . . . . . . . . . . . . . . . . . . . . . . . . . . . . . . . . . . . . . 84 1.6.11 Error * Set Time . . . . . . . . . . . . . . . . . . . . . . . . . . . . . . . . . . . . . . . . . . . . . . . . . . . . . . . . . . . . . . . . . . . . . . . . . . . . . . . 84 1.6.12 Error * SSL - This page contains secure and non secure items . . . . . . . . . . . . . . . . . . . . . . . . . . . . . . . . . . . . . . . . . . 84 1.6.13 Error * Write to Config . . . . . . . . . . . . . . . . . . . . . . . . . . . . . . . . . . . . . . . . . . . . . . . . . . . . . . . . . . . . . . . . . . . . . . . . . . 87 1.7 Add-Ons . . . . . . . . . . . . . . . . . . . . . . . . . . . . . . . . . . . . . . . . . . . . . . . . . . . . . . . . . . . . . . . . . . . . . . . . . . . . . . . . . . . . . . . . . . . 88 1.7.1 Authentication . . . . . . . . . . . . . . . . . . . . . . . . . . . . . . . . . . . . . . . . . . . . . . . . . . . . . . . . . . . . . . . . . . . . . . . . . . . . . . . . . 88 1.7.1.1 Yubico . . . . . . . . . . . . . . . . . . . . . . . . . . . . . . . . . . . . . . . . . . . . . . . . . . . . . . . . . . . . . . . . . . . . . . . . . . . . . . . . . . 88 1.7.1.1.1 YubiKey . . . . . . . . . . . . . . . . . . . . . . . . . . . . . . . . . . . . . . . . . . . . . . . . . . . . . . . . . . . . . . . . . . . . . . . . . . . . 88
  • 2. 1.7.2 Payment Modules . . . . . . . . . . . . . . . . . . . . . . . . . . . . . . . . . . . . . . . . . . . . . . . . . . . . . . . . . . . . . . . . . . . . . . . . . . . . . . 93 1.7.2.1 2Checkout . . . . . . . . . . . . . . . . . . . . . . . . . . . . . . . . . . . . . . . . . . . . . . . . . . . . . . . . . . . . . . . . . . . . . . . . . . . . . . . 93 1.7.2.1.1 2Checkout Hosted Payment . . . . . . . . . . . . . . . . . . . . . . . . . . . . . . . . . . . . . . . . . . . . . . . . . . . . . . . . . . . . . 93 1.7.2.2 Authorize.net . . . . . . . . . . . . . . . . . . . . . . . . . . . . . . . . . . . . . . . . . . . . . . . . . . . . . . . . . . . . . . . . . . . . . . . . . . . . . 96 1.7.2.2.1 Advanced Integration Method (AIM) . . . . . . . . . . . . . . . . . . . . . . . . . . . . . . . . . . . . . . . . . . . . . . . . . . . . . . . 96 1.7.2.2.2 Simple Integration Method (SIM) . . . . . . . . . . . . . . . . . . . . . . . . . . . . . . . . . . . . . . . . . . . . . . . . . . . . . . . . . 98 1.7.2.3 ChronoPay . . . . . . . . . . . . . . . . . . . . . . . . . . . . . . . . . . . . . . . . . . . . . . . . . . . . . . . . . . . . . . . . . . . . . . . . . . . . . . . 99 1.7.2.3.1 ChronoPay Hosted Payment Page . . . . . . . . . . . . . . . . . . . . . . . . . . . . . . . . . . . . . . . . . . . . . . . . . . . . . . . 100 1.7.2.4 ClickandBuy . . . . . . . . . . . . . . . . . . . . . . . . . . . . . . . . . . . . . . . . . . . . . . . . . . . . . . . . . . . . . . . . . . . . . . . . . . . . . . 101 1.7.2.4.1 ClickandBuy E-Payment . . . . . . . . . . . . . . . . . . . . . . . . . . . . . . . . . . . . . . . . . . . . . . . . . . . . . . . . . . . . . . . . 102 1.7.2.5 ipayment . . . . . . . . . . . . . . . . . . . . . . . . . . . . . . . . . . . . . . . . . . . . . . . . . . . . . . . . . . . . . . . . . . . . . . . . . . . . . . . . . 104 1.7.2.5.1 ipayment Credit Card . . . . . . . . . . . . . . . . . . . . . . . . . . . . . . . . . . . . . . . . . . . . . . . . . . . . . . . . . . . . . . . . . . 104 1.7.2.6 PayPal . . . . . . . . . . . . . . . . . . . . . . . . . . . . . . . . . . . . . . . . . . . . . . . . . . . . . . . . . . . . . . . . . . . . . . . . . . . . . . . . . . 105 1.7.2.6.1 PayPal Express Checkout . . . . . . . . . . . . . . . . . . . . . . . . . . . . . . . . . . . . . . . . . . . . . . . . . . . . . . . . . . . . . . 107 1.7.2.6.2 PayPal Website Payments Pro (UK) Direct Payments . . . . . . . . . . . . . . . . . . . . . . . . . . . . . . . . . . . . . . . . . 109 1.7.2.6.3 PayPal Website Payments Pro (UK) Express Checkout . . . . . . . . . . . . . . . . . . . . . . . . . . . . . . . . . . . . . . . 111 1.7.2.6.4 PayPal Website Payments Pro (US) Direct Payments . . . . . . . . . . . . . . . . . . . . . . . . . . . . . . . . . . . . . . . . . 113 1.7.2.6.5 PayPal Website Payments Standard . . . . . . . . . . . . . . . . . . . . . . . . . . . . . . . . . . . . . . . . . . . . . . . . . . . . . . 114 1.7.2.7 Sage Pay . . . . . . . . . . . . . . . . . . . . . . . . . . . . . . . . . . . . . . . . . . . . . . . . . . . . . . . . . . . . . . . . . . . . . . . . . . . . . . . . 116 1.7.2.7.1 Sage Pay Form . . . . . . . . . . . . . . . . . . . . . . . . . . . . . . . . . . . . . . . . . . . . . . . . . . . . . . . . . . . . . . . . . . . . . . 118 1.7.2.7.2 Sage Pay Server . . . . . . . . . . . . . . . . . . . . . . . . . . . . . . . . . . . . . . . . . . . . . . . . . . . . . . . . . . . . . . . . . . . . . 121 1.7.2.7.3 Sage Pay Direct . . . . . . . . . . . . . . . . . . . . . . . . . . . . . . . . . . . . . . . . . . . . . . . . . . . . . . . . . . . . . . . . . . . . . . 123 1.7.2.8 WorldPay . . . . . . . . . . . . . . . . . . . . . . . . . . . . . . . . . . . . . . . . . . . . . . . . . . . . . . . . . . . . . . . . . . . . . . . . . . . . . . . . 127 1.7.2.8.1 WorldPay Select Junior . . . . . . . . . . . . . . . . . . . . . . . . . . . . . . . . . . . . . . . . . . . . . . . . . . . . . . . . . . . . . . . . 127 1.7.3 Shipping Modules . . . . . . . . . . . . . . . . . . . . . . . . . . . . . . . . . . . . . . . . . . . . . . . . . . . . . . . . . . . . . . . . . . . . . . . . . . . . . . 129 1.7.3.1 Flat Rate Shipping . . . . . . . . . . . . . . . . . . . . . . . . . . . . . . . . . . . . . . . . . . . . . . . . . . . . . . . . . . . . . . . . . . . . . . . . . 130 1.7.3.2 Per Item Shipping . . . . . . . . . . . . . . . . . . . . . . . . . . . . . . . . . . . . . . . . . . . . . . . . . . . . . . . . . . . . . . . . . . . . . . . . . . 131 1.7.3.3 Table Rate Shipping . . . . . . . . . . . . . . . . . . . . . . . . . . . . . . . . . . . . . . . . . . . . . . . . . . . . . . . . . . . . . . . . . . . . . . . . 132 1.7.3.4 United State Parcel Service (USPS) . . . . . . . . . . . . . . . . . . . . . . . . . . . . . . . . . . . . . . . . . . . . . . . . . . . . . . . . . . . 134 1.7.3.5 Zone Rates Shipping . . . . . . . . . . . . . . . . . . . . . . . . . . . . . . . . . . . . . . . . . . . . . . . . . . . . . . . . . . . . . . . . . . . . . . . 136 1.7.4 Order Total . . . . . . . . . . . . . . . . . . . . . . . . . . . . . . . . . . . . . . . . . . . . . . . . . . . . . . . . . . . . . . . . . . . . . . . . . . . . . . . . . . . . 137 1.8 Upgrade Guides . . . . . . . . . . . . . . . . . . . . . . . . . . . . . . . . . . . . . . . . . . . . . . . . . . . . . . . . . . . . . . . . . . . . . . . . . . . . . . . . . . . . . 138 1.8.1 v2.2 to v2.3.0 . . . . . . . . . . . . . . . . . . . . . . . . . . . . . . . . . . . . . . . . . . . . . . . . . . . . . . . . . . . . . . . . . . . . . . . . . . . . . . . . . . 138 1.8.1.1 (A) (SEC) Administration Tool Log-In Update . . . . . . . . . . . . . . . . . . . . . . . . . . . . . . . . . . . . . . . . . . . . . . . . . . . . 139 1.8.1.2 (SQL) (UP) Update Database Field Lengths . . . . . . . . . . . . . . . . . . . . . . . . . . . . . . . . . . . . . . . . . . . . . . . . . . . . . 140 1.8.1.3 (AC) (COMPAT) Fix Timezone Warning Messages for PHP v5.3 . . . . . . . . . . . . . . . . . . . . . . . . . . . . . . . . . . . . . 141 1.8.1.4 (AC) (COMPAT) Use Perl-Compatible Regular Expressions for PHP v5.3 . . . . . . . . . . . . . . . . . . . . . . . . . . . . . . 142 1.8.1.5 (C) (SEC) Add Customer Session Token to Forms . . . . . . . . . . . . . . . . . . . . . . . . . . . . . . . . . . . . . . . . . . . . . . . . 154 1.8.1.6 (C) (BUG) Validate Removal of Customer Address . . . . . . . . . . . . . . . . . . . . . . . . . . . . . . . . . . . . . . . . . . . . . . . . 163 1.8.1.7 (AC) (BUG) Sanitize Parameters . . . . . . . . . . . . . . . . . . . . . . . . . . . . . . . . . . . . . . . . . . . . . . . . . . . . . . . . . . . . . . 163 1.8.1.8 (A) (UP) Add Support for Basic HTTP Authentication . . . . . . . . . . . . . . . . . . . . . . . . . . . . . . . . . . . . . . . . . . . . . . 171 1.8.1.9 (C) (UP) Generate a New Shopping Cart ID When Restoring Products . . . . . . . . . . . . . . . . . . . . . . . . . . . . . . . . 180 1.8.1.10 (C) (BUG) Fix Navigation History Session Content . . . . . . . . . . . . . . . . . . . . . . . . . . . . . . . . . . . . . . . . . . . . . . . 181 1.8.1.11 (AC) (UP) Improve Validation of E-Mail Addresses . . . . . . . . . . . . . . . . . . . . . . . . . . . . . . . . . . . . . . . . . . . . . . . 181 1.8.1.12 (AC) (UP) Code Cleanup . . . . . . . . . . . . . . . . . . . . . . . . . . . . . . . . . . . . . . . . . . . . . . . . . . . . . . . . . . . . . . . . . . . 186 1.8.1.13 (A) (UP) Update Define Languages Page . . . . . . . . . . . . . . . . . . . . . . . . . . . . . . . . . . . . . . . . . . . . . . . . . . . . . . 187 1.8.1.14 (C) (BUG) Verify Shopping Cart Product Attribute Combinations . . . . . . . . . . . . . . . . . . . . . . . . . . . . . . . . . . . . 191 1.8.1.15 (AC) (UP) Remove PHP3 Compatibility Code . . . . . . . . . . . . . . . . . . . . . . . . . . . . . . . . . . . . . . . . . . . . . . . . . . . 192 1.8.1.16 (AC) (UP) Improve IP Address Detection . . . . . . . . . . . . . . . . . . . . . . . . . . . . . . . . . . . . . . . . . . . . . . . . . . . . . . . 200 1.8.1.17 (A) (BUG) Don't Show Empty Menu Entries . . . . . . . . . . . . . . . . . . . . . . . . . . . . . . . . . . . . . . . . . . . . . . . . . . . . . 204 1.8.1.18 (AC) (UP) Add htaccess Protection to the Images Directory . . . . . . . . . . . . . . . . . . . . . . . . . . . . . . . . . . . . . . . . 204 1.8.1.19 (C) (UP) Optimize Tax Calculations . . . . . . . . . . . . . . . . . . . . . . . . . . . . . . . . . . . . . . . . . . . . . . . . . . . . . . . . . . . 204 1.8.1.20 (AC) (UP) Improve Force Cookie Usage in Sessions . . . . . . . . . . . . . . . . . . . . . . . . . . . . . . . . . . . . . . . . . . . . . 207 1.8.1.21 (A) (BUG) Fix Automatic Removal of Manufacturer Images . . . . . . . . . . . . . . . . . . . . . . . . . . . . . . . . . . . . . . . . 207 1.8.1.22 (A) (UP) Add API Version Tag to Modules . . . . . . . . . . . . . . . . . . . . . . . . . . . . . . . . . . . . . . . . . . . . . . . . . . . . . . 208 1.8.1.23 (C) (UP) Hide Currencies and Languages Info Boxes for Single Currencies and Languages . . . . . . . . . . . . . . . 209 1.8.1.24 (A) (UP) Hide Language Selection if Only One Language is Installed . . . . . . . . . . . . . . . . . . . . . . . . . . . . . . . . . 210 1.8.1.25 (C) (BUG) Fix Retrieval of Special Product Prices . . . . . . . . . . . . . . . . . . . . . . . . . . . . . . . . . . . . . . . . . . . . . . . . 211 1.8.1.26 (A) (BUG) Fix HTML E-Mails . . . . . . . . . . . . . . . . . . . . . . . . . . . . . . . . . . . . . . . . . . . . . . . . . . . . . . . . . . . . . . . . 212 1.8.1.27 (A) (BUG) Improve Saving of Module Parameters . . . . . . . . . . . . . . . . . . . . . . . . . . . . . . . . . . . . . . . . . . . . . . . . 213 1.8.1.28 (AC) (UP) Add Pre-Populated List of Currencies . . . . . . . . . . . . . . . . . . . . . . . . . . . . . . . . . . . . . . . . . . . . . . . . . 214 1.8.1.29 (A) (SQL) (NEW) Introduce Security Directory Permissions Feature . . . . . . . . . . . . . . . . . . . . . . . . . . . . . . . . . . 217 1.8.1.30 (AC) (SQL) (NEW) Introduce Action Recorder Feature . . . . . . . . . . . . . . . . . . . . . . . . . . . . . . . . . . . . . . . . . . . . 219 1.8.1.31 (AC) (UP) Cleanup Language Definitions . . . . . . . . . . . . . . . . . . . . . . . . . . . . . . . . . . . . . . . . . . . . . . . . . . . . . . 227 1.8.1.32 (AC) (NEW) Move Installation Checks to New Security Checks Modules . . . . . . . . . . . . . . . . . . . . . . . . . . . . . . 230 1.8.1.33 (A) (UP) Introduce Windows Compatible is_writable() Function . . . . . . . . . . . . . . . . . . . . . . . . . . . . . . . . . . . . . 236 1.8.1.34 (A) (UP) Bypass HTTP Authentication for IIS Webservers . . . . . . . . . . . . . . . . . . . . . . . . . . . . . . . . . . . . . . . . . 242 1.8.1.35 (AC) (UP) Update PHP_SELF Value . . . . . . . . . . . . . . . . . . . . . . . . . . . . . . . . . . . . . . . . . . . . . . . . . . . . . . . . . . 243 1.8.1.36 (A) (NEW) Introduce Easy Store Logo Uploader . . . . . . . . . . . . . . . . . . . . . . . . . . . . . . . . . . . . . . . . . . . . . . . . . 244 1.8.1.37 (AC) (SQL) (UP) Update Password Hashing to Phpass . . . . . . . . . . . . . . . . . . . . . . . . . . . . . . . . . . . . . . . . . . . 245 1.8.1.38 (C) (BUG) Fix Length Check of Customer Passwords . . . . . . . . . . . . . . . . . . . . . . . . . . . . . . . . . . . . . . . . . . . . . 250 1.8.1.39 (C) (BUG) Fix Notice When Products Without Attributes are Added to the Shopping Cart . . . . . . . . . . . . . . . . . 251 1.8.1.40 (C) (BUG) Verify Languages Currency Exists . . . . . . . . . . . . . . . . . . . . . . . . . . . . . . . . . . . . . . . . . . . . . . . . . . . 252 1.8.1.41 (C) (BUG) Allow Quoted Words to be Searched . . . . . . . . . . . . . . . . . . . . . . . . . . . . . . . . . . . . . . . . . . . . . . . . . 252 1.8.2 v2.3.0 to v2.3.1 . . . . . . . . . . . . . . . . . . . . . . . . . . . . . . . . . . . . . . . . . . . . . . . . . . . . . . . . . . . . . . . . . . . . . . . . . . . . . . . . 253 1.8.2.1 (C) (UP) Confirm New Product Reviews . . . . . . . . . . . . . . . . . . . . . . . . . . . . . . . . . . . . . . . . . . . . . . . . . . . . . . . . 253 1.8.2.2 (C) (A) (BUG) Fix a PHP Notice in Phpass . . . . . . . . . . . . . . . . . . . . . . . . . . . . . . . . . . . . . . . . . . . . . . . . . . . . . . 254 1.8.2.3 (C) (BUG) Fix Reviews Box Language Definition . . . . . . . . . . . . . . . . . . . . . . . . . . . . . . . . . . . . . . . . . . . . . . . . . 255 1.8.2.4 (A) (BUG) Fix Pre-Defined Australian Dollar Currency Code . . . . . . . . . . . . . . . . . . . . . . . . . . . . . . . . . . . . . . . . . 256 1.8.2.5 (A) (UP) Label the HTML Content field for Large Product Images . . . . . . . . . . . . . . . . . . . . . . . . . . . . . . . . . . . . . 256
  • 3. 1.8.2.6 (C) (UP) XHTML Fixes for Popup Pages . . . . . . . . . . . . . . . . . . . . . . . . . . . . . . . . . . . . . . . . . . . . . . . . . . . . . . . . 257 1.8.2.7 (C) (UP) Update Version to v2.3.1 . . . . . . . . . . . . . . . . . . . . . . . . . . . . . . . . . . . . . . . . . . . . . . . . . . . . . . . . . . . . . 259
  • 4. osCommerce Online Merchant v2.3 osCommerce Online Merchant v2.3 Copyright Copyright (c) 2006-2010 osCommerce. All rights reserved. http://www.oscommerce.com Authors Harald Ponce de Leon John Fitchett Melinda Odom Table of Contents Introduction New Installation Catalog (Frontend) Administration Tool (Backend) Tips Errors & Fixes Add-Ons Upgrade Guides Introduction Introduction osCommerce Online Merchant is a free online shop e-commerce solution under continuous development by the open source community. Its core features allows store owners to setup, run, and maintain their online stores with absolutely no software costs or license fees involved, and with no programming or technical knowledge needed. The success of osCommerce Online Merchant is secured by a dedicated team that focuses on the core features, and by an active community of store owners and developers that focus on additional features. To date, the community has provided over 5,000 add-ons that are available for free, that extend on the core features of osCommerce Online Merchant to meet the needs of individual store owners. osCommerce Online Merchant is built with the powerful PHP web scriping language and uses the fast MySQL database server for the online store data. The combination of PHP and MySQL allows osCommerce Online Merchant to run on any webserver environment that supports PHP and MySQL, which includes Linux, Solaris, BSD, Mac OS X, and Microsoft Windows environments. osCommerce was started in March 2000 and has since matured to a solution that is powering many thousands of live shops around the world. New Installation New Installation Requirements Pre-Installation Steps Installation Procedure Post-Installation Steps Requirements Requirements
  • 5. osCommerce Online Merchant can be installed on any PHP enabled web server that can connect to a MySQL database. This includes shared servers, dedicated servers, and local installations running on Linux, Unix, BSD, Mac OS X, and Microsoft Windows operating systems. Web Server PHP MySQL Database Server Web Server The web server must support PHP either as a module or allow execution of CGI scripts. For performance reasons FastCGI is recommended over CGI. PHP osCommerce Online Merchant is compatible with PHP 4 and PHP 5. For performance and security reasons it is recommended to use the latest PHP 5 version on the web server. The following PHP options are recommended to be set in the php.ini configuration file: register_globals Off magic_quotes_gpc Off file_uploads On session.auto_start Off session.use_trans_sid Off The following PHP extensions are mandatory: MySQL MySQL database extension. The following PHP extensions are recommended: GD Image processing module. cURL Network communication library. OpenSSL Encryption library. MySQL Database Server The minimum MySQL version required is v3.23. It is recommended to use the latest MySQL 4 or MySQL 5 version on the database server. The following MySQL storage engines are supported: MyISAM Default storage engine. Pre-Installation Steps Pre-Installation Steps osCommerce Online Merchant is a web based solution that needs its relevant files to exist on the web server. The files can be copied to the web server by extracting the download package on your computer and uploading its contents to the web server via FTP, or by copying the download package to the web server directly and extracting its contents there. Copying the Files to the Web Server Using FTP to Copy the Download Package Contents to the Web Server Directly Extracting the Download Package on the Web Server File Permissions Using FTP to Change File Permissions Changing File Permissions Directly on the Server Database Web Server and Database Server Details Web Server Details Database Server Details Copying the Files to the Web Server
  • 6. The contents of the download package need to be copied to the public HTML directory the web server is serving from. Examples of public HTML directories are: /home/shinyredapples/public_html/ /srv/www/htdocs/ /usr/local/htdocs/ /var/www/vhosts/shinyredapples.com/httpdocs/ The contents of the download package once extracted is: catalog (directory) CHANGELOG community_docs.pdf documentation.pdf extras (directory) LICENSE STANDARD upgrade.html Using FTP to Copy the Download Package Contents to the Web Server The download package of osCommerce Online Merchant should be saved and extracted on your computer to reveal its contents. The directory must be copied to the public HTML directory on the web server.catalog This can be achieved on most FTP clients by dragging the directory from your local file browser panel to the remote panel listing thecatalog files on the web server. All PHP files must be uploaded in ASCII mode (not in Binary mode). Directly Extracting the Download Package on the Web Server The download package of osCommerce Online Merchant should be saved and extracted on the web server to reveal its contents. The directory must be copied to the public HTML directory.catalog This can be achieved with the following terminal command: cp -R catalog /path/to/public/html/directory/ File Permissions The following files need to be writable by the web server. Files Web Server Writable catalog/includes/configure.php catalog/admin/includes/configure.php The and files must have their web server writablecatalog/includes/configure.php catalog/admin/includes/configure.php permission removed after the installation procedure has completed successfully. This is described in the Post-Installation chapter.Steps Please consult with your hosting provider for the correct permission flag to allow the web server to write to those files. This is commonly defined with a permission flag of .755 In some cases a world write permission flag of 777 can be used but may lead to an insecure installation of osCommerce Online Merchant. Changing the file permissions can be performed by most FTP clients or directly on the web server. Using FTP to Change File Permissions Most FTP clients are capable of changing file permissions on the web server. This is commonly performed by right-clicking on the file and selecting "Properties" or "Attributes" on the context menu. The file permissions can be changed by allowing all users to read, write, and execute the file, or by manually entering the world readable and world writable flag of .777
  • 7. Changing File Permissions Directly on the Server Changing file permissions directly on the web server can be performed with the following terminal command: chmod -R 777 /path/to/public/html/directory/catalog/file Database A MySQL database on the web server or database server is required for the installation procedure to successfully import the database table structure and required data settings. Web Server and Database Server Details The following web server and database server details are required during the installation procedure. Please consult your hosting provider if these details are not known. Web Server Details Setting Description Possible Value Server Address The web address to the online store. http://www.shinyredapples.com/catalog/ Root Directory The directory where the online store is installed on the web server. /home/shinyredapples/public_html/catalog/ Database Server Details Setting Description Possible Value Server Address The address of the database server in the form of a hostname or IP address. localhost Username The username used to connect to the database server. shinyredapples Password The password that is used together with the username to connect to the database server. securepassword Database Name The name of the database to hold the data in. oscommerce Installation Procedure Installation Procedure The web based installation procedure configures the online store and imports the configuration data into the database. This is necessary to create a fully functional online store and to create an administrator that administrates the online store through the Administration Tool. The configuration values provided by default are safe to use but may need to be changed depending on the environment of the web server. Installing a New Online Store Step 1: Welcome Page Step 2: Database Server Step 3: Web Server Step 4: Online Store Settings Step 5: Finished! Please review the chapter before continuing with the installation procedure.Pre-Installation Steps Installing a New Online Store The web based installation procedure is automatically started when accessing the online store through a web browser. This can be achieved by entering the WWW address of osCommerce Online Merchant installation in your browser. For example: http://www.shinyredapples.com/catalog/ osCommerce Online Merchant automatically detects if the installation has already been completed and redirects to the installation procedure if it has not yet been performed.
  • 8. Step 1: Welcome Page The first step is the welcome page shown in which displays the current recommended configuration settings for PHP.Figure 1 Figure 1. Welcome Page It is recommended to update a PHP configuration value, or to install and activate a PHP extension, if it is marked against the recommended setting. When making PHP configuration changes or when installing and activating a PHP extension, the web server service needs to be restarted for the changes to take effect. Once restarted, refreshing the welcome installation page and viewing the listing can confirm if the PHP configuration changes have taken place and if it meets the recommendedServer Capabilities settings. Step 2: Database Server The second step shown in sets the database connection parameters to successfully connect to the database server, to import theFigure 2a database table structure, and to import required data.
  • 9. Figure 2a. Database Server Configuration The installation procedure verifies the values entered before proceeding to the next step. If there is a problem connecting to the database server an error message is shown similar to the message shown in .Figure 2b Figure 2b. Database Server Connection Error Message Check to make sure the correct username, password, and database name are listed. Step 3: Web Server
  • 10. The third step shown in sets the web server parameters to successfully serve the online store to users.Figure 3 Figure 3. Web Server Configuration Step 4: Online Store Settings The fourth step shown in sets the store owner and administrator settings for the online store.Figure 4 Figure 4. Store Owner Settings It is important to keep note of the administrator username and password as these are used to login and to access the Administration Tool. Additional administrators can be created in the Administration Tool after the installation procedure has been successfully completed. Step 5: Finished! The last step in the installation procedure stores the database server and web server parameters to the configuration file on the web server. On successfully saving the configuration file, the installation procedure is finalized and the online store is ready to be used as shown on .Figure 5
  • 11. Figure 5. Successful Installation Confirmation Please review the chapter after the installation procedure has been successfully completed toPost-Installation Steps secure the online store. Post-Installation Steps Post-Installation Steps Upon successful installation of osCommerce Online Merchant, the following steps need to be performed to secure the installation of the online store. Remove Installation Files Reset File and Directory Permissions Configuration Files Writable Directories Extra Protection for the Administration Tool Remove Installation Files The directory must be removed from the web server otherwise a user could use the installation procedure and reconfigure thecatalog/install online store to use another database server. Reset File and Directory Permissions Configuration Files The file permissions on catalog/includes/configure.php and catalog/admin/includes/configure.php must be set to deny write access by the web server service. This is commonly performed by setting the permission flag to a read only value of 644 or 444 depending on your server. Writable Directories The following directories must be set to allow the web server service to write to for the Administration Tool to function properly. This is commonly performed by setting the permission flags to a world-writable value of .777 Directories Web Server Writable catalog/images
  • 12. 1. 2. 3. 4. 5. 6. 7. catalog/cache (create this folder) catalog/admin/backups catalog/admin/images/graphs Extra Protection for the Administration Tool The Administration Tool is secured by its own login routine but is still publicly accessible. It is recommended to further protect the Administration Tool by setting a htaccess password on the directory.catalog/admin If no extra protection is set for the Administration Tool, it is recommended to move the directorycatalog/admin/backups outside the public html directory otherwise public access to the backup files would be possible. The location of the backup directory must be correctly defined in .catalog/includes/configure.php Catalog (Frontend) Catalog (Frontend) Template Layout and Header Tags Template Layout and Header Tags Template Layout and Header Tags A basic template layout structure has been introduced in osCommerce Online Merchant v2.2 to simplify the process of customizing the design of the catalog frontend. Building the Template Layout Header and Meta Tag Modules Building the Template Layout The template design layout is defined in and , with the page contentcatalog/includes/template_top.php catalog/includes/template_bottom.php existing in the base catalog files. The final template layout is built with the following procedure: Base catalog file requested (eg, )catalog/index.php Application initialization through catalog/includes/application_top.php Control logic executed for actions performed Template design layout initialization through catalog/includes/template_top.php Page content loaded Template design layout finalized through catalog/includes/template_bottom.php Application finalized through catalog/includes/application_bottom.php The outside structure of the design layout is specified in and ,catalog/includes/template_top.php catalog/includes/template_bottom.php which, for compatibility to earlier osCommerce Online Merchant v2.2 releases, also utilizes ,catalog/includes/header.php , , and .catalog/includes/footer.php catalog/includes/column_left.php catalog/includes/column_right.php The default template layout is defined as: catalog/includes/template_top.php HTML doctype Header/Meta tags Page header ( )catalog/includes/header.php Page left column ( )catalog/includes/column_left.php Base catalog files (eg, )catalog/index.php Page content catalog/includes/template_bottom.php Page right column ( )catalog/includes/column_right.php Page footer ( )catalog/includes/footer.php
  • 13. Header and Meta Tag Modules As all base catalog files use the same file to define the HTML doctype, page title, and header tags, acatalog/includes/template_top.php modular header and meta tags implementation complements the template layout structure that allows page specific modules to define the page title and set additional header and meta tags. The header and meta tag modules are located in inside sub-directories matching the name of thecatalog/includes/modules/header_tags base catalog file (without the file extension), and are loaded in alphabetical order. An example header and meta tag module is which adds the product name to thecatalog/includes/modules/header_tags/product_info/title.php page title on the product information page. If the base catalog file name is changed, the matching header and meta tag module sub-directory must also be renamed otherwise the modules will no longer load together with the page. The header and meta tag modules must follow the following format: <?php class ht_productInfo_title { function parse() { global $oscTemplate; /* module specific code goes here */ $oscTemplate->setTitle('New Page Title Name, ' . $oscTemplate->getTitle()); } } ?> Module Class Name The module class name must be defined as: ht_productInfo_title ht Short code for "Header Tag" to distinguish header and meta tag modules from other modules. productInfo The name of the matching base catalog file in camel case form (without the file extension). title The filename of the module (without the file extension). Examples of modules include: Filename Class Name catalog/includes/modules/header_tags/create_account/module_name.php ht_createAccount_module_name catalog/includes/modules/header_tags/index/module_name.php ht_index_module_name catalog/includes/modules/header_tags/products_new/module_name.php ht_productsNew_module_name Module parse() Method The module must contain a static method which contains the main code for the module, and must define as a globalparse() $oscTemplate variable to alter the header and meta tags for the page. The class provides the following three methods to alter the tags for the page:oscTemplate getTitle Returns the current title of the page. By default the page title is defined by the language definition which is the name of the onlineTITLE shop. $title = $oscTemplate->getTitle(); setTitle Sets a new title for the page. $oscTemplate->setTitle('New Page Title');
  • 14. addHeaderTag Adds a new header tag to the page. $oscTemplate->addHeaderTag('<link rel= type= href= />');"stylesheet" "text/css" "new_stylesheet.css" Installing New Modules New modules can be installed by copying the module files to the appropriate sub-directories in for thecatalog/includes/modules/header_tags page they should be loaded for. The modular implementation allows page specific header and meta tags to be altered without needing to edit core source code files. Administration Tool (Backend) Administration Tool (Backend) The Administration Tool is used to configure the online store, insert products for sale, administrate customers, and process orders. The Administration Tool is protected by a login mechanism which only allows verified administrators to login and to administrate the online store. Configuration Catalog Customer Section Locations & Taxes Localization Reports Tools Configuration Configuration The Configuration section will setup all the basic store configuration. To access the configuration section click on "Configuration" and a drop down of text links will appear underneath. Clicking the "Configuration" link puts you on the "My Store" page. To edit any of these listings in the center of the page click the "i" with the circle around it of each listing to highlight it and click on the "edit" button to the right. Administrators My Store Minimum Values Maximum Values Images Customer Details Shipping & Packaging Product Listing Stock Logging Cache Email Options Download GZIP Compression Sessions Administrators Administrators The store administrators login information was setup during installation of the store. After you login with that information you can edit the username and password and add additional administrators.
  • 15. My Store My Store My Store lists general information values for the store owner. To edit any of these listings click the "i" with the circle around it on the line you want to edit and when that listing is highlighted, click the "edit" button to the right of that listing. Store Name Store Owner E-Mail Address E-Mail From Country Zone Expected Sort Order Expected Sort Field Switch To Default Language Currency Send Extra Order Email to Use Search-Engine Safe URLs Display Cart After Adding Product Allow Guest to Tell a Friend Default Search Operator Store Address and Phone Show Category Counts Tax Decimal Places Display Prices with Tax Figure 1 shows the My Store listing page under Admin -> Configuration -> My Store
  • 16. Figure 1. My Store listing page under Admin > Configuration > My Store Store Name The name of your store that works in conjunction with the search engines. A 15-20 word sentence using some keywords is good. Store Owner The store owner's name, or can also be the name of the store. This value will be in the "from" field of any email that is sent from the website when sent, such as one that is sent to the customer after purchasing. E-Mail Address The store general email address used for receiving. This will be the destination for any emails sent through the website, such as through the feedback from or notification emails sent by the website as notification of new orders. This should be a SINGLE email address only. E-Mail From The email in the "from" field of any email that is sent from the website. It can be the same address as 'E-Mail Address'. This should be a SINGLE email address only. Country Your country of residence for your store. Zone The state or zone of residence for the store. This is necessary to enter, as it is used in any tax or shipping cost calculations. Expected Sort Order When you setup a new product in the "Catalog" section of your store you can set a "Date Available:" for your product which is the "expected
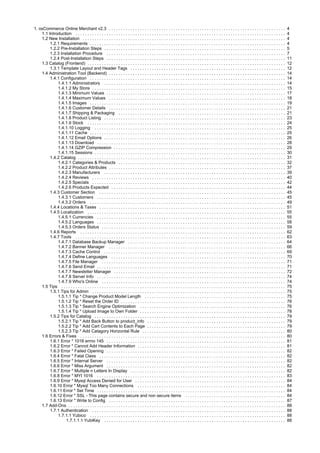
  • 17. sort order" in the expected products box. This value is ordered either ascending or descending order. A listing of all the "products expected" is under "Catalog/Products Expected" in your store admin. Expected Sort Field The "expected sort field" is the column listings to sort by in the expected products box either by the "product name" or the "date expected". Switch To Default Language Currency If you have several currencies it will automatically switch currencies when the language is changed. Send Extra Order Email to The email address where you will receive orders. There can be several email addresses here for backups in this format: Name 1 <email@address1>, Name 2 <email@address2>. If the store owner's email is not in this listing the store owner will not be notified of an order. Whereas the 'E-Mail Address' above is for only one entry, this is how to effectively add addresses to that function. Use Search-Engine Safe URLs Turn on for search-engine safe urls. Display Cart After Adding Product If set to "true" the shopping cart page will show when a product is put in the cart. The customer then must click on "continue" to go back to their product page to continue shopping. The customer will also see their items in the shopping cart box. If this is set to "false" then the customer will stay on the same page of the item they are putting in the cart and will be able to see their items in the shopping cart box in the top right column box of your store. Customized stores may or may not have this feature. Allow Guest to Tell a Friend Enables a box for the customer, when shopping, to send an email about a specific product after accessing the product description area. Default Search Operator Gives you "and' or "or" to use to search with. Store Address and Phone The name of the store owner's store, phone, and other information that will be seen by the customer when they use check/money order to checkout. Show Category Counts Set to "true" to show the counts of products in each main category folder. Set to "false" if you do not want to show the number of products in each main category folder. A small arrow to the right of the folder will still show. Tax Decimal Places Pad the tax value this amount of decimal places. For example, if the cost of tax was $2, this would display as $2.00 Display Prices with Tax Set to "true" the prices will display including tax on the shopping cart before checking out and also shows the tax on the confirmation checkout page not adding the tax again to the product total. If this setting is used then you need to set the "Display Tax" to "false" under "Modules/Order Total" section. Set to "false" the product prices will not display with tax and the tax will display on the confirmation checkout page adding the tax to the product total. Minimum Values Minimum Values The values set for Minimum values are any fields filled out by the store owner that will affect the minimum amount of text for the credit card owner, credit card number, review text, best sellers, and the minimum number of products a customer has purchased. The minimum values are any field that is filled out by the customer. Usually these are left as is but they can be changed if desired. To edit any of these listings click the "i" with the circle around it on the line you want to edit and when that listing is highlighted, click the "edit" button to the right of that listing. Figure 1 shows the Minimum Values listing page under Admin -> Configuration -> Minimum Values
  • 18. Figure 1. Minimum Values listing page under Admin -> Configuration -> Minimum Values Maximum Values Maximum Values The Maximum Values are the values for the different module listings in the store. To edit any of these listings click the "i" with the circle around it on the line you want to edit and when that listing is highlighted, click the "edit" button to the right of that listing. Figure 2 shows the Maximum Values listing page under Admin -> Configuration -> Maximum Values
  • 19. Figure 2. Maximum Values listing page under Admin -> Configuration -> Maximum Values Most of these are self-explanatory. There are just a few that sometimes can be confusing. Address Book Entries Maximum address book entries a customer is allowed to have. Search Results Number of products listed on the store product pages per page. This listing is also used for the admin searches. Page Links Navigation numbers at the bottom of the product listing before going to dots (ex: 5 ...). Categories to List Per Row How many categories to list per row. New Products Listing Maximum number of new products to display in new products page. Order History Maximum number of orders to display in the order history page. Images
  • 20. Images The settings for all the image sizes in the store are listed and editable. Small Image Width & Height Heading Image Width & Height Subcategory Image Width & Height Calculate Image Size Image Required To edit any of these listings click the "i" with the circle around it on the line you want to edit and when that listing is highlighted, click the "edit" button to the right of that listing. Figure 1 shows the Images listing page under Admin -> Configuration -> Images Figure 1. Images listing page under Admin -> Configuration -> Images Small Image Width & Height The "Small Image Width & Height" are the image sizes of the product thumbnails on the product listing page. Heading Image Width & Height The "Heading Image Width & Height" are the image sizes that are uploaded for each category folder that show in the upper right corner of the text body after clicking on a category folder in your store. Subcategory Image Width & Height The "Subcategory Image Width & Height" are the image sizes for all subcategory folders listed in the text body after clicking on a subcategory folder. Calculate Image Size Set to true to set your images. Image Required
  • 21. Image Required set to true will list all images in the store even if an image shows blank because of misnaming. Set to false all the images that are valid will show and the blank ones because of misnaming will not show. Note: If the images are going to be all different sizes a tip is to totally remove all the "width" measurements. Do not put a "0" in the space, instead totally remove it and leave a blank space for the "width only" measurement. If left blank, osCommerce will resize the images according to the "height" measurement and constrain the image so there is no distortion. Customer Details Customer Details Customer detail values are the values entered when a customer creates a new account. These can be turned off or on at the store owner's discretion. Some listings (such as Newsletter) can only be set to only, and some listings (such as Gender) are set to oron or off required not , and other listings give the option of a Minimum number of letters required for that listing.required To edit any of these listings click the "i" with the circle around it on the line you want to edit and when that listing is highlighted, click the "edit" button to the right of that listing. Figure 1 shows the Customer Details listing page under Admin -> Configuration -> Customer Details Figure 1. Customer Details listing page under Admin -> Configuration -> Customer Details The minimum set of fields that can be required to create an account are: First Name Last Name E-Mail Address Password Post Code State
  • 22. Shipping & Packaging Shipping & Packaging Shipping/Packaging allows the store owner to setup values for weight that are used by the shipping modules. Country of Origin Postal Code Enter Maximum Package Weight You Will Ship To edit any of these listings click the "i" with the circle around it on the line you want to edit and when that listing is highlighted, click the "edit" button to the right of that listing. Figure 1 shows the Shipping/Packaging listing page under Admin -> Configuration -> Shipping/Packaging Figure 1. Shipping/Packaging listing page under Admin -> Configuration -> Shipping/Packaging Country of Origin The country of origin to be used in shipping quotes. Postal Code Postal code of the store to be used in shipping quotes. Enter the Maximum Package Weight You Will Ship Put your maximum weight here of a package you will ship, anything over this the packaging will be calculated as multiple smaller parcels. Two values that are next in the list are used for the calculation of the number of packages: "Package Tare weight" (initially set at 3 weight units) and "Larger packages - percentage increase" (standard set at 10%). The shipping module estimates the weight of the packing material as whichever is larger: the fixed Tare weight ("Tare" comes from Arabic for "throw-away"), or the percentage of the product weight. This overhead weight is added to the weight of the products when computing postage. For example, say Tare weight = 3 and Percentage = 10. Then a 1-pound package gets 4 pounds worth of postage (the fixed Tare weight is
  • 23. larger). And 100 pounds of product gets 110 pounds worth of postage (the variable percentage is larger). Product Listing Product Listing The Product Listing section is edited to list the various columns available for the product listings in the store. The columns are sorted from left to right on the product listing page according to the "Value" that is set for each one in this section. If a value of "0" is set that column will be turned completely off on the product listing page of the store. Display Product Image Display Product Manufacturer Name Display Product Model Display Product Name Display Product Price Display Product Quantity Display Product Weight Display Buy Now Column Display Category/Manufacturer Filter Location of Prev/Next Navigation Bar To edit any of these listings click the "i" with the circle around it on the line you want to edit and when that listing is highlighted, click the "edit" button to the right of that listing. Figure 1 shows the Product Listing page under Admin -> Configuration -> Product Listing Figure 1. Product Listing page under Admin -> Configuration -> Product Listing Location of Prev/Next Navigation Bar Location of Prev/Next Navigation Bar sets the location of the Prev/Next Navigation Bar, either top, bottom, or both. The number of products listed on each product listing page in your store is set in Configuration -> Maximum Values -> Search Results. If you are looking for a horizontal presentation of the products on the product listing page instead of the default vertical presentation please look at:
  • 24. Additional Contribution Product Listing in Columns Stock Stock Stock is a complete inventory control allowing the store owner to keep track of all inventory by setting a quantity available for each product. Check Stock Level & Subtract Stock Allow Checkout Mark Product out of Stock Stock Re-order Level NOTE: To edit any of these listings click the "i" with the circle around it on the line you want to edit and when that listing is highlighted, click the "edit" button to the right of that listing. Figure 1 shows the Stock listing page under Admin -> Configuration -> Stock Figure 1. Stock listing page under Admin -> Configuration -> Stock Check Stock Level & Subtract Stock Set Stock level and Subtract Stock to true and the ecommerce software will check your stock and substract from the product stock value you have set on each product if used when items are purchased. Allow Checkout Allow Checkout allows customer to checkout even though your stock level is too low for a particular product. Mark Product out of Stock Mark Product out of Stock is a symbol you can use to mark a product on the checkout page when it is out of stock. The default osCommerce store uses asterisks ***.
  • 25. Stock Re-order Level An amount is entered to define when stock needs to be reordered ... for the store owner's information only. Logging Logging Set Logging features. To edit any of these listings click the "i" with the circle around it on the line you want to edit and when that listing is highlighted, click the "edit" button to the right of that listing. Figure 1 shows the Logging page under Admin -> Configuration -> Logging Figure 1. Logging page under Admin -> Configuration -> Logging Cache Cache The cache control allows the store owner to save certain areas of the shopping cart to a cache folder. This allows for a performance increase when users are browsing the store as the database is not queried again until the cache has expired or has been reset by the store owner. The default value of using cache is "false". When you set it to true but the directory that is set under "Cache Directory" is not available you get a pink error message at the top of the store screen like this when you go to Tools->Cache Error: Cache directory does not exist. Please set this in Configuration -> Cache. Leaving the default /tmp/ might work but when you are on a shared server other osC shops on the server might also write their cache to this folder. The risk is that the catalog menu of another shop might be shown in yours!
  • 26. Therefore you are better off creating a subdirectory folder named (for example) "cache" in the "catalog" folder or directly in your root folder with your store files. Set the chmod permissions to 755 (the webserver should be able to write to this folder) or to 777 in some instances. You can use an FTP program to change the permissions. Click on Cache Directory and set the absolute directory path to the "cache" folder. If there is any question or problem establishing the absolute path, it may be because of server redirects. Go to Tools/Database Backup and see what path is listed by the Admin for the database 'backups' folder. Use that path and append 'catalog/cache/' to the end of it so that your path might appear as: /home/username/www/catalog/cache/ Pay close attention to case sensitivity so that the directory path exactly matches the "cache" folder created in FTP. Go back to Tools/Cache Control, refresh if necessary, and the error message should be gone. To edit any of these listings click the "i" with the circle around it on the line you want to edit and when that listing is highlighted, click the "edit" button to the right of that listing. Figure 1 shows the Cache page in Admin -> Configuration -> Cache Figure 1. Cache page in Admin -> Configuration -> Cache It is recommended that the cache directory is NOT in the same place for all stores hosted on the same server for security reasons. Blocks of cached pages from different store areas are shown in the admin under Tools/Cache Control. The cached pages can be deleted by clicking the reset button under the "action" column which will remove the cached pages. These pages will be replaced automatically when accessed again. Email Options Email Options
  • 27. There are a number of configuration options available to control how the emails are sent to the customer. These have already been set when installed. Only change if you have an understanding or email functions. The information below is for general understanding. E-Mail Transport Method Sendmail SMTP E-mail Linefeeds Use MIME HTML When Sending Emails Verifying E-mail Addresses through DNS Send E-mails To edit any of these listings click the "i" with the circle around it on the line you want to edit and when that listing is highlighted, click the "edit" button to the right of that listing. Figure 1 shows the E-Mail Options listing page under Admin -> Configuration -> E-Mail Options Figure 1. E-Mail Options listing page under Admin -> Configuration -> E-Mail Options E-Mail Transport Method osCommerce is able to send emails containing HTML to the customer. Sendmail is a unix method of sending mails and smtp is used mostly on windows/mac servers. If the webserver is a windows server use smtp and if the webserver is unix based then use sendmail. Sendmail To ensure the correct functioning of the emails to be sent to the customers the following settings need to be set. E-Mail Transport Method = Sendmail E-Mail Linefeeds = LF SMTP An SMTP mail server is most commonly used when hosting websites on Windows based servers. To ensure the correct functioning of the emails to be sent to the customers the following settings need to be set.
  • 28. E-Mail Transport Method = SMTP E-Mail Linefeeds = CRLF E-mail Linefeeds Email Linefeeds defines the character sequence used to separate mail headers. Unix/Linux uses LF alone to separate lines (new line character) but Windows uses a combination of CR & LF ( CRLF Line feed). Set to LF if you are on a Unix/Linux server and set to CRLF if you are on a Windows server. Use MIME HTML When Sending Emails Sending MIME type determines the content of mail like txt/html, txt/xml, etc. Set to true for HTML emails and false for pure text emails. This feature is still under development. Verifying Email Addresses through DNS osCommerce is able to verify email addresses by contacting the name server for a domain to ensure that it is setup to receive emails. This gives a good check to ensure invalid email addresses cant be entered. Since all the email addresses contain the domain name (@domain.com), the existence of the domain name can be verified to make sure to some extent that the email id given by the user is valid. This is done through 'nslookup' command; however, this may not work on windows so keep it false on windows based servers. Some hosting companies disable this feature. If you are having problems when creating customer accounts set this option to False. Send Emails It is possible to disable the sending out of all emails to the customer. This is useful during the development and testing phases. Set to true to send emails to the customer when they register or checkout after purchasing and set to false to disable the sending of emails to customers. Download Download The "Download Section" needs to be enabled if you are going to allow customers to download products directly after purchasing from your store ... examples are ebooks. These downloadable products should be zipped up and uploaded to the "catalog/download" folder of your store. This is accomplished via FTP or your server administration from your hosting company. It is best to use lower case letters to name your files. The zipped products will be read from the "pub" folder. Make sure /catalog/pub has permissions of 777 (chmod 777) and /catalog/download has permissions of 755 (chmod 755). After install these files in catalog/includes/configure.php are shown: define('DIR_FS_DOWNLOAD', DIR_FS_CATALOG . 'download/'); define('DIR_FS_DOWNLOAD_PUBLIC', DIR_FS_CATALOG . 'pub/'); Setup Downloads Enable Download Download by Redirect Expiry Delay (Days) Maximum Number of Downloads To edit any of these listings click the "i" with the circle around it on the line you want to edit and when that listing is highlighted, click the "edit" button to the right of that listing. Figure 1 shows the Download listing page under Admin -> Configuration -> Download
  • 29. Figure 1. Download listing page under Admin -> Configuration -> Download Setup Downloads 1. Under configuration in the admin set up the downloads by turning on "Enable download" and "Download by redirect". Click each listing to highlight and click the "edit" button. Enable Download Whether or not downloadable products are allowed. Download by Redirect Use browser redirection for download. Disable on non-Unix systems. Expiry Delay (Days) How many days the download will be available for before being deleted. Maximum Number of Downloads Maximum number of times the customer will be able to download the file before they are locked out. 2. Add the product in the admin under "catalog -> categories/products" into your category folder. 3. After you have added the product go to "Catalog -> Product Attributes" in the admin. 4. Choose the product in the center bottom "Product Attributes" box of this section. When you have download enabled in the configuration section of your store a downloadable product can be added in the bottom center of the "Catalog/Product Attributes" section. When putting a product in as a downloadable one you have the option to change how many downloads and how many days a customer has to retrieve their downloads. When you list the zip file to be downloaded for that product be sure the name is exactly like the name of the download in the downloads folder as it is "case sensitive". GZIP Compression GZIP Compression
  • 30. When GZIP Compression is set to true each page that is accessed over the Internet is first completely constructed by the server and then compressed using gzip before sending it to the browser (when the browser supports this, otherwise it will not be gzip'ed before sending). Normal setting is 5. It helps customers on slow connections (remember that images are already compressed using gif or jpg, only the HTML is compressed) but is an extra load to the server. To edit any of these listings click the "i" with the circle around it on the line you want to edit and when that listing is highlighted, click the "edit" button to the right of that listing. Figure 1 shows the GZip page under Admin -> Configuration -> GZip Compression Figure 1. GZip page under Admin -> Configuration -> GZip Compression Sessions Sessions A session is a unique number assigned to a client (visitor). The unique number is also used as a filename in /tmp Because the client has the number on his URL (or in a cookie) you can keep track of what he/she wants /does by writing data to the session file. That data is also available in your scripts. So in order for your sessions to work (file based) the php script (which is ran by the webserver) needs write access to a directory (like /tmp). If this directory lives WITHIN your document root (remotely accessible by a browser) it is a security threat as people can actually read other peoples' session files in their browser. Consider this: http://www.yoursite.com/sessions/ If you had directory listings on I would get a nice list of all current sessions on your site on that moment. If I would click one it would show me the contents and if I would copy it and use it as my own session I could impersonate that specific user... (session hijacking) If it lives OUTSIDE the doc root you can not reach it from the outside world. The webserver itself can.
  • 31. So find out who your webserver runs as (linux is usually nobody from group nobody) and change ownership (chown) of the dir to that. Next you chmod it 700 which makes it only accessible to that user/group. It is up to you where you want to store your sessions, mysql or files. The mySQL option is offered for shared hosting accounts where loads of people use the /tmp directory making the chance of session hijacking or session mistakes bigger. To edit any of these listings click the "i" with the circle around it on the line you want to edit and when that listing is highlighted, click the "edit" button to the right of that listing. Figure 1 shows the Sessions page under Admin -> Configuration -> Sessions Figure 1. Sessions page under Admin -> Configuration -> Sessions You should set the configuration value for "Prevent Spider Sessions" to true. In the directory catalog/includes/ there is a file named spiders.txt file which contains a list of search engine spiders and if "Prevent spider sessions" is set to true then those spiders are not allowed to create session ids. This file is not up-to-date. There is a contribution called "Updated spiders.txt". Additional Contribution http://addons.oscommerce.com/info/2455 If you leave "Prevent Spider Sessions" on "false" your site will be indexed by search engines with links that contain session ids. People who click on them arrive at your website with the same session id. If one person is already logged in and the new visitor arrives with the same session id then there is crossover between their accounts, their carts etc. If your site has SSL you can also set "Recreate session id" to true to force updating of session ids when people switch to ssl. Customers on aol cannot use your store with these all set to "True". The only two that can be set to "True" for aol users are "Force Cookie Use" and "Prevent Spider Sessions". Catalog Catalog
  • 32. The "Catalog Section" is for adding main category listings, products, product attributes, manufacturers, and other functions necessary for a well running eCommerce store. Categories & Products Product Attributes Manufacturers Reviews Specials Products Expected Categories & Products Categories & Products The categories are folders which house your products and are listed in the main "Top" dropdown section. Add a New Category Folder Edit a Category Folder Delete a Category Folder Move a Category Folder Add a New Product Ajax Attribute Manager (*additional contribution*) Delete a New Product Move a New Product Copy a New Product All products must be in a catalog -> category folder to be viewable in the osCommerce store. Figure 1 shows the Category listing page under Admin -> Catalog -> Categories & Products Figure 1. Category listing page under Admin -> Catalog -> Categories & Products To edit any of the listings click the "i" with the circle around it on the line you want to edit and when that listing is highlighted, click the "edit", "delete", or "move" button to the right of that listing. Add a New Category Folder
  • 33. Clicking on the "new category" button in the center section will make a new folder. After you have made a new folder or product it will show on the main screen which is called "Top" which is the name in the drop-down box to the upper right of the admin page. This drop-down box will eventually list all the folders in your store. Each category folder is sorted alphabetically unless you attach a sort order to it. To attach a sort order to a category folder put a number in the "sort order" box when making the folder. If you want to change or remove the sort order later, click the "i" with the circle around it to the right of the folder you want to change to highlight it and then click the "edit", "delete", or "move" buttons. Be aware that if you have products in a folder and you click the "delete" button all of the products in that folder will also be deleted. Clicking the "edit" button will edit the category folder itself and clicking the "move" button and choosing a new place for the category folder in the drop down box will move the entire folder with all products in it to another place. To get inside the category folder to add products click the "yellow folder" to the left of the category folder name. This puts you inside the category folder. Edit a Category Folder Figure 2 shows the Categories Edit listing page under Admin -> Catalog -> Categories -> Edit Figure 2. Categories New Categories listing page under Admin -> Catalog -> Categories -> Edit Category Name The Category Name is limited to 32 characters which needs to be adhered to as the number of characters will effect the width of the left column if increased too high. The characters can be increased in the categories_description database table in phpMyAdmin. If you have other languages installed you would set a category name for all languages. Category Image A Category Image can be uploaded for that particular Category. The image size is set in the and is called theConfiguration -> Images Subcategory Image. This image will show to the customer in the upper right corner of the body after clicking on the category. Sort Order The "Sort Order" is set by a number. If a sort order is left blank, the category folders will sort alphabetically.
  • 34. Move a Category Folder After a Category has been created it may be necessary to move it to another Category Folder. Figure 3 shows the Categories Move listing page under Admin -> Catalog -> Categories -> Move Figure 3. Categories Move listing page under Admin -> Catalog -> Categories -> Move To move a Category, click the "i" with the circle around it to highlight the Category you want to move and click the "move" button to the right of that listing. The next page text reads "Please select which category you wish "your main category folder" to reside in." Choose a new location for the Category folder in the drop down menu and click "move". Delete a Category Folder Figure 4 shows the Category Delete listing page under Admin -> Catalog -> Categories -> Delete
  • 35. Figure 4. Category Delete listing page under Admin -> Catalog -> Categories -> Delete To delete a Category, click the "i" with the circle around it to highlight the Category you want to delete and click the "delete" button to the right of that listing. The next page gives warnings about deleting a category. Be aware that if you have products in a folder and you click the "delete" button all of the products in that folder will also be deleted. Clicking the "edit" button will edit the category folder itself and clicking the "move" button and choosing a new place for the category folder in the dropdown box will move the entire folder with all products in it to another place. Add a New Product Clicking on the "new product" button will create a new product. This screen shot will show the Ajax Attribute Manager and the WYSIWYG Editor contributions if they are installed. Figure 5 shows the Product page under Admin -> Catalog -> Categories & Products -> New Product
  • 36. Figure 5. Category listing page under Admin -> Catalog -> Categories & Products -> New Product When you are creating a new product you have the ability to: show the product in or out of stock ... "in" or "turned on" will show a green dot highlighted in the "status" column of the product listings and "out" or "turned off" will show a red highlighted dot in the "status" column of the product listings set the date the product will be available which corresponds with the "Products Expected" module set the product's manufacturer set the product's name and description (if using different languages an editing box will be available for each language to be translated) set the product's quantity in stock (this corresponds with the "Configuration -> Stock" section, product's model number
  • 37. upload the products's image set a product's url if you need to link out to another site set the product's price set the tax class which is used to charge tax on each product set products weight which, if you are using "weight" for your shipping schedule under "Modules/Shipping", each product will need to have a weight listed Note: The tax class must be setup first in the "Locations/Taxes" section in your store admin. Ajax Attribute Manager ( )additional contribution The ajax attribute manager is an easy way to add and assign attributes when adding your products. When you add a product to the store in the product description area you can assign attributes to it which is an easier way to add them than using the Product Attributes as indicated below. The more recent Ajax Attribute Manager will add downloadable products in the product description area. Click to download the .AJAX Attribute Manager WYSIWYG Editor for the Product description area ( ).additional contribution The wysiwyg editor is an easy way to format your product descriptions. Click to download the .WYSIWYG Editor Delete a New Product To delete a new product, click the "i" with the circle around it to highlight the product you want to delete and click the "delete" button on the right. This will completely remove the product from your store database. If you want to keep the product in the store database to show at a later time it is best to click the "red circle under the Status column" which just turns the product off in your store but leaves it in the database. Move a New Product To move a new product, click the "i" with the circle around it to highlight the product you want to move and click the "move" button on the right. This works the same as moving a main category folder. When you click the "move" button you will see this message: "Move (name of product) to:". Choose a place to move it and click the "move" button. Copy a New Product To copy a new product, click the "i" with the circle around it to highlight the product you want to copy and click the "copy to" button on the right. When you click the "copy to" button you will see this message: Copy Method: -Link product -Duplicate product Choose "Link product" if you want to link it only as one product that shows in your store but the product can be added to as many category folders as you want. Click "Duplicate product" if you want to add another separate product ... an example would be if you have a product with the same description but a different name, picture, and price. Note that if you duplicate a product it's status will be set to "off" at first until you click the green status icon that sets it to true ... on. Product Attributes Product Attributes Attributes give the store owner an additional way to market products. For example, shirts are sold of different sizes and different colors. Sizes and Colors are considered attributes. Product Attributes must be set up individually for each product. They are a great way to offer mutliple options to a customer without needing to create many separate but similar products to choose from. It is always best to setup as many of your attributes using this section as possible before adding your products. Figure 1 shows the Categories listing page under Admin -> Catalog -> Product Attributes
  • 38. Figure 1. Product Attributes listing page under Admin -> Catalog -> Product Attributes Product Attributes First, you would setup the "Option Name" (under "Product Options" at the top left). Using shirts as an example you would have at least 2 "Option Names", color and size. Next, you will setup your "Option Values" (under "Option Values" at the top right). In this section you will see a box that shows the "Option Names" that you have already setup. You have color setup as an "Option Name" so make sure color is in this box. Then, to the right of that box is a blank box where you type in one of your colors. Do this for each color and then do this again for each size. Make sure you associate and "Option Value" (red, white, blue) with an "Option Name" (color, size, etc.). Now, you are ready to start adding options to your products. Under the "Products Attributes" section at the bottom you will see a drop down box listing all of your products that you have already put into your store. Choose a product in the drop down menu and add your attributes. A price either increased or decreased from the "base" price of the product can be set by putting an amount in the "Value Price" box and choosing a "plus" or a "minus" sign in the "Price Prefix" drop down menu. If the price stays the same on each attribute then leave the "Value Price" box blank. For Example: size = medium = 10.00 (this is the regular price so no need to put a price in the "price box" size = small = 8.00 (put 2.00 - (this is $2 with a "minus" sign from the base price of $10.00)
  • 39. size = large = 12.00 (put 2.00 + (this is $2 with a "plus" sign from the base price of $10.00) The bottom "Products Attributes" section is the area to setup any downloadable products like eBooks, etc. AJAX Attribute Manager The easier way to install the contribution.AJAX Attribute Manager Using the AJAX Attribute Manager check the boxes of the attributes you want to use for a particular product. A price either increased or decreased from the "base" price of the product can be set by putting an amount in the "Value Price" box and choosing a "plus " or a "minus in the "Price Prefix" drop down menu. If the price stays the same on each attribute then leave the "Value Price" box blank. Manufacturers Manufacturers Manufacturer's Edits Manufacturer's Name Manufacturer's Image Manufacturer's URL Delete Manufacturer A list of manufacturers can be added to the store, and which product was made by which manufacturer can also be set. This allows the customer to search by manufacturers when shopping. Figure 1 shows the Manufacturers listing page under Admin -> Catalog -> Manufacturers Figure 1. Manufacturers listing page under Admin -> Catalog -> Manufacturers To edit or delete any of these listings click the "i" with the circle around it on the line you want to edit and when that listing is highlighted, click the "edit" or "delete" button to the right of that listing. Add a manufacturer with its own image by clicking the "insert" button link. The "Manufacturers URL" link box can also be used as a direct link to the manufacturer that shows only in the "Manufacturer Info" box in the right column if used.
  • 40. Manufacturer's Edits Figure 2 shows the Manufacturers edit page under Admin -> Catalog -> Manufacturers -> Edit Figure 2. Manufacturers edit page under Admin -> Catalog -> Manufacturers -> Edit Manufacturer's Name This is the Manufacturer's name that will be displayed to the customer. It will be the same text displayed regardless of which language the customer is using. Manufacturer's Image An image can be uploaded, typically the Manufacturer's logo, to represent the Manufacturer to the customer. This can be especially helpful if the image is more recognizable than the actual name, especially if the customer doesn't recognize the name entered above due to language differences. Manufacturer's URL The url can be entered to direct the customer to the Manufacturer's website, so the customer can go to the Manufacturer's website. This website can be different for each of the installed languages. Delete Manufacturer After highlighting the Manufacturer you want to remove click the delete button to the right and follow the directions. Reviews Reviews Reviews Listings Reviews Edits Delete Reviews Reviews Listings
  • 41. Each time a customer writes a review it is added to the store database and listed in the "Reviews" section. These reviews can be edited or deleted by the store administrator. To edit any of these listings click the "i" with the circle around it on the line you want to edit and when that listing is highlighted, click the "edit" button to the right of that listing. Figure 1 shows the Reviews listing page under Admin -> Catalog -> Reviews Figure 1. Reviews listing page under Admin -> Catalog -> Reviews Reviews Edits Reviews can also be edited through the Administrative tool. The text of the review can be changed, as well as the rating for the review. Figure 2 shows the Reviews edit page under Admin -> Catalog -> Reviews -> Edit
  • 42. Figure 2. Reviews edit page under Admin -> Catalog -> Reviews -> Edit Delete Reviews To delete a review, click the "i" with the circle around it to highlight the review you want to delete and click the "delete" button to the right. Specials Specials Specials Listings Specials Edit Product Special Price Expiry Date Specials Delete Specials are products that from time to time have a reduced cost to purchase. These are products that currently exist in the store so they must be added through the normal section before setting a special price. The products set on special will be added toCategories & Products the "Specials" box with the special price in your store. When a customer navigates to the product the special price will show and also on the product listing page of your store. Specials Listings
  • 43. To edit any of these listings click the "i" with the circle around it on the line you want to edit and when that listing is highlighted, click the "edit" button to the right of that listing. Figure 1 shows the Specials listing page under Admin -> Catalog -> Specials Figure 1. Specials listing page under Admin -> Catalog -> Specials Specials Edit To add a new special to the store, click on the "new product" button link. Products can be listed as a special discount by a percentage or by an amount. On the next screen choose your product from the drop-down box, put a special price. This can be a percentage (10%) off or it can be a reduced set dollar amount like 10.00, and the expiration date if any. If you enter a new price, the decimal separator must be a '.' (decimal-point), example: 49.99 Leave the expiry date empty for no expiration. Figure 2 shows the Specials edit page under Admin -> Catalog -> Specials -> Edit
  • 44. Figure 2. shows the Specials edit page under Admin -> Catalog -> Specials -> Edit Product This is the product that will be on special. It must be a product that already exists in the store. Special Price This is the price that will be advertised and used when the customer orders the product. The "original" price that was set through the administrative tool will also be displayed with a strikethrough font, with this price displayed in red next to it. Expiry Date These are the dates that describe when the special price and status will be in effect. For example, a store owner might wish to make a product a special for only a week, after which time it will return to normal. These dates allow the store owner to have this functionality without having to return to the administrative tool exactly one week later. Specials Delete To delete a special, click the "i" with the circle around it to highlight the special you want to delete and click the "delete" button to the right. Products Expected Products Expected The products expected section is the listing of products that will be expected to be in your store on a certain date. These product listings originally are setup when adding a new product to the " " section by choosing a "Products Status" and a "DateCategories & Products Available". To edit any of these listings click the "i" with the circle around it on the line you want to edit and when that listing is highlighted, click the "edit" button to the right of that listing. Figure 1 shows the Products Expected listing page under Admin -> Catalog -> Products Expected
  • 45. Figure 1. Products Expected listing page under Admin -> Catalog -> Products Expected When putting a product into the store there is a "Date Available" calendar to setup a date the product will be available for purchase in the store. This must be set when putting the product into the store. The products expected can be edited from this section instead of going into each product in Categories/Products. When a product has an expected date on it that product can be seen on the first page only of the store at the bottom center called "Upcoming Products" and has the date to the right. Customer Section Customer Section The customers section holds all of the customers and orders that have been placed. The customer information can be edited, deleted, see orders, and emailed from this section. The "Search" box in the top of the page will enable you to search for a string of text in the fields last name, first name and email address of customers. The store owner can edit any customer details except the password. Customers Orders Customers Customers Edit Customer Customer Orders Customer Email Customer Delete The names, details and orders of customers who have created accounts and/or purchased from the store are listed showing the date their
  • 46. account was created. A number of options are available for the store owner. To edit any of these listings click the "i" with the circle around it on the line you want to edit and when that listing is highlighted, click the "edit" button to the right of that listing. Figure 1 shows the Customers page under Admin -> Customers Figure 1. Customers listing page under Admin -> Customers Edit Customer This option allows the store owner to edit the name and contact details relating to a particular customer. Figure 2 shows the Customers edit page under Admin -> Customers -> Edit
  • 47. Figure 2. Customers listing page under Admin -> Customers -> Edit Note: The orders for this customer will not be removed when a customer is deleted. Customer Orders The orders option takes the store owner to the orders screen to review the orders for that customer. Figure 3 shows the Customer orders page under Admin -> Customers -> Orders
  • 48. Figure 3. Customer orders page under Admin -> Customers -> Orders Customer Email Figure 4 shows the Customer orders page under Admin -> Customers -> email
  • 49. Figure 4. Customer orders page under Admin -> Customers -> email Customer Delete Inactive customers can be removed. To delete a customer click the "i" with the circle around it on the customer you want to delete and when that listing is highlighted, click the "delete" button to the right of that listing. Orders Orders The Orders section are all the "pending" orders. To edit click the "i" with the circle around it to highlight the order, and then click the "edit" button to see the order. Figure 1 shows the Customer orders page under Admin -> Customers -> Orders
  • 50. Figure 1. Customer orders page under Admin -> Customers -> Orders Orders can be viewed and edited. Comments about the order can be added to notify the customer of the order progress or append the comments. If the comments are sent to the customer the customer will be able to read and review them in their store account as long as the order stays in the database. You also have an invoice and packing slip that can be printed. It is always advisable to print out your order details of each order to keep a hard copy. Figure 2 shows the Customer orders page under Admin -> Customers -> Orders -> Edit
  • 51. Figure 2. Customer orders page under Admin -> Customers -> Orders -> Edit Locations & Taxes Locations & Taxes Tax Classes are required to group Tax Zones and Tax Rates together, and to allow products to be assigned a Tax Class which would inherit the Tax Zone and Tax Rate relationships. Taxes and zones are setup as follows:
  • 52. Countries A listing of all countries in your store. Figure 1 shows the Customers page under Admin -> Locations / Taxes -> Countries Figure 1. Customers listing page under Admin -> Locations / Taxes -> Countries Zones A listing of all zones in your store. Figure 2 shows the Customers page under Admin -> Locations / Taxes -> Zones
  • 53. Figure 2. Customers listing page under Admin -> Locations / Taxes -> Zones Tax Zones The state and tax description of your store. Figure 3 shows the Customers page under Admin -> Locations / Taxes -> Tax Zones
  • 54. Figure 3. Customers listing page under Admin -> Locations / Taxes -> Tax Zones Tax Classes The title of your tax class title like "taxable goods" and the description of that title. Figure 4 shows the Customers page under Admin -> Locations / Taxes -> Tax Classes Figure 4. Customers listing page under Admin -> Locations / Taxes -> Tax Classes Tax Rates The tax rate of the state your store is in.
  • 55. Figure 5 shows the Customers page under Admin -> Locations / Taxes -> Tax Rates Figure 5. Customers listing page under Admin -> Locations / Taxes -> Tax Rates How to Setup Your Taxes In admin, under Locations/Taxes, click on "Tax Zones" Click on the "new zone" button. In the Zone Name: input field I enter "CA" For Description I enter "California". Click on "insert" After you click insert, you will see CA show up in the list. You think you're done, but not quite! Click on the "CA" (or whatever name you have!) in the list and you will see the heading say "Geographical Zones / CA" Here you see a "new zone" button again. Click on it! Now you get to select a geographical zone. From Country, I Select United States From Region, Select California. Click "update" A few more steps to go! Now under "Locations/Taxes" click on "Tax Rates" Click on "new tax rate" button Select "Taxable Goods" from the Tax Class Title drop down menu From the Zone menu, select CA (or whatever zone you created) In the Tax Rate field enter the tax percentage In the Description, enter the description, e.g. "California Sales Tax" Now you're done! Localization Localization Localizatin is seting up your default currency, language, and order status to notify and communicate with your customers. Currencies Languages Orders Status
  • 56. Currencies Currencies Two currencies are installed by default, the US Dollar and the EU Euro. Although the exchange rates of the other currencies will be updated automatically when the update tool is used, if any products have been entered in the Administration Tool, they will need to have the prices updated manually so be sure to install the default currency first, THEN add products! To edit click the "i" with the circle around it on the line you want to edit and when that listing is highlighted, click the "edit" button to the right of that listing. Figure 1 shows the Currencies listing page under Admin -> Localization -> Currencies Figure 1. Currencies listing page under Admin -> Localization -> Currencies Currencies are also editable. Figure 2 shows the Currencies listing page under Admin -> Localization -> Currencies -> Edit