SlideShare una empresa de Scribd logo
ES   Instrucciones de uso y mantenimiento de cocinas
                eléctricas

           FR   Notice d'installation et d'utilisation des cuisinières
                électriques

           PT   Instruções de uso e manutenção de fogões eléctricos

                Instructions for use and maintenance of electric
           GB   cookers


                           5CF-4VMC X


                                              0
                                              C


7281 FUT                           05-2005
                                  C600237I2
ES
                                 INTRODUCCIÓN
Gracias por el interés que ha manifestado por nuestros productos y por la compra de
nuestra cocina.
Antes de instalar y usar la cocina lea y siga atentamente las instrucciones del presente
manual que contiene informaciones importantes acerca de la seguridad, así como
indicaciones y sugerencias que le facilitarán el uso correcto del aparato.
Con el fin de modernizar el aparato y de mejorar su calidad, el fabricante se reserva el
derecho a introducir modificaciones, incluso sin avisar, sin que ello signifique problema
alguno para el usuario.
Nuestros aparatos cumplen con las normas de seguridad EN 60335-1; EN 60335-2-6.
La instalación de la cocina la debe realizar un instalador cualificado de aparatos
eléctricos o técnico del taller autorizado que se deberá atener a las normas de
instalación vigentes.
El fabricante declina cualquier responsabilidad por daños a enseres o personas
derivados de una mala instalación o un uso incorrecto del aparato.
!ADVERTENCIA!
1.   La cocina debe ser reparada exclusivamente por el servicio técnico autorizado.
     La reparación inadecuada puede causar riesgos graves. La cocina dañada no
     puede ser usada hasta que no se efectúe la reparación.
2.   No levante nunca la cocina agarrando del tirador de la puerta del horno.
3. Si la superficie de la mesa vitrocerámica está rota, hay que apagar el aparato
   para evitar choques.
4.   Durante el uso el aparato se pone caliente. Se aconseja mantener cuidado y no
     tocar elementos calientes dentro del horno.
5.   Si se usa el grill, las partes accesibles pueden calentarse. Evitar el contacto de
     los ninos.
6.   Para evitar el riesgo de choque eléctrico, antes de cambiar la lámpara hay que
     asegurarse de que el aparato está apagado.
                                           1
GB                                    TROUBLESHOOTING                                                                                                   INDICE                                              ES
    7 TROUBLESHOOTING                                                                                    1 INFORMACIONES GENERALES ....................................................3
                                                                                                           1.1 CARACTERÍSTICAS TÉCNICAS ......................................................3
    WARNING !                                                                                              1.2 CONSTRUCCIÓN DEL APARATO ....................................................3
    Before proceeding with the troubleshooting, disconnect the cooker from the                             1.3 USO .............................................................................................4
    electric mains.
                                                                                                           1.4 PREPARACIÓN .............................................................................4
In case of disturbances in the cooker operation, check the guidelines below to learn if you are able       1.5 INDICACIONES IMPORTANTES .....................................................4
to remedy the problem by yourselves.                                                                     2 INSTALACIÓN .................................................................................4
                                                                                                           2.1 UBICACIÓN ..................................................................................4
Oven fails to be turned on
                                                                                                           2.2 CONEXIÓN ...................................................................................5
•     Burnt fuses - replace them.
•     If the fuses burn again, it may mean that too many units are operated at the same time.            3 USO DE LA ENCIMERA VITROCERÁMICA .....................................6
                                                                                                           3.1 REGLAS GENERALES DE USO DE LA ENCIMERA
Oven lighting does not function                                                                                VITROCERÁMICA ........................................................................6
                                                                                                           3.2 ELECCIÓN DE LOS RECIPIENTES ADECUADOS .............................6
                                                                                                           3.3 INDICADOR DE CALENTAMIENTO ...............................................7
                          If the oven has been operated and is still hot, wait until it cools down.
                                                                                                         4 HORNO ...........................................................................................7
                  2
                          •    Bulb is not screwed all the way in - unscrew glass bowl 1 from lamp         4.1 CONSTRUCCIÓN Y EQUIPAMIENTO .............................................7
                               socket 2, and screw the bulb 3 all the way in (Fig. 17).                    4.2 MANDO DE HORNO ............................................................8
                  3
                          •    Burnt bulb - unscrew glass bowl 1 of the lamp, and replace with a           4.3 MANDO SELECTOR DE FUNCIONES ............................................8
                 1             new bulb featuring the following parameters: type E14; 230 V; 25 W;
                                                                                                           4.4 MANDO REGULADOR DE TEMPERATURA .......................................8
                               temperature resistance 300°C.
                                                                                                           4.5 PROGRAMADOR ELECTRÓNICO...................................................9
                                                                                                           4.6 ENCENDIDO Y APAGADO DEL HORNO ..........................................9
                                                                                                                   4.6.1   ENCENDIDO DEL HORNO ...............................................................9
       Fig. 17                                                                                                     4.6.2   APAGADO DEL HORNO ...................................................................9
                                                                                                           4.7 MODALIDADES DE USO .............................................................9
Too much smoke in the oven                                                                                 4.8 INDICACIONES REFERIDAS AL ASADO........................................................11
•     When grilling, the generated smoke is a normal condition. The amount of smoke can be               5 PROGRAMADOR ELECTRÓNICO ..............................................13
      lowered by decreasing the temperature or reducing the amounts of fat and water in baking           6 LIMPIEZA Y MANTENIMIENTO .....................................................17
      dish.
                                                                                                           6.1 ADVERTENCIAS GENERALES ....................................................17
•     Dirty turnspit. The fat left on the turnspit from the previous usage will be burnt for some time
      and thus generating smoke. Take care to clean the turnspit thoroughly after each use.                6.2 LIMPIEZA DE LA ENCIMERA VITROCERÁMICA ..............................17
                                                                                                           6.3 LIMPIEZA DEL HORNO ................................................................18
Flashing message "0.00" on timer display                                                                           6.3.1   DESMONTAJE DE LA PUERTA DEL HORNO ...................................19
•    Voltage drop or momentary interruption in the mains power supply. Disconnect the cooker from                  6.3.2   DESMONTAJE DE LAS GUÍAS Y DE LAS PROTECCIONES
     the mains, wait a moment, then connect to the mains again, and set the current time.                                  LATERALES CATALÍTICAS ...............................................................19
                                                                                                                   6.3.3   DESMONTAJE DE LA PROTECCIÓN CATALÍTICA TRASERA ...........20
                                                                                                         7 ELIMINACIÓN DE DEFECTOS ......................................................21


                                                  21                                                                                                        2
ES                                 INFORMACIONES GENERALES                                                                                      CLEANING AND MAINTENANCE                                         GB
1 INFORMACIONES GENERALES
1.1 CARACTERÍSTICAS TÉCNICAS
                                                                                                       Tabla 1
                                                                                  5CF-4VMC X
                                                                                                                                                                                                             Fig. 16
Dimensiones externas de la cocina (altura x anchura x profundidad)              850 x 600 x 600 [mm]
Dimensiones internas del horno      (altura x anchura x profundidad)           335 x 405 x 425 [mm]
                                                                3
Volumen del horno                                            [dm ]                    58,0
                                                                                   2 unidades
 Focos de la encimera
                                                                                    1 unidad
 vitrocerámica HiLight
                                                                                    1 unidad                     6.3.4 CLEANING THE INTERIOR OF THE OVEN COMPARTMENT
                                                                                        •                        •   After removing the guides and catalytic covers, clean the interior of the oven compartment.
                                                                                        •                        •   Clean the enamelled surfaces with kitchen cleaning agents.
                           grill                             2,0 kW                     •
                                                                                                                 •   In order to clean baked stains that are difficult to remove, special agents for cleaning ovens can
Equipamiento del horno                                                                  •                            be used. However, these chemicals are caustic and therefore they should be used very
                                                                                        •                            carefully in minimum quantities, observing the manufacturer's recommendations on their use.
                           girapollos
                                                                                        •                        •   After cleaning the oven interior first assembly the rear catalytic shield 2 with the screws 1
                           ventilador
                                                                                                                     (fig. 16).
                                                                                        •
                                                                                                                 •   Then assembly the side catalytic shields and the guides on both side walls of the oven.
 Potencia nominal de la cocina                                 kW                      8,7
 Programador electrónico                                                                •                            CAUTION !
1.2 CONSTRUCCIÓN DELAPARATO                                                                                          Special agents for cleaning ovens can only be used on enamelled surfaces. It is
                                                                       Fig. 1                                        forbidden to use it for cleaning the covers coated with catalytic enamel.
                                                                       1- encimera vitrocerámica                     During assembly you should pay attention if guides are fastened on the right
                                                                       2 - foco ø 145 mm                             wall of oven. The bar, limiting insertion of the sheet or net in chamber, should
                                                                       3 - foco ø 210 mm                             be behind the rear hanging of guides.
                                                                       4 - foco ø 180 mm
                                                                       5 - horno eléctrico
                                                                       6 - panel de mandos
                                                                       7 - puerta del horno
                                                                       8 - cajón
                                                                       9 - bandeja
                                                                       10 - parrilla
                                                                       11 - indicador de calentamiento
                                                                       12 - mando selector de funciones
                                                                       13 - mando regulador de
                                                                             temperatura
                                                                       14 - programador electrónico
                                                                       15 - piloto regulador de
                                                                             temperatura
                                                                       16 - piloto funcionamiento de
                                                                            cocina
                                                         3                                                                                                        20
GB                                 CLEANING AND MAINTENANCE                                                                                      INSTALACIÓN                                    ES
•        Open the door entirely                                                                             1.3 USO
•        Lock hinges on both sides of the door by placing the clamping ring 1 on the catch 2 of the hinge
         bow 3 (fig. 14)                                                                                    •     La cocina se ha diseñado para la preparación de alimentos exclusivamente en el
                                                                                                                  hogar. Su uso para otros fines está prohibido.
•        Next grasp the door with both hands, turn it in closing direction through an angle of 450 and
         take out the hinges.                                                                               •     El presente aparato cumple con las normas antiparasitarias de la UE.

    CAUTION!                                                                                                1.4 PREPARACIÓN
    1. The hinge bow is tense with a big strength, therefore while taking out the                           1.    Limpie las superficies esmaltadas y de cristal con un paño suave y húmedo.
       door a special care must be taken not to cut one's own fingers                                       2.    El horno, la rejilla, la bandeja, etc. límpielos con una disolución caliente de
    2. During cleaning the upper wall of oven you should pay attention to electric                                detergente.
       heaters, temperature sensor and lamp of oven illumination; do not change
       position of sensor setting                                                                           3.    Antes de usar la cocina por primera vez, ponga los focos en marcha durante unos
    3. Do not pour water onto the bottom of oven otherwise it may trickle through
                                                                                                                  3 minutos sin recipiente.
       some possible leakage and get on the lower heater.                                                   4.    Ponga el horno en marcha a la máxima temperatura durante 1 hora. El humo y olor
                                                                                                                  que se desprenden del horno durante este tiempo son de poca importancia y
When the oven door is removed, you can dismantle both pairs of runners. The runners and oven                      basta asegurar la ventilación correcta abriendo las ventanas.
bottom should be preferably cleaned each time they get dirty.
                                                                                                            1.5 INDICACIONES IMPORTANTES
6.3.2. DISASSEMBLY OF GUIDES AND SIDE CATALYTIC SHIELDS
                                                                                                            1.    Durante el uso, los focos de la encimera vitrocerámica y la cavidad del horno se
            a)                                              b)                                                    calientan. !Evite el acceso de los niños!
                                                                                                            2.    Las grasas y los aceites sobrecalentados pueden quemarse fácilmente, por lo
                                                                                                                  tanto los alimentos de este tipo prepárelos siempre bajo control.
                                                                                                            3.    En caso de avería, desconectar la cocina de la red eléctrica.
                                                                                                            4.    Durante su uso la cocina se calienta. !Tengan cuidado de no tocar elementos
                                                                                                                  calientes dentro del horno! !Corre el riesgo de quemarse!
                                                                                                            5.    Para quitar las ollas y sacar moldes del horno se recomienda trabajar con guantes
                                                                                                                  de protección.
                                                                                                            6.    En el horno y el cajón no almacene objetos inflamables y no resistentes al calor.
                                                                                                            7.    No sobrecargue la puerta abierta. No se apoye sobre ella.
                                                                                                            8.    Los cables de alimentación de otros electrodomésticos deben pasar lejos de la
                                                  Fig. 15                                                         cocina encendida y caliente.
                                                                                                            9.    No utilice el aparato para calentar el local.
To disassembly the side catalytic shields you must first disassembly both the guides.
Disassembly of guides:                                                                                           2 INSTALACIÓN
     – gently press the ladder bar 1 down and take it from beneath the blocking cap 2, (fig. 15a),
     – turn aside the guides 4, lift and take them off from the oven openings (fig. 15b),                   2.1     UBICACIÓN
     – take the catalytic shields 3 out.
                                                                                                            •    Retire de la cocina los elementos de embalaje, incluido el plástico que recubre las
6.3.4 DISASSEMBLY OF REAR CATALYTIC SHIELD                                                                       partes de acero inoxidable. Los materiales del embalaje deben ser tratados de
                                                                                                                 acuerdo con la normativa vigente.
     –      unscrew four screws 1, marked with arrows (fig. 16),
     –      take the shield 2 from the oven rear wall 3.                                                    •    El local debe ser seco y adecuadamente ventilado. La ubicación del aparato debe
                                                                                                                 garantizar el acceso libre a todos los elementos de mando.
    CAUTION !                                                                                               •    La cocina puede ser colocada en fila de los muebles solamente hasta la altura de
    The oven must be switched off before removing the guard.                                                     850mm. La distancia entre los lados laterales de la cocina y los armarios de la
                                                                                                                 cocina debe ser por lo menos 30mm.

                                                     19                                                                                                 4
ES                                                 INSTALACIÓN                                                                                                  CLEANING AND MAINTENANCE                                          GB
•           En caso de instalar una campana, la distancia mínima entre la encimera de gas y                                  a)                               b)
            la campana debe ser de 650mm. No coloque muebles por encima de la cocina.                                                                                           •    The cookware used for cooking on the ceramic
•           Antes de usar el aparato, es preciso nivelarlo. Para este fin dispone de patas                                                                                           hob should always be clean and dry. Draw
            regulables a las que se accede retirando el cajón.                                                                                                                       special attention to the cookware bottoms as
                                                                                                                                                                                     food residue stuck to them will bake during the
                                                                                                                                                                                     next use of the hob.
2.2 CONEXIÓN
El aparato debe ser instalado adecuadamente por un instalador cualificado conforme                                                                                                  Fig. 13
con la normativa vigente. Está prohibido introducir cambios en la instalación eléctrica
de la cocina.                                                                                                                6.3 OVEN CLEANING
Antes de proceder a la conexión asegúrese de que:
                                                                                                                                  CAUTION!
        -     la tensión nominal en el local es igual que la indicada en la placa de                                              1.  Before cleaning you should wait until oven cools down. Hot heaters may
              características,                                                                                                       cause burns.
        -     la línea de alimentación del aparato está preparada para suministrar la potencia                                    2.  Cleaning the oven in use of appliances for steam generation under pressure
                                                                                                                                     is not allowed.
              indicada en la placa de características.
                                                                                                                                  3.  It is the best to clean the bottom of the oven after each use, not to allow the
La instalación eléctrica de alimentación de la cocina, debe estar equipada con un                                                    remains of food and spots of oil to roast again.
interruptor de seguridad que actúa en caso de avería. La distancia de apertura de los
contactos del interruptor debe ser igual o superior a 3mm.                                                                   •         The oven compartment is coated with ceramic enamel, and both of the side covers and the
                                                                                                                                       rear cover are coated with catalytic enamel.
Para conectar el cable de alimentación a la red se debe tener en cuenta que:                                                 •         During normal use, the oven compartment is heated to high temperatures, which facilitates
        -     el cable verde-amarillo (de protección) debe conectarse al borne de tierra                               .               absorbing the emitted fumes by the catalytic enamel.
        -     el cable azul es neutro (cero),                                                                                •         Periodically, especially after cooking very fat dishes, the self-cleaning cycle must be carried
                                                                                                                                       out. It is done by in turning the oven on for one hour's time and setting the maximum temperature
        -     los cables marrón, negro y rojo son para la fase (live),                                                                 (250°C). During this time, the oven door should be closed. During the self-cleaning cycle, the
        -     el cable no debe entrar en contacto con las superficies cuya temperatura sea                                             dirt deposited on the oven walls oxidizes and evaporates.
              superior a 75OC,
                                                                                                                                  CAUTION !
        -     en caso de que el aparato se entregue sin cable, utilizar uno del tipo H05RR-F ó
                                                                                                                                  No detergents nor soap can be used for cleaning the covers coated with the catalytic
              H05V2V2 con la sección adecuada como arriba se ha indicado.
                                                                                                                                  enamel as this could cause damage to the enamel.
A continuación se representa el esquema de posibles conexiones:
                                                                                                                             •         After some time, the catalytic covers will loose their self-cleaning properties; when their
    1N ~230V 50Hz          2N ~400V 50Hz            3N ~400V 50Hz          2 ~230V 50Hz       3 ~230V 50Hz                             surface becomes glossy they should be replaced.
                                        2                                                                  2                 •         In order to replace the catalytic covers, it is necessary to remove the oven door and guide
      3 x 6 mm 2             4 x 2,5 mm               5 x 1,5 mm 2           3 x 6 mm 2         4 x 2,5 mm
                                                                                                                                       assembly.
    L 1 L 2 L3 N N         L 1 L 2 L3 N N          L 1 L 2 L3 N N          L 1 L 2 L3 N N    L 1 L 2 L3 N N
                                                                                                                             6.3.1         DISASSEMBLY OF OVEN DOOR
    L1                N PE L1    L2           N PE L1 L2 L3           N PE L1          L 2 PE L1          L2        L 3 PE
                                       230V                    230V                                230V      230V
                                230V                      230V
              230V                                                              230V                  230V
                                                        230V
                                                        Fig. 2
A -Int. nominal por fases; B - Protección                                                                      Tabla 2
    A          34,8             26,1                    13,0                    34,8                  22,6
    B          40,0             32,0                     16,0                   40,0                  25,0
                                                                                                                                                                   Fig. 14 Taking out the oven door
                                                           5                                                                                                                        18
GB                               CLEANING AND MAINTENANCE                                                                          USO DE LA ENCIMERA VITROCERÁMICA                               ES
Unlocking the programmer
                                                                                                          3 USO DE LA ENCIMERA VITROCERÁMICA
    – Simultaneously press the buttons         and        and hold them until the indicator   goes out.   3.1 REGLAS GENERALES DE USO DE LA ENCIMERA VITROCERÁMICA
    Caution !
                                                                                                          •   Evitar caídas de objetos duros sobre la encimera ya que esta podría romperse.
    Setting the function knob on position "0" does not disable the safety features.
                                                                                                          •   No rascar la superficie con puntas agudas de recipientes u objetos.
5.9 SOUND SYGNALS THE PROGRAMMER EMITS                                                                    •   La superficie de la encimera es resistente pero puede rayarse. Por ello es
                                                                                                              aconsejable no rozar las ollas sino levantarlas al mover.
There is a possibility to turn off the signals emitted by the programmer.                                 •   Los recipientes deben colocarse en medio del círculo de foco marcado.
1. Turning off the sound signals:                                                                         •   Los focos pueden ponerse en marcha después de haber colocado encima la olla.
    -    press and hold the button      down, at the same time press and hold down the button         .       No se debe poner en marcha el foco con la olla vacía o con una olla de fondo
2. Activating the sound signals:                                                                              deformado; corre el riesgo de avería.
    -    press and hold the button      down, at the same time press and hold down the button         .   •   En la encimera no pueden prepararse alimentos en lámina de aluminio o en
                                                                                                              recipientes de plástico; tampoco se debe colocar objetos de plástico.
    6. CLEANING AND MAINTENANCE
                                                                                                          3.2 ELECCIÓN DE LOS RECIPIENTES ADECUADOS
    Warning !
    Before proceeding with cleaning, disconnect the cooker from the electrical
    power supply, and wait until it cools down.
                                                                                                          •   La selección de los recipientes adecuados es una de las condiciones del buen
                                                                                                              funcionamiento de la encimera vitrocerámica.
6.1 GENERAL REMARKS                                                                                       •   Las ollas deben tener fondos gruesos, planos y secos con diámetro igual o mayor
                                                                                                              que el del foco. Si el diámetro del fondo de la olla es menor que el del foco, parte del
•       The cooker must not be cleaned with the use of any coarse-grained, abrasive powders, abrasive         calor no se aprovecha.
        sponges, aggressive chemical agents and sharp objects.
•       The parts made of stainless steel, knobs and fascia panel should be cleaned with soft cleaning                                             !Correcto!
        liquids without any abrasive powders since they could damage the overprints.
                                                                                                                                                   •     Poco consumo de energía
•       After using them, baking tins and forms, grates and roast pans should be soaked in luke-warm
        water with the addition of washing liquid, then washed and carefully dried.
                                                                                                                                                   •     Buena conducción de calor
•       Check to make sure that the oven door seal is clean.                                                                                             - ollas planas
                                                                                                                                                         - diámetro del fondo igual al del foco
6.2 CLEANING THE CERAMIC HOB                                                                                                                             - tapa bien ajustada
•       Clean the ceramic hob surface regularly after each use, as even the smallest dirt will bake       •    La superficie del fondo deformada aumenta el tiempo de cocción y el consumo de
        during the next use.                                                                                   energía eléctrica.
•       The hob should be cleaned with the special cleaning agents intended for this purpose.
•       Avoid using abrasive sponges, powders and creams.                                                 !Incorrecto!
•       Small stains should be removed with a damp cloth or sponge (Fig. 13a) moistened with
        lukewarm water with the addition of soft cleaning agent, then wipe the hob until it is dry.       •    Mucho consumo de energía
•       Heavy stains should be removed with the use of special agents for cleaning ceramic hobs.          •    Mala conducción de calor
•       In order to remove food build-up from the ceramic hob, we advise to use a wooden blade or         •    Largo tiempo de cocción
        special scraper (Fig. 13b), taking care not to scratch the glass surface of the hob.

    WARNING !
    Do not use oven cleaning agents for cleaning the ceramic hob, since they are
    very aggressive and can cause the permanent damage to the hob surface.

•       Keep away from the hob heating zones such materials as plastics, or aluminium foil, as they
        can melt. In case they have malted onto the surface, remove them immediately from the hob
        surface (when it is still warm). Similarly, with the foods with high sugar content; on the hot
        surface of the hob, sugar can melt very quickly resulting in permanent stains. The change in      Olla demasiado pequeña         Fondo de la olla deformado                Tapa no ajustada
        the hob surface colour does not affect its proper functioning.                                                                                 Fig. 3

                                                     17                                                                                                  6
ES                    USO DE LA ENCIMERA VITROCERÁMICA                                                                         ELECTRONIC PROGRAMMER                                         GB
3.3 INDICADOR DE CALENTAMIENTO                                                             -     Set the desired time with the buttons           and / or     e.g. 25 minutes; after a few seconds
                                                                                                 the function is active, the indicator glows continuously; the display shows current time.
                         •    El calentamiento de los focos, está marcado por el
                                                                                           -     When the set time has come to an end the sound signal turns on (see point 5.3) and the
                              indicador especial situado en la parte delantera de la
                              encimera (figura 4).                                               indicator      is flashing.
     B            C
                         •    Cuando los focos están calientes, están también           Changing the timer setting:
                              encendidos los pilotos indicadores de calentamiento                 Perform the same operations as with setting the timer.
                              correspondientes a cada foco.
     A            D                                                                     Erasing the timer setting:
                         •    Los pilotos se encienden cuando la temperatura de los
                              focos supera los 50oC.                                       -    Press repeatedly the button           , until the indicator   starts flashing;
                         •    En caso de que los pilotos se quemen y no señalicen el       -    Press the button        and hold it until 0:00 appears on the display.
         Fig. 4               calor, avise al servicio de asistencia técnica.
                                                                                        After a few seconds the indicator             goes out. Current time or the time left to baking end will be
                         •·    Los focos de la encimera vitrocerámica se encienden y    shown on the display (if there was a programme set before).
                               se apagan girando los mandos (figura 5) situados en el
                               panel de mandos. El mando puede girarse en ambos           Caution !
                               sentidos.                                                  If the timer is used while a programme is being operated, you must remember
                                                                                          that after the timer is turned off, the programmer does not switch off the oven.
                         •     Antes de poner el foco en marcha asegúrese si el mando
                               corresponde al foco que quiere activar.
                                                                                        5.7 ERASING FUNCTIONS CONNECTED WITH MEASURING THE
                         •     Girando el mando en sentido horario se consigue el
                               aumento gradual de potencia del foco del mínimo al          TIME
         Fig. 5                máximo.                                                  All the earlier set functions may be erased in two ways:
                                                                                        1. Press and hold for a few seconds the button     . The indicators of the chosen functions will
                                                                                           turn off which means they are no longer active.
4 HORNO                                                                                 2. Set the function knob on the position "0".
4.1 CONSTRUCCIÓN Y EQUIPAMIENTO
                                                                                           Caution !
                                                                                           After setting the function knob on position "0" the oven is turned off whereas the
                                                                                           timer is not.
                                                                                        If functions are erased when the oven is operating, the oven changes into manual mode and the
                                                    Fig. 6
                                                                                        user should control its further work. To turn the oven off both control knobs must be set on position
                                                    1 - resistencia superior,           "0".
                                                    2 - resistencia del grill;
                                                    3 - resistencia inferior;           5.8 SAFETY LOCK FUNCTIONS
                                                    4 - proteccion perforada;
                                                                                        1. AUTOMATIC DISCONNECTION FUNCTION
                                                    5 - guías;
                                                    6 - protectores laterales;          If the oven operates in manual mode continuously, after 3 hours it will be automatically disconnected.
                                                    7 - lámpara del horno;              A short sound signal will turn on and the indicator    will start flashing. To turn the indicator
                                                    8 - detector de temperatura;        off, the oven function knob must be set on position "0".
                                                    9 - motor del girapollos
                                                                                        2. THE CHILD SAFETY LOCK FUNCTION
                                                                                        Programmer safety lock
EQUIPAMIENTO
                                                                                               - Press both the buttons         and        at the same time and hold them for a few seconds until
                              Bandeja esmaltada para pasteles. Se puede usar como                an indicator      appears on the display.
                              depósito de recogida de grasa si la cocción se realiza
                              directamente en la rejilla.                               If the oven is off at the moment of lockout, after blocking it will not be possible to turn it on. If the
                                                                                        oven is on, the method of heating and temperature can be changed whereas the programmer
                                                                                        setting cannot.
                                           7                                                                                                    16
GB                                 ELECTRONIC PROGRAMMER                                                                                                          HORNO                                                   ES
Erasing settings:                                                                                                                                Rejilla sirve para depositar recipientes usados en el horno.
   -   press the button     ,        is flashing,                                                                                                En la rejilla se pueden asar directamente algunos
                                                                                                                                                 alimentos como carnes, pescados, etc.
   -   press the button    until 0:00 appears on the display. After a few seconds the indicator
       goes out and the current time is shown on the display.
                                                                                                                                                 Soporte del girapollos sirve para fijar el mismo.
5.5 PROGRAMMING THE BAKING END
                                                                                                                          Fig. 7
This function is most often used together with the baking time function.
   -   Choose the heating method with the knob e.g.                    and set the oven temperature,              4.2 MANDO DE HORNO
   -   Programme the baking time e.g. 45 minutes, as described above,
                                                                                                                  Entre los mandos del horno están:
   -   Press the button     , until the indicator        starts flashing and using the buttons         and / or
                                                                                                                      – Mando selector de funciones
           set the desired time of oven switch off e.g. 14.30.                                                        – Mando regulador de temperatura
                                                                                                                      – Programador electrónico
After a few seconds the settings are remembered. The display shows the time when the baking
started. The indicator     glows. At 13:45 the oven automatically turns on, the display shows the                 4.3 MANDO SELECTOR DE FUNCIONES                                       El mando dispone de siguientes
time left to the baking end, the indicator          glows. At 14:30 the oven automatically turns off, the                                                                               posiciones:
sound signal turns on, the indicator          is flashing.                                                                                  Sentido de                     Sentido de   0   - horno apagado
Changing of the baking time end:                                                                                                            encendido                      apagado
                                                                                                                                                                                            - resistencia inferior
                                                                                                                            0
                                                                                                                                                             0
   -   Press the button   , until the indicator               starts flashing, the display shows the time of                                                                                - resistencia inferior y superior


                                                                                                                                                         5
       baking end which was set earlier,


                                                                                                                                                     100
                                                                                                                                                                                            - resistencia superior
   -   Change the time with the buttons             and / or       .


                                                                                                                                                                       250
                                                                                                                                                                                            - girapollos y resistencia del grill


                                                                                                                                                         0
                                                                                                                                                           15    200
Erasing the setting:                                                                                                                                                                        - resistencia inferior y ventilador
   -   Press the button     , until the indicator            starts flashing,                                                                                                               - girapollos y resistencia del grill
   -   Press the button      until on the display there appears the time which is the sum of the
                                                                                                                                                                                              y ventilador
                                                                                                                        Fig. 8                               Fig. 9
       current time and the baking time.                                                                                                                                                    - resistencia inferior y superior
The function of setting the time is erased and the oven will turn on immediately in accordance with                                                                                         - resistencia circular y ventilador
the baking time settings
                                                                                                                  •   Después de posicionar el mando selector de funciones (figura 8) en la posición de trabajo, se
  Caution !                                                                                                           enciende el piloto de control y la lampara del horno.
  During every programme operation you can check the current time. To do so                                       •   Después de terminar la cocción apague siempre el horno.
  press the button    , until the indicator   starts flashing, for a few minutes the
  programmer will display the current time and then it will show the time left to the                             4.4 MANDO REGULADOR DE TEMPERATURA
  baking end.
                                                                                                                  •   El mando regulador de temperatura (figura 9) permite posicionar y mantener de forma
                                                                                                                      automática la temperatura del horno en el nivel preseleccionado.
5.6 TIMER                                                                                                         •   En el mando se han marcado las posiciones 50, 100, 150, 200, 250 que corresponden a las
The timer signals, with the use of a sound, when the set time is finished. It operates independently                  temperaturas del horno medidas en OC.
from the programme. You can use it both when the oven is on and off. The timer does not turn off                  •   Al posicionar la temperatura gire el mando en sentido horario y al apagar - en sentido
the oven.                                                                                                             antihorario.
                                                                                                                  •   Después de posicionar la temperatura se activan las resistencias y se enciende el piloto de
Setting of the timer:
                                                                                                                      control. Al llegar a la temperatura deseada las resistencias y el piloto se apagan
   -   Press the button         , until the indicator        starts flashing; the display shows 0:00.                 automáticamente. Las resistencias y el piloto se encienden y se apagan como consecuencia
                                                                                                                      del funcionamiento del regulador de temperatura.

                                                        15                                                                                                             8
ES                                            HORNO                                                                                          ELECTRONIC PROGRAMMER                                                    GB
4.5 PROGRAMADOR ELECTRÓNICO                                                                               To programme you must press the function button                 and within a few second you set the desired
Con el programador electrónico es posible mandar el trabajo del horno de modo automático o                time using the button     . You may adjust the time with the button                .
semiautomático. La existencia del programador no elimina la posiblidad de mando manual de la
                                                                                                          Pressing the buttons     and      changes the time by one minute, whereas pressing them for a
cocina. Modo de empleo del programador se describe en adelante.
                                                                                                          longer time turns on the fast forward function.
                                                                                                          After connecting the cooker to supply network or after power cut off, indicator                 is flashing on
4.6 ENCENDIDO Y APAGADO DEL HORNO
                                                                                                          the display. The first thing to do is to set the current time.
4.6.1    ENCENDIDO DEL HORNO
                                                                                                          If there was a power cut off during oven work, the indicator                  is flashing on the display.
1.   Seleccionar el modo de calentamiento girando con el selector de funciones.
                                                                                                          Set the function knob on position "0". Set the current time.
2.   Posicionar la temperatura deseada con el mando regulador de temperatura.
3.   Por medio del programador seleccionar el tiempo de trabajo del horno.                                5.2 SETTING THE CURRENT TIME
4.6.2 APAGADO DEL HORNO                                                                                   The oven function knob (item 12 on fig. 2) should be set on position "0".
                                                                                                             - Press the button       ; the time12.00 appears on the display.
Cuando el alimento esté listo, gire el mando de selector de funciones y el mando regulador de
temperatura hasta la posición de cero 0.                                                                     - Set the desired time with the buttons               and/or      .
                                                                                                             - After a few seconds the indicator               goes out, the time is set.
4.7 MODALIDADES DE USO
                                                                                                          5.3 SOUND SIGNAL
        CALENTAMIENTO CON LA RESISTENCIA INFERIOR
                                                                                                          Once a programme comes to an end the programmer emits a sound signal and the active function
        Es la función que permite acabar la cocción de los pasteles. Se utiliza durante los últimos       indicator is flashing.
        10-15 minutos de cocción.                                                                         After 60 sec the sound signal automatically switches off and the function indicator is still flashing.
                                                                                                          The indicator may be turned off by pressing any button.
        SISTEMA CONVENCIONAL (resistencia superior e inferior)
                                                                                                             CAUTION !
        La función con la que el alimento se calienta desde arriba y desde debajo. Este modo de              The sound signal may be turned off earlier by pressing any button. Pressing the
        calentamiento sirve perfectamente para asar pasteles, carnes, pescados, pan y pizza.                 button will, however, changing the operational mode from automatic to manual.
        Los alimentos deben colocarse en un solo nivel del horno, mejor en el segundo.                       The oven heaters turn off and the user must control further baking. Once the
                                                                                                             baking has finished both control knobs shall be set on position "0".
        CALENTAMIENTO CON LA RESISTENCIA SUPERIOR
        Es la función destinada para rematar los asados; gracias a ella el pastel queda dorado por        5.4 PROGRAMMING THE BAKING TIME
        la parte superior. Este modo sirve también para gratinar alimentos (tostadas, guisos al
        gratín, etc.).                                                                                       -   Choose the oven heating method e.g.                and set the desired temperature
        RESISTENCIA INFERIOR Y VENTILADOR ENCENDIDOS                                                         -   Press the button         , until the indicator        starts flashing,
        Resistencia inferior y ventilador funcionan a la vez. Este tipo de calentar esta previsto            -   Set the baking time with the buttons             and / or         e.g. 45 minutes.
        para preparar pastas de levadura y para conservar frutas y verduras. Aconsejamos de               After a few seconds the indicator           glows continuously. The programmer measures time. The
        poner platos en la primera o segunda guía de abajo y hay que utilizar las bandejas bajas.
                                                                                                          display shows time left.
        GRILL                                                                                               After programming the oven operation you can check the current time. To do so
        Después de seleccionar la función        se pone en marcha la resistencia de griil y el motor       press the button      until the indicator   starts flashing. The programmer will
        de girapollos. Si el usuario no va usar el girapollos, hay que colocar el guiso en la rejilla o
                                                                                                            display the current time for a few seconds and then it will show the time left to
        en la bandeja en una de las guías superiores y asar de forma tradicional.
                                                                                                            baking end.
                                                                                                          Changing of baking time:
     !Atención!
     Durante el asado con grill el aparato no debe dejarse sin control. Las partes accesibles de             -   press the button     ,         is flashing,
     la cocina están calientes. Evitar contacto de los niños.                                                -   change the setting with the buttons              and / or          .
                                                  9                                                                                                               14
GB                            ELECTRONIC PROGRAMMER                                                                                               HORNO                                               ES
                                                                     Table 4 Meat dishes                                                  GRILL TRADICIONAL
                                                                                                    Uso del grill:
                                                       O
             Dish                     Temperature [ C]                      Timing [min.]           -    precalentar el horno seleccionando la temperatura máxima,
                                                                                                    -    colocar el alimento en el horno en la guía superior,
 Meat                                                                                               -    en la guía inferior colorar la bandeja que recogerá la grasa,
                                           225 - 250
  - short roasting                                                    12 - 15 per centimetre        -    poner el mando selector de funciones en la posición       ,
 Meat                                                                   of meat thickness
                                           190 - 210                                                -    seleccionar la temperatura deseada y el tiempo del grill,
  - long roasting                                                                                   -    transcurrida la mitad del tiempo, darle vuelta al guiso.
 Chicken                                   225 -250                              50 - 60
                                                                                                    Terminado el asado con grill, apagar el horno.
 Goose, duck, turkey                       200 - 210                 Up to 3 hours depending
                                                                            on the size                                         ASADO CON GIRAPOLLOS
 Venison                                   190 - 210
 Fish                                                                                               El girapollos sirve para asar girando los guisos como aves, chorizos, shashliks, etc.
                                           225 - 250                             20 - 30
   - roasting, up to 2 kg
                                           180 - 200                             30 - 50            Funcionamiento del horno:
   - stewing, up to 2 kg                                                                               -   quitar del horno todo el equipamiento innecesario y montar el soporte del girapollos,
                                                                                                       -   en la barra del girapollos montar uno de los pinchos y pinchar el guiso para que quede
 5. ELECTRONIC PROGRAMMER                                                                                  fijado de forma simétrica; luego pinchar con el segundo pincho y fijarlo bien apretando el
                                                                                                           tornillo del pincho,
                                                                                                       -   colocar el guiso preparado de esta forma introduciendo el extremo agudo en el motor
Electronic digital programmer allows for controlling oven operation. The programmer indicates the          girapollos y apretando a tope y apoyar el otro extremo en el marco,
current time to an accuracy of 1 minute. Once the programme has come to an end it emits a sound
and automatically switches off the oven.                                                                -       poner el mando selector de funciones en la posición        ,seleccionar la temperatura y
The programmer controls:                                                                                        eventualmente el tiempo de trabajo.

1. functions connected with measuring time:
   - setting current time,
   - programming baking time                                                                                                                          1          Fig. 10
   - programming the time of baking end
                                                                                                            2
   - setting the timer                                                                                      4                                                    1   - resistencia del grill;
2. safety functions:                                                                                                                                             2   - motor del girapollos;
                                                                                                            3                                         6
    - automatic disconnection                                                                                                                                    3   - pinchos;
    - child safety lock,                                                                                    5                                         7          4   - espadín del girapollos;
                                                                                                                                                                 5   - bandeja (depósito de grasa);
                                                                                                                                                                 6   - soporte del girapollos;
5.1 GENERAL REMARKS                                                                                                                                              7   - protección de mandos;

                                               Fig. 12
                                               1 - button for choosing programmer function
                                                                                                            LA FUNCIÓN DE DORADO EN EL GIRAPOLLOS CON LA VENTILACIÓN DE AIRE
                                               2 - button "+" for setting time                              CALIENTE
                                               3 - button "-" for setting time
                                                                                                        La resistencia de gril, el motor de girapollos y ventilador funcionan a la vez. Utilizando el
                                               4 - automatic disconnection indicator                    girapollos hay que colocar bien el plato en el espadín y asegurar que no se mueve como
                                               5 - baking time indicator                                descrito arribo y después encender el horno. Esta función esta prevista para dorar grandes
                                               6 - time of baking end indicator                         trozos de carne.
                                                                                                         – Con esta función se puede dorar el plato con el ventilador encendido, sin utilizar el
                                               7 - timer indicator
                                                                                                            girapollos. En este caso no se debe de montar el girapollos y el plato hay que colocar en
                                               8 - current time adjustment indicator                        la rejilla en el nivel inferior. Debajo de la rejilla hay que meter una bandeja para grasa que
                                               9 - displayed time                                           puede caer. Se puede dorar en esta forma por ejemplo: rodaja de carne, lomo, pollos,
                                                                                                            aves, etc.
                                               10 - safety lock indicator
                                                                                                         – Con este método no es necesario el calentamiento inicial del horno. El tiempo de dorado es
                                               11 - function not available                                  mas corto de unos 20 % respecto al. Dorado tradicional.

                                               13                                                                                                    10
ES                                              HORNO                                                                                                      OVEN                                           GB
                 TERMOVENTILACIÓN                                                                           •     When selecting the baking temperature and duration, the weight and consistency of pastry
                                                                                                                  should be taken into consideration.
     •   Con esta función encender las resistencias superior e inferior y ventilador o resistencia          •     While baking, too high temperature should be avoided, as cakes will not rise and could sink.
         circular y ventilador. Ventilador ubicado detrás de la cubierta trasera perforada esta                   On the other hand, keeping cakes too long in the hot oven can cause the cakes to burn and
         provocando el circuito de aire caliente dentro del horno. Con este modo de calentar la                   dry.
         temperatura de cocinado debe de ser menor que durante la cocción tradicional y debe que            •     The tins with the dishes can be placed on any level of the oven, however the second level is
         ser menor que 2000C.                                                                                     recommended. The user, taking account of their own observations and experience, should
     •   Al final de asado, es aconsejable girar el molde con su parte delantera para atrás.                      select the most appropriate level for each dish.
     •   La función de termoventilación sirve perfectamente para el asado paralelo de dos guisos
                                                                                                            •     When baking for the first time, the best way is to start with medium temperature settings from
         del mismo o del distinto tipo (ej. carne y pescado) colocados en distintos niveles pero
                                                                                                                  the range indicated in the recipe, and the next time select higher temperature, if necessary.
         cocinados a la misma temperatura. Al cocinar dos guisos es aconsejable subir la temperatura
                                                                                                                  Lower temperature causes the dishes to be more uniformly browned.
         respecto al valor indicado para un solo guiso.
     •   Para asar y cocinar carnes es aconsejable escoger trozos más grandes, superiores a 1               •     In order to check if the baking is ready, a few minutes before switching off the oven, a
         kg.                                                                                                      wooden rod should be put into the cake; if pastry does not stick to the rod - the baking is
                                                                                                                  ready. After the baking, the cake should be preferably left in the oven for approximately 5
     En caso de cocción simultánea de dos guisos:
                                                                                                                  more minutes.
     – Hay que sacar del horno los dos guisos y verificar si están hechos; si uno de los guisos
       queda sin hacerse, hay que volver a colocarlo en el horno y seguir cocinando.                        •     Specified in the tables below, there are approximate baking times and temperatures for various
                                                                                                                  dishes. Practically, there may be differences that the user should correct based on their own
                                                                                                                  experience. The best way is to try the particular dishes a few times, and make notes of the
                 DESCONGELACIÓN                                                                                   optimal time and temperature.
     •   Gracias a la función de termoventilación el horno sirve también para descogelar alimentos                                                                                        Table 2 Cakes
         profundamente congelados. Se aconseja colocar los productos congelados en la bandeja
         a nivel dos o tres. La temperatura seleccionada para la descongelación depende del tipo                                                                     O
                                                                                                                           Cake                     Temperature [ C]                   Timing [min]
         de alimento.
     •   Dulces, frutas y gelatinas de carne se descongelan accionando la termoventilación sin                  Friable cake                             180 - 190                         45 - 60
         seleccionar la temperatura.
                                                                                                                Yeast-cake                               180 - 200                         45 - 60
     •   Descongelando carnes y aves hay que envolverlas con lámina de aluminio para proteger
         contra la influencia directa del aire caliente, colocarlas en la parte central baja, accionar el       Crumble-cake                             200 - 220                         20 - 30
         horno y seleccionar la temperatura de 50 a 700C.                                                       Fruit-cake                               200 - 210                         30 - 40
     •   Los guios preparados para comer, ej. verduras (embalados con de aluminio) se pueden
         asar sin descongelación previa.
                                                                                                                Sponge-cake                              180 - 200                         20 - 30
                                                                                                                Shortcake                                210 - 220                         10 - 20
4.8 INDICACIONES REFERIDAS AL ASADO                                                                             Twist cake                               220 - 240                         30 - 40
•   Para el asado de pasteles se pueden usar moldes tradicionales de chapa así como moldes
    cubiertos de teflón, cerámicos, de vidrio y de aluminio .                                                                                                                             Table 3 Cakes
•   Antes de usarlos por primera vez, es aconsejable colocar los moldes en el horno bien calentado
                                                                                                                                                                     O
    para que pierda su olor.                                                                                               Cake                     Temperature [ C]               Timing [Hours:min]
•   Los moldes hay que rellenarlos con la masa hasta 2/3 de altura, dejando suficiente espacio
                                                                                                                Meringue                                    100                          1:00 - 1:10
    para que puedan crecer.
•   Hay que seguir estrictamente las indicaciones respecto al precalentamiento del horno puesto                 Sandy ring cake                             160                          1:05 - 1:10
    que para cada tipo de pastel las exigencias son distintas.                                                  Yeast ring cake                             160                          1:00 - 1:10
•   Durante el asado la masa tiene que calentarse de forma homogénea. Esta condición se cumple
                                                                                                                Flan case                                   160                          0:25 - 0:35
    al seleccionar la función      ó     ó   .                                                                  Streusel cake                               175                          0:20 - 0:30
•   Si la parte superior del pastel queda demasiado quemada, la próxima vez hay que colocar el
                                                                                                                Fruit slices                                175                          0:40 - 0:55
    molde con la masa en un nivel más bajo, seleccionar la temperatura más reducida y el tiempo de
    cocción más largo.                                                                                          Biscuit                                     160                          0:30 - 0:40
•   Si la parte inferior del pastel queda demasiado quemada, la próxima vez hay que colocar el
    molde más arriba y seleccionar la temperatura más baja.
•   Al seleccionar la temperatura y el tiempo de asado hay que tomar en cuenta el peso y la
    densidad de la masa.
                                                   11                                                                                                        12
GB                                              OVEN                                                                                                    HORNO                                              ES
                                                                                                           • Es aconsejable colocar los alimentos en el segundo nivel. No obstante, el usuario a base de sus
           FORCED HEAT CIRCULATION                                                                           experiencias y observaciones debe seleccionar el nivel óptimo para cada uno de los guisos.
                                                                                                           • Para comprobar si el pastel está listo, hay que introducir un palillo de madera unos minutos
        • Such a heating method allows for uniform heat circulation around the food. When using              antes de terminar la cocción. Si el pastel no se pega al palillo, está listo. Terminada la cocción,
          this heating method, the temperature should be slightly lower as compared to the traditional       dejar reposar en el horno unos 5 minutos.
          cooking. The temperature should be set below 200°C.
                                                                                                           • Para el asado de carnes se pueden usar platos cerámicos, de vidrio, de acero esmaltado y de
        • The forced heat circulation function is ideal for simultaneous cooking of two dishes of            hierro fundido, con los mangos resistentes a altas temperaturas.
          the same or different kind (e.g. meat and fish), which are placed in the oven on two
                                                                                                           • Al asar las carnes, hay que seleccionar la temperatura en función del tipo y tamano de la carne.
          different levels; however, the two dishes should require similar cooking temperatures.
                                                                                                             Cuanto más grande, más largo tiene que ser el tiempo con la temoperatura relativamente baja.
        • At the end of cooking, the front side of baking tin should be preferably turned backwards.         Los trozos pequenos exigen menos tiempo de asado en la temperatura más alta. Como dato
        • When baking the two dishes, the temperature should be slightly higher than recommended,            orientativo se puede considerar unos 12-15 por cada centímetro de carne. Es aconsejable asar
          and the time longer than at baking the single dish. When the set time has elapsed, remove
                                                                                                             la carne con método convencional, es decir seleccionando         , ya que después de asarse
          both dishes from the oven, and make sure that they are sufficiently cooked. If one of the
                                                                                                             queda jugoso.
          dishes requires further cooking, leave it in the oven until it is cooked properly.
                                                                                                           • En el horno puede cocinarse cualquier tipo de guiso, pero no es aconsejable asar piezas cuyo
                                                                                                             peso es menor de 1 kg. La carne se puede asar en la bandeja o en la rejilla. Al asar en la rejilla,
            DEFROSTING                                                                                       por debajo hay que colocar la bandeja para recoger las gotas de grasa.
        Thanks to the forced heat circulation, the oven is ideal for defrosting deep frozen foods.
        Generally, we advise to place the frozen products on the plate located in the second or                                                                                     Tabla 3. Pasteles
        third oven level. Temperature selection for the defrosting process depends on the kind of                                                                                   Tiempo de asado
        frozen food.                                                                                               Tipo de pastel
                                                                                                                                                                                        [minutos]
        • Confectionary, fruits and meat jelly are defrosted by starting the forced heat circulation
          without setting the temperature.                                                                    Torta de molde                             180-190                            45-60
        • While defrosting meat or poultry, wrap it with aluminium foil in order to prevent the direct        Torta de levadura                          180-200                            45-60
          effect of the hot air, and then place it in the middle or lower part of the oven compartment,
          turn the oven on, and set the temperature to approximately 50 - 70°C.                              Pastel de migajas                           200-220                            20-30
        • Ready-to-use frozen products, e.g. frozen vegetables (wrapped with aluminium foil)                 Pastel de frutas                            200-210                            30-40
          can be baked immediately without defrosting.
                                                                                                             Bizcocho                                    180-200                            20-30
4.8 GENERAL HINTS ON PREPARING DISHES                                                                        Pastaflora                                  210-220                            10-20
•    Cakes can be baked with the use of the traditional tins as well as teflon-coated tins, and forms        Pastel retorcido                            220-240                            30-40
     made of ceramics, glass and aluminium foil.
•    If other baking tins are used, in addition to the baking plate supplied along with the cooker, they
     should be placed in the middle of the wire shelf.                                                                                                                Tabla 4 Alimentos de carne
•    When selecting the baking temperature, use the following hints:                                                                                                                Tiempo del asado
                                                                                                                       Alimento
    –     Thin pastry - high heat power, short baking duration                                                                                                                          [minutos]
    –     Thick layer of pastry and liquid pastry - lower heat power, longer baking duration                 Carne
•    Baking tins should be filled up to 2/3 of their height, leaving enough space for rising.                                                           225 - 250
                                                                                                             - asado de corta duración                                          12-15 por cada centímetro
•    For cooking meat, cookware made of ceramic, glass, enamelled steel or iron can be used,
                                                                                                             Carne                                                                de grosor de la carne
     with the handles resistant to elevated temperatures.                                                                                               190 - 210
                                                                                                             - asado de larga duración
•    The directions concerning oven preheating should be strictly observed, as there are different
     recommendations for different cakes.                                                                    Pollos                                      225 -250                          50 - 60
•    During the baking process, cake should be uniformly heated. This condition is achieved when
                                                                                                             Oca, pato, pavo                            200 - 210                Dependiendo del tamano
    selecting function        or      or     .
                                                                                                             Carne de caza                              190 - 210                    hasta 3 horas
•   If the top of the cake is too dark, the next time the tin with the pastry should be put in the lower
    level of the oven, and lower temperature should be selected with increasing the baking time.             Pescado
                                                                                                                                                        225 - 250                          20 - 30
•   If the bottom of the cake is too dark, the next time put the baking tin in the higher level of the       - asado hasta 2 kg
    oven, and select lower temperature.                                                                                                                 180 - 200                          30 - 50
                                                                                                             - estofado hasta 2 kg

                                                  11                                                                                                        12
ES                           PROGRAMADOR ELECTRÓNICO                                                                                                    OVEN                                            GB
                                           Tabla 5 Asado con termoventilación                ó         How to use the electric grill
                                                                                                       -   preheat the oven by setting the maximum temperature (2500C),
         Tipo de guiso                  Temperatura [0C]            Tiempo de asado [hh:min]           -   put the dish in the oven,
                                                                                                       -   insert on the highest runner,
  Pastaflora                                  100                           1:00 – 1:10                -   insert the drip tray on the bottom runner,
  Torta de molde                              160                           1:05 – 1:10                -   set the function change-over switch knob to position             ,
  Bizcocho con levadura                       160                           1:00 – 1:10                -   set the required temperature,
                                                                                                       -   After half of the grilling time, turn the grilled portions over.
  Base para la torta                          160                          0:25 – 0:35
                                                                                                       When the grilling is over - turn the oven off.
  Torta de levadura                           175                           0:40 – 0:45
                                                                                                                                       GRILLING WITH ROASTING-SPIT
 Pastel con migajas                           175                           0:20 – 0:30
  Pastel con frutas                           175                           0:40 – 0:55                Roasting-spit is used to rotary grilling such dishes as poultry, sausages, shashliks, etc.
                                                                                                       How to handle the oven:
  Bizcocho                                    160                           0:30 – 0:40
                                                                                                       -   remove all unnecessary outfit from the oven and slide in the roasting-spit frame;
                                                                                                       -   slide one fork onto the spit and stick meat onto it while paying attention it is symmetri-cal along
 5 PROGRAMADOR ELECTRÓNICO                                                                                 the stick; then slide in the second fork and secure it in its position by tightening the set screw;
                                                                                                       -   insert the pointed end of spit into the roast-spit drive connection, push it home and rest the
Este temporizador digital permite el control y mando del trabajo de horno. El temporizador demuestra       other end of spit on the frame;
el tiempo actual con la precisión de 1 minuto. Después de cada programa realizado el temporizador      -   screw out the handle,
emite una senal acústica y desconecta automáticamente el horno.
                                                                                                       -   turn on the oven, adjust the temperature and, possibly, set the time of grilling.
El programador realiza:
1. funciones de tiempo:                                                                                                                                                Fig. 11
    - Regulación de tiempo actual,
    - Programación del tiempo de cocinado,                                                                                                                             1   - grill heater;
    - Programación de finalización del cocinado,                                                                                                                       2   - roasting-spit drive;
    - Regulación de minutero (avisador),                                                                                                                               3   - forks;
                                                                                                                                                                       4   - spit;
2. funciones de seguridad:                                                                                                                                             5   - baking tray;
   -   Desconexión automática,                                                                                                                                         6   - roasting-spit frame;
   -   Bloqueo de seguridad para los ninos.                                                                                                                            7   - handle.
5.1 NOTAS GENERALES
                                    Dibujo 11
                                    1 - botón selector de funciones del temporizador
                                    2 - botón "+" de ajuste del tiempo                                         GRILLING WITH FORCED HEAT CIRCULATION ON
                                    3 - botón "-"de ajuste del tiempo                                          • This function is intended for broiling large meat portions (pork loin, chicken,
                                    4 - símbolo indicador de desconexión automática
                                                                                                                 etc.). In this case there is no need to preheat the oven.
                                    5 - símbolo indicador de la duración del cocinado
                                    6 - símbolo indicador de la hora de finalización del cocinado
                                                                                                               • The food, in respect to their size, should be placed on the third or fourth level
                                    7 - símbolo indicador del minutero (avisador)                                of the oven.
                                    8 - símbolo indicador de ajuste de hora de tiempo actual                   • This function allows for improving the taste of foods; so called "crisp crust" is
                                    9 - la pantalla                                                              also developed.
                                    10 - símbolo indicador de bloqueo de seguridad para ninos
                                    11 - función inaccesible                                                   Operating procedure:
                                                                                                                   - place the meat in the oven,
Para ajustar la hora hay que pulsar el botón de la función      y durante unos secundas hay que                    - set the function change-over switch knob to position     ,
ajustar el tiempo deseado usando el botón         . Con el botón      se puede corregir el tiempo                  - set the required temperature and possibly time of grilling.
ajustado.
                                                13                                                                                                        10
5 cf 4vmcx-(7281) - Servicio Tecnico Fagor

Más contenido relacionado

La actualidad más candente

Manual instrucciones Ferroli prextherm rsh 900 2600
Manual instrucciones Ferroli prextherm rsh 900 2600Manual instrucciones Ferroli prextherm rsh 900 2600
Manual instrucciones Ferroli prextherm rsh 900 2600
ClimAhorro
 
Mi 3290 earth_analyser_spa_ver_1.1.2_20_752_690
Mi 3290 earth_analyser_spa_ver_1.1.2_20_752_690Mi 3290 earth_analyser_spa_ver_1.1.2_20_752_690
Mi 3290 earth_analyser_spa_ver_1.1.2_20_752_690
Jossemar Cristhian Bartolo Onayram
 
Engineering manual bge
Engineering manual bgeEngineering manual bge
Engineering manual bge
ronaldo laime
 
Manual instrucciones Ferroli PREXTHERM rsw-1250-3600
Manual instrucciones Ferroli PREXTHERM rsw-1250-3600Manual instrucciones Ferroli PREXTHERM rsw-1250-3600
Manual instrucciones Ferroli PREXTHERM rsw-1250-3600
ClimAhorro
 
Manual de voladura konya
Manual de voladura konyaManual de voladura konya
Manual de voladura konya
CRUZ SAÚL JAIRO
 
Manual mantenimiento plantas electricas diesel
Manual mantenimiento plantas electricas dieselManual mantenimiento plantas electricas diesel
Manual mantenimiento plantas electricas diesel
kbeman
 
Energia Alternativa práctica
Energia Alternativa prácticaEnergia Alternativa práctica
Energia Alternativa práctica
almelini
 
Sat diagnosis y errores
Sat diagnosis y erroresSat diagnosis y errores
Sat diagnosis y errores
Casimiro Catalá Gregori
 
Documents.mx manual de-calculo-y-diseno-de-cuarto-frios
Documents.mx manual de-calculo-y-diseno-de-cuarto-friosDocuments.mx manual de-calculo-y-diseno-de-cuarto-frios
Documents.mx manual de-calculo-y-diseno-de-cuarto-frios
Jesus Eduardo Moran Muñoz
 
293684273 manual-de-calculo-y-diseno-de-cuarto-frios
293684273 manual-de-calculo-y-diseno-de-cuarto-frios293684273 manual-de-calculo-y-diseno-de-cuarto-frios
293684273 manual-de-calculo-y-diseno-de-cuarto-frios
Jose Torales Delvalle
 
Manual aire acondicionado
Manual aire acondicionadoManual aire acondicionado
Manual aire acondicionado
furbydjv
 
90131824 curso-formacion-ascensores
90131824 curso-formacion-ascensores90131824 curso-formacion-ascensores
90131824 curso-formacion-ascensores
Alex Ander
 
Manual bosch horno independiente hbc36 d753
Manual bosch   horno independiente hbc36 d753Manual bosch   horno independiente hbc36 d753
Manual bosch horno independiente hbc36 d753
Alsako Electrodomésticos
 
Manual bosch combi kgn36 s71
Manual bosch   combi kgn36 s71Manual bosch   combi kgn36 s71
Manual bosch combi kgn36 s71
Alsako Electrodomésticos
 
Manual bosch horno multifunción acero inox hbc36 d754
Manual bosch   horno multifunción acero inox hbc36 d754 Manual bosch   horno multifunción acero inox hbc36 d754
Manual bosch horno multifunción acero inox hbc36 d754
Alsako Electrodomésticos
 
Control de motores con matlab
Control de motores con matlabControl de motores con matlab
Control de motores con matlab
uzyzu
 

La actualidad más candente (18)

Curso lab view6i
Curso lab view6iCurso lab view6i
Curso lab view6i
 
Manual instrucciones Ferroli prextherm rsh 900 2600
Manual instrucciones Ferroli prextherm rsh 900 2600Manual instrucciones Ferroli prextherm rsh 900 2600
Manual instrucciones Ferroli prextherm rsh 900 2600
 
Diseño centrales de calor
Diseño centrales de calorDiseño centrales de calor
Diseño centrales de calor
 
Mi 3290 earth_analyser_spa_ver_1.1.2_20_752_690
Mi 3290 earth_analyser_spa_ver_1.1.2_20_752_690Mi 3290 earth_analyser_spa_ver_1.1.2_20_752_690
Mi 3290 earth_analyser_spa_ver_1.1.2_20_752_690
 
Engineering manual bge
Engineering manual bgeEngineering manual bge
Engineering manual bge
 
Manual instrucciones Ferroli PREXTHERM rsw-1250-3600
Manual instrucciones Ferroli PREXTHERM rsw-1250-3600Manual instrucciones Ferroli PREXTHERM rsw-1250-3600
Manual instrucciones Ferroli PREXTHERM rsw-1250-3600
 
Manual de voladura konya
Manual de voladura konyaManual de voladura konya
Manual de voladura konya
 
Manual mantenimiento plantas electricas diesel
Manual mantenimiento plantas electricas dieselManual mantenimiento plantas electricas diesel
Manual mantenimiento plantas electricas diesel
 
Energia Alternativa práctica
Energia Alternativa prácticaEnergia Alternativa práctica
Energia Alternativa práctica
 
Sat diagnosis y errores
Sat diagnosis y erroresSat diagnosis y errores
Sat diagnosis y errores
 
Documents.mx manual de-calculo-y-diseno-de-cuarto-frios
Documents.mx manual de-calculo-y-diseno-de-cuarto-friosDocuments.mx manual de-calculo-y-diseno-de-cuarto-frios
Documents.mx manual de-calculo-y-diseno-de-cuarto-frios
 
293684273 manual-de-calculo-y-diseno-de-cuarto-frios
293684273 manual-de-calculo-y-diseno-de-cuarto-frios293684273 manual-de-calculo-y-diseno-de-cuarto-frios
293684273 manual-de-calculo-y-diseno-de-cuarto-frios
 
Manual aire acondicionado
Manual aire acondicionadoManual aire acondicionado
Manual aire acondicionado
 
90131824 curso-formacion-ascensores
90131824 curso-formacion-ascensores90131824 curso-formacion-ascensores
90131824 curso-formacion-ascensores
 
Manual bosch horno independiente hbc36 d753
Manual bosch   horno independiente hbc36 d753Manual bosch   horno independiente hbc36 d753
Manual bosch horno independiente hbc36 d753
 
Manual bosch combi kgn36 s71
Manual bosch   combi kgn36 s71Manual bosch   combi kgn36 s71
Manual bosch combi kgn36 s71
 
Manual bosch horno multifunción acero inox hbc36 d754
Manual bosch   horno multifunción acero inox hbc36 d754 Manual bosch   horno multifunción acero inox hbc36 d754
Manual bosch horno multifunción acero inox hbc36 d754
 
Control de motores con matlab
Control de motores con matlabControl de motores con matlab
Control de motores con matlab
 

Similar a 5 cf 4vmcx-(7281) - Servicio Tecnico Fagor

Manual ariston nox 24 ff bajo n ox
Manual ariston nox 24 ff bajo n oxManual ariston nox 24 ff bajo n ox
Manual ariston nox 24 ff bajo n ox
Precio Calderas
 
M. instalacion calderas condensacion natur - Servicio Tecnico Fagor
M. instalacion calderas condensacion natur  - Servicio Tecnico FagorM. instalacion calderas condensacion natur  - Servicio Tecnico Fagor
M. instalacion calderas condensacion natur - Servicio Tecnico Fagor
serviciotecnicofagor
 
M. uso calderas condensacion natur - Servicio Tecnico Fagor
M.  uso calderas condensacion natur - Servicio Tecnico FagorM.  uso calderas condensacion natur - Servicio Tecnico Fagor
M. uso calderas condensacion natur - Servicio Tecnico Fagor
serviciotecnicofagor
 
Cocina Smeg CX61GV9
Cocina Smeg CX61GV9Cocina Smeg CX61GV9
Cocina Smeg CX61GV9
Alsako Electrodomésticos
 
M. uso fc 24 a - Servicio Tecnico Fagor
M. uso fc 24 a - Servicio Tecnico FagorM. uso fc 24 a - Servicio Tecnico Fagor
M. uso fc 24 a - Servicio Tecnico Fagor
serviciotecnicofagor
 
Ecomat i manual repararo nivel i ii
Ecomat i manual repararo nivel i iiEcomat i manual repararo nivel i ii
Ecomat i manual repararo nivel i ii
Daniel Jose
 
Manual balay microondas 3 wgx1959p
Manual balay   microondas 3 wgx1959pManual balay   microondas 3 wgx1959p
Manual balay microondas 3 wgx1959p
Alsako Electrodomésticos
 
Manual balay microondas 3wgx1929p
Manual balay   microondas 3wgx1929pManual balay   microondas 3wgx1929p
Manual balay microondas 3wgx1929p
Alsako Electrodomésticos
 
71396065.pdf
71396065.pdf71396065.pdf
71396065.pdf
CarlosEduardoGarciaG3
 
Fuera de borda
Fuera de bordaFuera de borda
Fuera de borda
Denis Ugeño
 
Solucion problemas sist electrico freightliner
Solucion problemas sist electrico freightlinerSolucion problemas sist electrico freightliner
Solucion problemas sist electrico freightliner
Victor Rivas
 
Horno BOSCH CMG6764W1
Horno BOSCH CMG6764W1Horno BOSCH CMG6764W1
Horno BOSCH CMG6764W1
Alsako Electrodomésticos
 
Horno BOSCH CMG6764B1
Horno BOSCH CMG6764B1Horno BOSCH CMG6764B1
Horno BOSCH CMG6764B1
Alsako Electrodomésticos
 
Horno BOSCH CMG6764W1
Horno BOSCH CMG6764W1Horno BOSCH CMG6764W1
Horno BOSCH CMG6764W1
Alsako Electrodomésticos
 
Horno BOSCH CMG6764B1
Horno BOSCH CMG6764B1Horno BOSCH CMG6764B1
Horno BOSCH CMG6764B1
Alsako Electrodomésticos
 
Horno BOSCH CNG6764S1
Horno BOSCH CNG6764S1Horno BOSCH CNG6764S1
Horno BOSCH CNG6764S1
Alsako Electrodomésticos
 
Horno BOSCH CNG6764S1
Horno BOSCH CNG6764S1 Horno BOSCH CNG6764S1
Horno BOSCH CNG6764S1
Alsako Electrodomésticos
 

Similar a 5 cf 4vmcx-(7281) - Servicio Tecnico Fagor (20)

Manual ariston nox 24 ff bajo n ox
Manual ariston nox 24 ff bajo n oxManual ariston nox 24 ff bajo n ox
Manual ariston nox 24 ff bajo n ox
 
M. instalacion calderas condensacion natur - Servicio Tecnico Fagor
M. instalacion calderas condensacion natur  - Servicio Tecnico FagorM. instalacion calderas condensacion natur  - Servicio Tecnico Fagor
M. instalacion calderas condensacion natur - Servicio Tecnico Fagor
 
M. uso calderas condensacion natur - Servicio Tecnico Fagor
M.  uso calderas condensacion natur - Servicio Tecnico FagorM.  uso calderas condensacion natur - Servicio Tecnico Fagor
M. uso calderas condensacion natur - Servicio Tecnico Fagor
 
Cocina Smeg CX61GV9
Cocina Smeg CX61GV9Cocina Smeg CX61GV9
Cocina Smeg CX61GV9
 
M. uso fc 24 a - Servicio Tecnico Fagor
M. uso fc 24 a - Servicio Tecnico FagorM. uso fc 24 a - Servicio Tecnico Fagor
M. uso fc 24 a - Servicio Tecnico Fagor
 
Ecomat i manual repararo nivel i ii
Ecomat i manual repararo nivel i iiEcomat i manual repararo nivel i ii
Ecomat i manual repararo nivel i ii
 
Manual balay microondas 3 wgx1959p
Manual balay   microondas 3 wgx1959pManual balay   microondas 3 wgx1959p
Manual balay microondas 3 wgx1959p
 
Manual balay microondas 3wgx1929p
Manual balay   microondas 3wgx1929pManual balay   microondas 3wgx1929p
Manual balay microondas 3wgx1929p
 
Manual Ventilador bennett 560
Manual Ventilador bennett 560Manual Ventilador bennett 560
Manual Ventilador bennett 560
 
71396065.pdf
71396065.pdf71396065.pdf
71396065.pdf
 
Fuera de borda
Fuera de bordaFuera de borda
Fuera de borda
 
Solucion problemas sist electrico freightliner
Solucion problemas sist electrico freightlinerSolucion problemas sist electrico freightliner
Solucion problemas sist electrico freightliner
 
Horno BOSCH CMG6764W1
Horno BOSCH CMG6764W1Horno BOSCH CMG6764W1
Horno BOSCH CMG6764W1
 
Horno BOSCH CMG6764B1
Horno BOSCH CMG6764B1Horno BOSCH CMG6764B1
Horno BOSCH CMG6764B1
 
Horno BOSCH CMG6764W1
Horno BOSCH CMG6764W1Horno BOSCH CMG6764W1
Horno BOSCH CMG6764W1
 
Horno BOSCH CMG6764B1
Horno BOSCH CMG6764B1Horno BOSCH CMG6764B1
Horno BOSCH CMG6764B1
 
Horno BOSCH CNG6764S1
Horno BOSCH CNG6764S1Horno BOSCH CNG6764S1
Horno BOSCH CNG6764S1
 
Horno BOSCH CNG6764S1
Horno BOSCH CNG6764S1 Horno BOSCH CNG6764S1
Horno BOSCH CNG6764S1
 
Fabian romero
Fabian romeroFabian romero
Fabian romero
 
Fabian romero
Fabian romeroFabian romero
Fabian romero
 

Más de serviciotecnicofagor

Dicho y hecho n 30 - Servicio Técnico Fagor
Dicho y hecho n 30 - Servicio Técnico FagorDicho y hecho n 30 - Servicio Técnico Fagor
Dicho y hecho n 30 - Servicio Técnico Fagor
serviciotecnicofagor
 
Dicho y hecho nº 31 - Servicio Técnico Fagor
Dicho y hecho nº 31 - Servicio Técnico FagorDicho y hecho nº 31 - Servicio Técnico Fagor
Dicho y hecho nº 31 - Servicio Técnico Fagor
serviciotecnicofagor
 
Mi vt 6 & vt-12 - 14 id - Servicio Tecnico Fagor
Mi vt 6 & vt-12 - 14 id - Servicio Tecnico FagorMi vt 6 & vt-12 - 14 id - Servicio Tecnico Fagor
Mi vt 6 & vt-12 - 14 id - Servicio Tecnico Fagor
serviciotecnicofagor
 
Mi sw 200 400 - 15. id - Servicio Tecnico Fagor
Mi sw 200 400 - 15. id - Servicio Tecnico FagorMi sw 200 400 - 15. id - Servicio Tecnico Fagor
Mi sw 200 400 - 15. id - Servicio Tecnico Fagor
serviciotecnicofagor
 
Mi sp 350 350 plus - Servicio Tecnico Fagor
Mi sp 350 350 plus - Servicio Tecnico FagorMi sp 350 350 plus - Servicio Tecnico Fagor
Mi sp 350 350 plus - Servicio Tecnico Fagor
serviciotecnicofagor
 
Mi rt 150 - Servicio Tecnico Fagor
Mi rt 150 - Servicio Tecnico FagorMi rt 150 - Servicio Tecnico Fagor
Mi rt 150 - Servicio Tecnico Fagor
serviciotecnicofagor
 
Mi pres 05 - Servicio Tecnico Fagor
Mi pres 05 - Servicio Tecnico FagorMi pres 05 - Servicio Tecnico Fagor
Mi pres 05 - Servicio Tecnico Fagor
serviciotecnicofagor
 
Mi pan 850. 14 id - Servicio Tecnico Fagor
Mi pan 850. 14 id - Servicio Tecnico FagorMi pan 850. 14 id - Servicio Tecnico Fagor
Mi pan 850. 14 id - Servicio Tecnico Fagor
serviciotecnicofagor
 
Mi mv 200 - 11id - Servicio Tecnico Fagor
Mi mv 200 - 11id - Servicio Tecnico FagorMi mv 200 - 11id - Servicio Tecnico Fagor
Mi mv 200 - 11id - Servicio Tecnico Fagor
serviciotecnicofagor
 
Mi mv 100 - 13id - Servicio Tecnico Fagor
Mi mv 100 - 13id - Servicio Tecnico FagorMi mv 100 - 13id - Servicio Tecnico Fagor
Mi mv 100 - 13id - Servicio Tecnico Fagor
serviciotecnicofagor
 
Mi mo 25 m & mo-25 b & mo-25 gm & mo-25 gb - Servicio Tecnico Fagor
Mi mo 25 m & mo-25 b & mo-25 gm & mo-25 gb - Servicio Tecnico FagorMi mo 25 m & mo-25 b & mo-25 gm & mo-25 gb - Servicio Tecnico Fagor
Mi mo 25 m & mo-25 b & mo-25 gm & mo-25 gb - Servicio Tecnico Fagor
serviciotecnicofagor
 
Mi gp 240 280 & mg-300 - 15 id - Servicio Tecnico Fagor
Mi gp 240 280 & mg-300 - 15 id - Servicio Tecnico FagorMi gp 240 280 & mg-300 - 15 id - Servicio Tecnico Fagor
Mi gp 240 280 & mg-300 - 15 id - Servicio Tecnico Fagor
serviciotecnicofagor
 
Mi sw 220 420 & pa-1400 - Servicio Tecnico Fagor
Mi sw 220 420 & pa-1400 - Servicio Tecnico FagorMi sw 220 420 & pa-1400 - Servicio Tecnico Fagor
Mi sw 220 420 & pa-1400 - Servicio Tecnico Fagor
serviciotecnicofagor
 
Mi f 306 - 14 id - Servicio Tecnico Fagor
Mi f 306 - 14 id - Servicio Tecnico FagorMi f 306 - 14 id - Servicio Tecnico Fagor
Mi f 306 - 14 id - Servicio Tecnico Fagor
serviciotecnicofagor
 
Mi f 206 - 13id - Servicio Tecnico Fagor
Mi f 206 - 13id - Servicio Tecnico FagorMi f 206 - 13id - Servicio Tecnico Fagor
Mi f 206 - 13id - Servicio Tecnico Fagor
serviciotecnicofagor
 
Mi f 110 - 13id - Servicio Tecnico Fagor
Mi f 110 - 13id - Servicio Tecnico FagorMi f 110 - 13id - Servicio Tecnico Fagor
Mi f 110 - 13id - Servicio Tecnico Fagor
serviciotecnicofagor
 
Mi cv 900 m - 14 id - Servicio Tecnico Fagor
Mi cv 900 m - 14 id - Servicio Tecnico FagorMi cv 900 m - 14 id - Servicio Tecnico Fagor
Mi cv 900 m - 14 id - Servicio Tecnico Fagor
serviciotecnicofagor
 
Mi cu 180 - 6 id - Servicio Tecnico Fagor
Mi cu 180 - 6 id - Servicio Tecnico FagorMi cu 180 - 6 id - Servicio Tecnico Fagor
Mi cu 180 - 6 id - Servicio Tecnico Fagor
serviciotecnicofagor
 
Mi bv 2006 nx - Servicio Tecnico Fagor
Mi bv 2006 nx - Servicio Tecnico FagorMi bv 2006 nx - Servicio Tecnico Fagor
Mi bv 2006 nx - Servicio Tecnico Fagor
serviciotecnicofagor
 
Mi bv 460 480 - 14. id - Servicio Tecnico Fagor
Mi bv 460 480 - 14. id - Servicio Tecnico FagorMi bv 460 480 - 14. id - Servicio Tecnico Fagor
Mi bv 460 480 - 14. id - Servicio Tecnico Fagor
serviciotecnicofagor
 

Más de serviciotecnicofagor (20)

Dicho y hecho n 30 - Servicio Técnico Fagor
Dicho y hecho n 30 - Servicio Técnico FagorDicho y hecho n 30 - Servicio Técnico Fagor
Dicho y hecho n 30 - Servicio Técnico Fagor
 
Dicho y hecho nº 31 - Servicio Técnico Fagor
Dicho y hecho nº 31 - Servicio Técnico FagorDicho y hecho nº 31 - Servicio Técnico Fagor
Dicho y hecho nº 31 - Servicio Técnico Fagor
 
Mi vt 6 & vt-12 - 14 id - Servicio Tecnico Fagor
Mi vt 6 & vt-12 - 14 id - Servicio Tecnico FagorMi vt 6 & vt-12 - 14 id - Servicio Tecnico Fagor
Mi vt 6 & vt-12 - 14 id - Servicio Tecnico Fagor
 
Mi sw 200 400 - 15. id - Servicio Tecnico Fagor
Mi sw 200 400 - 15. id - Servicio Tecnico FagorMi sw 200 400 - 15. id - Servicio Tecnico Fagor
Mi sw 200 400 - 15. id - Servicio Tecnico Fagor
 
Mi sp 350 350 plus - Servicio Tecnico Fagor
Mi sp 350 350 plus - Servicio Tecnico FagorMi sp 350 350 plus - Servicio Tecnico Fagor
Mi sp 350 350 plus - Servicio Tecnico Fagor
 
Mi rt 150 - Servicio Tecnico Fagor
Mi rt 150 - Servicio Tecnico FagorMi rt 150 - Servicio Tecnico Fagor
Mi rt 150 - Servicio Tecnico Fagor
 
Mi pres 05 - Servicio Tecnico Fagor
Mi pres 05 - Servicio Tecnico FagorMi pres 05 - Servicio Tecnico Fagor
Mi pres 05 - Servicio Tecnico Fagor
 
Mi pan 850. 14 id - Servicio Tecnico Fagor
Mi pan 850. 14 id - Servicio Tecnico FagorMi pan 850. 14 id - Servicio Tecnico Fagor
Mi pan 850. 14 id - Servicio Tecnico Fagor
 
Mi mv 200 - 11id - Servicio Tecnico Fagor
Mi mv 200 - 11id - Servicio Tecnico FagorMi mv 200 - 11id - Servicio Tecnico Fagor
Mi mv 200 - 11id - Servicio Tecnico Fagor
 
Mi mv 100 - 13id - Servicio Tecnico Fagor
Mi mv 100 - 13id - Servicio Tecnico FagorMi mv 100 - 13id - Servicio Tecnico Fagor
Mi mv 100 - 13id - Servicio Tecnico Fagor
 
Mi mo 25 m & mo-25 b & mo-25 gm & mo-25 gb - Servicio Tecnico Fagor
Mi mo 25 m & mo-25 b & mo-25 gm & mo-25 gb - Servicio Tecnico FagorMi mo 25 m & mo-25 b & mo-25 gm & mo-25 gb - Servicio Tecnico Fagor
Mi mo 25 m & mo-25 b & mo-25 gm & mo-25 gb - Servicio Tecnico Fagor
 
Mi gp 240 280 & mg-300 - 15 id - Servicio Tecnico Fagor
Mi gp 240 280 & mg-300 - 15 id - Servicio Tecnico FagorMi gp 240 280 & mg-300 - 15 id - Servicio Tecnico Fagor
Mi gp 240 280 & mg-300 - 15 id - Servicio Tecnico Fagor
 
Mi sw 220 420 & pa-1400 - Servicio Tecnico Fagor
Mi sw 220 420 & pa-1400 - Servicio Tecnico FagorMi sw 220 420 & pa-1400 - Servicio Tecnico Fagor
Mi sw 220 420 & pa-1400 - Servicio Tecnico Fagor
 
Mi f 306 - 14 id - Servicio Tecnico Fagor
Mi f 306 - 14 id - Servicio Tecnico FagorMi f 306 - 14 id - Servicio Tecnico Fagor
Mi f 306 - 14 id - Servicio Tecnico Fagor
 
Mi f 206 - 13id - Servicio Tecnico Fagor
Mi f 206 - 13id - Servicio Tecnico FagorMi f 206 - 13id - Servicio Tecnico Fagor
Mi f 206 - 13id - Servicio Tecnico Fagor
 
Mi f 110 - 13id - Servicio Tecnico Fagor
Mi f 110 - 13id - Servicio Tecnico FagorMi f 110 - 13id - Servicio Tecnico Fagor
Mi f 110 - 13id - Servicio Tecnico Fagor
 
Mi cv 900 m - 14 id - Servicio Tecnico Fagor
Mi cv 900 m - 14 id - Servicio Tecnico FagorMi cv 900 m - 14 id - Servicio Tecnico Fagor
Mi cv 900 m - 14 id - Servicio Tecnico Fagor
 
Mi cu 180 - 6 id - Servicio Tecnico Fagor
Mi cu 180 - 6 id - Servicio Tecnico FagorMi cu 180 - 6 id - Servicio Tecnico Fagor
Mi cu 180 - 6 id - Servicio Tecnico Fagor
 
Mi bv 2006 nx - Servicio Tecnico Fagor
Mi bv 2006 nx - Servicio Tecnico FagorMi bv 2006 nx - Servicio Tecnico Fagor
Mi bv 2006 nx - Servicio Tecnico Fagor
 
Mi bv 460 480 - 14. id - Servicio Tecnico Fagor
Mi bv 460 480 - 14. id - Servicio Tecnico FagorMi bv 460 480 - 14. id - Servicio Tecnico Fagor
Mi bv 460 480 - 14. id - Servicio Tecnico Fagor
 

Último

MICRO BIT, LUCES Y CÓDIGOS. SERGIO LOZANO
MICRO BIT, LUCES Y CÓDIGOS. SERGIO LOZANOMICRO BIT, LUCES Y CÓDIGOS. SERGIO LOZANO
MICRO BIT, LUCES Y CÓDIGOS. SERGIO LOZANO
sergioandreslozanogi
 
plan contable empresarial para empresass
plan contable empresarial para empresassplan contable empresarial para empresass
plan contable empresarial para empresass
SUSANJHEMAMBROSIOSEV1
 
U1. C2. TIPOS DE INSTITUCIONES FINANCIERAS.pptx
U1. C2. TIPOS DE INSTITUCIONES FINANCIERAS.pptxU1. C2. TIPOS DE INSTITUCIONES FINANCIERAS.pptx
U1. C2. TIPOS DE INSTITUCIONES FINANCIERAS.pptx
fernfre15
 
Normas internacionales de informacion financiera16 Arrendamientos.pdf
Normas internacionales de informacion financiera16 Arrendamientos.pdfNormas internacionales de informacion financiera16 Arrendamientos.pdf
Normas internacionales de informacion financiera16 Arrendamientos.pdf
MaraDosil
 
STEEPLE/PESTEL - Análisis de cada Factor
STEEPLE/PESTEL - Análisis de cada FactorSTEEPLE/PESTEL - Análisis de cada Factor
STEEPLE/PESTEL - Análisis de cada Factor
bauldecuentosec
 
Evitando riesgos en la designación y en las actuaciones del comité de selecci...
Evitando riesgos en la designación y en las actuaciones del comité de selecci...Evitando riesgos en la designación y en las actuaciones del comité de selecci...
Evitando riesgos en la designación y en las actuaciones del comité de selecci...
Pedrorivera339137
 
INFORME ADMINISTRACIÓN EN PROPIEDAD HORIZONTAL
INFORME ADMINISTRACIÓN EN PROPIEDAD HORIZONTALINFORME ADMINISTRACIÓN EN PROPIEDAD HORIZONTAL
INFORME ADMINISTRACIÓN EN PROPIEDAD HORIZONTAL
dorislilianagarb
 
BANRURAL S.A Case Study, Guatemala. INCAE Business Review, 2010.
BANRURAL S.A Case Study, Guatemala. INCAE Business Review, 2010.BANRURAL S.A Case Study, Guatemala. INCAE Business Review, 2010.
BANRURAL S.A Case Study, Guatemala. INCAE Business Review, 2010.
Anna Lucia Alfaro Dardón - Ana Lucía Alfaro
 
CATALOGO 2024 ABRATOOLS - ABRASIVOS Y MAQUINTARIA
CATALOGO 2024 ABRATOOLS - ABRASIVOS Y MAQUINTARIACATALOGO 2024 ABRATOOLS - ABRASIVOS Y MAQUINTARIA
CATALOGO 2024 ABRATOOLS - ABRASIVOS Y MAQUINTARIA
Fernando Tellado
 
BIG DATA EN LOS NEGOCIOS CASO DE INMOBILIARIA
BIG DATA EN LOS NEGOCIOS CASO DE INMOBILIARIABIG DATA EN LOS NEGOCIOS CASO DE INMOBILIARIA
BIG DATA EN LOS NEGOCIOS CASO DE INMOBILIARIA
loidaeunicer
 
SESIaN N° 03.pptx GESTION PROYECTOS UCV 2024
SESIaN N° 03.pptx GESTION PROYECTOS UCV 2024SESIaN N° 03.pptx GESTION PROYECTOS UCV 2024
SESIaN N° 03.pptx GESTION PROYECTOS UCV 2024
auyawilly
 
SMEs as Backbone of the Economies, INCAE Business Review 2010
SMEs as Backbone of the Economies, INCAE Business Review 2010SMEs as Backbone of the Economies, INCAE Business Review 2010
SMEs as Backbone of the Economies, INCAE Business Review 2010
Anna Lucia Alfaro Dardón - Ana Lucía Alfaro
 
El Pitch Deck de Facebook que Facebook utilizó para levantar su ronda de semi...
El Pitch Deck de Facebook que Facebook utilizó para levantar su ronda de semi...El Pitch Deck de Facebook que Facebook utilizó para levantar su ronda de semi...
El Pitch Deck de Facebook que Facebook utilizó para levantar su ronda de semi...
dntstartups
 
capitulo-5-libro-contabilidad-costo-volumen-utilidad.pdf
capitulo-5-libro-contabilidad-costo-volumen-utilidad.pdfcapitulo-5-libro-contabilidad-costo-volumen-utilidad.pdf
capitulo-5-libro-contabilidad-costo-volumen-utilidad.pdf
cessarvargass23
 
Trigonometria Plan-el mejor.pptxssssssss
Trigonometria Plan-el mejor.pptxssssssssTrigonometria Plan-el mejor.pptxssssssss
Trigonometria Plan-el mejor.pptxssssssss
QuerubinOlayamedina
 
Valor que revierte al vendedor de la mercadería exportada
Valor que revierte al vendedor de la mercadería exportadaValor que revierte al vendedor de la mercadería exportada
Valor que revierte al vendedor de la mercadería exportada
Instituto de Capacitacion Aduanera
 
La Norma Internacional de Contabilidad 21 Efectos de las variaciones en las t...
La Norma Internacional de Contabilidad 21 Efectos de las variaciones en las t...La Norma Internacional de Contabilidad 21 Efectos de las variaciones en las t...
La Norma Internacional de Contabilidad 21 Efectos de las variaciones en las t...
mijhaelbrayan952
 
Guía para hacer un Plan de Negocio para tu emprendimiento.pdf
Guía para hacer un Plan de Negocio para tu emprendimiento.pdfGuía para hacer un Plan de Negocio para tu emprendimiento.pdf
Guía para hacer un Plan de Negocio para tu emprendimiento.pdf
pppilarparedespampin
 
Capacitación chatbot Wapi para enviar por whatsapp
Capacitación chatbot Wapi para enviar por whatsappCapacitación chatbot Wapi para enviar por whatsapp
Capacitación chatbot Wapi para enviar por whatsapp
acastropu
 
Solicitud de cambio de un producto, a nivel empresarial.
Solicitud de cambio de un producto, a nivel empresarial.Solicitud de cambio de un producto, a nivel empresarial.
Solicitud de cambio de un producto, a nivel empresarial.
femayormisleidys
 

Último (20)

MICRO BIT, LUCES Y CÓDIGOS. SERGIO LOZANO
MICRO BIT, LUCES Y CÓDIGOS. SERGIO LOZANOMICRO BIT, LUCES Y CÓDIGOS. SERGIO LOZANO
MICRO BIT, LUCES Y CÓDIGOS. SERGIO LOZANO
 
plan contable empresarial para empresass
plan contable empresarial para empresassplan contable empresarial para empresass
plan contable empresarial para empresass
 
U1. C2. TIPOS DE INSTITUCIONES FINANCIERAS.pptx
U1. C2. TIPOS DE INSTITUCIONES FINANCIERAS.pptxU1. C2. TIPOS DE INSTITUCIONES FINANCIERAS.pptx
U1. C2. TIPOS DE INSTITUCIONES FINANCIERAS.pptx
 
Normas internacionales de informacion financiera16 Arrendamientos.pdf
Normas internacionales de informacion financiera16 Arrendamientos.pdfNormas internacionales de informacion financiera16 Arrendamientos.pdf
Normas internacionales de informacion financiera16 Arrendamientos.pdf
 
STEEPLE/PESTEL - Análisis de cada Factor
STEEPLE/PESTEL - Análisis de cada FactorSTEEPLE/PESTEL - Análisis de cada Factor
STEEPLE/PESTEL - Análisis de cada Factor
 
Evitando riesgos en la designación y en las actuaciones del comité de selecci...
Evitando riesgos en la designación y en las actuaciones del comité de selecci...Evitando riesgos en la designación y en las actuaciones del comité de selecci...
Evitando riesgos en la designación y en las actuaciones del comité de selecci...
 
INFORME ADMINISTRACIÓN EN PROPIEDAD HORIZONTAL
INFORME ADMINISTRACIÓN EN PROPIEDAD HORIZONTALINFORME ADMINISTRACIÓN EN PROPIEDAD HORIZONTAL
INFORME ADMINISTRACIÓN EN PROPIEDAD HORIZONTAL
 
BANRURAL S.A Case Study, Guatemala. INCAE Business Review, 2010.
BANRURAL S.A Case Study, Guatemala. INCAE Business Review, 2010.BANRURAL S.A Case Study, Guatemala. INCAE Business Review, 2010.
BANRURAL S.A Case Study, Guatemala. INCAE Business Review, 2010.
 
CATALOGO 2024 ABRATOOLS - ABRASIVOS Y MAQUINTARIA
CATALOGO 2024 ABRATOOLS - ABRASIVOS Y MAQUINTARIACATALOGO 2024 ABRATOOLS - ABRASIVOS Y MAQUINTARIA
CATALOGO 2024 ABRATOOLS - ABRASIVOS Y MAQUINTARIA
 
BIG DATA EN LOS NEGOCIOS CASO DE INMOBILIARIA
BIG DATA EN LOS NEGOCIOS CASO DE INMOBILIARIABIG DATA EN LOS NEGOCIOS CASO DE INMOBILIARIA
BIG DATA EN LOS NEGOCIOS CASO DE INMOBILIARIA
 
SESIaN N° 03.pptx GESTION PROYECTOS UCV 2024
SESIaN N° 03.pptx GESTION PROYECTOS UCV 2024SESIaN N° 03.pptx GESTION PROYECTOS UCV 2024
SESIaN N° 03.pptx GESTION PROYECTOS UCV 2024
 
SMEs as Backbone of the Economies, INCAE Business Review 2010
SMEs as Backbone of the Economies, INCAE Business Review 2010SMEs as Backbone of the Economies, INCAE Business Review 2010
SMEs as Backbone of the Economies, INCAE Business Review 2010
 
El Pitch Deck de Facebook que Facebook utilizó para levantar su ronda de semi...
El Pitch Deck de Facebook que Facebook utilizó para levantar su ronda de semi...El Pitch Deck de Facebook que Facebook utilizó para levantar su ronda de semi...
El Pitch Deck de Facebook que Facebook utilizó para levantar su ronda de semi...
 
capitulo-5-libro-contabilidad-costo-volumen-utilidad.pdf
capitulo-5-libro-contabilidad-costo-volumen-utilidad.pdfcapitulo-5-libro-contabilidad-costo-volumen-utilidad.pdf
capitulo-5-libro-contabilidad-costo-volumen-utilidad.pdf
 
Trigonometria Plan-el mejor.pptxssssssss
Trigonometria Plan-el mejor.pptxssssssssTrigonometria Plan-el mejor.pptxssssssss
Trigonometria Plan-el mejor.pptxssssssss
 
Valor que revierte al vendedor de la mercadería exportada
Valor que revierte al vendedor de la mercadería exportadaValor que revierte al vendedor de la mercadería exportada
Valor que revierte al vendedor de la mercadería exportada
 
La Norma Internacional de Contabilidad 21 Efectos de las variaciones en las t...
La Norma Internacional de Contabilidad 21 Efectos de las variaciones en las t...La Norma Internacional de Contabilidad 21 Efectos de las variaciones en las t...
La Norma Internacional de Contabilidad 21 Efectos de las variaciones en las t...
 
Guía para hacer un Plan de Negocio para tu emprendimiento.pdf
Guía para hacer un Plan de Negocio para tu emprendimiento.pdfGuía para hacer un Plan de Negocio para tu emprendimiento.pdf
Guía para hacer un Plan de Negocio para tu emprendimiento.pdf
 
Capacitación chatbot Wapi para enviar por whatsapp
Capacitación chatbot Wapi para enviar por whatsappCapacitación chatbot Wapi para enviar por whatsapp
Capacitación chatbot Wapi para enviar por whatsapp
 
Solicitud de cambio de un producto, a nivel empresarial.
Solicitud de cambio de un producto, a nivel empresarial.Solicitud de cambio de un producto, a nivel empresarial.
Solicitud de cambio de un producto, a nivel empresarial.
 

5 cf 4vmcx-(7281) - Servicio Tecnico Fagor

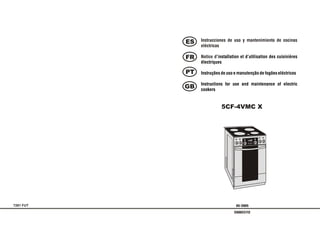
  • 1. ES Instrucciones de uso y mantenimiento de cocinas eléctricas FR Notice d'installation et d'utilisation des cuisinières électriques PT Instruções de uso e manutenção de fogões eléctricos Instructions for use and maintenance of electric GB cookers 5CF-4VMC X 0 C 7281 FUT 05-2005 C600237I2
  • 2. ES INTRODUCCIÓN Gracias por el interés que ha manifestado por nuestros productos y por la compra de nuestra cocina. Antes de instalar y usar la cocina lea y siga atentamente las instrucciones del presente manual que contiene informaciones importantes acerca de la seguridad, así como indicaciones y sugerencias que le facilitarán el uso correcto del aparato. Con el fin de modernizar el aparato y de mejorar su calidad, el fabricante se reserva el derecho a introducir modificaciones, incluso sin avisar, sin que ello signifique problema alguno para el usuario. Nuestros aparatos cumplen con las normas de seguridad EN 60335-1; EN 60335-2-6. La instalación de la cocina la debe realizar un instalador cualificado de aparatos eléctricos o técnico del taller autorizado que se deberá atener a las normas de instalación vigentes. El fabricante declina cualquier responsabilidad por daños a enseres o personas derivados de una mala instalación o un uso incorrecto del aparato. !ADVERTENCIA! 1. La cocina debe ser reparada exclusivamente por el servicio técnico autorizado. La reparación inadecuada puede causar riesgos graves. La cocina dañada no puede ser usada hasta que no se efectúe la reparación. 2. No levante nunca la cocina agarrando del tirador de la puerta del horno. 3. Si la superficie de la mesa vitrocerámica está rota, hay que apagar el aparato para evitar choques. 4. Durante el uso el aparato se pone caliente. Se aconseja mantener cuidado y no tocar elementos calientes dentro del horno. 5. Si se usa el grill, las partes accesibles pueden calentarse. Evitar el contacto de los ninos. 6. Para evitar el riesgo de choque eléctrico, antes de cambiar la lámpara hay que asegurarse de que el aparato está apagado. 1
  • 3. GB TROUBLESHOOTING INDICE ES 7 TROUBLESHOOTING 1 INFORMACIONES GENERALES ....................................................3 1.1 CARACTERÍSTICAS TÉCNICAS ......................................................3 WARNING ! 1.2 CONSTRUCCIÓN DEL APARATO ....................................................3 Before proceeding with the troubleshooting, disconnect the cooker from the 1.3 USO .............................................................................................4 electric mains. 1.4 PREPARACIÓN .............................................................................4 In case of disturbances in the cooker operation, check the guidelines below to learn if you are able 1.5 INDICACIONES IMPORTANTES .....................................................4 to remedy the problem by yourselves. 2 INSTALACIÓN .................................................................................4 2.1 UBICACIÓN ..................................................................................4 Oven fails to be turned on 2.2 CONEXIÓN ...................................................................................5 • Burnt fuses - replace them. • If the fuses burn again, it may mean that too many units are operated at the same time. 3 USO DE LA ENCIMERA VITROCERÁMICA .....................................6 3.1 REGLAS GENERALES DE USO DE LA ENCIMERA Oven lighting does not function VITROCERÁMICA ........................................................................6 3.2 ELECCIÓN DE LOS RECIPIENTES ADECUADOS .............................6 3.3 INDICADOR DE CALENTAMIENTO ...............................................7 If the oven has been operated and is still hot, wait until it cools down. 4 HORNO ...........................................................................................7 2 • Bulb is not screwed all the way in - unscrew glass bowl 1 from lamp 4.1 CONSTRUCCIÓN Y EQUIPAMIENTO .............................................7 socket 2, and screw the bulb 3 all the way in (Fig. 17). 4.2 MANDO DE HORNO ............................................................8 3 • Burnt bulb - unscrew glass bowl 1 of the lamp, and replace with a 4.3 MANDO SELECTOR DE FUNCIONES ............................................8 1 new bulb featuring the following parameters: type E14; 230 V; 25 W; 4.4 MANDO REGULADOR DE TEMPERATURA .......................................8 temperature resistance 300°C. 4.5 PROGRAMADOR ELECTRÓNICO...................................................9 4.6 ENCENDIDO Y APAGADO DEL HORNO ..........................................9 4.6.1 ENCENDIDO DEL HORNO ...............................................................9 Fig. 17 4.6.2 APAGADO DEL HORNO ...................................................................9 4.7 MODALIDADES DE USO .............................................................9 Too much smoke in the oven 4.8 INDICACIONES REFERIDAS AL ASADO........................................................11 • When grilling, the generated smoke is a normal condition. The amount of smoke can be 5 PROGRAMADOR ELECTRÓNICO ..............................................13 lowered by decreasing the temperature or reducing the amounts of fat and water in baking 6 LIMPIEZA Y MANTENIMIENTO .....................................................17 dish. 6.1 ADVERTENCIAS GENERALES ....................................................17 • Dirty turnspit. The fat left on the turnspit from the previous usage will be burnt for some time and thus generating smoke. Take care to clean the turnspit thoroughly after each use. 6.2 LIMPIEZA DE LA ENCIMERA VITROCERÁMICA ..............................17 6.3 LIMPIEZA DEL HORNO ................................................................18 Flashing message "0.00" on timer display 6.3.1 DESMONTAJE DE LA PUERTA DEL HORNO ...................................19 • Voltage drop or momentary interruption in the mains power supply. Disconnect the cooker from 6.3.2 DESMONTAJE DE LAS GUÍAS Y DE LAS PROTECCIONES the mains, wait a moment, then connect to the mains again, and set the current time. LATERALES CATALÍTICAS ...............................................................19 6.3.3 DESMONTAJE DE LA PROTECCIÓN CATALÍTICA TRASERA ...........20 7 ELIMINACIÓN DE DEFECTOS ......................................................21 21 2
  • 4. ES INFORMACIONES GENERALES CLEANING AND MAINTENANCE GB 1 INFORMACIONES GENERALES 1.1 CARACTERÍSTICAS TÉCNICAS Tabla 1 5CF-4VMC X Fig. 16 Dimensiones externas de la cocina (altura x anchura x profundidad) 850 x 600 x 600 [mm] Dimensiones internas del horno (altura x anchura x profundidad) 335 x 405 x 425 [mm] 3 Volumen del horno [dm ] 58,0 2 unidades Focos de la encimera 1 unidad vitrocerámica HiLight 1 unidad 6.3.4 CLEANING THE INTERIOR OF THE OVEN COMPARTMENT • • After removing the guides and catalytic covers, clean the interior of the oven compartment. • • Clean the enamelled surfaces with kitchen cleaning agents. grill 2,0 kW • • In order to clean baked stains that are difficult to remove, special agents for cleaning ovens can Equipamiento del horno • be used. However, these chemicals are caustic and therefore they should be used very • carefully in minimum quantities, observing the manufacturer's recommendations on their use. girapollos • • After cleaning the oven interior first assembly the rear catalytic shield 2 with the screws 1 ventilador (fig. 16). • • Then assembly the side catalytic shields and the guides on both side walls of the oven. Potencia nominal de la cocina kW 8,7 Programador electrónico • CAUTION ! 1.2 CONSTRUCCIÓN DELAPARATO Special agents for cleaning ovens can only be used on enamelled surfaces. It is Fig. 1 forbidden to use it for cleaning the covers coated with catalytic enamel. 1- encimera vitrocerámica During assembly you should pay attention if guides are fastened on the right 2 - foco ø 145 mm wall of oven. The bar, limiting insertion of the sheet or net in chamber, should 3 - foco ø 210 mm be behind the rear hanging of guides. 4 - foco ø 180 mm 5 - horno eléctrico 6 - panel de mandos 7 - puerta del horno 8 - cajón 9 - bandeja 10 - parrilla 11 - indicador de calentamiento 12 - mando selector de funciones 13 - mando regulador de temperatura 14 - programador electrónico 15 - piloto regulador de temperatura 16 - piloto funcionamiento de cocina 3 20
  • 5. GB CLEANING AND MAINTENANCE INSTALACIÓN ES • Open the door entirely 1.3 USO • Lock hinges on both sides of the door by placing the clamping ring 1 on the catch 2 of the hinge bow 3 (fig. 14) • La cocina se ha diseñado para la preparación de alimentos exclusivamente en el hogar. Su uso para otros fines está prohibido. • Next grasp the door with both hands, turn it in closing direction through an angle of 450 and take out the hinges. • El presente aparato cumple con las normas antiparasitarias de la UE. CAUTION! 1.4 PREPARACIÓN 1. The hinge bow is tense with a big strength, therefore while taking out the 1. Limpie las superficies esmaltadas y de cristal con un paño suave y húmedo. door a special care must be taken not to cut one's own fingers 2. El horno, la rejilla, la bandeja, etc. límpielos con una disolución caliente de 2. During cleaning the upper wall of oven you should pay attention to electric detergente. heaters, temperature sensor and lamp of oven illumination; do not change position of sensor setting 3. Antes de usar la cocina por primera vez, ponga los focos en marcha durante unos 3. Do not pour water onto the bottom of oven otherwise it may trickle through 3 minutos sin recipiente. some possible leakage and get on the lower heater. 4. Ponga el horno en marcha a la máxima temperatura durante 1 hora. El humo y olor que se desprenden del horno durante este tiempo son de poca importancia y When the oven door is removed, you can dismantle both pairs of runners. The runners and oven basta asegurar la ventilación correcta abriendo las ventanas. bottom should be preferably cleaned each time they get dirty. 1.5 INDICACIONES IMPORTANTES 6.3.2. DISASSEMBLY OF GUIDES AND SIDE CATALYTIC SHIELDS 1. Durante el uso, los focos de la encimera vitrocerámica y la cavidad del horno se a) b) calientan. !Evite el acceso de los niños! 2. Las grasas y los aceites sobrecalentados pueden quemarse fácilmente, por lo tanto los alimentos de este tipo prepárelos siempre bajo control. 3. En caso de avería, desconectar la cocina de la red eléctrica. 4. Durante su uso la cocina se calienta. !Tengan cuidado de no tocar elementos calientes dentro del horno! !Corre el riesgo de quemarse! 5. Para quitar las ollas y sacar moldes del horno se recomienda trabajar con guantes de protección. 6. En el horno y el cajón no almacene objetos inflamables y no resistentes al calor. 7. No sobrecargue la puerta abierta. No se apoye sobre ella. 8. Los cables de alimentación de otros electrodomésticos deben pasar lejos de la Fig. 15 cocina encendida y caliente. 9. No utilice el aparato para calentar el local. To disassembly the side catalytic shields you must first disassembly both the guides. Disassembly of guides: 2 INSTALACIÓN – gently press the ladder bar 1 down and take it from beneath the blocking cap 2, (fig. 15a), – turn aside the guides 4, lift and take them off from the oven openings (fig. 15b), 2.1 UBICACIÓN – take the catalytic shields 3 out. • Retire de la cocina los elementos de embalaje, incluido el plástico que recubre las 6.3.4 DISASSEMBLY OF REAR CATALYTIC SHIELD partes de acero inoxidable. Los materiales del embalaje deben ser tratados de acuerdo con la normativa vigente. – unscrew four screws 1, marked with arrows (fig. 16), – take the shield 2 from the oven rear wall 3. • El local debe ser seco y adecuadamente ventilado. La ubicación del aparato debe garantizar el acceso libre a todos los elementos de mando. CAUTION ! • La cocina puede ser colocada en fila de los muebles solamente hasta la altura de The oven must be switched off before removing the guard. 850mm. La distancia entre los lados laterales de la cocina y los armarios de la cocina debe ser por lo menos 30mm. 19 4
  • 6. ES INSTALACIÓN CLEANING AND MAINTENANCE GB • En caso de instalar una campana, la distancia mínima entre la encimera de gas y a) b) la campana debe ser de 650mm. No coloque muebles por encima de la cocina. • The cookware used for cooking on the ceramic • Antes de usar el aparato, es preciso nivelarlo. Para este fin dispone de patas hob should always be clean and dry. Draw regulables a las que se accede retirando el cajón. special attention to the cookware bottoms as food residue stuck to them will bake during the next use of the hob. 2.2 CONEXIÓN El aparato debe ser instalado adecuadamente por un instalador cualificado conforme Fig. 13 con la normativa vigente. Está prohibido introducir cambios en la instalación eléctrica de la cocina. 6.3 OVEN CLEANING Antes de proceder a la conexión asegúrese de que: CAUTION! - la tensión nominal en el local es igual que la indicada en la placa de 1. Before cleaning you should wait until oven cools down. Hot heaters may características, cause burns. - la línea de alimentación del aparato está preparada para suministrar la potencia 2. Cleaning the oven in use of appliances for steam generation under pressure is not allowed. indicada en la placa de características. 3. It is the best to clean the bottom of the oven after each use, not to allow the La instalación eléctrica de alimentación de la cocina, debe estar equipada con un remains of food and spots of oil to roast again. interruptor de seguridad que actúa en caso de avería. La distancia de apertura de los contactos del interruptor debe ser igual o superior a 3mm. • The oven compartment is coated with ceramic enamel, and both of the side covers and the rear cover are coated with catalytic enamel. Para conectar el cable de alimentación a la red se debe tener en cuenta que: • During normal use, the oven compartment is heated to high temperatures, which facilitates - el cable verde-amarillo (de protección) debe conectarse al borne de tierra . absorbing the emitted fumes by the catalytic enamel. - el cable azul es neutro (cero), • Periodically, especially after cooking very fat dishes, the self-cleaning cycle must be carried out. It is done by in turning the oven on for one hour's time and setting the maximum temperature - los cables marrón, negro y rojo son para la fase (live), (250°C). During this time, the oven door should be closed. During the self-cleaning cycle, the - el cable no debe entrar en contacto con las superficies cuya temperatura sea dirt deposited on the oven walls oxidizes and evaporates. superior a 75OC, CAUTION ! - en caso de que el aparato se entregue sin cable, utilizar uno del tipo H05RR-F ó No detergents nor soap can be used for cleaning the covers coated with the catalytic H05V2V2 con la sección adecuada como arriba se ha indicado. enamel as this could cause damage to the enamel. A continuación se representa el esquema de posibles conexiones: • After some time, the catalytic covers will loose their self-cleaning properties; when their 1N ~230V 50Hz 2N ~400V 50Hz 3N ~400V 50Hz 2 ~230V 50Hz 3 ~230V 50Hz surface becomes glossy they should be replaced. 2 2 • In order to replace the catalytic covers, it is necessary to remove the oven door and guide 3 x 6 mm 2 4 x 2,5 mm 5 x 1,5 mm 2 3 x 6 mm 2 4 x 2,5 mm assembly. L 1 L 2 L3 N N L 1 L 2 L3 N N L 1 L 2 L3 N N L 1 L 2 L3 N N L 1 L 2 L3 N N 6.3.1 DISASSEMBLY OF OVEN DOOR L1 N PE L1 L2 N PE L1 L2 L3 N PE L1 L 2 PE L1 L2 L 3 PE 230V 230V 230V 230V 230V 230V 230V 230V 230V 230V Fig. 2 A -Int. nominal por fases; B - Protección Tabla 2 A 34,8 26,1 13,0 34,8 22,6 B 40,0 32,0 16,0 40,0 25,0 Fig. 14 Taking out the oven door 5 18
  • 7. GB CLEANING AND MAINTENANCE USO DE LA ENCIMERA VITROCERÁMICA ES Unlocking the programmer 3 USO DE LA ENCIMERA VITROCERÁMICA – Simultaneously press the buttons and and hold them until the indicator goes out. 3.1 REGLAS GENERALES DE USO DE LA ENCIMERA VITROCERÁMICA Caution ! • Evitar caídas de objetos duros sobre la encimera ya que esta podría romperse. Setting the function knob on position "0" does not disable the safety features. • No rascar la superficie con puntas agudas de recipientes u objetos. 5.9 SOUND SYGNALS THE PROGRAMMER EMITS • La superficie de la encimera es resistente pero puede rayarse. Por ello es aconsejable no rozar las ollas sino levantarlas al mover. There is a possibility to turn off the signals emitted by the programmer. • Los recipientes deben colocarse en medio del círculo de foco marcado. 1. Turning off the sound signals: • Los focos pueden ponerse en marcha después de haber colocado encima la olla. - press and hold the button down, at the same time press and hold down the button . No se debe poner en marcha el foco con la olla vacía o con una olla de fondo 2. Activating the sound signals: deformado; corre el riesgo de avería. - press and hold the button down, at the same time press and hold down the button . • En la encimera no pueden prepararse alimentos en lámina de aluminio o en recipientes de plástico; tampoco se debe colocar objetos de plástico. 6. CLEANING AND MAINTENANCE 3.2 ELECCIÓN DE LOS RECIPIENTES ADECUADOS Warning ! Before proceeding with cleaning, disconnect the cooker from the electrical power supply, and wait until it cools down. • La selección de los recipientes adecuados es una de las condiciones del buen funcionamiento de la encimera vitrocerámica. 6.1 GENERAL REMARKS • Las ollas deben tener fondos gruesos, planos y secos con diámetro igual o mayor que el del foco. Si el diámetro del fondo de la olla es menor que el del foco, parte del • The cooker must not be cleaned with the use of any coarse-grained, abrasive powders, abrasive calor no se aprovecha. sponges, aggressive chemical agents and sharp objects. • The parts made of stainless steel, knobs and fascia panel should be cleaned with soft cleaning !Correcto! liquids without any abrasive powders since they could damage the overprints. • Poco consumo de energía • After using them, baking tins and forms, grates and roast pans should be soaked in luke-warm water with the addition of washing liquid, then washed and carefully dried. • Buena conducción de calor • Check to make sure that the oven door seal is clean. - ollas planas - diámetro del fondo igual al del foco 6.2 CLEANING THE CERAMIC HOB - tapa bien ajustada • Clean the ceramic hob surface regularly after each use, as even the smallest dirt will bake • La superficie del fondo deformada aumenta el tiempo de cocción y el consumo de during the next use. energía eléctrica. • The hob should be cleaned with the special cleaning agents intended for this purpose. • Avoid using abrasive sponges, powders and creams. !Incorrecto! • Small stains should be removed with a damp cloth or sponge (Fig. 13a) moistened with lukewarm water with the addition of soft cleaning agent, then wipe the hob until it is dry. • Mucho consumo de energía • Heavy stains should be removed with the use of special agents for cleaning ceramic hobs. • Mala conducción de calor • In order to remove food build-up from the ceramic hob, we advise to use a wooden blade or • Largo tiempo de cocción special scraper (Fig. 13b), taking care not to scratch the glass surface of the hob. WARNING ! Do not use oven cleaning agents for cleaning the ceramic hob, since they are very aggressive and can cause the permanent damage to the hob surface. • Keep away from the hob heating zones such materials as plastics, or aluminium foil, as they can melt. In case they have malted onto the surface, remove them immediately from the hob surface (when it is still warm). Similarly, with the foods with high sugar content; on the hot surface of the hob, sugar can melt very quickly resulting in permanent stains. The change in Olla demasiado pequeña Fondo de la olla deformado Tapa no ajustada the hob surface colour does not affect its proper functioning. Fig. 3 17 6
  • 8. ES USO DE LA ENCIMERA VITROCERÁMICA ELECTRONIC PROGRAMMER GB 3.3 INDICADOR DE CALENTAMIENTO - Set the desired time with the buttons and / or e.g. 25 minutes; after a few seconds the function is active, the indicator glows continuously; the display shows current time. • El calentamiento de los focos, está marcado por el - When the set time has come to an end the sound signal turns on (see point 5.3) and the indicador especial situado en la parte delantera de la encimera (figura 4). indicator is flashing. B C • Cuando los focos están calientes, están también Changing the timer setting: encendidos los pilotos indicadores de calentamiento Perform the same operations as with setting the timer. correspondientes a cada foco. A D Erasing the timer setting: • Los pilotos se encienden cuando la temperatura de los focos supera los 50oC. - Press repeatedly the button , until the indicator starts flashing; • En caso de que los pilotos se quemen y no señalicen el - Press the button and hold it until 0:00 appears on the display. Fig. 4 calor, avise al servicio de asistencia técnica. After a few seconds the indicator goes out. Current time or the time left to baking end will be •· Los focos de la encimera vitrocerámica se encienden y shown on the display (if there was a programme set before). se apagan girando los mandos (figura 5) situados en el panel de mandos. El mando puede girarse en ambos Caution ! sentidos. If the timer is used while a programme is being operated, you must remember that after the timer is turned off, the programmer does not switch off the oven. • Antes de poner el foco en marcha asegúrese si el mando corresponde al foco que quiere activar. 5.7 ERASING FUNCTIONS CONNECTED WITH MEASURING THE • Girando el mando en sentido horario se consigue el aumento gradual de potencia del foco del mínimo al TIME Fig. 5 máximo. All the earlier set functions may be erased in two ways: 1. Press and hold for a few seconds the button . The indicators of the chosen functions will turn off which means they are no longer active. 4 HORNO 2. Set the function knob on the position "0". 4.1 CONSTRUCCIÓN Y EQUIPAMIENTO Caution ! After setting the function knob on position "0" the oven is turned off whereas the timer is not. If functions are erased when the oven is operating, the oven changes into manual mode and the Fig. 6 user should control its further work. To turn the oven off both control knobs must be set on position 1 - resistencia superior, "0". 2 - resistencia del grill; 3 - resistencia inferior; 5.8 SAFETY LOCK FUNCTIONS 4 - proteccion perforada; 1. AUTOMATIC DISCONNECTION FUNCTION 5 - guías; 6 - protectores laterales; If the oven operates in manual mode continuously, after 3 hours it will be automatically disconnected. 7 - lámpara del horno; A short sound signal will turn on and the indicator will start flashing. To turn the indicator 8 - detector de temperatura; off, the oven function knob must be set on position "0". 9 - motor del girapollos 2. THE CHILD SAFETY LOCK FUNCTION Programmer safety lock EQUIPAMIENTO - Press both the buttons and at the same time and hold them for a few seconds until Bandeja esmaltada para pasteles. Se puede usar como an indicator appears on the display. depósito de recogida de grasa si la cocción se realiza directamente en la rejilla. If the oven is off at the moment of lockout, after blocking it will not be possible to turn it on. If the oven is on, the method of heating and temperature can be changed whereas the programmer setting cannot. 7 16
  • 9. GB ELECTRONIC PROGRAMMER HORNO ES Erasing settings: Rejilla sirve para depositar recipientes usados en el horno. - press the button , is flashing, En la rejilla se pueden asar directamente algunos alimentos como carnes, pescados, etc. - press the button until 0:00 appears on the display. After a few seconds the indicator goes out and the current time is shown on the display. Soporte del girapollos sirve para fijar el mismo. 5.5 PROGRAMMING THE BAKING END Fig. 7 This function is most often used together with the baking time function. - Choose the heating method with the knob e.g. and set the oven temperature, 4.2 MANDO DE HORNO - Programme the baking time e.g. 45 minutes, as described above, Entre los mandos del horno están: - Press the button , until the indicator starts flashing and using the buttons and / or – Mando selector de funciones set the desired time of oven switch off e.g. 14.30. – Mando regulador de temperatura – Programador electrónico After a few seconds the settings are remembered. The display shows the time when the baking started. The indicator glows. At 13:45 the oven automatically turns on, the display shows the 4.3 MANDO SELECTOR DE FUNCIONES El mando dispone de siguientes time left to the baking end, the indicator glows. At 14:30 the oven automatically turns off, the posiciones: sound signal turns on, the indicator is flashing. Sentido de Sentido de 0 - horno apagado Changing of the baking time end: encendido apagado - resistencia inferior 0 0 - Press the button , until the indicator starts flashing, the display shows the time of - resistencia inferior y superior 5 baking end which was set earlier, 100 - resistencia superior - Change the time with the buttons and / or . 250 - girapollos y resistencia del grill 0 15 200 Erasing the setting: - resistencia inferior y ventilador - Press the button , until the indicator starts flashing, - girapollos y resistencia del grill - Press the button until on the display there appears the time which is the sum of the y ventilador Fig. 8 Fig. 9 current time and the baking time. - resistencia inferior y superior The function of setting the time is erased and the oven will turn on immediately in accordance with - resistencia circular y ventilador the baking time settings • Después de posicionar el mando selector de funciones (figura 8) en la posición de trabajo, se Caution ! enciende el piloto de control y la lampara del horno. During every programme operation you can check the current time. To do so • Después de terminar la cocción apague siempre el horno. press the button , until the indicator starts flashing, for a few minutes the programmer will display the current time and then it will show the time left to the 4.4 MANDO REGULADOR DE TEMPERATURA baking end. • El mando regulador de temperatura (figura 9) permite posicionar y mantener de forma automática la temperatura del horno en el nivel preseleccionado. 5.6 TIMER • En el mando se han marcado las posiciones 50, 100, 150, 200, 250 que corresponden a las The timer signals, with the use of a sound, when the set time is finished. It operates independently temperaturas del horno medidas en OC. from the programme. You can use it both when the oven is on and off. The timer does not turn off • Al posicionar la temperatura gire el mando en sentido horario y al apagar - en sentido the oven. antihorario. • Después de posicionar la temperatura se activan las resistencias y se enciende el piloto de Setting of the timer: control. Al llegar a la temperatura deseada las resistencias y el piloto se apagan - Press the button , until the indicator starts flashing; the display shows 0:00. automáticamente. Las resistencias y el piloto se encienden y se apagan como consecuencia del funcionamiento del regulador de temperatura. 15 8
  • 10. ES HORNO ELECTRONIC PROGRAMMER GB 4.5 PROGRAMADOR ELECTRÓNICO To programme you must press the function button and within a few second you set the desired Con el programador electrónico es posible mandar el trabajo del horno de modo automático o time using the button . You may adjust the time with the button . semiautomático. La existencia del programador no elimina la posiblidad de mando manual de la Pressing the buttons and changes the time by one minute, whereas pressing them for a cocina. Modo de empleo del programador se describe en adelante. longer time turns on the fast forward function. After connecting the cooker to supply network or after power cut off, indicator is flashing on 4.6 ENCENDIDO Y APAGADO DEL HORNO the display. The first thing to do is to set the current time. 4.6.1 ENCENDIDO DEL HORNO If there was a power cut off during oven work, the indicator is flashing on the display. 1. Seleccionar el modo de calentamiento girando con el selector de funciones. Set the function knob on position "0". Set the current time. 2. Posicionar la temperatura deseada con el mando regulador de temperatura. 3. Por medio del programador seleccionar el tiempo de trabajo del horno. 5.2 SETTING THE CURRENT TIME 4.6.2 APAGADO DEL HORNO The oven function knob (item 12 on fig. 2) should be set on position "0". - Press the button ; the time12.00 appears on the display. Cuando el alimento esté listo, gire el mando de selector de funciones y el mando regulador de temperatura hasta la posición de cero 0. - Set the desired time with the buttons and/or . - After a few seconds the indicator goes out, the time is set. 4.7 MODALIDADES DE USO 5.3 SOUND SIGNAL CALENTAMIENTO CON LA RESISTENCIA INFERIOR Once a programme comes to an end the programmer emits a sound signal and the active function Es la función que permite acabar la cocción de los pasteles. Se utiliza durante los últimos indicator is flashing. 10-15 minutos de cocción. After 60 sec the sound signal automatically switches off and the function indicator is still flashing. The indicator may be turned off by pressing any button. SISTEMA CONVENCIONAL (resistencia superior e inferior) CAUTION ! La función con la que el alimento se calienta desde arriba y desde debajo. Este modo de The sound signal may be turned off earlier by pressing any button. Pressing the calentamiento sirve perfectamente para asar pasteles, carnes, pescados, pan y pizza. button will, however, changing the operational mode from automatic to manual. Los alimentos deben colocarse en un solo nivel del horno, mejor en el segundo. The oven heaters turn off and the user must control further baking. Once the baking has finished both control knobs shall be set on position "0". CALENTAMIENTO CON LA RESISTENCIA SUPERIOR Es la función destinada para rematar los asados; gracias a ella el pastel queda dorado por 5.4 PROGRAMMING THE BAKING TIME la parte superior. Este modo sirve también para gratinar alimentos (tostadas, guisos al gratín, etc.). - Choose the oven heating method e.g. and set the desired temperature RESISTENCIA INFERIOR Y VENTILADOR ENCENDIDOS - Press the button , until the indicator starts flashing, Resistencia inferior y ventilador funcionan a la vez. Este tipo de calentar esta previsto - Set the baking time with the buttons and / or e.g. 45 minutes. para preparar pastas de levadura y para conservar frutas y verduras. Aconsejamos de After a few seconds the indicator glows continuously. The programmer measures time. The poner platos en la primera o segunda guía de abajo y hay que utilizar las bandejas bajas. display shows time left. GRILL After programming the oven operation you can check the current time. To do so Después de seleccionar la función se pone en marcha la resistencia de griil y el motor press the button until the indicator starts flashing. The programmer will de girapollos. Si el usuario no va usar el girapollos, hay que colocar el guiso en la rejilla o display the current time for a few seconds and then it will show the time left to en la bandeja en una de las guías superiores y asar de forma tradicional. baking end. Changing of baking time: !Atención! Durante el asado con grill el aparato no debe dejarse sin control. Las partes accesibles de - press the button , is flashing, la cocina están calientes. Evitar contacto de los niños. - change the setting with the buttons and / or . 9 14
  • 11. GB ELECTRONIC PROGRAMMER HORNO ES Table 4 Meat dishes GRILL TRADICIONAL Uso del grill: O Dish Temperature [ C] Timing [min.] - precalentar el horno seleccionando la temperatura máxima, - colocar el alimento en el horno en la guía superior, Meat - en la guía inferior colorar la bandeja que recogerá la grasa, 225 - 250 - short roasting 12 - 15 per centimetre - poner el mando selector de funciones en la posición , Meat of meat thickness 190 - 210 - seleccionar la temperatura deseada y el tiempo del grill, - long roasting - transcurrida la mitad del tiempo, darle vuelta al guiso. Chicken 225 -250 50 - 60 Terminado el asado con grill, apagar el horno. Goose, duck, turkey 200 - 210 Up to 3 hours depending on the size ASADO CON GIRAPOLLOS Venison 190 - 210 Fish El girapollos sirve para asar girando los guisos como aves, chorizos, shashliks, etc. 225 - 250 20 - 30 - roasting, up to 2 kg 180 - 200 30 - 50 Funcionamiento del horno: - stewing, up to 2 kg - quitar del horno todo el equipamiento innecesario y montar el soporte del girapollos, - en la barra del girapollos montar uno de los pinchos y pinchar el guiso para que quede 5. ELECTRONIC PROGRAMMER fijado de forma simétrica; luego pinchar con el segundo pincho y fijarlo bien apretando el tornillo del pincho, - colocar el guiso preparado de esta forma introduciendo el extremo agudo en el motor Electronic digital programmer allows for controlling oven operation. The programmer indicates the girapollos y apretando a tope y apoyar el otro extremo en el marco, current time to an accuracy of 1 minute. Once the programme has come to an end it emits a sound and automatically switches off the oven. - poner el mando selector de funciones en la posición ,seleccionar la temperatura y The programmer controls: eventualmente el tiempo de trabajo. 1. functions connected with measuring time: - setting current time, - programming baking time 1 Fig. 10 - programming the time of baking end 2 - setting the timer 4 1 - resistencia del grill; 2. safety functions: 2 - motor del girapollos; 3 6 - automatic disconnection 3 - pinchos; - child safety lock, 5 7 4 - espadín del girapollos; 5 - bandeja (depósito de grasa); 6 - soporte del girapollos; 5.1 GENERAL REMARKS 7 - protección de mandos; Fig. 12 1 - button for choosing programmer function LA FUNCIÓN DE DORADO EN EL GIRAPOLLOS CON LA VENTILACIÓN DE AIRE 2 - button "+" for setting time CALIENTE 3 - button "-" for setting time La resistencia de gril, el motor de girapollos y ventilador funcionan a la vez. Utilizando el 4 - automatic disconnection indicator girapollos hay que colocar bien el plato en el espadín y asegurar que no se mueve como 5 - baking time indicator descrito arribo y después encender el horno. Esta función esta prevista para dorar grandes 6 - time of baking end indicator trozos de carne. – Con esta función se puede dorar el plato con el ventilador encendido, sin utilizar el 7 - timer indicator girapollos. En este caso no se debe de montar el girapollos y el plato hay que colocar en 8 - current time adjustment indicator la rejilla en el nivel inferior. Debajo de la rejilla hay que meter una bandeja para grasa que 9 - displayed time puede caer. Se puede dorar en esta forma por ejemplo: rodaja de carne, lomo, pollos, aves, etc. 10 - safety lock indicator – Con este método no es necesario el calentamiento inicial del horno. El tiempo de dorado es 11 - function not available mas corto de unos 20 % respecto al. Dorado tradicional. 13 10
  • 12. ES HORNO OVEN GB TERMOVENTILACIÓN • When selecting the baking temperature and duration, the weight and consistency of pastry should be taken into consideration. • Con esta función encender las resistencias superior e inferior y ventilador o resistencia • While baking, too high temperature should be avoided, as cakes will not rise and could sink. circular y ventilador. Ventilador ubicado detrás de la cubierta trasera perforada esta On the other hand, keeping cakes too long in the hot oven can cause the cakes to burn and provocando el circuito de aire caliente dentro del horno. Con este modo de calentar la dry. temperatura de cocinado debe de ser menor que durante la cocción tradicional y debe que • The tins with the dishes can be placed on any level of the oven, however the second level is ser menor que 2000C. recommended. The user, taking account of their own observations and experience, should • Al final de asado, es aconsejable girar el molde con su parte delantera para atrás. select the most appropriate level for each dish. • La función de termoventilación sirve perfectamente para el asado paralelo de dos guisos • When baking for the first time, the best way is to start with medium temperature settings from del mismo o del distinto tipo (ej. carne y pescado) colocados en distintos niveles pero the range indicated in the recipe, and the next time select higher temperature, if necessary. cocinados a la misma temperatura. Al cocinar dos guisos es aconsejable subir la temperatura Lower temperature causes the dishes to be more uniformly browned. respecto al valor indicado para un solo guiso. • Para asar y cocinar carnes es aconsejable escoger trozos más grandes, superiores a 1 • In order to check if the baking is ready, a few minutes before switching off the oven, a kg. wooden rod should be put into the cake; if pastry does not stick to the rod - the baking is ready. After the baking, the cake should be preferably left in the oven for approximately 5 En caso de cocción simultánea de dos guisos: more minutes. – Hay que sacar del horno los dos guisos y verificar si están hechos; si uno de los guisos queda sin hacerse, hay que volver a colocarlo en el horno y seguir cocinando. • Specified in the tables below, there are approximate baking times and temperatures for various dishes. Practically, there may be differences that the user should correct based on their own experience. The best way is to try the particular dishes a few times, and make notes of the DESCONGELACIÓN optimal time and temperature. • Gracias a la función de termoventilación el horno sirve también para descogelar alimentos Table 2 Cakes profundamente congelados. Se aconseja colocar los productos congelados en la bandeja a nivel dos o tres. La temperatura seleccionada para la descongelación depende del tipo O Cake Temperature [ C] Timing [min] de alimento. • Dulces, frutas y gelatinas de carne se descongelan accionando la termoventilación sin Friable cake 180 - 190 45 - 60 seleccionar la temperatura. Yeast-cake 180 - 200 45 - 60 • Descongelando carnes y aves hay que envolverlas con lámina de aluminio para proteger contra la influencia directa del aire caliente, colocarlas en la parte central baja, accionar el Crumble-cake 200 - 220 20 - 30 horno y seleccionar la temperatura de 50 a 700C. Fruit-cake 200 - 210 30 - 40 • Los guios preparados para comer, ej. verduras (embalados con de aluminio) se pueden asar sin descongelación previa. Sponge-cake 180 - 200 20 - 30 Shortcake 210 - 220 10 - 20 4.8 INDICACIONES REFERIDAS AL ASADO Twist cake 220 - 240 30 - 40 • Para el asado de pasteles se pueden usar moldes tradicionales de chapa así como moldes cubiertos de teflón, cerámicos, de vidrio y de aluminio . Table 3 Cakes • Antes de usarlos por primera vez, es aconsejable colocar los moldes en el horno bien calentado O para que pierda su olor. Cake Temperature [ C] Timing [Hours:min] • Los moldes hay que rellenarlos con la masa hasta 2/3 de altura, dejando suficiente espacio Meringue 100 1:00 - 1:10 para que puedan crecer. • Hay que seguir estrictamente las indicaciones respecto al precalentamiento del horno puesto Sandy ring cake 160 1:05 - 1:10 que para cada tipo de pastel las exigencias son distintas. Yeast ring cake 160 1:00 - 1:10 • Durante el asado la masa tiene que calentarse de forma homogénea. Esta condición se cumple Flan case 160 0:25 - 0:35 al seleccionar la función ó ó . Streusel cake 175 0:20 - 0:30 • Si la parte superior del pastel queda demasiado quemada, la próxima vez hay que colocar el Fruit slices 175 0:40 - 0:55 molde con la masa en un nivel más bajo, seleccionar la temperatura más reducida y el tiempo de cocción más largo. Biscuit 160 0:30 - 0:40 • Si la parte inferior del pastel queda demasiado quemada, la próxima vez hay que colocar el molde más arriba y seleccionar la temperatura más baja. • Al seleccionar la temperatura y el tiempo de asado hay que tomar en cuenta el peso y la densidad de la masa. 11 12
  • 13. GB OVEN HORNO ES • Es aconsejable colocar los alimentos en el segundo nivel. No obstante, el usuario a base de sus FORCED HEAT CIRCULATION experiencias y observaciones debe seleccionar el nivel óptimo para cada uno de los guisos. • Para comprobar si el pastel está listo, hay que introducir un palillo de madera unos minutos • Such a heating method allows for uniform heat circulation around the food. When using antes de terminar la cocción. Si el pastel no se pega al palillo, está listo. Terminada la cocción, this heating method, the temperature should be slightly lower as compared to the traditional dejar reposar en el horno unos 5 minutos. cooking. The temperature should be set below 200°C. • Para el asado de carnes se pueden usar platos cerámicos, de vidrio, de acero esmaltado y de • The forced heat circulation function is ideal for simultaneous cooking of two dishes of hierro fundido, con los mangos resistentes a altas temperaturas. the same or different kind (e.g. meat and fish), which are placed in the oven on two • Al asar las carnes, hay que seleccionar la temperatura en función del tipo y tamano de la carne. different levels; however, the two dishes should require similar cooking temperatures. Cuanto más grande, más largo tiene que ser el tiempo con la temoperatura relativamente baja. • At the end of cooking, the front side of baking tin should be preferably turned backwards. Los trozos pequenos exigen menos tiempo de asado en la temperatura más alta. Como dato • When baking the two dishes, the temperature should be slightly higher than recommended, orientativo se puede considerar unos 12-15 por cada centímetro de carne. Es aconsejable asar and the time longer than at baking the single dish. When the set time has elapsed, remove la carne con método convencional, es decir seleccionando , ya que después de asarse both dishes from the oven, and make sure that they are sufficiently cooked. If one of the queda jugoso. dishes requires further cooking, leave it in the oven until it is cooked properly. • En el horno puede cocinarse cualquier tipo de guiso, pero no es aconsejable asar piezas cuyo peso es menor de 1 kg. La carne se puede asar en la bandeja o en la rejilla. Al asar en la rejilla, DEFROSTING por debajo hay que colocar la bandeja para recoger las gotas de grasa. Thanks to the forced heat circulation, the oven is ideal for defrosting deep frozen foods. Generally, we advise to place the frozen products on the plate located in the second or Tabla 3. Pasteles third oven level. Temperature selection for the defrosting process depends on the kind of Tiempo de asado frozen food. Tipo de pastel [minutos] • Confectionary, fruits and meat jelly are defrosted by starting the forced heat circulation without setting the temperature. Torta de molde 180-190 45-60 • While defrosting meat or poultry, wrap it with aluminium foil in order to prevent the direct Torta de levadura 180-200 45-60 effect of the hot air, and then place it in the middle or lower part of the oven compartment, turn the oven on, and set the temperature to approximately 50 - 70°C. Pastel de migajas 200-220 20-30 • Ready-to-use frozen products, e.g. frozen vegetables (wrapped with aluminium foil) Pastel de frutas 200-210 30-40 can be baked immediately without defrosting. Bizcocho 180-200 20-30 4.8 GENERAL HINTS ON PREPARING DISHES Pastaflora 210-220 10-20 • Cakes can be baked with the use of the traditional tins as well as teflon-coated tins, and forms Pastel retorcido 220-240 30-40 made of ceramics, glass and aluminium foil. • If other baking tins are used, in addition to the baking plate supplied along with the cooker, they should be placed in the middle of the wire shelf. Tabla 4 Alimentos de carne • When selecting the baking temperature, use the following hints: Tiempo del asado Alimento – Thin pastry - high heat power, short baking duration [minutos] – Thick layer of pastry and liquid pastry - lower heat power, longer baking duration Carne • Baking tins should be filled up to 2/3 of their height, leaving enough space for rising. 225 - 250 - asado de corta duración 12-15 por cada centímetro • For cooking meat, cookware made of ceramic, glass, enamelled steel or iron can be used, Carne de grosor de la carne with the handles resistant to elevated temperatures. 190 - 210 - asado de larga duración • The directions concerning oven preheating should be strictly observed, as there are different recommendations for different cakes. Pollos 225 -250 50 - 60 • During the baking process, cake should be uniformly heated. This condition is achieved when Oca, pato, pavo 200 - 210 Dependiendo del tamano selecting function or or . Carne de caza 190 - 210 hasta 3 horas • If the top of the cake is too dark, the next time the tin with the pastry should be put in the lower level of the oven, and lower temperature should be selected with increasing the baking time. Pescado 225 - 250 20 - 30 • If the bottom of the cake is too dark, the next time put the baking tin in the higher level of the - asado hasta 2 kg oven, and select lower temperature. 180 - 200 30 - 50 - estofado hasta 2 kg 11 12
  • 14. ES PROGRAMADOR ELECTRÓNICO OVEN GB Tabla 5 Asado con termoventilación ó How to use the electric grill - preheat the oven by setting the maximum temperature (2500C), Tipo de guiso Temperatura [0C] Tiempo de asado [hh:min] - put the dish in the oven, - insert on the highest runner, Pastaflora 100 1:00 – 1:10 - insert the drip tray on the bottom runner, Torta de molde 160 1:05 – 1:10 - set the function change-over switch knob to position , Bizcocho con levadura 160 1:00 – 1:10 - set the required temperature, - After half of the grilling time, turn the grilled portions over. Base para la torta 160 0:25 – 0:35 When the grilling is over - turn the oven off. Torta de levadura 175 0:40 – 0:45 GRILLING WITH ROASTING-SPIT Pastel con migajas 175 0:20 – 0:30 Pastel con frutas 175 0:40 – 0:55 Roasting-spit is used to rotary grilling such dishes as poultry, sausages, shashliks, etc. How to handle the oven: Bizcocho 160 0:30 – 0:40 - remove all unnecessary outfit from the oven and slide in the roasting-spit frame; - slide one fork onto the spit and stick meat onto it while paying attention it is symmetri-cal along 5 PROGRAMADOR ELECTRÓNICO the stick; then slide in the second fork and secure it in its position by tightening the set screw; - insert the pointed end of spit into the roast-spit drive connection, push it home and rest the Este temporizador digital permite el control y mando del trabajo de horno. El temporizador demuestra other end of spit on the frame; el tiempo actual con la precisión de 1 minuto. Después de cada programa realizado el temporizador - screw out the handle, emite una senal acústica y desconecta automáticamente el horno. - turn on the oven, adjust the temperature and, possibly, set the time of grilling. El programador realiza: 1. funciones de tiempo: Fig. 11 - Regulación de tiempo actual, - Programación del tiempo de cocinado, 1 - grill heater; - Programación de finalización del cocinado, 2 - roasting-spit drive; - Regulación de minutero (avisador), 3 - forks; 4 - spit; 2. funciones de seguridad: 5 - baking tray; - Desconexión automática, 6 - roasting-spit frame; - Bloqueo de seguridad para los ninos. 7 - handle. 5.1 NOTAS GENERALES Dibujo 11 1 - botón selector de funciones del temporizador 2 - botón "+" de ajuste del tiempo GRILLING WITH FORCED HEAT CIRCULATION ON 3 - botón "-"de ajuste del tiempo • This function is intended for broiling large meat portions (pork loin, chicken, 4 - símbolo indicador de desconexión automática etc.). In this case there is no need to preheat the oven. 5 - símbolo indicador de la duración del cocinado 6 - símbolo indicador de la hora de finalización del cocinado • The food, in respect to their size, should be placed on the third or fourth level 7 - símbolo indicador del minutero (avisador) of the oven. 8 - símbolo indicador de ajuste de hora de tiempo actual • This function allows for improving the taste of foods; so called "crisp crust" is 9 - la pantalla also developed. 10 - símbolo indicador de bloqueo de seguridad para ninos 11 - función inaccesible Operating procedure: - place the meat in the oven, Para ajustar la hora hay que pulsar el botón de la función y durante unos secundas hay que - set the function change-over switch knob to position , ajustar el tiempo deseado usando el botón . Con el botón se puede corregir el tiempo - set the required temperature and possibly time of grilling. ajustado. 13 10