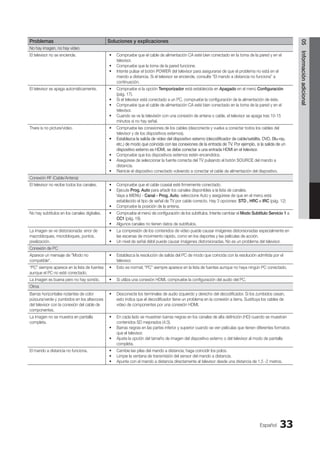
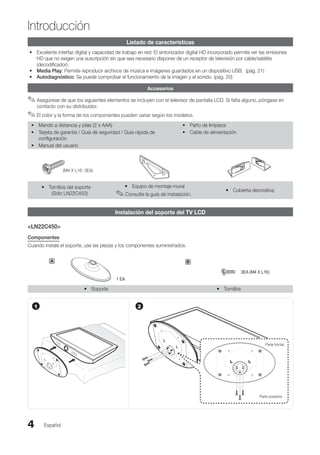
Este manual de usuario describe las funciones y características de un televisor LCD de Samsung. Incluye instrucciones para conectar el televisor a una antena, dispositivos de audio y video, y una PC. También explica cómo navegar por los menús del televisor para cambiar la configuración de imagen, sonido, canales y otros ajustes.

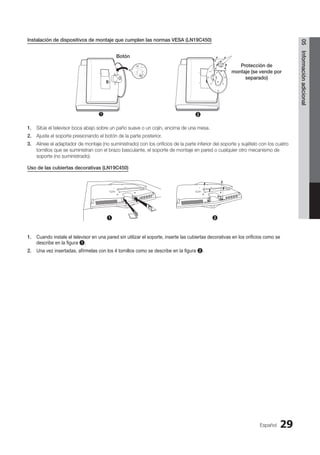
![8
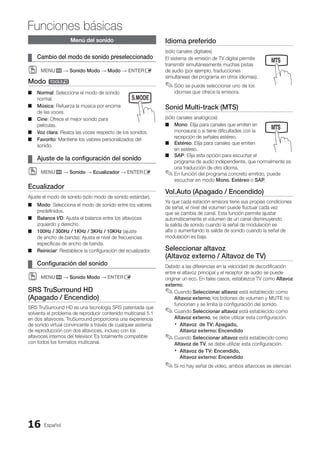
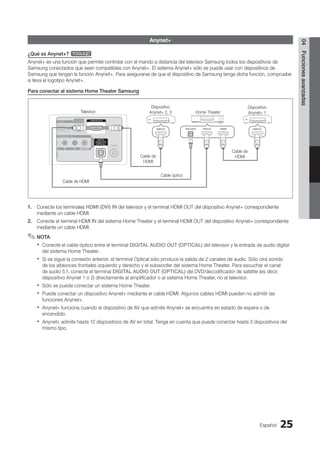
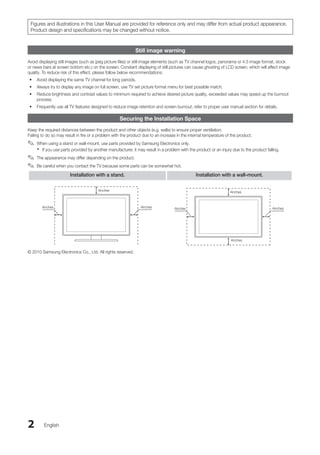
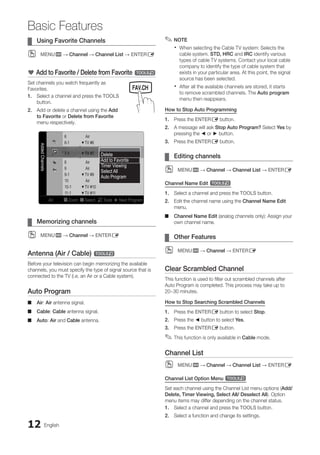
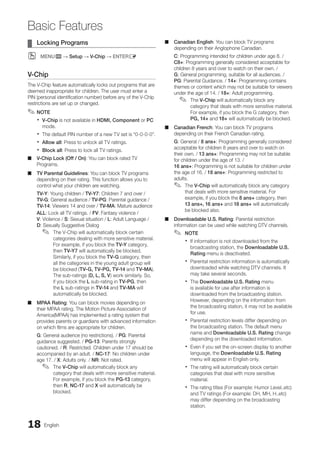
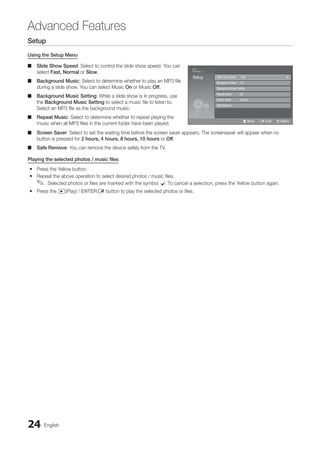
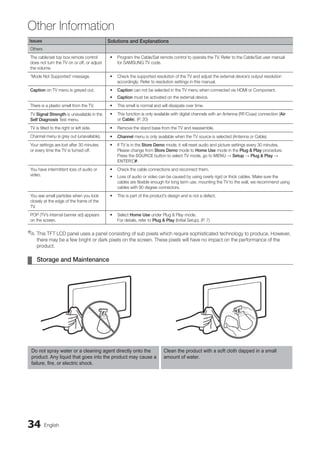
Connecting to an AV Device
Using an HDMI / DVI Cable: HD connection (up to 1080p)
We recommend using the HDMI connection for the best quality HD picture.
Available devices: DVD, Blu-ray player, HD cable box, HD STB (Set-Top-Box) satellite receiver
HDMI (DVI) IN
✎
✎ / PC/DVI AUDIO IN
When using an HDMI/DVI cable connection, you must use the
x
x HDMI (DVI) IN jack for video. A DVD, Blu-ray
player, HD cable box, HD STB satellite receiver, cable box, or STB satellite receiver may require a DVI-HDMI (DVI
to HDMI) cable or DVI-HDMI (DVI to HDMI) adapter. The PC/DVI AUDIO IN jack is required for audio.
The picture may not display normally (if at all) or the audio may not work if an external device that uses an older
x
x
version of HDMI mode is connected to the TV. If such a problem occurs, ask the manufacturer of the external
device about the HDMI version and, if out of date, request an upgrade.
Be sure to purchase a certified HDMI cable. Otherwise, the picture may not display or a connection error may
x
x
occur.
Using a Component Cable: (up to 1080p), Using an Audio/Video Cable: (480i only)
Available devices: DVD, Blu-ray player, cable box, STB satellite receiver, VCR
Device
R-AUDIO-L PR PB Y
DVI OUT
BD/DVD player/
HD cable/sat box
R-AUDIO-L PR PB Y
HDMI OUT
R-AUDIO-L PR PB Y
AUDIO OUT
W
R
R-AUDIO-L PR PB Y
COMPONENT OUT
R-AUDIO-L PR PB Y
AUDIO OUT Blu-ray player
W
Y
W
Y B G
R
W
W
B G
R
R
R
R
R
R-AUDIO-L PR PB Y
VIDEO OUT VCR
R-AUDIO-L PR PB Y
AUDIO OUT
When connecting to
✎
✎ AV IN, the color of
the AV IN [Y/VIDEO] jack (Green) does not
match the color of the video cable (Yellow).
For better picture quality, the Component
✎
✎
connection is recommended over the A/V
connection.
Red White
W W B G
R
R
W
Y
W W B G
R
R
W
Y
Yellow Red White Red Blue Green
English
Connections
Connections
BN68-02751A_Eng.indb 8 2010-08-31 �� 5:04:37](https://image.slidesharecdn.com/lc450-zxbn68-02751a-04l02-0901-231005011628-ecb6ef26/85/LC450-ZX-BN68-02751A-04L02-0901-pdf-8-320.jpg)

![14 English
Basic Features
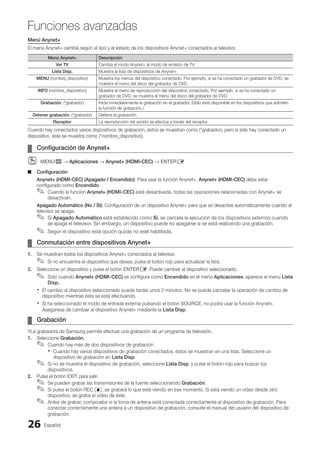
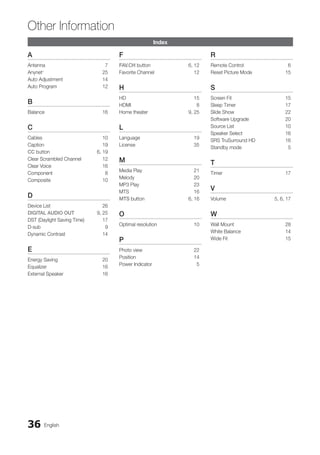
Setting up the TV with your PC
¦
¦
Set the input source to PC.
Auto Adjustment t
MENU
O
O m →Picture → Auto Adjustment →
ENTERE
Adjust frequency values/positions and fine tune the settings
automatically.
Not available when connecting through HDMI/DVI
✎
✎
cable.
Screen
Coarse / Fine
■
■ : Removes or reduces picture noise. If the
noise is not removed by Fine-tuning alone, then adjust
the frequency as best as possible (Coarse) and Fine-
tune again. After the noise has been reduced, readjust
the picture so that it is aligned to the center of screen.
Position
■
■ : Adjust the PC’s screen positioning if it does
not fit the TV screen. Press the ▲ or ▼ button to adjust
the Vertical-Position. Press the ◄ or ► button to adjust
the Horizontal-Position.
Image Reset
■
■ : Resets the image to default settings.
Using Your TV as a Computer (PC) Display
Setting Up Your PC Software (Based on Windows XP)
Depending on the version of Windows and the video card,
the actual screens on your PC will probably look different, but
the same basic set-up information will apply in most cases.
(If not, contact your computer manufacturer or Samsung
Dealer.)
1. Click on “Control Panel” on the Windows start menu.
2. Click on “Appearance and Themes” in the “Control
Panel” window and a display dialog-box will appear.
3. Click on “Display” and a display dialog box will appear.
4. Navigate to the “Settings” tab on the display dialog-box.
The correct size setting (resolution) [Optimum: 1360x768
y
y
pixels]
If a vertical-frequency option exists on your display
y
y
settings dialog box, the correct value is ‘60’ or ‘60 Hz’.
Otherwise, just click ‘OK’ and exit the dialog box.
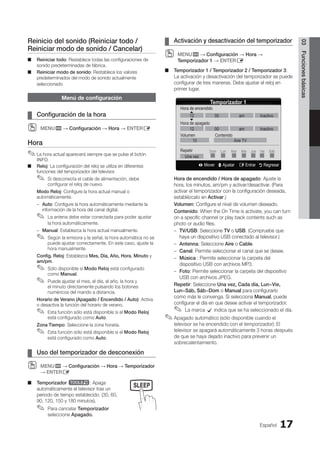
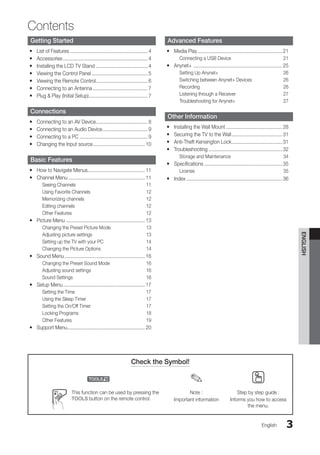
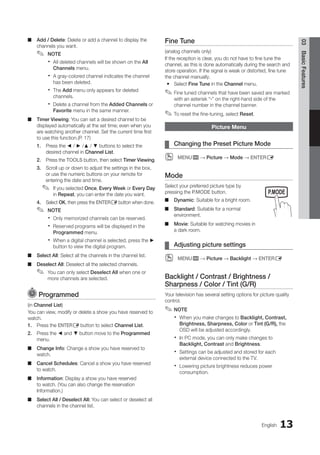
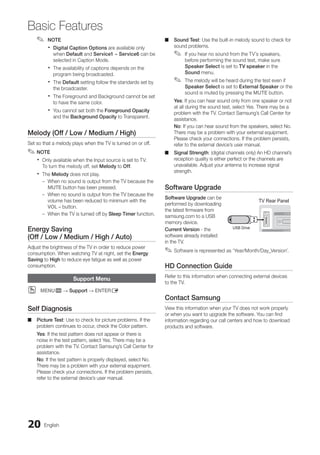
Changing the Picture Options
¦
¦
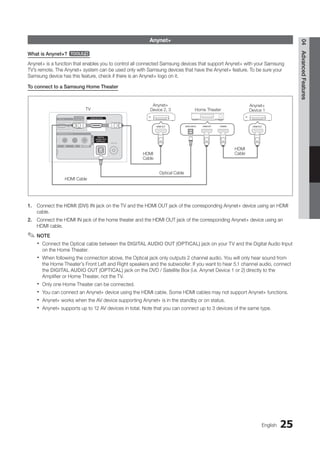
Advanced Settings
MENU
O
O m → Picture → Advanced Settings →
ENTERE
(available in Standard / Movie mode)
Compared to previous models, new Samsung TVs have a
more precise picture.
In PC mode, you can only make changes to
✎
✎ Gamma
and White Balance.
Black Tone (Off / Dark / Darker / Darkest)
■
■ : Select the
black level to adjust the screen depth.
Dynamic Contrast (Off / Low / Medium / High)
■
■ :
Adjust the screen contrast.
Gamma
■
■ : Adjust the primary color intensity.
Color Space (Auto / Native)
■
■ : Adjust the range of colors
available to create the image.
White Balance
■
■ : Adjust the color temperature for a more
natural picture.
R-Offset / G-Offset / B-Offset: Adjust each color's
(red, green, blue) darkness.
R-Gain / G-Gain / B-Gain : Adjust each color's (red,
green, blue) brightness.
Reset: Resets the White Balance to it's default
settings.
Flesh Tone
■
■ : Emphasize pink flesh tone.
Edge Enhancement (Off / On)
■
■ : Emphasize object
boundaries.
Advanced Settings
Black Tone : Off ►
Dynamic Contrast : Medium
Gamma : 0
Color Space : Native
White Balance
Flesh Tone : 0
Edge Enhancement : On
U Move E Enter R Return
BN68-02751A_Eng.indb 14 2010-08-31 �� 5:04:42](https://image.slidesharecdn.com/lc450-zxbn68-02751a-04l02-0901-231005011628-ecb6ef26/85/LC450-ZX-BN68-02751A-04L02-0901-pdf-14-320.jpg)


![Español
8
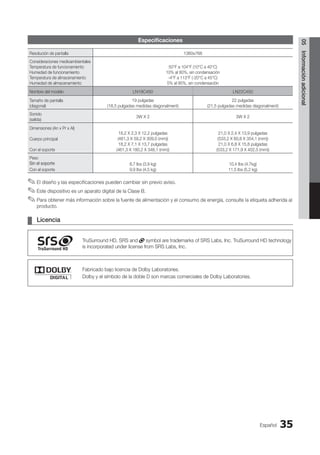
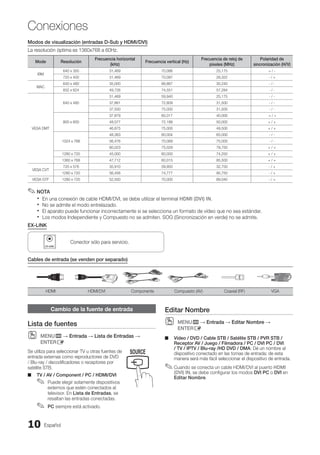
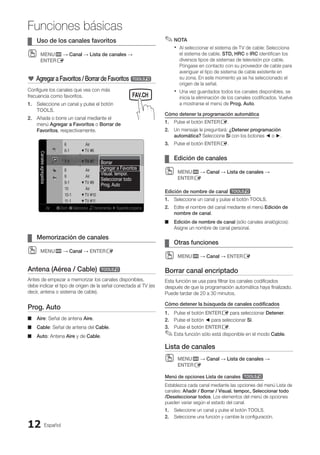
Conexiones
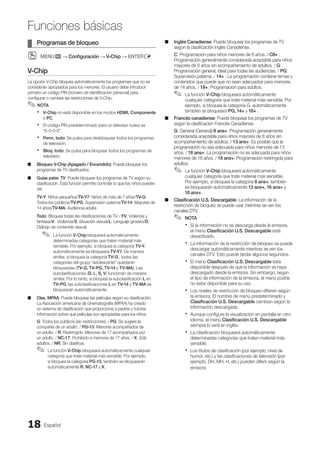
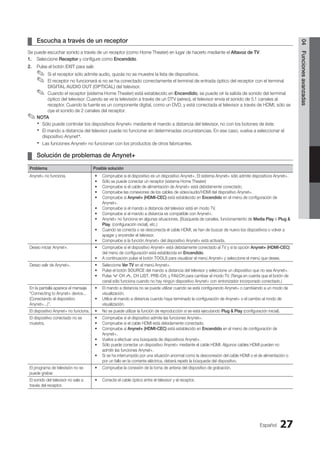
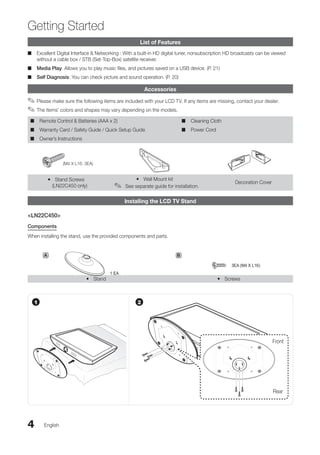
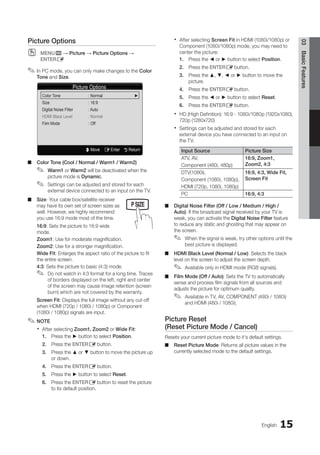
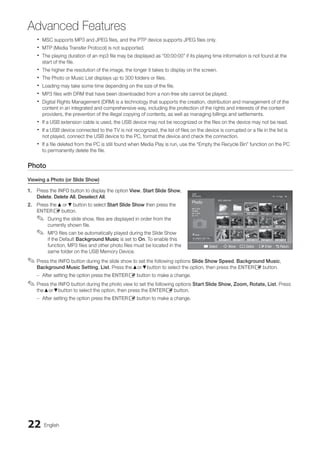
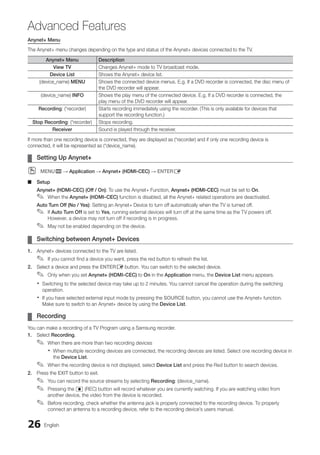
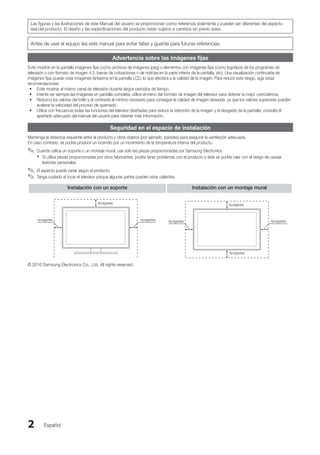
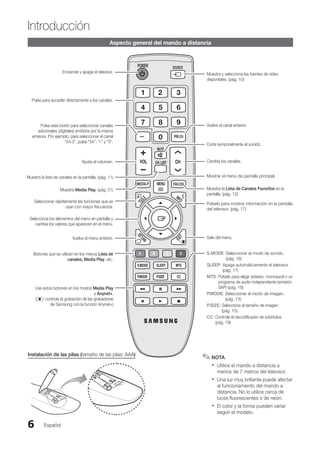
Conexión a un dispositivo AV
Uso de un cable HDMI/DVI: Conexión HD (hasta 1080p)
Para conseguir una mejor calidad de imagen HD es aconsejable utilizar una conexión HDMI.
Dispositivos disponibles: Reproductor de DVD/Blu-ray, receptor por cable HD/satélite HD (decodificador).
HDMI (DVI) IN
✎
✎ / PC/DVI AUDIO IN
Cuando se usa una conexión de cable HDMI/DVI, se debe conectar en el terminal
x
x HDMI (DVI) IN para
vídeo. Es posible que un reproductor de DVD, Blu-ray, receptor por cable HD, receptor por satélite HD STB,
decodificador o receptor por satélite STB necesite un cable DVI-HDMI (de DVI a HDMI) o un adaptador DVI-
HDMI (de DVI a HDMI). Se necesita el terminal PC/DVI AUDIO IN para el sonido.
La imagen quizás no se muestre correctamente (o no se muestre en absoluto) o el audio puede que no
x
x
funcione si se conecta al televisor un dispositivo externo que utiliza una versión más antigua del modo HDMI.
En tales casos, consulte al fabricante del dispositivo externo acerca de la versión HDMI y, si ésta es antigua,
solicite una actualización.
Debe adquirir un cable certificado HDMI. De lo contrario, la imagen puede no mostrarse o producirse un error
x
x
de conexión.
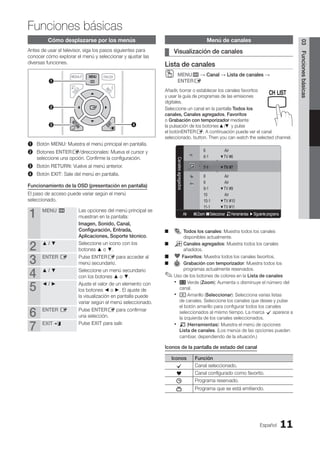
Uso de un cable de componentes (hasta 1080i) o audio/vídeo (sólo 480i)
Dispositivos disponibles: Reproductor DVD y Blu-ray, decodificador por cable, receptor por satélite STB, aparato de vídeo VCR
Dispositivo
R-AUDIO-L PR PB Y
DVI OUT
BD/DVD/decodificador
de cable HD/satélite
R-AUDIO-L PR PB Y
HDMI OUT
R-AUDIO-L PR PB Y
AUDIO OUT
W
R
R-AUDIO-L PR PB Y
COMPONENT OUT
R-AUDIO-L PR PB Y
AUDIO OUT Reproductor Blu-ray
W
Y
W
Y B G
R
W
W
B G
R
R
R
R
R
R-AUDIO-L PR PB Y
VIDEO OUT Aparato de vídeo
R-AUDIO-L PR PB Y
AUDIO OUT
Cuando se conecta a
✎
✎ AV IN el color
(verde) del terminal AV IN [Y/VIDEO] no
coincide con el cable de vídeo (amarillo).
Para obtener la mejor calidad de
✎
✎
imagen, se recomienda la conexión de
componentes antes que la conexión A/V.
W W B G
R
R
Rojo Blanco Rojo Azul Verde
Rojo Blanco
W W B G
R
R
W
Y
BN68-02751A_Spa.indd 8 2010-08-31 �� 5:05:54](https://image.slidesharecdn.com/lc450-zxbn68-02751a-04l02-0901-231005011628-ecb6ef26/85/LC450-ZX-BN68-02751A-04L02-0901-pdf-44-320.jpg)
![Español
14
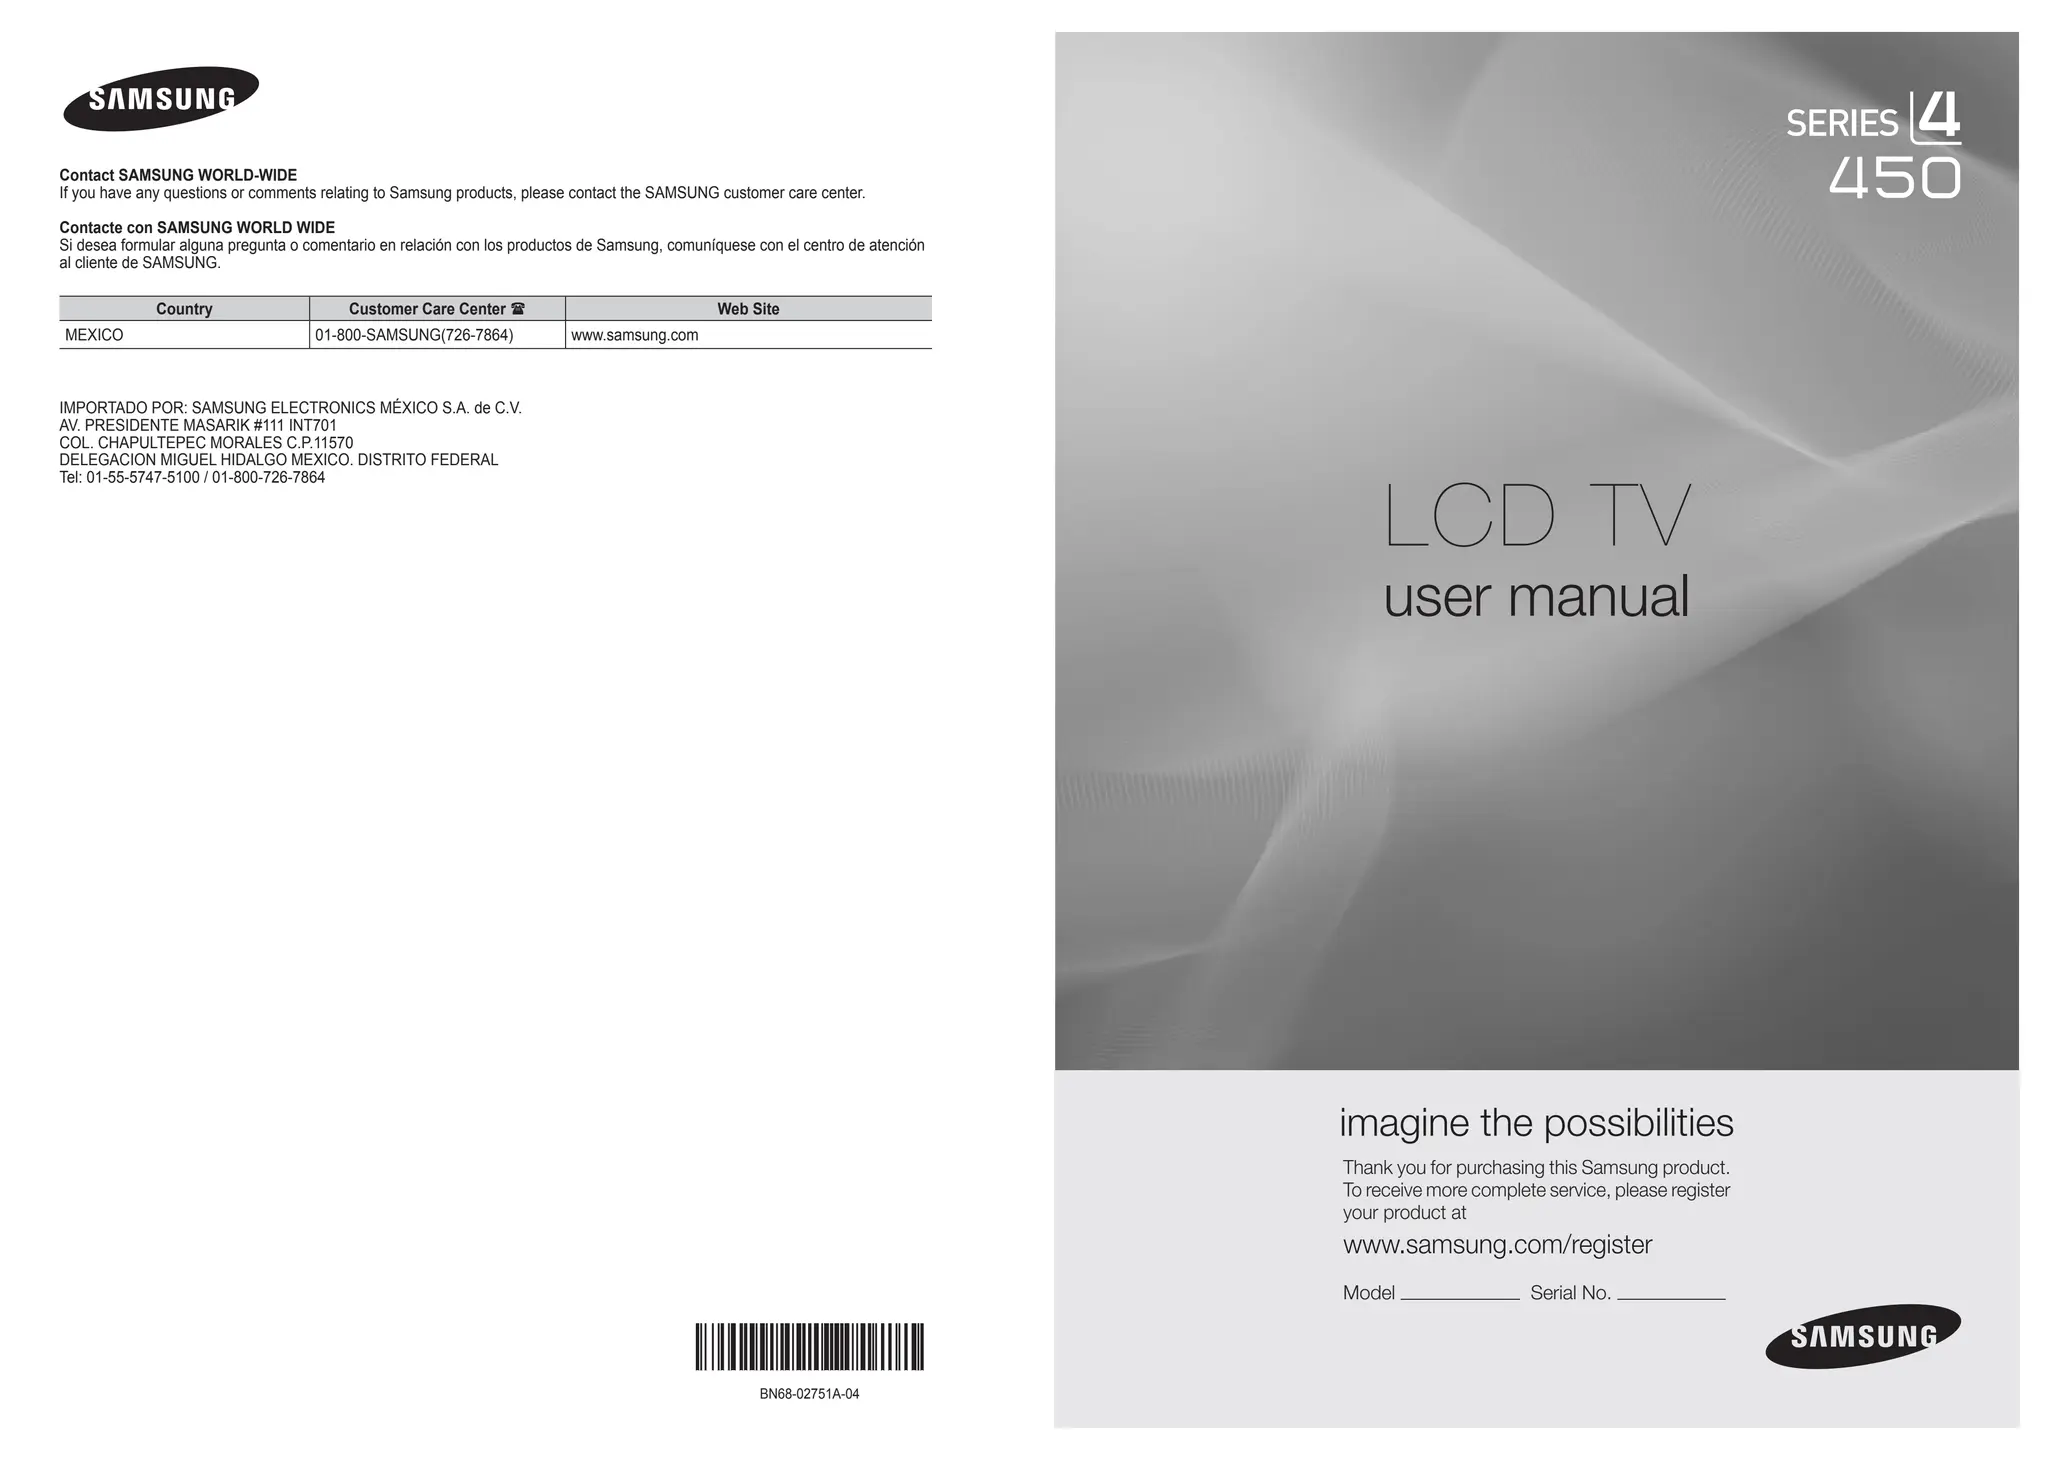
Funciones básicas
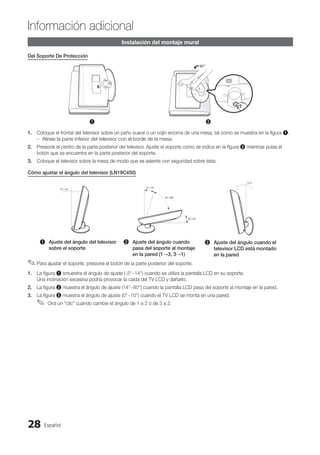
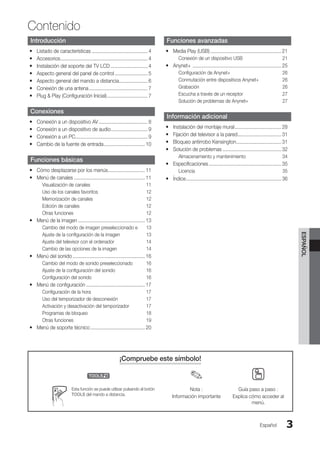
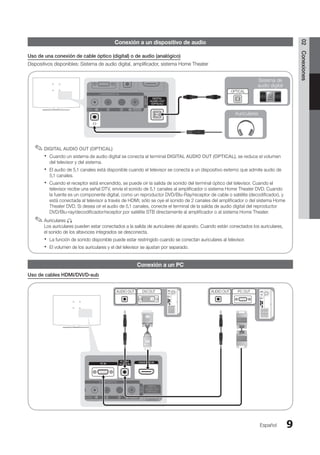
Ajuste del televisor con el ordenador
¦
¦
Defina la fuente de entrada al PC.
Ajuste automático t
MENU
O
O m → Imagen → Ajuste automático →
ENTERE
Ajuste automáticamente los valores y las posiciones de la
frecuencia y afine la configuración.
No disponible en las conexiones a través del cable
✎
✎
HDMI/DVI.
Pantalla
Grueso / Fino
■
■ : Elimina o reduce el ruido de la imagen.
Si el ruido no desaparece sólo con la sintonización
fina, realice los ajustes de frecuencia hasta el máximo
(Grueso) y vuelva a realizar la sintonización fina.
Después de reducir el ruido, vuelva a ajustar la imagen
para que quede alineada en el centro de la pantalla.
Posición
■
■ : Ajuste la posición de la pantalla del PC si no
se acopla a la pantalla del TV. Pulse los botones ▲ o ▼
para ajustar la posición vertical. Pulse los botones
◄ o ► para ajustar la posición horizontal.
Reiniciar Imagen
■
■ : Restablece la configuración
predeterminada de la imagen.
Uso del televisor como una pantalla de ordenador (PC)
Configuración del software del PC (basado en Windows XP)
Según la versión de Windows y la tarjeta de vídeo, las
pantallas reales del PC pueden ser diferentes, pero se
aplicará casi siempre la misma información de configuración
básica. (En caso contrario, póngase en contacto con el
fabricante del ordenador o con el distribuidor de Samsung.)
1. Haga clic en “Panel de control” en el menú de inicio de
Windows.
2. Haga clic en “Apariencia y temas” en la ventana “Panel
de control” y aparecerá un cuadro de diálogo.
3. Haga clic en “Pantalla” y aparecerá una cuadro de
diálogo sobre la pantalla.
4. Vaya a la pestaña “Configuración” en el cuadro de
diálogo.
Configuración correcta del tamaño (resolución) [Óptima:
y
y
1360 x 768 píxeles]
Si existe una opción de frecuencia vertical en el cuadro
y
y
de diálogo de configuración de la pantalla, el valor
correcto es “60” o “60 Hz”. Si no, haga clic en “Aceptar”
y salga del cuadro de diálogo.
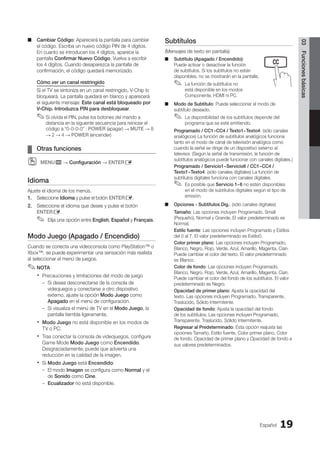
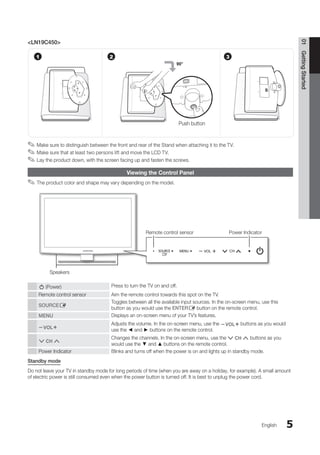
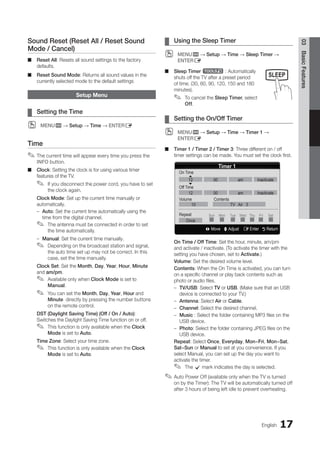
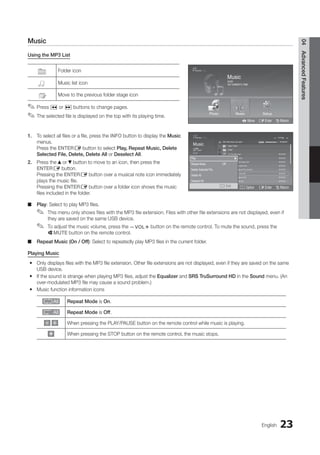
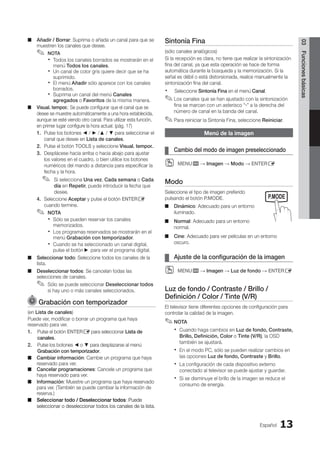
Cambio de las opciones de la imagen
¦
¦
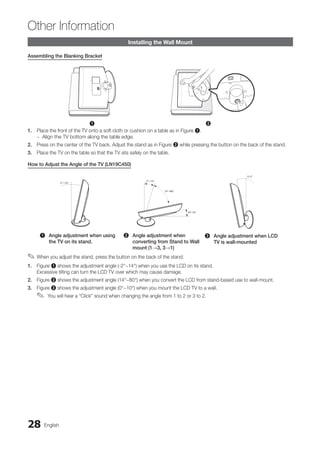
Configuración avanzada
MENU
O
O m → Imagen → Configuración avanzada →
ENTERE
(disponible en los modos Normal / Cine)
Si se comparan con los modelos anteriores, los nuevos
televisores de Samsung muestran imágenes más precisas.
En el modo PC, sólo se pueden cambiar
✎
✎ Gamma y
Balance de blanco.
Tono del negro (Apagado / Oscuro / Más oscuro / El
■
■
más oscuro): Seleccione el nivel de negro para ajustar
la profundidad de la pantalla.
Contraste Dinám. (Apagado / Bajo / Medio / Alto)
■
■ :
Ajuste el contraste de la pantalla.
Gamma
■
■ : Ajuste la intensidad del color primario.
Espacio de color (Auto / Nativo)
■
■ : Ajuste la gama de
colores disponibles para crear la imagen.
Balance de blanco
■
■ : Ajuste la temperatura del color
para obtener una imagen más natural.
Bal. Rojo / Bal. Verde / Bal. Azul: Ajuste la intensidad
de cada color (rojo, verde, azul).
Gan. Rojo / Gan. Verde / Gan. Azul: Ajuste el brillo de
cada color (rojo, verde, azul).
Reiniciar: Restablece los valores predeterminados de
Balance de blanco.
Tono Piel
■
■ : Mejore el tono rosado de “tono piel”.
Mejora de perfiles (Apagado / Encendido)
■
■ : Mejora los
bordes del objeto.
Configuración avanzada
Tono del negro : Apagado ►
Contraste Dinám. : Medio
Gamma : 0
Espacio de color : Nativo
Balance de blanco
Tono Piel : 0
Mejora de perfiles : Encendido
U Mover E Entrar R Regresar
BN68-02751A_Spa.indd 14 2010-08-31 �� 5:05:59](https://image.slidesharecdn.com/lc450-zxbn68-02751a-04l02-0901-231005011628-ecb6ef26/85/LC450-ZX-BN68-02751A-04L02-0901-pdf-50-320.jpg)