SlideShare una empresa de Scribd logo
1 de 9
PAGINA CON
MAQUETACION (CSS)
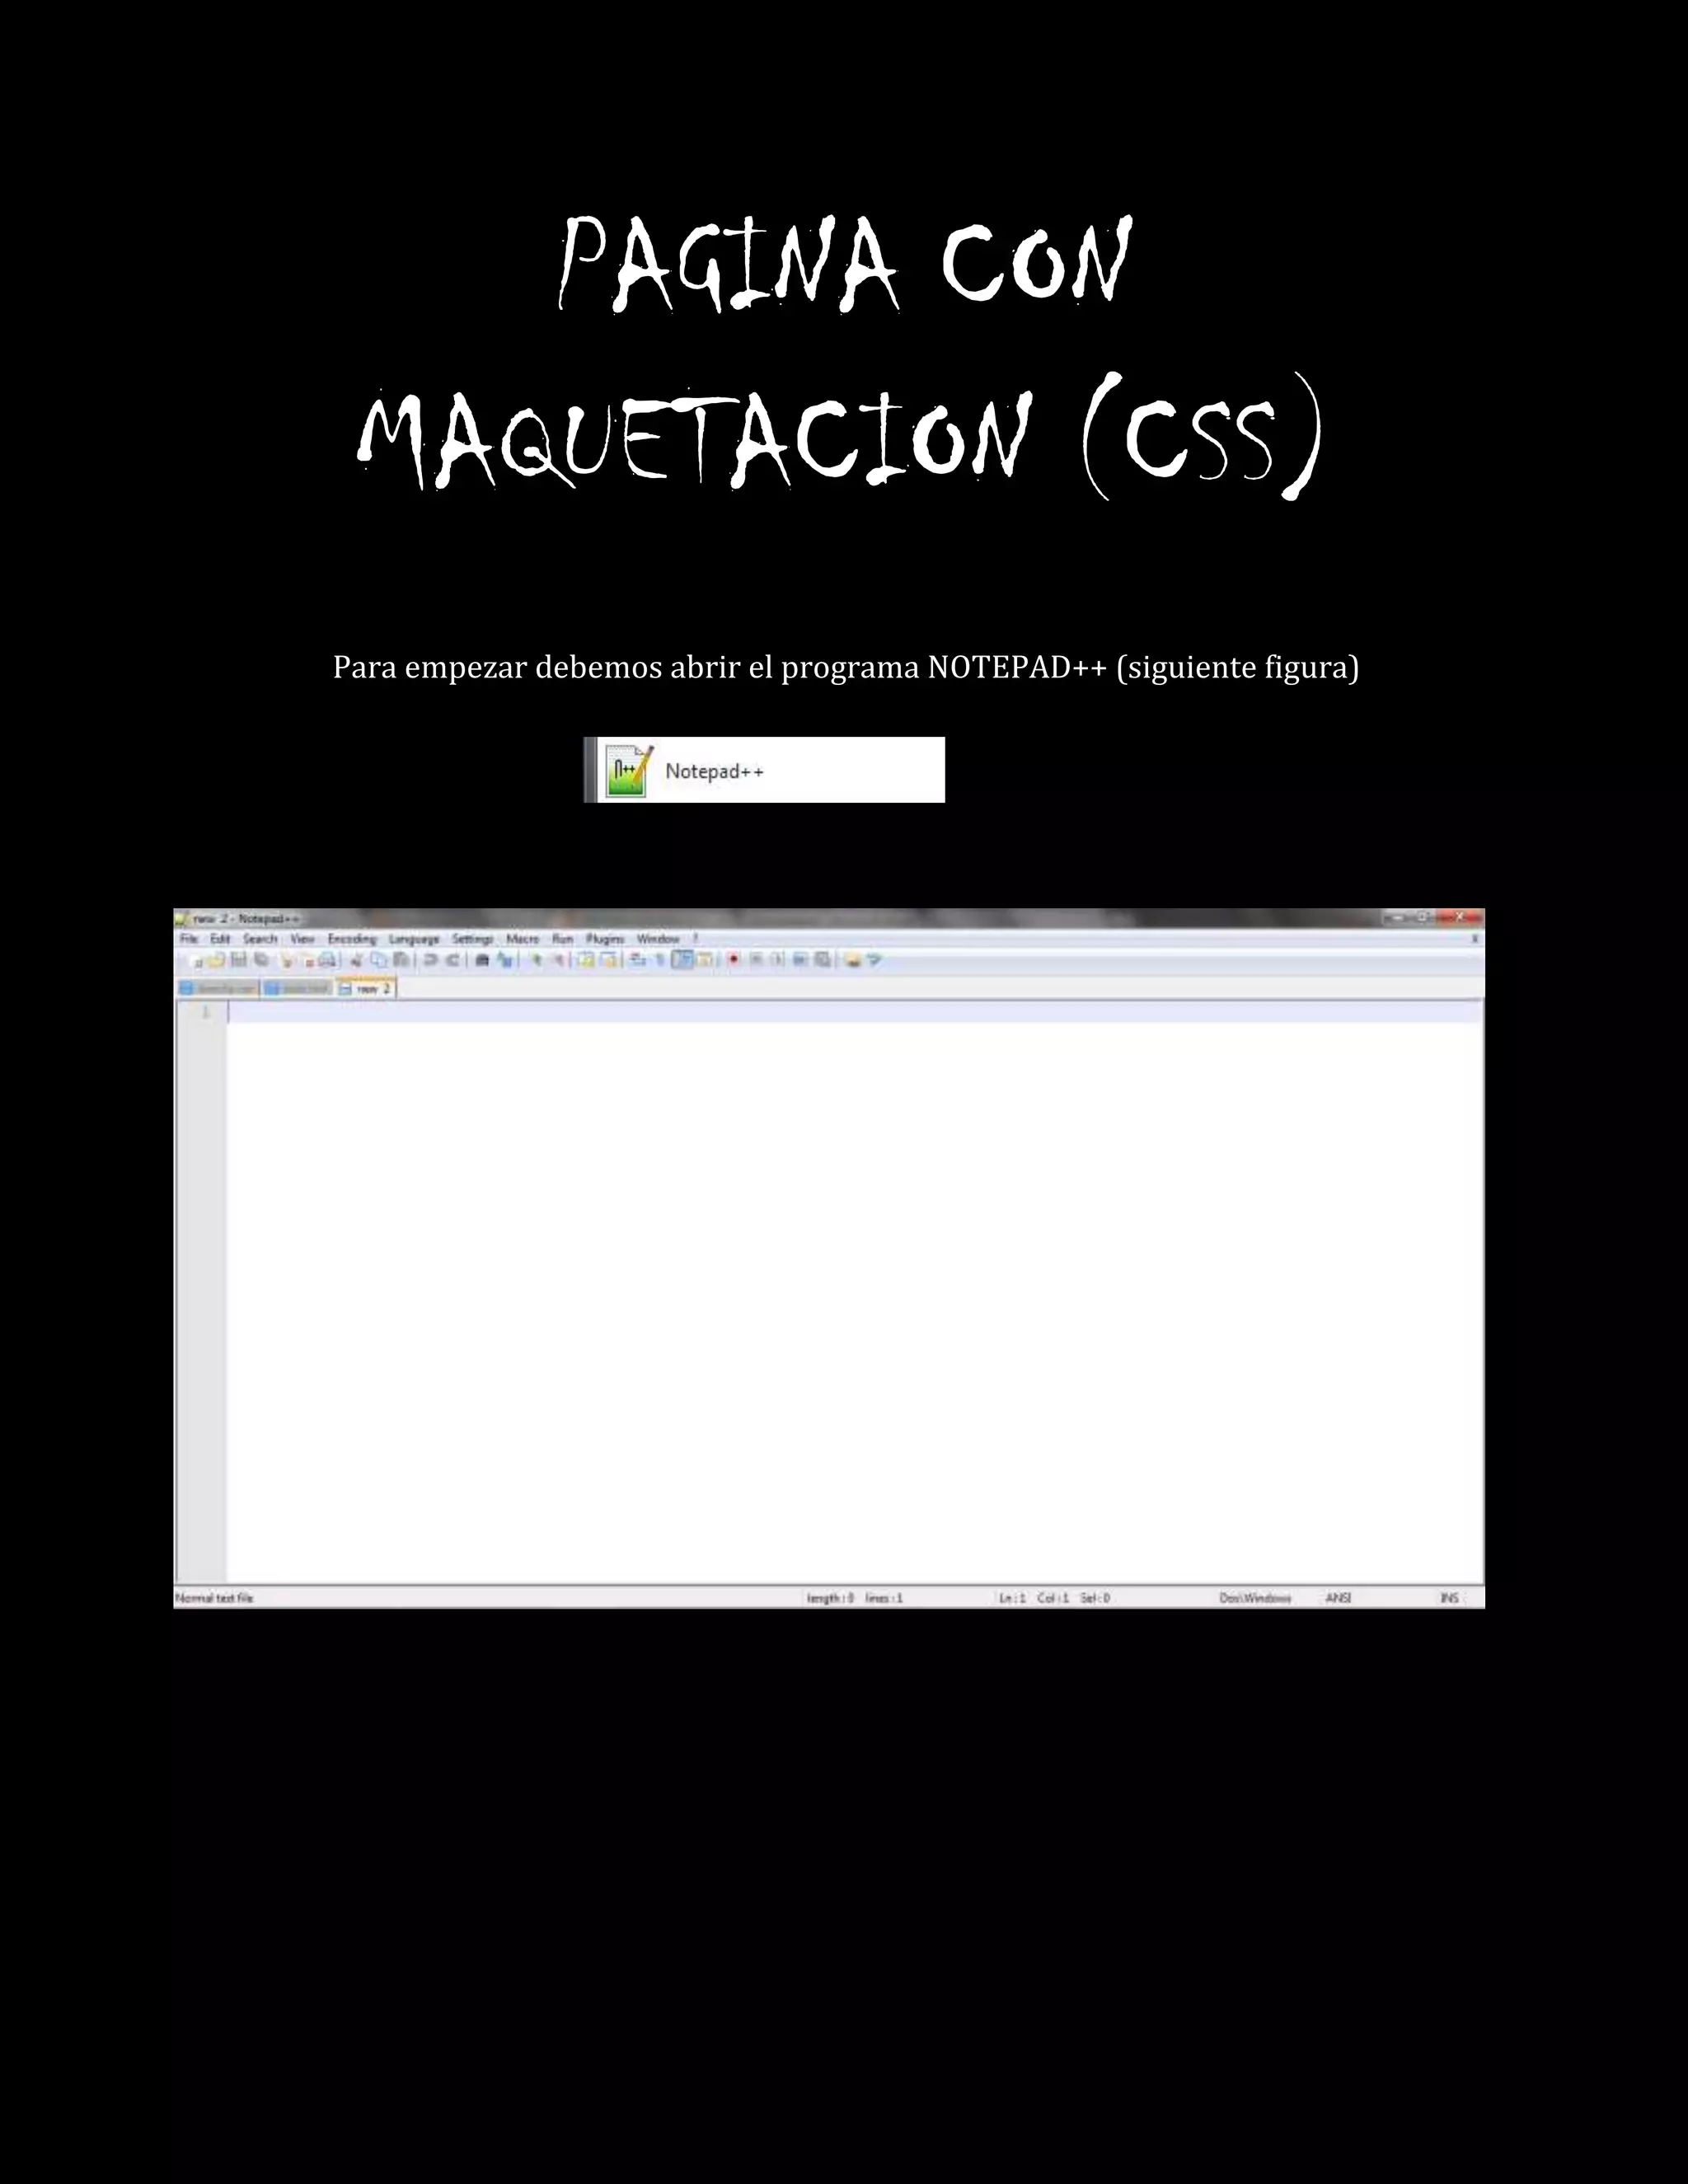
Para empezar debemos abrir el programa NOTEPAD++ (siguiente figura)
Luego debemos crear un archivo donde vamos a poner todo el código de la pagina
donde vamos aponer direcciones para la maqueteacion (siguiente código)
<!DOCTYPE>
<HTML>
<!--RECUERDE QUE ESTE ES EL TAG PARA COMENTARIOS-->
<HEAD>
<TITLE>11 Computacion</TITLE>
<link href="css/estilo.css" rel="stylesheet" type="text/css"/>
<link href="css/header.css" rel="stylesheet" type="text/css"/>
<link href="css/centro.css" rel="stylesheet" type="text/css"/>
<link href="css/derecha.css" rel="stylesheet" type="text/css"/>
<link href="css/izquierda.css" rel="stylesheet" type="text/css"/>
</HEAD>
<BODY>
<!--el div agrupa una serie de elementos que van a ser cambiados por el maqueteador css-->
<DIV id="TODO">
<header>
<!--header es la cabecera en html5-->
<h1><center> NOVA ERA"</center></h1>
<center>
<p> En esta pagina ofrecemos un amplio gama de equipos de Computo, con sus respectivos
valores en el mercado </p>
</center>
<form action="index.html" method="post">
<input size="20px" type="text">
<input type="submit" value="buscar">
</form>
<NAV>
<UL>
<!--HACEMOS UNA LISTA NO ORDENADA DE NUESTRO MENU-->
<A NAME="iniciodeldocumento"></A>
<h1>
<LI><a HREF="#finaldeldocumento">Ir al Final</A>
<LI><a HREF="#tipo">Tipos de computadores</A>
</h1>
</nav>
</header>
</UL>
<!--PARA LOS BLOQUES QUE VAN A QUFDAR A LA DERECHA O A LA IZQUIERDA DE LA PAGINA
WEB-->
<ASIDE ID="IZQUIERDA">
<P>
<H3>BLOG INFORMATIVO</H3>
<ul>
<li><a href="http://diego11c.blogspot.com/"> Compuneko<time>
2013</time></A></li>
</ul>
</P>
</ASIDE>
<ASIDE ID="derecha">
<P> <form action="indeindex.html"method="post"/>
<table>
<tr>
<th colspan="2">
iniciar secion
</th>
</tr>
<tr>
<th>
<label>Usuario</label>
</th>
<th>
<input type="text" name="nombreuser" size="10px">
</th>
</tr>
<tr>
<th>
<label>Contraseña</label>
</th>
<th>
<input type="password" name="pass" size="10px">
</th>
</tr>
</table>
</P>
</ASIDE>
<!--LOS ARTICULOS PRINCIPALES SE UBICAN CON UN TAG LLAMADO SECTION-->
<SECTION class="clase1" contenteditable="true">
<A NAME="tipo"></A>
<ARTICLE>
<H1>TIPO DE COMPUTADORES</H1>
<P> Un artículo es un texto que presenta la postura personal de un periodista , de un analista
o de un pensador,
frente a un acontecimiento, un problema actual o de interés general.
Mediante estos textos se pretende muchas veces influir en la opinión de los
lectores.
Para lograrlo el escritor emplea argumentos o razones que seducen al lector
acercándolo a su postura,
persuadiéndolo a un tema o hecho.
En el artículo,generalmente se parte del planteamiento de un problema o
situación problemática, o sea,
de opiniones encontradas u opuestas. Quien escribe un artículo no solo analiza los
hechos,
sino que al interpretarlos y dar su opinión, argumenta a favor o en contra de ellos.
Todos estos factores hacen del artículo un texto argumentativo.
</P>
<center>
<img class="imagenes" src="imagen/images.jpg">
</center>
<video width="400" height="200" controls="controls" proload="proload">
<source src="imagenes/Ñengo Flow No Dice Na (Video Oficial).mp4">
</source>
</video>
</ARTICLE>
<ARTICLE>
<H1>ARTICULO DOS</H1>
<P> ESTE ES UN PARRAFO QUE PERTENECE AL ARTICULO 2 </P>
</ARTICLE>
<audio controls="controls" src="imagenes/Plan B Se Cree Mala ( Vídeo Oficial ) La
Formula.mp3">
si no sirve utilice otro servidor
</audio>
<ARTICLE>
<H1>ARTICULO TRES</H1>
<P> ESTE ES UN PARRAFO QUE PERTENECE AL ARTICULO 3 </P>
</ARTICLE>
<ARTICLE>
<H1>ARTICULO CUATRO</H1>
<P> ESTE ES UN PARRAFO QUE PERTENECE AL ARTICULO 4 </P>
</ARTICLE>
<A NAME="FINALDELDOCUMENTO"></A>
<A HREF ="#iniciodeldocumento" <H2><CENTER>Presione aui para ir al
inicio</A></H2></CENTER>
</SECTION>
<!—E L PIE DE PAGINA SE ESCRIBE CON EL TAG FOOTER -->
<FOOTER>
<P> Aqui colocaremos nuestro pie de pagina </p>
</footer>
</div>
</BODY>
</HTML>
Luego vamos a crear otro archivo donde vamos a colocar el código de estilo (siguiente
código)
/*esta es una hoja de estilo principal para mi pagina web*/
div#todo{
margin:0 auto;
width:959px;
border:solid 1px Orange;
}
header{
height:150px;
border:solid 1px Orange;
width:957px;
overflow:hidden;
}
/*maquetando el aside izquierda*/
aside#izquierda{
float:left;
border:solid 1px RED;
}
/*maquetando la la seccion central*/
section{
float:left;
border:solid 1px RED;
width:;
}
/*maquetando el aside derecha*/
aside#derecha{
float:right;
border:solid 1px Orange;
}
footer{
float:left;
border:solid 1px Orange;
}
Luego debemos crear otro archivo para el código de header (siguiente código)
/*maquetando el header*/
/*fuente personalizada*/
@font-face{
font-family:destroyed;
src:url(fuentes/destroyed.ttf)format('truetype');
}
border{
border-radius:60px 10px 20px 10;
box-shadow:0px 0px 15px Red;
}
/*
/*h1*/
header h1{
font-family:destroyed;
margin-left:35px;
text-shadow:5px 5px 5px orange;
}
/*p*/
header p{
margin-left:57px;
}
header form{
float:right;
}
/*menu horizontal*/
header ul{
list-style:none;
}
header ul li{
float:left;
margin-top: 1px; /**/
}
header ul li a{
text-decoration:none;
color:blue;
border:solid 3px Blue;
margin:left 3px;
padding:5px 15px 5 px 15px;
border-radius: 5px 5px 0px 0px;
box-shadow:10px 5px 10px Orange; /*derecha abajo lo grande*/
transition:background 1s, color 1s, border 1s, box-shadow 1s;/*despues*/
transition:background 1s, color 1s, border 1s, box-shadow 1s;
}
header ul li a:hover{
color:yellow;
border:solid 3px Red;
box-shadow:opx 5px 10px green;
background:Red;
}
Luego debemos crear otro archivo para centro (siguiente código)
/*sección central*/
img.imagenes{
transform:scale(1,1);
-webkit-transform:scale(1,1);
-moz-transform:scale(1,1);
-o-transform:scale(1,1);
-ms-transform:scale(1,1);
transition:transform 1s;
-webkit-transition:-webkit-transform 1s;
-moz-transition:-moz-transform 1s;
-o-transform:-o-transform 1s;
-ms-transform:-o-transform 1s;
}
img.imagenes:hover{
transform:scale(1.5,1.5);
-webkit-transform:scale(1.5,1.5);
-moz-transform:scale(1.5,1.5);
-o-transform:scale(1.5,1.5);
-ms-transform:scale(1.5,1.5);
}
/*colocamos un backgroun y border a la parte central*/
section{
margin-top:35px;
background:blue;
box-shadow:0px 0px 20px red;
border-radius: 10px 10px 10px 10px;
border:solid 7px #000000;
}
section article p{
text-align:center;
margin-left: 30px;
margin-right:30px;
}
/*colocamos en el documento la siguiente orden </article class="clase1"
contenteditable="true"> para leer mas article class="clase1" contenteditable="true">
<small>Leer mas</small>*/
Luego debemos crear otro archivo para el código de la derecha (siguiente código)
/*aside derecha*/
aside#derecha{
margin-top:25px;
border:solid 1px red;
box-shadow:0px 0px 15px red;
border-radius: 10px 10px 10px 10px;
transition: border 1s, box-shadow 1s,background 1s;
-webkit-transition:border 1s, box-shadow 1s,background 1s;
-moz-transition:border 1s, box-shadow 1s,background 1s;
-0-transition:border 1s, box-shadow 1s,background 1s;
-ms-transition:border 1s, box-shadow 1s,background 1s;
}
aside#derecha:hover{
background:gold;
border:solid 1px blue;
box-shadow:0px 0px 15px blue;
}
aside#derecha ul{
list-style:none;
padding:10px;
}
Luego otro archivo para el código de la izquierda (siguiente código)
/*aside fooder*/
aside#izquierda{
margin-top:25px;
border:solid 1px red;
box-shadow:0px 0px 15px red;
border-radius: 10px 10px 10px 10px;
transition: border 1s, box-shadow 1s,background 1s;
-webkit-transition:border 1s, box-shadow 1s,background 1s;
-moz-transition:border 1s, box-shadow 1s,background 1s;
-0-transition:border 1s, box-shadow 1s,background 1s;
-ms-transition:border 1s, box-shadow 1s,background 1s;
}
aside#izquierda:hover{
background:gold;
border:solid 1px blue;
box-shadow:0px 0px 15px blue;
}
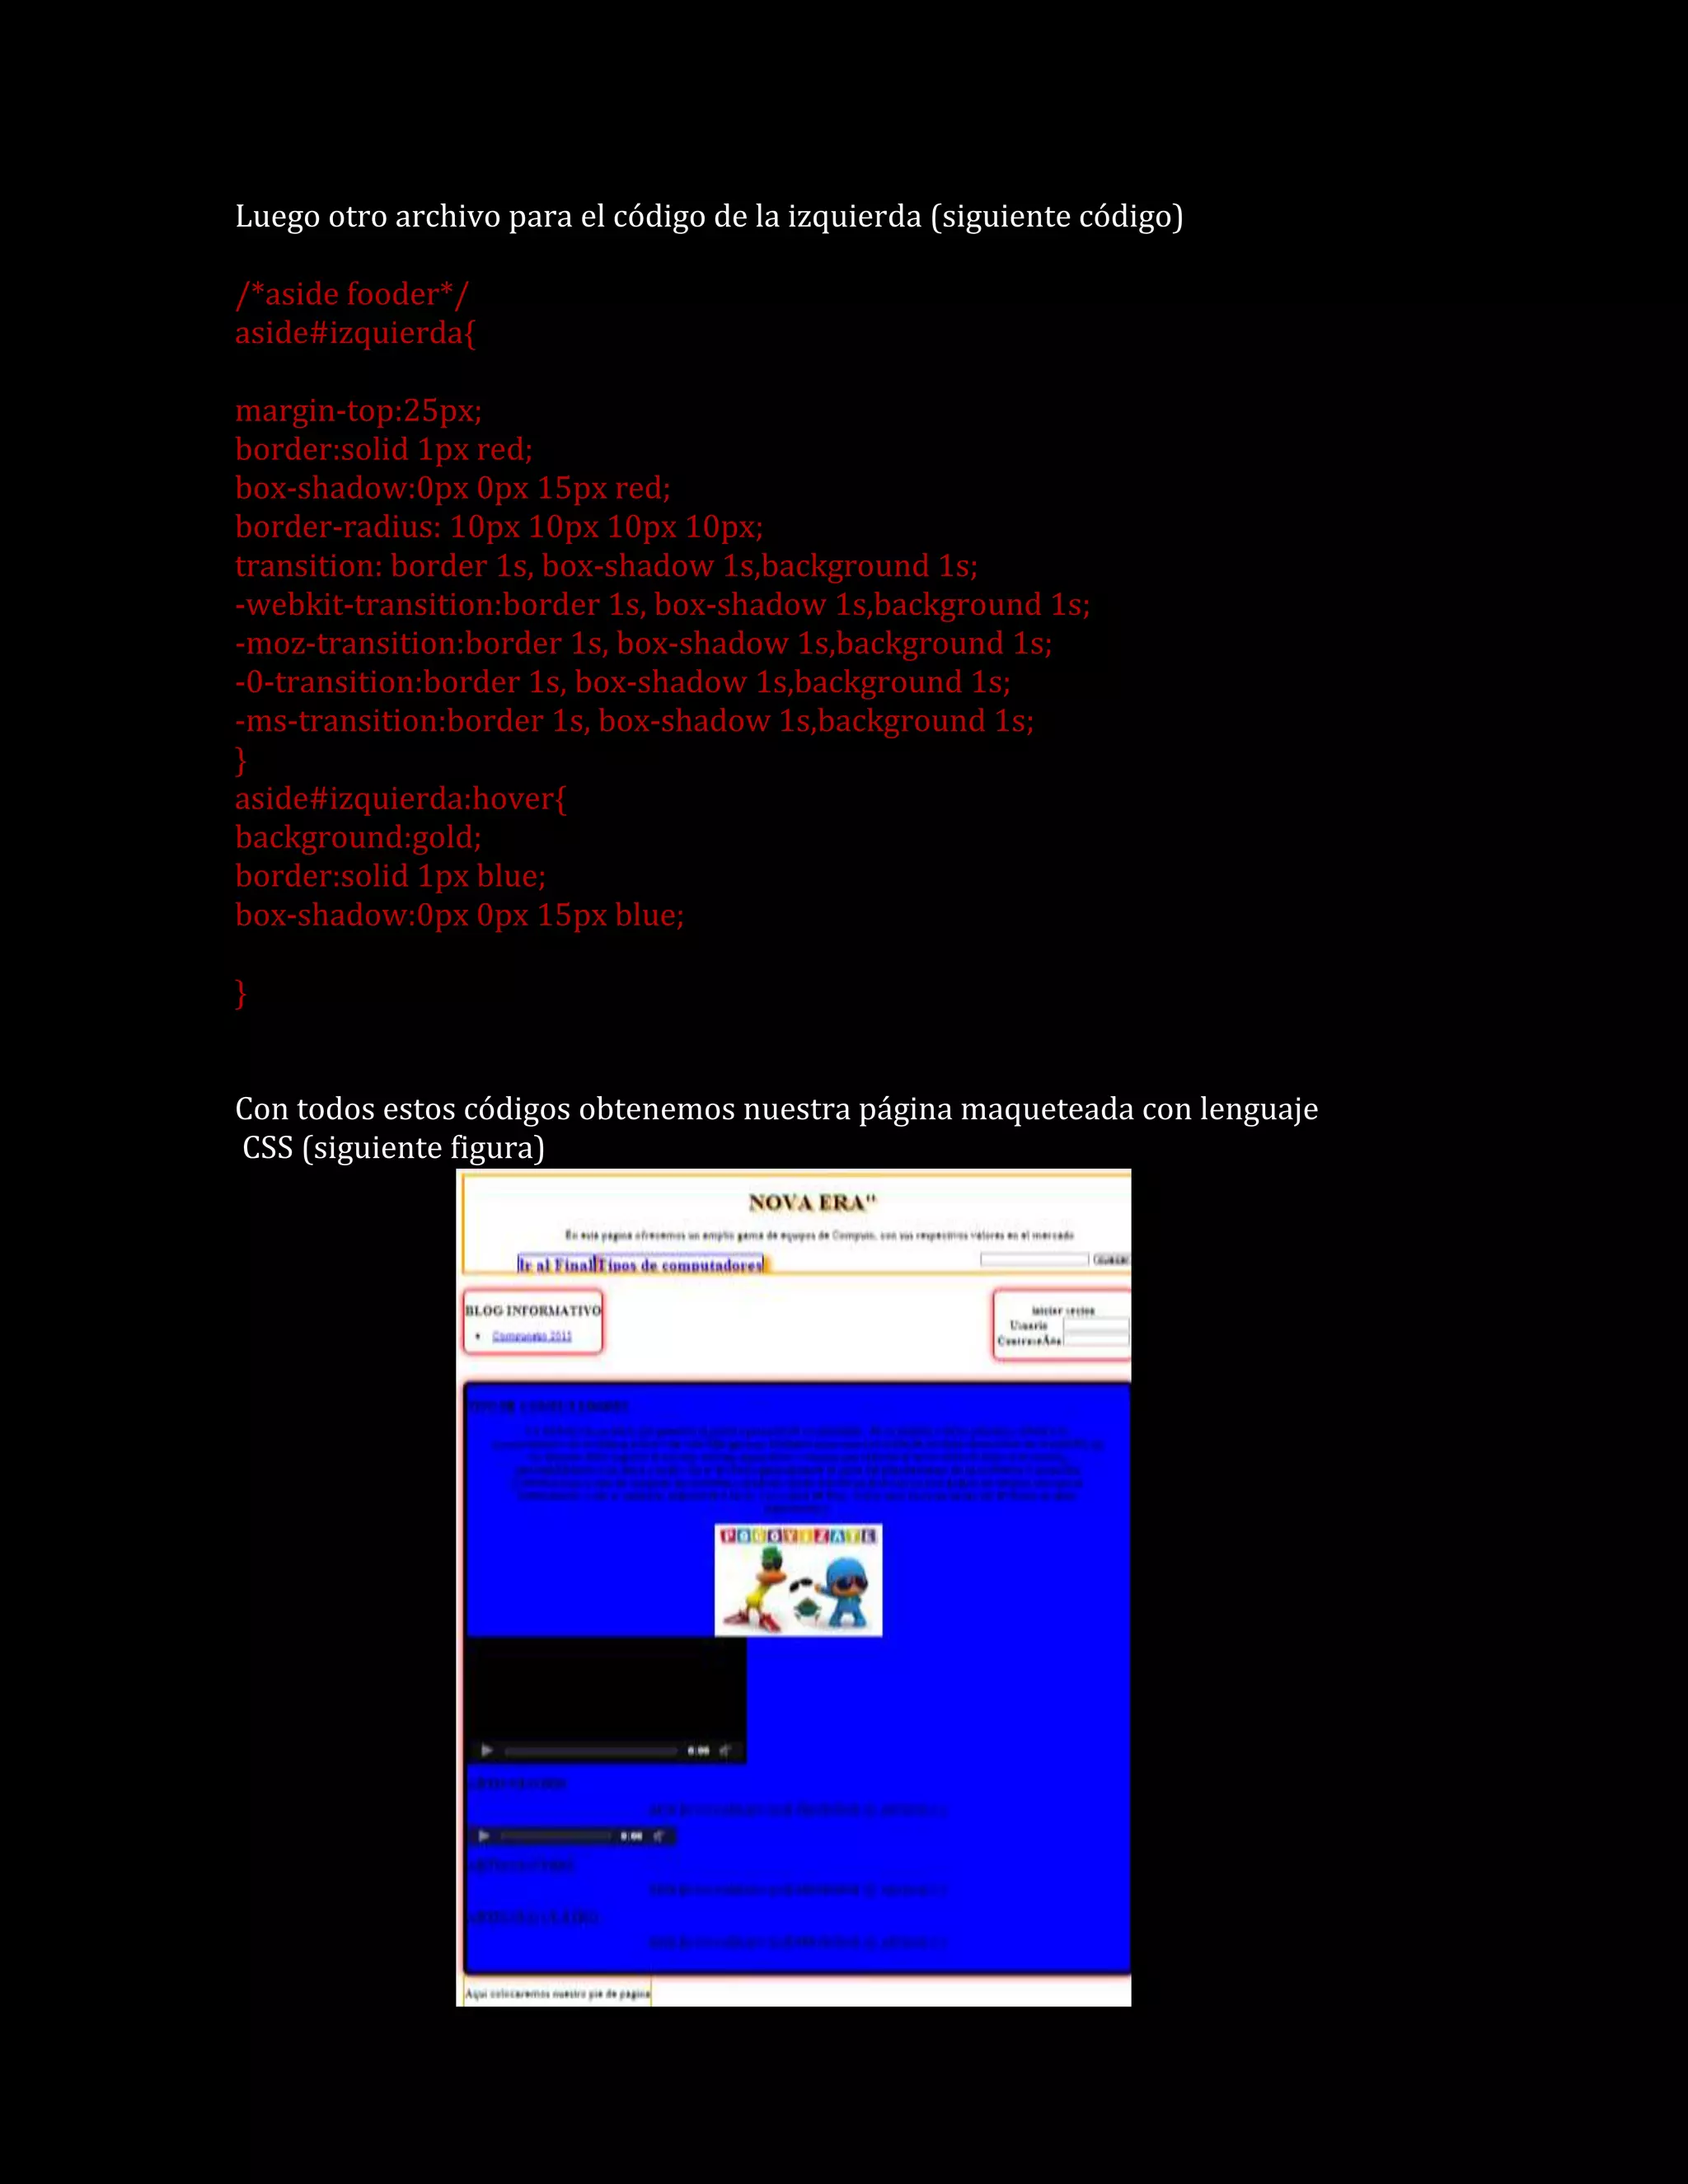
Con todos estos códigos obtenemos nuestra página maqueteada con lenguaje
CSS (siguiente figura)

Más contenido relacionado

Destacado

Dossier blog
Dossier blogDossier blog
Dossier blogsalvallao
 
Clase 3.1-por qué binario
Clase 3.1-por qué binarioClase 3.1-por qué binario
Clase 3.1-por qué binario142918
 
Las competencias en ti cs
Las competencias  en ti csLas competencias  en ti cs
Las competencias en ti csMariela Lira
 
Terra Universo. Carina
Terra Universo. CarinaTerra Universo. Carina
Terra Universo. Carinaguest5a034e
 
Alg2 section 1.7
Alg2 section 1.7Alg2 section 1.7
Alg2 section 1.7nscross40
 

Destacado (6)

Dossier blog
Dossier blogDossier blog
Dossier blog
 
Clase 3.1-por qué binario
Clase 3.1-por qué binarioClase 3.1-por qué binario
Clase 3.1-por qué binario
 
Las competencias en ti cs
Las competencias  en ti csLas competencias  en ti cs
Las competencias en ti cs
 
Terra Universo. Carina
Terra Universo. CarinaTerra Universo. Carina
Terra Universo. Carina
 
Cristais De Agua
Cristais De AguaCristais De Agua
Cristais De Agua
 
Alg2 section 1.7
Alg2 section 1.7Alg2 section 1.7
Alg2 section 1.7
 

Similar a Pagina con maquetacion

Similar a Pagina con maquetacion (20)

Laboratorio 03
Laboratorio 03Laboratorio 03
Laboratorio 03
 
Trabajo jose 2
Trabajo jose 2Trabajo jose 2
Trabajo jose 2
 
Html actividades 1
Html actividades  1Html actividades  1
Html actividades 1
 
Html actividades 1
Html actividades  1Html actividades  1
Html actividades 1
 
Ejercicios htm lcompletos
Ejercicios htm lcompletosEjercicios htm lcompletos
Ejercicios htm lcompletos
 
MAQUETACIÒN WEB-Naomy
MAQUETACIÒN WEB-NaomyMAQUETACIÒN WEB-Naomy
MAQUETACIÒN WEB-Naomy
 
MAQUETACION WEB
MAQUETACION WEBMAQUETACION WEB
MAQUETACION WEB
 
Presentación CSS y HTML en Gummurcia
Presentación CSS y HTML en GummurciaPresentación CSS y HTML en Gummurcia
Presentación CSS y HTML en Gummurcia
 
De HTML a Express
De HTML a ExpressDe HTML a Express
De HTML a Express
 
Codigo html
Codigo htmlCodigo html
Codigo html
 
jQuery Mobile :: Cuadros de diálogo
jQuery Mobile :: Cuadros de diálogojQuery Mobile :: Cuadros de diálogo
jQuery Mobile :: Cuadros de diálogo
 
Comando y ejercicios para HTML
Comando y ejercicios para HTMLComando y ejercicios para HTML
Comando y ejercicios para HTML
 
html
htmlhtml
html
 
Wp config.php
Wp config.phpWp config.php
Wp config.php
 
Wp config.php
Wp config.phpWp config.php
Wp config.php
 
Recuperacion
RecuperacionRecuperacion
Recuperacion
 
Manual html1 (Informatica Aplia Educa)
Manual html1 (Informatica Aplia Educa)Manual html1 (Informatica Aplia Educa)
Manual html1 (Informatica Aplia Educa)
 
Introducción al Desarrollo Web
Introducción al Desarrollo WebIntroducción al Desarrollo Web
Introducción al Desarrollo Web
 
Practicas html
Practicas htmlPracticas html
Practicas html
 
Introducción a CSS en XHTML
Introducción a CSS en XHTMLIntroducción a CSS en XHTML
Introducción a CSS en XHTML
 

Más de cristian guevara (20)

Instrumentos
InstrumentosInstrumentos
Instrumentos
 
Cantantes
CantantesCantantes
Cantantes
 
Cantantes
CantantesCantantes
Cantantes
 
Movimientos predefinidos
Movimientos predefinidosMovimientos predefinidos
Movimientos predefinidos
 
Texto en flash
Texto en flashTexto en flash
Texto en flash
 
Pagina en dreamvewear
Pagina en dreamvewearPagina en dreamvewear
Pagina en dreamvewear
 
Importación a flash
Importación a flashImportación a flash
Importación a flash
 
Síntesis de una función
Síntesis de una funciónSíntesis de una función
Síntesis de una función
 
Síntesis de una función
Síntesis de una funciónSíntesis de una función
Síntesis de una función
 
Creación de gráficos y degradados
Creación de gráficos y degradadosCreación de gráficos y degradados
Creación de gráficos y degradados
 
Sprite
SpriteSprite
Sprite
 
Mantenimiento
MantenimientoMantenimiento
Mantenimiento
 
Formularios con html5
Formularios con html5Formularios con html5
Formularios con html5
 
Botones pulsantes
Botones pulsantesBotones pulsantes
Botones pulsantes
 
Clips de pelicula
Clips de peliculaClips de pelicula
Clips de pelicula
 
Ejercicios en actionscript fundamentales
Ejercicios en actionscript fundamentalesEjercicios en actionscript fundamentales
Ejercicios en actionscript fundamentales
 
Estructuras de control en php
Estructuras de control en phpEstructuras de control en php
Estructuras de control en php
 
Ejercicios en actionscript fundamentales
Ejercicios en actionscript fundamentalesEjercicios en actionscript fundamentales
Ejercicios en actionscript fundamentales
 
Fundamentales en actio script
Fundamentales en actio scriptFundamentales en actio script
Fundamentales en actio script
 
Puertos
PuertosPuertos
Puertos
 

Pagina con maquetacion

  • 1. PAGINA CON MAQUETACION (CSS) Para empezar debemos abrir el programa NOTEPAD++ (siguiente figura)
  • 2. Luego debemos crear un archivo donde vamos a poner todo el código de la pagina donde vamos aponer direcciones para la maqueteacion (siguiente código) <!DOCTYPE> <HTML> <!--RECUERDE QUE ESTE ES EL TAG PARA COMENTARIOS--> <HEAD> <TITLE>11 Computacion</TITLE> <link href="css/estilo.css" rel="stylesheet" type="text/css"/> <link href="css/header.css" rel="stylesheet" type="text/css"/> <link href="css/centro.css" rel="stylesheet" type="text/css"/> <link href="css/derecha.css" rel="stylesheet" type="text/css"/> <link href="css/izquierda.css" rel="stylesheet" type="text/css"/> </HEAD> <BODY> <!--el div agrupa una serie de elementos que van a ser cambiados por el maqueteador css--> <DIV id="TODO"> <header> <!--header es la cabecera en html5--> <h1><center> NOVA ERA"</center></h1> <center> <p> En esta pagina ofrecemos un amplio gama de equipos de Computo, con sus respectivos valores en el mercado </p> </center> <form action="index.html" method="post"> <input size="20px" type="text"> <input type="submit" value="buscar"> </form> <NAV> <UL> <!--HACEMOS UNA LISTA NO ORDENADA DE NUESTRO MENU--> <A NAME="iniciodeldocumento"></A> <h1> <LI><a HREF="#finaldeldocumento">Ir al Final</A> <LI><a HREF="#tipo">Tipos de computadores</A> </h1> </nav> </header> </UL> <!--PARA LOS BLOQUES QUE VAN A QUFDAR A LA DERECHA O A LA IZQUIERDA DE LA PAGINA WEB--> <ASIDE ID="IZQUIERDA">
  • 3. <P> <H3>BLOG INFORMATIVO</H3> <ul> <li><a href="http://diego11c.blogspot.com/"> Compuneko<time> 2013</time></A></li> </ul> </P> </ASIDE> <ASIDE ID="derecha"> <P> <form action="indeindex.html"method="post"/> <table> <tr> <th colspan="2"> iniciar secion </th> </tr> <tr> <th> <label>Usuario</label> </th> <th> <input type="text" name="nombreuser" size="10px"> </th> </tr> <tr> <th> <label>Contraseña</label> </th> <th> <input type="password" name="pass" size="10px"> </th> </tr> </table> </P> </ASIDE> <!--LOS ARTICULOS PRINCIPALES SE UBICAN CON UN TAG LLAMADO SECTION--> <SECTION class="clase1" contenteditable="true"> <A NAME="tipo"></A> <ARTICLE>
  • 4. <H1>TIPO DE COMPUTADORES</H1> <P> Un artículo es un texto que presenta la postura personal de un periodista , de un analista o de un pensador, frente a un acontecimiento, un problema actual o de interés general. Mediante estos textos se pretende muchas veces influir en la opinión de los lectores. Para lograrlo el escritor emplea argumentos o razones que seducen al lector acercándolo a su postura, persuadiéndolo a un tema o hecho. En el artículo,generalmente se parte del planteamiento de un problema o situación problemática, o sea, de opiniones encontradas u opuestas. Quien escribe un artículo no solo analiza los hechos, sino que al interpretarlos y dar su opinión, argumenta a favor o en contra de ellos. Todos estos factores hacen del artículo un texto argumentativo. </P> <center> <img class="imagenes" src="imagen/images.jpg"> </center> <video width="400" height="200" controls="controls" proload="proload"> <source src="imagenes/Ñengo Flow No Dice Na (Video Oficial).mp4"> </source> </video> </ARTICLE> <ARTICLE> <H1>ARTICULO DOS</H1> <P> ESTE ES UN PARRAFO QUE PERTENECE AL ARTICULO 2 </P> </ARTICLE> <audio controls="controls" src="imagenes/Plan B Se Cree Mala ( Vídeo Oficial ) La Formula.mp3"> si no sirve utilice otro servidor </audio> <ARTICLE> <H1>ARTICULO TRES</H1> <P> ESTE ES UN PARRAFO QUE PERTENECE AL ARTICULO 3 </P> </ARTICLE> <ARTICLE> <H1>ARTICULO CUATRO</H1> <P> ESTE ES UN PARRAFO QUE PERTENECE AL ARTICULO 4 </P> </ARTICLE> <A NAME="FINALDELDOCUMENTO"></A> <A HREF ="#iniciodeldocumento" <H2><CENTER>Presione aui para ir al inicio</A></H2></CENTER> </SECTION>
  • 5. <!—E L PIE DE PAGINA SE ESCRIBE CON EL TAG FOOTER --> <FOOTER> <P> Aqui colocaremos nuestro pie de pagina </p> </footer> </div> </BODY> </HTML> Luego vamos a crear otro archivo donde vamos a colocar el código de estilo (siguiente código) /*esta es una hoja de estilo principal para mi pagina web*/ div#todo{ margin:0 auto; width:959px; border:solid 1px Orange; } header{ height:150px; border:solid 1px Orange; width:957px; overflow:hidden; } /*maquetando el aside izquierda*/ aside#izquierda{ float:left; border:solid 1px RED; } /*maquetando la la seccion central*/ section{ float:left; border:solid 1px RED; width:; } /*maquetando el aside derecha*/ aside#derecha{ float:right; border:solid 1px Orange; } footer{ float:left;
  • 6. border:solid 1px Orange; } Luego debemos crear otro archivo para el código de header (siguiente código) /*maquetando el header*/ /*fuente personalizada*/ @font-face{ font-family:destroyed; src:url(fuentes/destroyed.ttf)format('truetype'); } border{ border-radius:60px 10px 20px 10; box-shadow:0px 0px 15px Red; } /* /*h1*/ header h1{ font-family:destroyed; margin-left:35px; text-shadow:5px 5px 5px orange; } /*p*/ header p{ margin-left:57px; } header form{ float:right; } /*menu horizontal*/ header ul{ list-style:none; } header ul li{ float:left; margin-top: 1px; /**/ } header ul li a{ text-decoration:none; color:blue; border:solid 3px Blue; margin:left 3px; padding:5px 15px 5 px 15px;
  • 7. border-radius: 5px 5px 0px 0px; box-shadow:10px 5px 10px Orange; /*derecha abajo lo grande*/ transition:background 1s, color 1s, border 1s, box-shadow 1s;/*despues*/ transition:background 1s, color 1s, border 1s, box-shadow 1s; transition:background 1s, color 1s, border 1s, box-shadow 1s; transition:background 1s, color 1s, border 1s, box-shadow 1s; } header ul li a:hover{ color:yellow; border:solid 3px Red; box-shadow:opx 5px 10px green; background:Red; } Luego debemos crear otro archivo para centro (siguiente código) /*sección central*/ img.imagenes{ transform:scale(1,1); -webkit-transform:scale(1,1); -moz-transform:scale(1,1); -o-transform:scale(1,1); -ms-transform:scale(1,1); transition:transform 1s; -webkit-transition:-webkit-transform 1s; -moz-transition:-moz-transform 1s; -o-transform:-o-transform 1s; -ms-transform:-o-transform 1s; } img.imagenes:hover{ transform:scale(1.5,1.5); -webkit-transform:scale(1.5,1.5); -moz-transform:scale(1.5,1.5); -o-transform:scale(1.5,1.5); -ms-transform:scale(1.5,1.5); } /*colocamos un backgroun y border a la parte central*/ section{ margin-top:35px; background:blue;
  • 8. box-shadow:0px 0px 20px red; border-radius: 10px 10px 10px 10px; border:solid 7px #000000; } section article p{ text-align:center; margin-left: 30px; margin-right:30px; } /*colocamos en el documento la siguiente orden </article class="clase1" contenteditable="true"> para leer mas article class="clase1" contenteditable="true"> <small>Leer mas</small>*/ Luego debemos crear otro archivo para el código de la derecha (siguiente código) /*aside derecha*/ aside#derecha{ margin-top:25px; border:solid 1px red; box-shadow:0px 0px 15px red; border-radius: 10px 10px 10px 10px; transition: border 1s, box-shadow 1s,background 1s; -webkit-transition:border 1s, box-shadow 1s,background 1s; -moz-transition:border 1s, box-shadow 1s,background 1s; -0-transition:border 1s, box-shadow 1s,background 1s; -ms-transition:border 1s, box-shadow 1s,background 1s; } aside#derecha:hover{ background:gold; border:solid 1px blue; box-shadow:0px 0px 15px blue; } aside#derecha ul{ list-style:none; padding:10px; }
  • 9. Luego otro archivo para el código de la izquierda (siguiente código) /*aside fooder*/ aside#izquierda{ margin-top:25px; border:solid 1px red; box-shadow:0px 0px 15px red; border-radius: 10px 10px 10px 10px; transition: border 1s, box-shadow 1s,background 1s; -webkit-transition:border 1s, box-shadow 1s,background 1s; -moz-transition:border 1s, box-shadow 1s,background 1s; -0-transition:border 1s, box-shadow 1s,background 1s; -ms-transition:border 1s, box-shadow 1s,background 1s; } aside#izquierda:hover{ background:gold; border:solid 1px blue; box-shadow:0px 0px 15px blue; } Con todos estos códigos obtenemos nuestra página maqueteada con lenguaje CSS (siguiente figura)