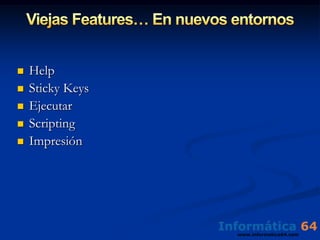
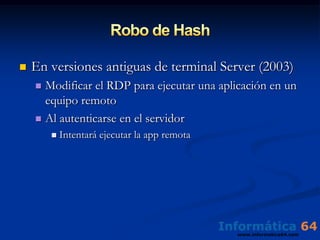
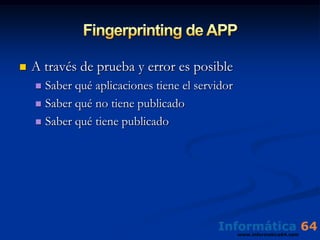
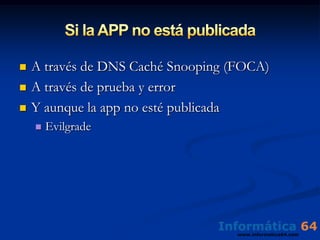
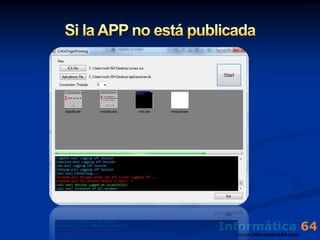
Este documento proporciona información sobre cómo hackear servidores Terminal Server y Citrix. Explica cómo buscar aplicaciones en estos servidores utilizando Google Dorks y ShodanDorks. También describe cómo robar hashes de autenticación en versiones antiguas de Terminal Server y cómo realizar fingerprinting de aplicaciones a través de prueba y error. Además, cubre cómo evadir las restricciones de software en estos servidores para ejecutar aplicaciones no autorizadas.
17. Evolución del Desktop en MS Diseñado para estar siempre conectado UI Mejorada Interfaz similar a Web Navegación local similar a navegación por Internet
18.
19. Viejas Features… En nuevos entornos Help StickyKeys Ejecutar Scripting Impresión
20. Robo de Hash En versiones antiguas de terminal Server (2003) Modificar el RDP para ejecutar una aplicación en un equipo remoto Al autenticarse en el servidor Intentará ejecutar la app remota
21. Fingerprinting de APP A través de prueba y error es posible Saber qué aplicaciones tiene el servidor Saber qué no tiene publicado Saber qué tiene publicado
22. Si la APP no está publicada A través de DNS Caché Snooping (FOCA) A través de prueba y error Y aunque la app no esté publicada Evilgrade
24. Office Components Por defecto las aplicaciones de office vienen sin plantillas de Seguridad Es posible descargarlas en un paquete de instalación separado Realidad Muchas aplicaciones desprovistas de políticas de grupo Ejecución de Macros sin firmar Posibilidad de ejecutar Macros firmadas por terceros Posibilidad de añadir certificados de terceros
25. Software RestrictionPolicies A partir de Windows server 2003 es posible Impedir la ejecución de aplicaciones Vía HASH Vía PATH En Windows Server 2008 R2 Todo lo anterior APPLOCKER
26. Software RestrictionPolicies Es posible bypassear estas restricciones Utilizando aplicaciones de terceros embebidas Realizando llamadas a APIS Utilizando WMI Utilizando “otro camino” Ej: Llamar a command.com en vez de cmd.exe
Stacked, 3-D text at dramatic angle(Intermediate)To reproduce the text on this slide, do the following:On the Home tab, in theSlides group, click Layout, and then click Blank.On the Insert tab, in the Text group, click Text Box, and then on the slide, drag to draw the text box.Enter text in the text box, select the text, and then on the Home tab, in the Font group, select Impact from the Font list, and then change the font size of each line so that the text is approximately the same width. For example, if you entered FIRST on one line, SECOND on the next line, and so on (as shown on the slide), do the following:Select the first line of text, and then on the Home tab, in the Font group, enter 100 in the Font Size box. Select the second line of text, and then on the Home tab, in the Font group, enter 70 in the Font Size box. Select the third line of text, and then on the Home tab, in the Font group, enter 94 in the Font Size box. Select the fourth line of text, and then on the Home tab, in the Font group, enter 75.5 in the Font Size box. Select all of the text. On the Home tab, in the Font group, click Character Spacing, and then click More Spacing. In the Font dialog box, on the Character Spacingtab, in the Spacing list, select Expanded. In the By box, enter 2.On the Home tab, in the Paragraph group, click Center to center the text in the text box.Under Drawing Tools, on the Format tab, in the bottom right corner of the WordArt Styles group, click the Format Text Effects dialog box launcher. In the Format Text Effects dialog box, click Text Fill in the left pane, select Gradient fill in the Text Fill pane, and then do the following:In the Type list, select Radial.Click the button next to Direction, and then click From Corner (second option from the left).Under Gradient stops, click Add or Remove until two stops appear in the drop-down list.Also under Gradient stops, customize the gradient stops that you added as follows:Select Stop 1 from the list, and then do the following:In the Stop position box, enter0%.Click the button next to Color, and then under Theme Colorsclick White, Background 1, Darker 15%(third row, first option from the left).Select Stop 2 from the list, and then do the following:In the Stop position box, enter100%.Click the button next to Color, and then under Theme Colorsclick White, Background 1, Darker 50%(sixth row, first option from the left).Also in the Format Text Effects dialog box, click 3-D Rotation in the left pane. In the 3-D Rotation pane, click the button next to Presets, and then under Perspectiveclick Perspective Heroic Extreme Left (third row, second option from the left).Also in the Format Text Effects dialog box, click 3-D Format in the left pane, and then do the following in the 3-D Format pane: Under Bevel, click the button next to Top, and then under Bevel click Cool Slant (first row, fourth option from the left). Under Depth, in the Depth box, enter 70 pt. Also in the Format Text Effects dialog box, click Shadowin the left pane. In the Shadowpane, click the button next to Presets, and then under Perspectiveclick Perspective Diagonal Upper Right (first row, second option from the left). To reproduce the background on this slide, do the following:Right-click the slide background area, and then clickFormat Background.In the Format Background dialog box, click Fill in the left pane, select Gradient fill in the Fill pane, and then do the following:In the Type list, select Linear.Click the button next to Direction, and then click Linear Down (first row, second option from the left).Under Gradient stops, click Add or Remove until two stops appear in the drop-down list.Also under Gradient stops, customize the gradient stops that you added as follows:Select Stop 1 from the list, and then do the following:In the Stop position box, enter64%.Click the button next to Color, and then under Theme Colorsclick Black, Text 1(first row, second option from the left).Select Stop 2 from the list, and then do the following:In the Stop position box, enter100%.Click the button next to Color, and then under Theme Colorsclick Black, Text 1, Lighter 35% (third row, second option from the left).
Custom “chrome” gradient-filled text with bevel and reflection(Advanced)To reproduce the text effects on this slide, do the following:On the Home tab, in theSlides group, click Layout, and then click Blank.On the Insert tab, in the Text group, click Text Box, and then on the slide, drag to draw the text box.Enter text in the text box, select the text, and then on the Home tab, in the Font group, select Corbel from the Font list, select 60 from the Font Size list, and then click Bold.On the Home tab, in the Paragraph group, click Center to center the text in the text box.On the Home tab, in the Font group, click Character Spacing, and then click More Spacing. In the Font dialog box, on the Character Spacingtab, in the Spacing list, select Expanded. In the By box, enter 2.Under Drawing Tools, on the Format tab, in the WordArt Styles group, click the arrow next toText Fill, point to Gradient, and then click More Gradients.In the Format Text Effects dialog box, click Text Fill in the left pane, selectGradient fill in the Text Fill pane, and then do the following:In the Type list, select Linear.Click the button next to Direction, and then clickLinear Down (first row, second option from the left). In the Angle box, enter 90°.Under Gradient stops, click Add or Remove until five stops appear in the drop-down list. Also under Gradient stops, customize the gradient stops that you added as follows:Select Stop 1 from the list, and then do the following:In the Stop position box, enter 0%. Click the button next to Color, click More Colors, and then in the Colors dialog box, on the Custom tab, enter values for Red: 55, Green: 146, and Blue: 170.Select Stop 2 from the list, and then do the following:In the Stop position box, enter 50%.Click the button next to Color, click More Colors, and then in the Colors dialog box, on the Custom tab, enter values for Red: 223, Green: 240, Blue: 245.Select Stop 3 from the list, and then do the following:In the Stop position box, enter 56%.Click the button next to Color, click More Colors, and then in the Colors dialog box, on the Custom tab, enter values for Red: 67, Green: 74, Blue: 90.Select Stop 4 from the list, and then do the following:In the Stop position box, enter 60%. Click the button next to Color, click More Colors, and then in the Colors dialog box, on the Custom tab, enter values for Red: 185, Green: 171, Blue: 147.Select Stop 5 from the list, and then do the following:In the Stop position box, enter 90%. Click the button next to Color, and then under Theme Colorsclick White, Background 1 (first row, first option from the left). Select the text on the slide, and then under Drawing Tools, on the Format tab, in the WordArt Styles group, click Text Effects, and then do the following:Point to Reflection, and then under Reflection Variations, click Half Reflection, touching (first row, second option from the left).Point to Bevel, and then under Bevel, click Cool Slant (first row, fourth option from the left).Under Drawing Tools, on the Format tab, in the bottom right corner of the WordArt Styles group, click the Format Text Effects dialog box launcher. In the Format Text Effects dialog box, click 3-D Format in the left pane, and then do the following in the 3-D Format pane:Under Bevel, next to Top, in the Width box, enter 4 pt,and in the Height box, enter 0.8 pt.Under Surface, click the button next to Material, and then under Standard, click Metal (fourth option from the left). In the Angle box, enter 80°.To reproduce the background on this slide, do the following:Right-click the slide background area, and then clickFormat Background.In the Format Background dialog box, click Fill in the left pane, select Gradient fill in the Fill pane, and then do the following:In the Type list, select Linear.Click the button next to Direction, and then clickLinear Down (first row, second option from the left).Under Gradient stops, click Add or Remove until two stops appear in the drop-down list.Also under Gradient stops, customize the gradient stops that you added as follows:Select Stop 1 from the list, and then do the following:In the Stop position box, enter72%.Click the button next to Color, and then under Theme Colorsclick Black, Text 1, Lighter 5% (sixth row, second option from the left).Select Stop 2 from the list, and then do the following:In the Stop position box, enter100%.Click the button next to Color, and then under Theme Colorsclick White, Background 1, Darker 35% (fifth row, first option from the left).