SlideShare una empresa de Scribd logo
1 de 60
Descargar para leer sin conexión
NSX-330
NSX=332
NSX=A92
COMPACT DISC STEREO SYSTEM
SISTEMA ESTEREOFONICO DE DISCO
COMPACTO
COMPACT DISC STEREO CASSEITE RECEIVER
RADIOCASSEITE ESTEREO CON DISCO COMPACTO
CX-N330 LH,HE,U,C,E,K
CX-N332 U
CX-A92 HE
SPEAKERSYSTEM
SISTEMADEALTAVOCES
SX=N330
SX-N332
SX-A92
“CAUTION: TO REDUCE THE RISK OF
ELECTRIC SHOCK,
DO NOT REMOVE COVER (OR BACK).
NO USER-SERVICEABLE PARTS INSIDE.
REFER SERVICING TO QUALIFIED
SERVICE PERSONNEL.”
Explanation of Graphical Symbols:
The lightning flash with arrowhead symbol,
within an equilateral triangle, is intended to
A
alert the user to the presence of uninsulated
“dangerous voltage” wlthm the product’s
enclosure that may be of sufficient magni-
tude to constitute a risk of electric shock to
persons.
A
The exclamation point within an equilateral
triangle IS intended to alert the user to the
presence of Important operating and main-
tenance (serwcmg) Instructions in the lit-
● erature accompanying the appliance.
TO REDUCE THE RISK OF FIRE OR ELECTRIC
SHOCK, DO NOT EXPOSE THIS APPLIANCE
TO RAIN OR MOISTURE.
CAUTION
Use of controls or adjustments or performance of procedures
other than those specified herein may result in hazardous
radiation exposure.
Ezl
CAUTION!
A
Invisible laser radiation when open and inter
locks defeated. Avoid exposure to beam.
WARNING
This equipment has been certified to comply with the limits for
a Class B computing device, pursuant to Subparl J of Part 15
of FCC Rules. Only peripherals cerbfied to comply with the
Class B limits maybe attached to this equipment. Operation
with noncertified peripherals is likely to result in interference to
radio and TV reception.
This equipment generates and uses radio frequency energy
and if not installed and used properly, that Is, in strict accor-
dance with the manufacturer’s Instructions, may cause inter-
ference to radio and televwon reception. It has been type
tested and found to comply with the limits for a Class B
computing device m accordance with the specifications in
Subpart J of Part 15 of FCC Rules, which are designed to
provide reasonable protection against such mteflerence m a
residential installation. However, there is no guarantee that
interference WIII not occur in a parhcular installation. If this
equipment does cause interference to radio or telewsion
reception, which can be determined by turning the equipment
off and on, the user is encouraged to try to correct the
interference by one or more of the following measures:
-reorient the receiving antenna
-relocate the equipment with respect to the receiver
-move the equipment away from the receiver
-plug the equipment into a different outlet so that equipment
and receiver are on different branch circuits.
If necessary, the user should consult the dealer or an experi-
enced radio/televmon technician for additional suggestions.
The user may find the following booklet prepared by the Federal
Communications Commission helpful:
‘[How to Identify and Resolve Radio-TV Interference Problems”
This booklet is available from the US Government Printing
Office, Washington, D.C., 20402, Stock No. 004-000-00345-4.
L
THIS DIGITAL APPARATUS DOES NOT EXCEED THE
CLASS B LIMITS FOR RADIO NOISE EMISSIONS FROM
DIGITAL APPARATUS AS SET OUT IN THE RADIO iN-
TERFERENCE REGULATIONS OF THE CANADIAN DE-
OWNER’S RECORD
For your convenience, record the model number and serial
number (you willfind them on the rear of your set) in the space
provided below. Please refer to them when you contact your
AIWA dealer m case of difficulty.
Model No. Serial No.
CX-N330
~
I CX-A92
Model No.
~ SX-N330
SX-N332
SX-A92
I I
I
Serial No.
I I
2
FEATURES .............................................4
PRECAUTIONS .......................................5
CONNECTIONS ......................................6
CLOCK SETTING .............1................... 12
SOUND ADJUSTMENT ........................14
LISTENING TO A COMPACT DISC ......16
PROGRAMMED PLAY .......................... 19
RANDOM PLAY ....................................20
REPEAT PLAY ......................................20
PLAYING BACK A TAPE .....................21
CONTINUOUS PLAY FROM DECK TO
DECK .....................................................24
TUNING INTO A STATION
MANUALLY .......................................25
PRESETTING STATIONS .....................26
TUNING INTO A PRESET STATION ...27
?
RECORDING .........................................28
TAPE DUBBING ....................................32
RECORDING FROM COMPACT
DISCS "...................." ..........................34
EDITING COMPACT DISCS .................36
Auto-edit recording ..........................36
Programmed-edit recording ............38
TIMER SETTING ...................................40
SLEEP TIMER SETTING ......................44
LISTENING TO OTHER SOURCES ......45
MICROPHONE MIXING ........................46
MAINTENANCE ....................................48
SPECIFICATIONS .................................49
TROUBLESHOOTING GUIDE ..............50
IDENTIFICATION OF PARTS ...............55
cARAcTERisTlcAs ............”..................4
PRECAUCIONES ....................................5
coNExloNEs .........................................6
PUESTA EN HORA DEL RELOJ ..........12
AJUSTE DEL SONIDO ......................... 14
ESCUCHA DE DISCOS COMPACTOS 16
REPRODUCTION PROGRAMADA ......19
REPRODUCTION ALEATORIA ............2O
REPRODUCTION REPETIDA ..............20
REPRODUCTION DE CINTAS .............21
REPRODUCTION CONTINUA
DE DECK A DECK ............................24
SINTONiA MANUAL DE
EMISORAS .......................m
................25
MEMORIZATION DE EMISORAS ........26
SINTONiA DE EMISORAS
MEMORIZADAS ................................27
GRABACION .........................................28
DUPLICATION DE CINTAS ..................32
GRABACION DE DISCOS
COMPACTOS ....................................34
EDICION DE DISCOS COMPACTOS ...36
Grabacion con edition
automatic ....................................36
Grabacion con edition
programada ..................................38
PROGRAMACION DEL
TEMPORIZADOR ..............................40
PROGRAMACION DEL
CRONODESCONECTADOR .............44
ESCUCHA DE OTRAS FUENTES ........45
MEZCLA CON MICROFONO ................46
MANTENIMIENTO .................................48
ESPECIFICACIONES .................,,.,,,,,,,, 51
GUiA PARA LA SOLUCION DE
PROBLEMAS ....................................52
IDENTIFICATION DE PARTES ............55
L
The illustrations in this manual show the HE Las ilustraciones de este manual corresponded *WE9fJbbfiHRHEi#320
al modelo HE. 1
3
BBE system Sistema BBE
BBE is a technology developed for professional
studio and live use. It gives astonishing definition
and clarity to music reproduction. It makes high-
frequency sound especially clear and brings out
the special character of vocals’ and solo instru-
ments,
AIWA is the world’s first manufacturer to employ
the BBE sound in consumer audio equipment.
CD edit functions
BBE es una tecnolog~a desarrollada para
emplearse en estudios profesionales y en directo.
BBE ofrece una definition y una claridad
asombrosas a la reproduction musical. BBE hate
especialmente claro el sonido de alta frecuencia y
enfatiza el caracter especial de Ias votes y Ios
instruments solistas.
AIWAesel primerfabricante del mundoen emplear
el sonido de BBE en un equipo de audio para el
consumidor.
Two different CD edit functions are available, and
you can easily make original tapes according to
your preference.
Other features
Amplifier section
● T-BASS for realistic reproduction at IOW sound
levels.
● The desired tone quality can be selected from
among three different preset tones.
Tuner section
e Synthesizer tuner.
● Internal daily eventksleep timer.
Cassette deck section
. High speed tape duplication.
CD player section
c Repeated playback of tracks.
● Playback of tracks in random order.
Funciones de edicibn de discos compactos
Existen cuatro funciones de edition de discos
compactos para mayor comodidad de duplication
que Ie permitiran crearfacilmente cintas originales
a su gusto.
Otras
Seccion del amplificador
● T-BASS para ofrecer una reproduction realista
a bajos niveles de sonido
● La calidad de tono puede seleccionarse de
entre Ios tres diferentes tonos memorizados.
Secci6n del sintonizador
● Sintonizador sintetizador
● Temporizador interno para programa diario/ y
cronodesconectador
Seccion del deck de casetes
c Duplication de discos compactos a gran
velocidad
%w%$wwr-
● zEa#lwJTlki%o
● #E%RmwkMl Elo
Seccion del reproductor de discos compactos
● Reproduction repetida de canciones
● Reproduction de canciones en orden aleatorio
4
Follow the advice below for safe and correct opera-
tion.
On AC voltage (LH, HE, U, C models)
Before use, check that the rated voltage of your
system matches your local voltage.
17%!Z%tiEl :%%!%AC” ‘“1
NSX-A92 HE selectable, 50/60 Hz
NSX-330 U, C 120/220-240 V AC
NSX-332 U selectable, 50/60 Hz
To adjust the operating voltage
The system shc,uld have been set for use on your
local voltage. If not, change the AC VOLTAGE
selector on the rear panel with a screwdriver or
similar object.
On placement
● Do not use the system in places which are
extremely hot, cold, dusty or humid.
● Place the system on a flat, even surface.
● Be careful nottoobstructthe ventilation holes on
the rear panel, as increased internal tempera-
ture may affect the electric parts. In particular,
do not place the system in an airtight rack.
On safety
.
.
.
When connecting and disconnecting the AC
cord, grip the plug and not the cord itself. Pulling
the cord may damage it and thus be hazardous.
When you are not going to use the system for a
long period of time, disconnect the AC cord. If
the cord is plugged in, a small amount of current
keeps on flowing to the system even if the power
switch is not ON.
If the AC cord is broken or damaged, or if the
wires are exposed, contact your dealer or an
AIWA setvice station and have it replaced or
repaired immediately.
On condensation
When the room is heated, you sometimes see
water drops on your windows; this is called con-
densation.
This can occur inside the CD player unit when:
. it is moved from a cold spot to a warm spot.
. it is used in a room where the heating system
has just been turned on.
● it is used in a place with a lot of moisture.
● it is used where it has direct contact with cool air,
such as near an air-conditioner.
When it has condensation inside, the unit may not
function normally. Let it stand for 1 to 2 hours
before turning the power on; or, gradually heat the
room and dry the unit before use.
Should any trouble occur, disconnect the AC cord
and refer servicing to qualified personnel only.
For customers purchasing the U or C mod-
els
When using the unit in the AC 220–240V posi-
tion, be sure to attach a suitable adaptor plug to
the plug end of the AC cord.
Adaptor plugs may be obtained at nominal cost
from an authorized AIWA dealer.
Para obtener una operation segura y apropiada,
siga Ios consejos ofrecidos a continuation.
Tension de CA (modelos LH, HE, U, C)
Antes de emplear el sistema, compruebe si su
tension nominal coincide con lade la red local.
NSX-A92 HE seleccionable, 50/60 Hz
NSX-330 U, C 120/220-240 V CA
NSX-332 U seleccionable, 50/60 Hz
Para ajustar la tension de alimentacion
El sistema ha sido ajustado para emplearse con la
tensi6n de la red local. Si la tensi6n de la red local
is diferente, cambie el selector AC VOLTAGE del
panel posterior del receptor estereo con un
destornillador u otro objeto puntiagudo.
Ubicacion
●
✎
✎
No emplee et sistema en Iugares
extremadamente calidos, fries, polvorientos, ni
h(rmedos.
Coloque el sistema sobre una superficie
nivelada.
Tenga cuidado de no obstruir Ios orificios de
venfilacion del panel posterior del receptor
estereo, ya que el aumento de la temperature
interna podria afectar Ios components
electr6nicos. En particular, nocoloque el sistema
en un armario cerrado.
Secfuridad
.
●
~ara conectar y desconectar el cable de CA,
sujeteel enchufe, noel propio cable. si tirase del
cable podrfadafiarlo, Ioque resultariapeligroso.
Cuando no vava a emriear el sistema durante
.
mucho tiem~o, de~conecte el cable de
alimentacion. Cuando el cable de alimentacion
este conectado, circulara una pequenacantidad
de corriente incluso aunque el interruptor de
alimentacion no este en ON.
Si el cable de alimentaci6n se rompe o daiia, o
si Ios hilos estan al descubierto, pongase
inmediatamente en contacto con un centro de
reparaciones AIWA para que se 10 reparen o
cambien.
Condensation
Al calentar una sala, a veces pueden verse gotas
de agua en Ias ventanas; esto se denomina
condensaci6n.
Este fenomeno puede ocurrir en el interior del
reproductor de discos compactos cuando:
● se traslade de un Iugar frio a otro calido.
● se emplee en una sala en la que se acabe de
poner en funcionamiento el sistema de
calefaccidm.
● se emplee en un Iugar con mucha humedad.
● se emplee en un Iugar directamente en contacto
con aire frio, como cerca de un acondicionador
de aire.
Cuando se haya producido condensation en el
interior, es posible que el sistema no funcione
normalmente. Dejelo 1 a 2 horas antes de conectar
la alimentacion, o caliente gradualmente la sala y
el sistema antes de emplear este.
Si se produce algun problems, desconecte el
cable de alirnentacion de CA y solicitar Ios.servicios
de personal cualificado solamente.
Para Ios clientas que hayan adquirido Ios
modelos U o C
Antes de emplear ei sistema en la position AC
220-240V, cerciorese de colocar en el cable de
alimentacion el adaptador de enchufe adecuado.
Los adaptadores de enchufe podran obtenerse
al costo nominal del proveedorAIWA autorizado.
NSX-330LH ,HE, 120/220/240V ?’liti~
NSX-A92HE %J=fj&J50/60Hz
NSX-330U,C 120/220-240V ~1%.%
NSX-332U fi%~ 50/60Hz
5
To an AC outlet + ~)
A un tomacorriente de CA
%Af?%&3ZjfisNRj?H?!Zo
Speaker (left)
Altavoz (izquierdo)
$%%%$ (E)
Tips on connection Consejos sobre Ias conexiones
● Be sure to connect correctly, according to the ● Cerciorese de realizar Ias conexiones como se
figure. muestra en la ilustracion.
● Turn on the power after verifying that the con- ● Conecte la alimentacion despues de haber
nection is correct. verificadoque Iasconexionessean correctas.
Notes on speaker connections Notas sobre la conexion de Ios altavoces
● Use speakers with an impedance of 6 ohms. ●
● This speaker system is magnetically shielded.
However, if the speaker should affect the color .
on the TV screen, turn off the TV, and turn it on
again 15-30 minutes later. If the TV screen still
has poor color, place the speaker system away
from the TV.
● Do not leave magnets or objects generating
magnetism near the speaker system.
.
Emplee altavoces con una impedancia de 6
ohmios.
Este sistemade altavoces esta magneticamente
apantallado. Sin embargo, si Ios altavoces
afectan el color o de la pantalla del televisor,
desconecte la alimentacion de este y vuelva a
conectarla despues de 15 a 30 minutes. Si el
colorde Iapantallasigue siendo de malacalidad,
aleje el sistema de altavoces del televisor.
No deje imanes ni objetos que generen
magnetism cerca del sistema de altavoces.
6
r
Dust cap
Tapa guardapolvo 1
To turn on the system
Power isw.rppliedtothe system when the POWER
button is pressed.
The system can be turned off by pressing the
same button again.
When the power is turned on
The indicator of the function button previously
used flashes for 4 seconds, and the operation
buttons usable in the function light up.
E. g.) When the CD function is selected
Ejemplo) Cuando se seleccione la funcion CD
m)
PAUSE
Para activar el sistema %ti*Yi%K.li9ai63
El sistema se activa al presionarel boton POWER. %MEPOWEWMWF, *3MMJ7fltW%%Mo
Este sistema puede desactivarse presionando otra #w{A*@*EIFl*&t&$, *%%iWk?%tlMaiKo
vez el mismo boton.
Cuando el sistema esta activado ‘H%%Ml@Be
El indicador del boton de funcion previamente ~fi&~h+JagE#&!M$J+&KEfi?@J??l 4 M%& 7$
usado parpadea por4 segundos, y se enciende Ios
botones de operation que pueden utilizarse en la
gfi~;s$!gg%wwl%m~il+%lto
tunclon.
‘DE??
ii%
SET CLEAR
PLAY/DIRECTION
C2El
DOWN
[fij
TUNING/PRESET/
TIMER/SKIP/SEARCH/MS
7
Connect the red plug to the R jack, and the
white plug to the L jack.
Conecte la clavija roja a la toma R, y la clavija
blanca a la toma L.
WJ.&iiZ4%XRk27LF3, MD&% Ei%iAU%7LFTo
LD player, VCR for playback, DAT deck, etc.
Rer)roductor de discos laser, videoarabadora
II
n para reproduction, deck DAT, etc. -
 LDIE#& RWM$$M%M, DATRA!S%.
II I mm I I
I
u. J
Pin-cord (optional)
Cordon con clavija (optional)
To connect an analog record player Para conectar un tocadiscos analogo EMHYM$$e+sf
Connect a player with an equalizer amplifier to Conecte un tocadiscos con un amplificador ~$fii%7fim*%Pg$*%%RvIDE0/
the VIDEO/AUX jacks. ecualizador a Ias tomas VIDEO/AUX.
.4UXR?LM%
8
Surround speaker (right)
Altavoz periferico (derecho)
m%%%?%%(%)
Rear
Trasera
7*H*R
Surround speaker: AIWA SX-R1 00, SX-R1 50, SX-R200, etc. (optional)
Altavoz periferico : AIWA SX-RI 00, SX-RI 50, SX-R200, etc. (optional)
~%%%% : AIWA SX-R1OO, SX-R150, SX-R200~(illflsf$)
Setup example
Ejemplo de instalacion
!%E51F0
Surround speaker (left)
Altavoz periferico (izquierdo)
HLW&%%%(%)
Notes Notas w
.
.
●
✎
The surrcund effect will not work with monaural c
sources.
Connect only surround speakers to the SUR- ●
ROUND SPEAKERS jacks.
Use surrcwnd speakers with an impedance of 16 ●
ohms.
Be sure i.o connect surround speakers to both ●
right and left jacks.
El efecto de sonido perimetrico no trabajara con ● &lBi4WWF%%E%E&B%o o
fuentes monoaurales.
A Ias tomas SURROUND SPEAKERS conecte
● ~$4W&%4Efi~xJ%ESURR0UND
solamente altavoces oerimetricos. SPEAKERS%3LI.
Emplee altavoces perimetricos con una ● #VHN3ti%%16 Q hbl!!%%%=%$o
impedancia de 16 ohmios. ● LE%+E72, ZiWR!%?L%I!&%@Yo
Cerciorese de conectar altavoces perimetricos
a ambas tomas, izquierda y derecha.
9
Rear (LH, HE, U, C models)
Trasera (modelos LH, HE, U, C)
f%Eii(LH. HE. U.(%4&)
‘Antenna terminals
Terminals de antena
(E, K models)
(modelos E, K)
(E.
K $%&!)
Position the supplied antennas after finding the
best direction for radio reception.
Coloque Ias antenas suministradas despues de
haber encontrado la mejor orientation para la
radiorrecepcion.
E+21!H4k2%%J%4k2
R&% fif*, l$FitE$YJx*z
ii.
For FM recetXion
Para la recepcion de FM For AM reception
FMkk;
.
Extend horizontal
Extiendala
hOriZOntalmente.
7kW&f$
Para la recepcion de AM
AMJIR%?EI
u I
For better FM re
Para meiorar la
FM2+?&JIk%M
T
Outdoor antenna
.-. Antena exterior
S**%
lr FM175Q R
J1 J
To position the AM(MW/LW) loop antenna
Ubicacion de la antena de cuadro de AM(MW/LbV)
WIGt$AM(MW/LW)ERf%
33RZHti To hang on a wall
10
To stand on a surface
Para colarla sobre una superficie
EEMEq%il
Para colgarla de una pared
HElfAJl
For better FM reception
Para mejorar la recepcion de FM
FM Z5%&]k%R
For MWILW reception
Para la recepcion de MW/LW For FM reception
MW/LWJIfC%M Para la recepcion de FM
FMJIk&?Rl
o ( 0
Extend horizontally.
Extiendala horizontalmente,
-Y
-.
1-
:
a=
Outdoor antenna
Antena exterior
~$’b%J%%
-—-— ———
3
T
lr FM/75Q b
h J
+ *
PAL socket connector (female)
Conector de normas PAL
(hembra)
PAL%13Z
(EI)
b
Note on the FM feeder antenna Nota sobre la antena interior de FM I%R%FMIWl!lWX$%
IDonot bring the ends near metal objects or curtain No acerque Ios extremes a objetos metalicos ni a ~&~*il#&gfi*~$jJ*R&f g#@jl.o
rails. rieles de cortinas.
lNotes on the AM (MW/LW) IOODantenna Notas sobre Iaconexion de la antena de cuadro M155AM(MW/LW)HWKX%4
. .
u Do not unwind the looped antenna wire. de AM (MW/LW) ● i#~*i@y~tix*o
I} Do not bring the loop antenna near the turntable ● No desbobine el conductor en forma de cuadro
system or CD player, or close to the AC cord or de la antena.
● ;~@j$~fjx.$$&$@g& agfDg&E2fi/TL%j$$
sDeaker cords. since noise will be picked up. ● No acerque la antena de cuadro al giradiscos, al EW%E4%%%$R!❑F@-5 Ifip%wo
reproductor de discos compactos, al cable de
alimentacion de CA, ni a Ios cables de Ios
altavoces, porque podria captar ruido.
11
1 CLOCK
~
b
Within 4 seconds, go to step 2.
Dentro de 4 segundos, siga al paso 2.
7=4 W$l!lmw%% 2 %%%.
o
Do
SET
b
2
5 Set the minutes.
Ajuste Ios minutes.
3 Set the hour.
Ajuste la hors.
6 Set the seconds.
Ajuste Ios segundos.
Ww!$%
u
Do
SET
b
Clock starts from 00 second
El reloj inicia su funcionamiento de 00.
EOOWR7%%13%=.
12
To set the time exactly
Press the SET button in step 6 to starl the clock at
the desired point, as indicated by another clock or
time signal from an external time source.
To display the clock while the power is on
Press the CLOCK button. The clock is displayed
for 4 seconds.
During recording or dubbing, the clock is not dis-
played even if the button is pressed.
To switch the time display
The time display is factory-set to the 12-hour stan-
dard. When switching to the 24-hour standard,
press the POWER button while pressing the CLOCK
button. Repeat the same procedure to restore the
12-hour standard.
In case of power failure
● for less than about 24 hours, the clock stops
during the failure.
Only the current time setting is needed.
● for more! than about 24 hours, setting of the
current time, station presetting and timer setting
are neecled.
Note
● The current time cannot be set with the remote
control.
● While setting the current time, the on-timer is not
activated when the specified time is displayed.
Para ajustar exactamente la hors
Presione el boton SET en el paso 6 para poner en
funcionamiento el reloj en el punto deseado,
indicado por otro reloj o la sefial horaria de de una
fuente externa.
Para visualizer el reloj cuando el sistema esta
activado
Presione el boton CLOCK. El reloj se visualiza
por 4 segundos.
Durante la grabacion o duplication, el reloj no
se visualizara aunque se presione el boton.
Para cambiar la visualization de la hors
La visualization de la hors ha sido ajustada en la
fabrica al sistema de 12 horas. Para cambiarla al
sistema de 24 horas, presione el bot6n POWER
manteninedo pulsado el boton CLOCK. Paravolver
al sistema de 12 horas, repita el mismo
procedimiento.
En caso de Corte del suministro electrico
.
.
si el torte ha durado menos de unas 24 horas,
el reloj se habra parado.
Solamente necesitara poner en hors el reloj.
si el torte ha durado mas de unas 24 horas,
necesitara poner en hors el reloj, memorizar Ias
emisoras, y programar el temporizador.
Nota
. La hors no puede ajustarse con el control remoto.
● Durante la puesta en hors, el temporizador no
se activara cuando se visualice la hors
especificada.
● mH2%lEEwm%
Wfw?lo
13
•1 To adjust the volume
TO kICE!aS!S the volume, turn the VOLUME control
clockwise.
To decrease the volume, turn the VOLUME control
counterclockwise.
❑ For louder deep bass
Press the T-BASS button repeatedly and select
one of the four levels for louder deep bass, or off
position to your preference.
Normally set to the second level.
❑ For clear and vivid high-definition
sound - BBE system
The two main causes of sound distortion are the
deterioration of the higher harmonics and improper
phase characteristics, The BBE system compen-
sates for these causes of distortion to produce
clear, high-definition sound reproduction closer to
that of the original source,
Press the BBE button repeatedly and select one of
the four levels, or off position to your preference.
la Para ajustar el volumen Ela31wwtiJ*s3
Para aumentar et volumen, gire et control VOL- %?%fiufiM&- Eif7i)jEK$VOLUMEJ4%
IJ~$$.
UME hacia la derecha.
Para disminuirlo, girelo hacia la izquierda.
~3W%f&tSF&,
FiffdE$@/OLUME&%IJ
j&$$.
El ❑I%i%wimfi%?m%
Para graves profundos
Presione et boton T-BASS repetidamente y
FZE%EEET-BASSW& %% 5 f!tl?$WZ-LJ
seleccione uno de Ios cuatro niveles FMFWHFJffk%, RtF&$&&J~fi, ~~offj~~o
de graves. Normalmente, ajuste al segundo nivel. i&%ifg&g3 2 ~+~o
ElPara un sonido de alta defmlclon,
. . . .
nitido y vivido - Sistema BBE ❑%%%~~&&W6%fkhf&@ - BBE%%t
Las dos causas principals de la distortion del &%* Eb5tifD*%EmRR7A;MEPg% fLm
sonido son el deterioro de Ias armonicas altas y Ias ZGf&%FJtH4~&l$o BBE%fjM?&E!!X%@
YJRE{j=
inadecuada~ caracterfsticas de fase. El sistema
BBE compensa estas causas de distortion para
mfsW&E’R4rlF7 73’Rii?IEErqaaEfglblmwmR
*&}J+
o
produciruna reproduction sonorade altadefinicion
casi igual a la fuente original, Presione el boton EZL’Z$W52BBEW3, %% 4 @F%WZ-, ELE3
BBE repetidamente y seleccione uno de Ios cuatro E%
MYJSX, EmoffilEo
niveles.
14
❑Selecting a factory-preset equaliza-
•I
Selecciondeuna curvadeecualizacion
tion curve preajustada en fabrica ❑*%mw*it5w#$@E4%
You can enjoy music with 3 different equaliza- Usted podradisfrutarde musicacon 3diferentes ?KmRH211mmz7R=wbq:3 M7Hfq%wti%z
tion curves preset at the factory, curvas de ecualizacion preajustadas en fabrica. @#.
*
Select an equalization mode. Seleccione el modo de ecualizacion deseado. iWW$JBlf%o
ROCK POP CLASSIC
(e.g.)/ (Ejemplo) / ({JO) ROCK
‘F ~’: 4 : - ‘
~: ~,1,,;lII:: ,.:,.’..”: ;,:::; ’:;:;;;:;;~;,;::”; ~ _ _ + ~:
“ ““:iq’f=’l%lf””t: : :; ““ ‘ -{ ‘“ :
y:h ~, f,”f ,:pt,;:’ :: ‘:. ~
,’ - - ,:
Preset equalization curve is displayed,
Se visualiza la curva de ecualizacion prefijada,
R%Xti?%ltifrt%f%i%%i.
To cancel the selected mode Para cancelar el modo seleccionado m~lWf@%*
Press the selected button twice. Presione dos veces el boton seleccionado. %EZlK+Wz$il%2Ao
—.
To select with the remote control Para seleccionar con el control remoto mi+l+m%+iRt2
Press it repeatedly. Presionelo repetidamente. ZE?EWEWLE2H0
GEQ
7!? r+p”’+c’’ss’c+%’r-l
—-— .——
ROCK: Powerful sound emphasizing treble and ROCK: Sonido potente con Iosgraves y agudos ROCK
bass enfatizados
POP:
POP:
More presence of vocals and midrange POP: Mas presencia de Ios sonidos vocales
CLASSIC: Sound enriched with heavy bass and y de la gama media
CLASSIC
fine treble CLASSIC: Sonido enriquecido con graves
potentes y agudos fines
About preset sound quality Cualidad acustica preajustada M%*5Q7’R%
$~~%jJ bb”~=, ;!$~~. &&&
When recording Cuando grabe $$79%
The VOLIJME control, BBE button, GRAPHIC El control VOLUME, el boton BBE, Ios botones
EQUALIZER buttons, and T-BASS button have no
VOLUME. BBEWQt. GRAPHIC EQUAL-
GRAPHIC EQUALIZER, y el boton T-BASS no
effect. tendran efecto sobre la grabacion.
IZER&&kT-BASS#&Ti& {’F%.
Headphone use Utilization de auriculares
?3@!t=%%.Z@M
Connect headphones to the PHONES jack. Conecte Ios auriculares a la toma PHONES.
RBR@3%klEiAPH01fES%TLo
To mute the sound temporarily
%%??3BR%5$?3
Para silenciar temporalmente el sonido
Press the MUTE button of the remote control. The Presione el boton MUTE del control remoto.
&EH@&JMLJTEHL !71WWH+JWR!
indicator of the function button blinks. To restore Parpadea el indicador del boton de funcion. Para N’%%.%%%’IXE%?3, RIFWH2!%W41L
the sound, press the button again. restablecer el sonido, presione nuevamente e!
mismo boton.
15
m--
(?
wOpEN’cLOsE
t?
Total number of tracks and pl~ying time
.umero total de Ias canciones y tiempo de
reproduction
EilfB 2M%WW%EORWS
3 PLAY/DIRECTION
9
Qb
Play begins.
Inicia la reproduction
EM=Fl?&
Track number being played and elapsed play-
ing time
El numero de la cancion en reproduction y el
tiempo transcurrido
w El%kE%mw%w%, *R7RW’%HKJRM.
16
To stop play
Press the M button.
To pause
Press the Iil button.
To resume play, press the II button again.
To play an 8cm CD
Load a disc onto the inner circle of the tray.
Note on the display window
If the disc includes more than 17 tracks, the track
numbers after 17 are not displayed.
To check the remaining time
Press the DISPLAY button during playback, The
amount of time remaining until all tracks finish
playing is disp;ayed.
To resume the play time display, press the DIS-
PLAY button again.
If a dirty disc is used
The disc may not play normally. (It may stop, the
search for a track may take longer, etc.)
In this case, press the ❑ STOP button to stop play,
and take out the disc. Then wipe it with a cleaning
cloth.
A disc with a major flaw will not play normally either.
Notes
● Do not place more than one compact disc on the
disc tray at “the same time.
c If, during CD play, the video image of a nearby
television is distorted, or if static is heard from a
nearby radio, please move this unit further away
from the affected television or radio.
Para cesar la reproduction
Presione el boton ■ ,
Para realizar una pausa
Presione el bot6n Il.
Para reanudar la reproduction, vuelva a presionar
el boton.
Pars reproducer un disco compacto de 8 cm
Coloquelo en el circulo interior de la bandeja.
Nota aobre la ventanilla visualizadora
Si ei disco contiene mas de 17 canciones, no se
visualizaran 10s ntimeros posteriors a 17.
Para comprobar el tiempo restsnte
Presione el boton DISPLAY durante la
reproduction. Se visualizara el tiempo de
reproducci6n restante hasta el final del disco.
Para reanudar la visualization del tiempo de
reproduction, vuelva a presionar el boton DIS-
PLAY.
En caso de un disco sucio
Ut7disco sucio puede que no se reproduzca
normalmente. (Puede detenerse la reproduction,
demerara mucho para buscar una cancion, etc.)
En este case, interrumpa la reproduction
presionando el boton de parada ~ STOP, saque
el disco y l~mpielo con el pailo de Iimpieza. El disco
con una rayadura grande puede tambien
reproducirse anormalmente.
?5m%!=wi
mm 9 E&It.
mismo. %EwF&KWAz.
Si, durante la reproduction de un disco
compacto, Ias imageries de untelevisorcercano
sufren distortion, o si se oyen estaticos en una
radio cercana, aleje el eistemadel televisor del
aparato de radio efectado.
DOWN
[*]
b
Keep it pressed.
Mantenerlo presionado.
–EE52
Togo back: Keep the + button pressed. Para retroceder: Mantenga presionado et bot6n
Togo ahead: Keep the - button pressed.
%%W21E31
: EXR+ w%.
+,
Release the button when you reach the point in the Para avanzat Mantenga presionado el boton B.
ZSl=lf% : k%
f%w+M&
track you are looking for. Suelte el boton cuando alcance el punto deseado. &31JE?fiFfix&i%Jw B %fWatl#&
DOWN Press it once.
[*]
Presionelo una vez
+3T-YK0
b
To find a previous track
By pressing the 4 button once during play, the
CD will return to the beginning of the current track.
If the button is pressed repeatedly before play
starts, the CD will return to the previous track(s).
To skip tracks
By pressing the* button once, the CD will move
to the beginning of the next track.
If the button is pressed repeatedly, the CD will
move in succession to the following tracks.
Note
During random play, the beginning of the previous
track cannot be searched for by pressing the+
button.
Para buscar una cancion anterior
Si presiona una vez el bot6n < durante la
reproduction, el disco compacto volvera al
comienzo de la cancion actual.
Si 10presiona repetidamenteantes de que se inicie
la reproduction, el disco compacto volvera al
comienzo de canciones anteriores.
Para buacar una canci6n posterior
Si presiona una vez el boton ~ durante la
reproduction, el disco compacto avanzara hasta
el comienzo de la cancion siguiente.
Si 10 presiona repetidamente antes, el disco
compacto avanzara sucesivamente hasta el
comienzo de canciones posteriors.
Nota
Durante la reoroduccion aleatoria no sera ~osible
buscar el comienzo de
presionando el boton +.
la cancion a’nterior
18
1
Izm
7!?
To check the programmed tracks
2 Select the desired tracks.
Seleccione Ias canciones que desee.
imHEim-!Jla lao -
3
Press the DOWN (+) or UP (-) button re-
peatedly during the stop mode. The track number
and the program number are displayed in pro-
grammed order.
To cancel programmed play
Press the ■ STOP button during the stop mode, or
press the 01’EN/CLOSE button.
To change Ithe program
After canceling the programmed play, program
the tracks a{]ain.
If the disc includes more than 17 tracks
Tracks after the 17th can be programmed, but their
track numbers are not displayed in the music
calendar.
Note
While the sleep function is activated, program
operation is impossible.
Para comprobar Ias canciones programadas
Presione el bot6n DOWN (44) o UP (-)
repetidamente durante el modo de parada. El
ntimero de canciones y el ntimero de programa se
visualizaran en el orden programado.
Para cancelar la reproduction programada
Presione el boton ■ STOP durante el modo de
parada o el boton OPEN/CLOSE.
Para cambiar el programa
Despues de cancelar la reproducci6n programada,
programe nuevamente Ias canciones.
‘d
&mwiQEi
E%JE%5W$EE%R!EDOWN (+4) m
(*) wao M El
?mmmww%wRti*o
Hwmw%l
W%kfi5WWEE ❑ STOP&Mfk,
:N23W
!EOPEN/CLOSE#&.
wRw%%17BJlf%!YJ!$kl
El, {Em El$w%f%w%
Si el disco contiene mas de 17 canciones
a~% ElE*RR%.
Pueden programarse Ias canciones posteriors a
la 17a., pero sus ntimeros no se visualizaran en el %
calendario musical. ‘i%f@t~J&@d@, ~~tik&fi&.%*{+0
Nota
Durante la activation de la funcion de
cronodesconectador, sera imposible la operation
del programa.
19
—
—
To cancel random play Para cancelar la reproduction aleatoria
Press the RANDOM button so that “RANDOM” in
mmlXt%7&Y’U%*m-4$zSl El
Presione el boton RANDOM de forma que “RAN-
the display goes out.
Z%Wi# ElZ&3%%, #/iERANDOMWf&
DOW desaparezca del visualizador.
To cancel repeat play Para cancelar la reproduction repetida EZ$HEE+X61?5
Press the REPEAT buttonso that “REPEA~ in the Presione el boton REPEAT de manera que se W!EfREPEAT#@, iXlI!kR5RliKf’’REPEAT”
display goes out. apague la visualization “REPEAT”.
W%.
Repeat play during programmed play Reproduction repetida durante la funcion de
Press the REPEAT button during programmed
&@@%k?%&+E,%3J@3%f2E?iEEZti73
reproduction programada.
play so that “REPEA~ is displayed. Repeat play Presioneel boton REPEAT durante la reproduction
&%*&g$&%tiS%gBREPEATa&,
will be performed, programada de manera que se visualice “RE- ftif7REPEAT’’Wfitimo
mmmmka.
PEAT”. Se realizara la reproduction repetida.
20
{ . . .
-.
.
-1
,’
2
t
II o
Cp
TAF’f:/DECt( 1/2
2
To stop play
Press the ■ button.
To pause (deck 2 only)
Press the II button.
-.
To resume play, press the II button again.
To change play direction
During play or pause, press the 4 ➤button.
Usable tapes
Normal (type I), CrOZ (Type II) or metal (type IV)
tapes can be played.
The type of the tape is detected automatically
when you insert the tape.
Para cesar la reproduction
Presione el boton H.
Para realizar una pausa (deck 2 solamente)
Presione el boton Il. Para reanudar la
reproduction, vuelva a presionar el boton IB.
Para cambiar el sentido de reproduction
Durante la reproduction o el modo de pausa,
presione el boton < F.
Cintas utilizable
Podran reproducirse cintas de tipo normal (tipo I),
CrOz (tipo II), ode metal (tipo IV).
El tipo de cinta se detectara automaticamente
cuando inserte un casete.
3
PLAY/DIRECTION
9
QD
@:Forward side :~:p Reverse side
Cara frontal Cara posterior
WiW *KIM
21
When listening to a tape recorded with DOLBY
NR
Press the DOLBY NR button to turn on the “no NR”
indicator on the display window.
For Dolby NR processed tape:
Turn on the indicator.
For a tape recorded without Dolby NR system:
Turn off the indicator.
To select the reverse mode (deck 2 only)
Press the REV MODE button until the desired
mode indicators are turned on.
Selected deck number
Wmero del deck seleccionado
-J
W*X%H%%W%
E.g.) The forward side of deck2 will be played backwhen
the PLAY button is pressed.
Ejemplo) La cara de avarice del deck 2 se reproducira
al presionar el boton PLAY.
@J: ?i&?EPLAY#QtU%
%W42 KIFJWIWHk
n.
To s;bct the deck to be played back when
tapes are inserted in both decks
Paraescuchar una cintagrabadaconel sistema
de reduccion de ruido Dolby
Presione el boton DOLBY NR a fin de que se
encienda el indicador “no NW en la ventanilla
visualizadora.
Para una cinta grabada con el sistema de
reduccion de ruido Dolby:
Haga que se encienda el indicador.
Para una cinta grabada sin el sistema de
reduccion de ruido Dolby:
Haga que se apague el indicador.
En el deck 1 Ias dos caras del casete se
reproduciran una vez,
Para bobinar rapidamente la cinta
Durante el modo de parada, presione el boton +
o * y despues el boton ■ a fin de parar el
bobinado.
Si inicia la reproduction desde la cara poste-
rior
En el deck 1, la cinta se parara siempre cuando se
haya reproducido una vez la cara posterior.
En el deck 2, si ha seleccionado ~), la cinta se
parara cuando se haya reproducido una vez la
cara posterior,
Nota
Es posible que se oiga ruido si hay un televisor
encendido. En tal caso apague el televisor o
separelo de este sistema.
Para comprobar el deck y la cara de
reproduction de la cinta durante el modo de
parada
La ventanilla visualizadora muestra el deck y la
cara seleccionados para la reproduction.
Consulte la figura en la columns de ingles.
Para seleccionarel decks reproducirse cuando
Ias cintas estan insertadas en ambos decks.
Each time it is pressed, the deck number changes. Cada vez que presione, cambia el numero del
Otherwise, the deck which was closed last is
@7AwEl!kR$E, Z%&Rti!%E!PE&%, ?3Ru,
deck. De 10contrario, se selecciona el deck que se
selected. selecciono tiltimo.
JM%%%3J%?W%91W5$H%
22
Press ~ or + during playback, referring to the
following table.
Note
.
Searching fcr the beginning of a track cannot be
correctly carried out on with the following tapes:
● A tape with a blank of less than 4 seconds
● A tape with a noisy blank
● A tape with long low-level sections
● A tape of low recording level
Presione * o < durante la reproduction,
consultando la tabla siguiente.
l!=z!l=kl=l
PMY,o,REcT,ON
lml’”l+- 1
I I I I I
23
o
9
TAPEIDEcK 112
2 3 Select 2.
Seleccione 3-
REV MODE
7!7
4
PLAY/DIRECTION
+!/
UD
Press repeatedly.
Presione repetidamente.
3ZTZE&#Z’$&
To select the deck to be played back first Para saleccionar el deck que debe reproducer BEHHWJH!31H%WE0
primero
Each time it is pressed, the deck number changes. Cada vez que presione, cambia el nbmero del
Otherwise, the deck which was closed last is se-
%VA&EItk?Mt, %%%#@lW&41?&t, %FOJ,
deck. De 10contrario, se selecciona el deck que se
lM%W%FJz?%%i%@53Wgo
Iected. selecciono tiitimo.
24
1 Select a band.
Seleccione la banda.
Wiw%
o
2 Extinguish the preset number.
Borre el numero prefijado.
u
Preset number
Numero prefijado
TEH%%W%
To search for a station quickly (Auto ssarch)
Press the DOWN (+) or UP (~) button for 1 to
2 seconds, and a station is searched for automati-
cally. Wher a station is found, searching stops
automatically. To stop it manually, press either the
DOWN (441) or UP (M) button once.
The searchil-lg may not stop at a station with a very
weak signal.
If the FM slerso broadcast signal is weak.
Press the Flfl MODE button to extinguish “AUTO
in the display. Background noise will be reduced
although the broadcast becomes monaural.
To change ths AM (MW) tuning interval
The AM (MW) tuning interval of the LH, U and C
models is factory-set to 10kHz, and that of the HE,
E and K models to 9kHz.
If you use ttm unit where the frequency allocation
system is dilferent from the preset one, press the
POWER button to turn off the power. Then, while
pressing the TUNER/BAND button press the
POWER buiton. To reset the interval, repeat this
procedure.
Para buscar rapidamente una emisora
(Btisqueda automatic)
Presione el boton DOWN (~) o UP (~) durante
102 segundos para buscar automaticamente una
emisora. Sise encuentra la emisora, la b(rsqueda
cesara automaticamente. Para cesarla
manualmente, presione una vez e boton DOWN
(+) o UP (-). Es posibleque no puedabuscarse
una emisora con una serial muy debil.
Si la sefial de rediodifusion de FM stereo es
debil
Presione el boton FM MODE para que desaparezca
“AUTO del visualizador. El ruido de fondo se
reducira, pero la recepcion sera monoaural.
Para cambiar SI intervalo de sintonia de AM
(MW)
El intervalo desintoniade AM (MW) de Ios modelos
LH, U v C esta aiustado en fabrica a 10kHz v el de
los’m~delos HE; E y K esta ajustado a 9kHz. Si
utiliza esta unidad donde el sistetna de aeignaci6n
de frecuencia es diferente del preestablecido,
presione et boton POWER para desconectar la
alimentacion. Luego de esto, mientras mantiene
presionado el boton TUNER/BAND, oprima el
boton POWER. Para reponer el intervalo, repita
este procedimiento.
3 Select a station.
Seleccione una emisoram
W5aMo
DOWN LJP
25
D_
C-J
1
Select a band and station.
Seleccione la banda y la
emisora.
iFl!&!%S@Uts*o
+
+5+
TUNEWBAND
Q
u
Extinguish preset number.
Haga que desaparezca el numero de
memorization.
Preset numb~r.
Ntimero de memorization.
TFGlq%??i%
m
2 Select a preset number
(1 to 32).
Seleccione un numero de
memorization (1 a 32).
i&iWW!’l%H& (1=32)
SET
b
b
Note Nota
The remote control cannot be used for preset- EI control remoto no puede utilizarse para la
ting. memorization.
26
3 Memorize the station.
Memorice la emisora.
%21WIS*.
o
no
SET
b
4 Repeat steps 1 to 3.
Rapita Ios pasos 1 a 3.
ZH51Z3*!S!0
.
1
—
r
Select a band.
Seleccione la banda.
i2iE%Jk!%
o
v
TUNER/BAND
2
PRESET
To select a preset number
When the DOWN (+) or UP (-) button is
pressed repeatedly, you can search for the
manually preset and factory-set* stations, only in
the band which is selected in step 1.
Example) When you preset three AM (MW)
stations to numbers 1 to 3, the preset numbers
are searched as following in the AM (MW) band.
1+2+3+25+26+27+28-+29
To receive a Stiition of the other bands, first
change the band by pressing the TUNER/BAND
button.
‘Factory-set stations
FM: Number 1 to 24
AM/MW: Number 25 to 29
LW (E, K models only): Number 30 to 32
Para seleccionar un ntimero momorizado
Presionando el boton DOWN (44) o UP (*),
usted podra buscar manualmente Ias emisoras
memorizadas y preajustadas en fabrica*, solo
en la banda seleccionada en el paso 1.
Ejemplo) Cuando usted memorice tres emisoras
a Ios numeros 1 al 3, Ios ntimeros memorizados
son buscados como sigue en la banda AM (MW)
1+2+3+25+26-+27+28+29
Para sintonizar una emisora de otras bandas,
cambie primero la banda presionando el boton
TUNER/BAND.
*Emisoras preajustadas en fabrica
FM: Numero 1 a 24
AMIMW: Ntimero 25 a 29
LW (modelos E, K solamente): Ntimero 30 a 32
3 Select a preset number.
Seleccione el ntimero de
memorization deseado.
i!.wiw=!w~~mo
27
When recording from a CD or a tape, see also the
pages after 32.
To stop recording
Press the E button.
To pause recording
Press the II button.
To resume recording, press the II button again.
To start recording with the remote control
First press the REC button, and then press the
4 ● (play) bu{ton within 2 seconds.
Monitoring
During recording, the output volume and tone of
the speakers or headphones maybe freely varied
without affecting the level of the recording.
Usable tapes
Normal (type I) and CrOz(type II) tapes can be
recorded on.
The type of the tape is detected automatically
when you inserf it.
To erase a recording
It
is possible to create a blank tape by erasing a
recording.
1 Press the TAPE button,
2 Insert the tape you want to erase into deck 2.
3 Set the reverse mode and the recording direc-
tion.
4 Press the VIDEO/AUX button. (Turn off the
power of the external equipment connected to
the VIDEO/AUX jack.)
5 Press the RECORD button.
Note
When a tape without an erasure prevention tab is
inserted, the dubbing operation will not begin.
Para grabar de un disco compacto o una cinta,
Consulte Ias paginas posteriors a 32,
Para cesar la grabacion
Presione el bottm H
Para realizar una pausa en la grabacion
Presione el boton II
Para reanudar la grabacion, vuelva a presionar el
boton Il.
Para iniciar la grabacibn con el control remoto
Presione primero el bot6n REC, y Iuego oprima el
boton < ➤(reproduction) poraproximadamente 2
segundos.
Monitoreo
Durante la grabacion, el volumen y el tono de
salida de Ios altavoces o auriculares pueden
cambiarse sin afectar el nivel de grabacion.
Cintas utilizable
Para grabar podra emplear cintas de tipo normal
(tipo I) y CrC)z (tipo 11),
El tipo de cinta se detectara autom~ticamente
cuando inserte un casete.
A.
.
.——*
1
I
“L
~:
—
—,
~
~:
_.#:
.—.—
.
4 :Selecl
:Selecl
Ew9$ii
o
L
—— .
TAPE/DEcK
T
—,—,
Es posible crear una cinta en blanco borrando una gtJ~B~o
rmahaci6n. 1
z-
1
2
3
4
5
Presione el bot6n TAPE. z?W31tH%f
Irlserte M.cinta que desea borrar en el deck 2.
2
#*@m&&.
Fije el modo de inversion y la direccion de 3
grabacidrr. %%!%7%%% 4
PresionC! el boton VIDEO/AUX, (Desconecte la
%%311%flto
alimentacion del equipo externo conectado a la
toma VIDEO/AUX.) %X’lzfi$fia, I%lZ!2-%t I17Z%E.
Presione el boton RECORD.
G2J%%*%%%M%*
5
E*
29
@ To record with Dolby noise reduction
system
The Dolby Noise Reduction system reduces tape
hiss and noise.
Press the DOLBY NR button to turn on the “no NW
indicator on the display.
For recording with DOLBY NR:
Turn on the indicator,
For recording without DOLBY NR system:
Turn off the indicator.
@ To select the reverse mode
Press the REV MODE button until the desired
mode indicators are turned on,
When you record on both sides, be sure to record
on the front side first. Recording automatically
stops after the reverse side recording is com-
pleted, even if the REV MODE button is set to CZ>.
To insert a 4-second blank space during re-
cording
Press the RECORD/REC MUTE button during the
recording or recording pause mode.
The red indicator blinks and incoming signals will
not be recorded on the tape, then a 4-second blank
space will be inserted.
4 seconds after the RECORD/REC MUTE button
is pressed, the cassette deck will automatically
enter the recording pause mode.
To resume recording, press the II button.
For a blsnk space of less than 4 seconds
After pressing the RECORD/REC MUTE button,
quickly press it again while the red indicator is
blinking and the recording will restart.
For a blank space of more than 4 seconds
After deck 2 enters the recording pause mode,
press the RECORD/REC MUTE button again.
Each time this button is pressed, a 4-second blank
space is added.
Note
If squealing sounds (beating) occur when record-
ing an AM(MW), LW broadcast, change the FM
MODE button to a different position, so as to
eliminate the beat noise.
By pressing the buffon repeatedly, the dot light is
on and off in turn in the display window.
30
@ Para grabar con el sistema de reduccion de
ruido Dolby
El sistema de reduccion de ruido Dolby reduce el
siseo y el ruido de la cinta.
Presione el boton DOLBY NR de forma que se
encienda indicador “00 NIT’ en el visualizador.
Para grabar con el sistema de reduccir% de
ruido Dolby:
Haga que se encienda el indicador.
Para grabar sin el sistema de reducci6n de ruido
Dolby:
Haga que se apague el indicador.
@ Para aeleccionar el modo de ionveraion
Presione el boton REV MODE hasta que se
enciendan Ios indicadores de modo deseados,
Nota
Para grabar en ambas caras, cerciorese de
comenzar por la frontal. La grabaci6n se parara
autom&icamente despues de haber finalizado la
cara posterior, inclusoaunqueel boton REV MODE
este en (=).
Para insertar un eapacio en blanco de 4
segundos durante la grabacion
Presione el boton RECORD/REC MUTE durante
la grabacir% o en el modo de grabaci6n en pausa.
El indicador rojo parpadeard, y Ias sefiales de
entrada no se grabaran en la cinta, y se insertara
un espacio en blanco de 4 segundos.
4 segundos despues de haber presionado el boton
RECORD/REC MUTE, el deck entrara
autom~ticamente en el modo de grabacitm en
pausa.
Para reanudar la grabacion, presione el boton Il.
Para dejar espacios en blanco de menos de 4
aegundoa
Despues de haber presionado el boton RECORD/
REC MUTE, vuelva a presionarlo rapidamente
mientras el indicador rojo este parpadeando, y se
reanudara la grabacion.
Para dejar un espacio en blsnco de mas de 4
segundos
Despuesdeque el deck2 hayaentrado en el modo
de grabacion en pausa, presione repetidamente el
boton RECORD/REC MUTE. Cada vez que 10
presione, se afiadira un espacio en blanco de 4
segundos.
Nota
Sise escuchan silbidos (batido) cuando se graban
programas de AM (MW), LW, cambie el boton FM
MODE a una position diferente para eliminartales
ruidos.
Presionando este boton repefidamente, la Iuz de
punto se enciende y se apaga en la ventanilla
visualizadora.
lfl~
[gEl Side A
❑
Cara A
AEd
~o
‘;*J (
e
@
~=
. ‘}
 &> ,
Tab for side A Detection slot
Lengueta para lacara A Ranura de deteccion
ARiMWFWW’ M’MJM
,— . .4
Cassette tape notes
Tape slaclk ❑
Check ancl tighten slack tape before use with a
pencil or similar tool. Slack tape may possibly
break or gc!t jammed in the mechanism.
C-1 20 tapt!
C-1 20 tapf? is extremely thin and easily deformed
or clamaged. It is not recommended for use in this
unit.
To prevent accidental erasure ❑
Use a screwdriver or other pointed tool to break off
the plastic tabs.
Reuse ~]
Cover the tab openings with cellophane tape.
● Take care not to cover the CrOz tape detection
slot when covering the tab openings.
Notas sobre Ias cintas de casete
Cinta floja ❑
Compruebe y tense la cinta usando un Iapiz o
herramienta similar. La cinta cuando esta floja
puede romperse o atascarse en el mecanismo.
Cinta C-120
La cinta C-120 es muy fina y se deforms o daha
con facilidad. No se recomienda para su empleo
en este aparato.
Para evitar borradoa accidentals ❑
Emplee un destornilladoro herramienta puntiaguda
para romper Ias Ienguetas de plastico.
Para volver a grabar ❑
Cubra Ios orificios de Ias Ienguetas con cinta
adhesiva.
● Tengacuidadode nocubrirla ranuradedetecci6n
de cintas CrOz cuando tape Ias aberturas de Ias
pestahas.
31
1
0
v
TAPE/DEcK 1/2
2
For playback For recording
Para reproduction Para grabacion
EC*FR $Ram ,
3 Start dubbing.
Inicie la duplication.
WfHm&
SYNCHRO DUBBING
as
NORMAL HIGH
b -c)
First the tapes are rewound to the beginning of
their forward sides, and then recording starts,
Se rebobinan Ias Cintas al comlenzo de SUS
caras de avarice y Iuego inicia la grabacion.
E%, #W&WHWKE&%W4uFll%lE% %%$%
Er#tio
32
To stop dubbing
Press the 11~
button.
About same tape side dubbing (STSD)
This feature allows both sides of the dubbed tape
to match those of the original tape.
The reverse side of both tapes will start at the
same time as soon as the longer tape has been
reversed.
@ To select dubbing speed
NORMAL: For dubbing at normal speed.
HIGH: For dubbing at high speed.
No’tes on dubbing
.
.
.
.
During dubbing, only the ■ button operates.
The same Dolby NR system as used on the
recorded tape is automatically used for the tape
to be recorded on.
During dubbing, noise may be recorded on the
tape if a “TVis on. If that happens, turn off the TV
or move it away from the unit.
If the leader segment of the tape to be recorded
on is longer than that of the tape to be played
back, recording on the reverse side may stop
midway through the program. In that case, dub
each side manually by following the next pro-
cedure.
To dub some part of the original tape manually
Press the IRECORD button instead of one of the
SYNCHRO DUBBING buttons. The tapes are not
rewound, and dubbing starts immediately.
● Make sure that “TAPE 1” is displayed. If not,
dubbing will not start.
● Before dubbing, set the tape direction, and set
the reverse mode to the” ~ “ position.
Tolne adjustment during dubbing
● ‘“rhe VOLUME, T-BASS, BBE and GRAPHIC
EQUALIZER buttons do not affect the level of
the recording.
● “The output sound tone cannot be changed by
the GRAPHIC EQUALIZER buttons in the middle
of recording.
Para cesar la duplication
Presione el boton ■ .
Duplication de la mismacara del casete(STSD)
Esta funci6n Ie permitira hater que ambas caras
del casete duplicado scan identicas a Ias del
casete original.
Las cintas de Ias caras posteriors de ambos
casetes se pondran en movimiento al mismo
tiempo tan pronto como se haya invertido el
casete de mayor du raci6n.
@ Para seleccionarlavelocidad deduplicacion
NORMAL: Para duplicar a velocidad normal
HIGH: Para duplicar a gran velocidad
Notas sobre la duplication
.
.
.
●
Durante la duplication solamente funcionara el
boton ■.
Ef%&k%&B%o
En la cinta du~licada se em~leara ● %lllw%aii% El%*$*, =1’SW9%%JJR*0 B
cinta original.
Durante la duplication, es posible que se grabe
RW%ERZ2RHRWIEKI’K B VJTi&miFTmo
ruido en la cinta si hay un televisor encendido. lkkWKZllKIV’lJ FJ2J%JR,=FWE$%%E%FR%.
Cuando suceda esto, apague el televisor o
aleielo de este sistema. =FZfJ&WW&#%M%91Ns
Si ‘s1 segmento guia de la cinta que desee i%
PERECORD%4f+UiEK
tt$Z
TSYNCHRO
duplicar es mas Iargo que el de la cinta original,
la grabacion de la cara posterior puede cesar
antes de que finalice la cinta original. En tal
case, duplique cada cara manual mente
siguiendo el procedimiento que se da a
continuation.
Para duplicar manualmente alguna parte de la
cinta original
Presione ei boton RECORD en vez de unos de Ios
botones SYNCHRO DUBBING. Nose
rebobinan Ias cintas y la operation de duplication
empieza inmediatamente.
● Cerciorese de que esta visualizado “TAPE 1”.
De no estarlo, no comenzara la duplicaci6n.
● Antes de la duplication, fije la direccion de la
cinta y el modo de inversion ala position” ~ “.
wMi&%EfiamE
● VOLUME, T-BASS, BBE XlGRAPHIC
EQUALIZER %Mtt7&##&+t3 %7.
● lE&=+A@%GRAPHIC EQUALIZER%M
$%wwlw+mo
Ajuste del tono durante la duplication
● Los botones VOLUME, T-BASS, BBE y
GRAPHIC EQUALIZER no afectan el nivel de la
grabacion.
● El tono de sonido de saiida no puede cambiarse
mediante Ios botones GRAPHIC EQUALIZER
durante la grabacion.
33
n
OPEN/CLOSE
o
5 Select the reverse mode.
Seleccione el modo de inversion.
REV MODE
T
34
.
0
Q
TAPE/DEcK 1/2
o
RECORD
T
Afler play ia completed Despues de terminar la reproduction tiB&%22%
The compact disc stops, but Deck 2 is still in the El disco compacto cesa, pero el Deck2 permanece %-hfu~fiwk, W%$w%217!lEm*a3ao
recording mode. Press the STOP button to stop it. en el modo de grabaclon. Preslone el boton STOP %l!ESTOP@J%@ZZFf%k
para detenerlo.
To stop recording ML**
Press the ■ button. The playback of the compact Para cesar la grabacion
disc stops simultaneously.
%&E ■ %@. E% WE%WJMWl%4$ko
Preslone el boton ■ La reproducclon del disco
compacto cesa simultaneamente.
35
36
To check the editing contents on side B
Press the DISPLAY button.
To cancel the editing contents
Press the ■ button or the OPEN/CLOSE button.
Note on CD edit function
Use a compact disc which includes upto20tracks.
Up to t 2 tracks can be programmed for recording
each side.
Para comprobar Ias canciones a ser editadas %?i%$MBBifKI%&I%@?
en la cara B &$E3DISPLAYE&fL
Presione el boton DISPLAY.
7H%!Wi4Rwm%H
Para cancelar Ias canciones a ser editadas WKSW&&EZOPEN/CLOSE+2?$Rc
Presione el boton R o el boton OPEN/CLOSE
boton. M%CD%KWW4E
Nota sobre la funcion de edition del disco
@wlR%i20Bm
El
wm%m)+o
compscto
77Jw&!&FJ2$Kl%WFti12Em Elo
Utilice un disco compacto que contiene 20
canciones. Podran programarse hasta 12
canciones para la grabacion de cada cara.
37
1
Put the side to be recorded on first facing you.
Ponga la cara a grabarse primero enfrentada hacia
usted.
5Hww%wJ-Ei$Hrw&.
5 Selected tracks for side A
Seleccione Ias canciones
deseadas para la cara A.
E$A~&+%&! R .
Remaining time of side A
Tiempo restante de la cara A
AEijRW%JEMRH%i
!
Selected tracks
Canciones seleccionadas
Wxm El
If the total time of the selected tracks exceeds
the tape length
The “--” mark is displayed instead of the track
number and the track is canceiled.
To check the program
In the stop mode, press the DISPLAY button.
Each time it is pressed, the contents of each side
are displayed in turn.
Remainina time on the tape
To change a program
First press the ■ STOP button to cancel the pro-
gram, then reprogram the tracks.
Time on cassette tapes
Cassette tapes generally have a bit more tape than
the time indicated on their labels. When you des-
ignatethe nominal tape length in step4, you should
have a little unrecorded tape at the end.
Side A
Track numbers
Si el tiempo total de Ias canciones
seleccionadas excede la duration de la cinta
Se visuaiiza la marca “--” en vez del numero de la
canci6n y se cancela la cancion.
Para comprobar el programa
En el modode parada, presioneel bot6n DISPLAY.
Cada vez que presione este boton, se visualiza
alternadamente Ias canciones de cada cara.
Tiempo remanente en la cinta r Cara A
Total number of tr~cks
38
Numero total de ca~ciones
.
.
—. 
2 3 4 Designate the tape length.
Designe la duraci6n de la cinta.
*WWW5E0
(Remote control only)
(Solo el control remoto)
(f& FEt+%M%)
o
[;1
EDIT— PRGM
I
CD ‘~+ ‘~ ~;x~c-,,
Press once.
Presione una vez.
E2Ef-?k
Tape length of side A
Duration de la cinta de la cara A.
ATEIFW&~i%
;. ...; ~,w-.. [ :.,g U
,!”’ . . . : 1(11
01[111
~ .. ,.
,,~ *-.“z ,~ ,Fmf ~> :—-&J._ :
70,,0fk,Ah
i,,,,
6 7 Select the tracks for
8 Start recording
side B. Inicie la grabacion.
Seleccione Ias Wwwio
canciones deseadas @ Set the Dolby NR type and the reverse
para la cara B. mode.
~BTFIti%~l%Ei$ E . Seleccione el sistemade reduccion de ruido
Dolby y el modo de inversion.
‘&~Dolby NRWA2W$$KI%N,.
D
RECORD
T
L~ =
First the tape is rewound to the Ibeginning of
the forward side, and then recording starts.
Se rebobina la cinta hasta el comienzo del
Iado de avarice y Iuego inicia la grabacion.
%x, wm?m?mw4mmm, ?7w$w
iw?liio
DISPLAY
.-
En primer Iugar, presione el boton ■ STOP para “--’’&ljtbpRRfi&l, LXiZ{tw El!%1% w B BP ~%, ~-~ ■ STOP+RilLAf~RX?~E~. %f$?
cancela r el programa, luego vuelva a programar
Ias canciones.
+lWx7#o
$&S+%%
Duraci6n de la cinta de Ios cassettes 7Zi%&fi~iH, $2EDISPLAY+FH,
La cinta de Ios cassettes normalmente dura algo @l&wH*, ~ufmkg~figbflqpjao
mas que el tiempo inidcado en sus etiquetas.
Cuandc, designe la duration nominal de la cinta en
el paso 4, Ie quedara cierta cinta sin grabar al final.
‘~f~%+hb%~~~~p”q rAEd
Nbmwos de canciones
39
40
o
00
SET
(!3
DOWN
[*])
b
u
00
SET
(!3
41
Y
6 Get ready for the source.
Prepare la fuente.
W!if%%imw
o
J Listening to a disc
Escucha de un disco
J&ga~$$jug)+
@) Load a disc onto the disctray.
Coloque un disco en el receptor de disco.
#@J&R
j?G&Pgf&k.o
@ Press the CD funcbon button.
Presione el bot6n de funci6n CD.
WECD~fiWM.
o
F
CD
~ Insert a cassette tape into deck 1 or deck 2. @ Press the TAPE function button.
Inserte un casete en el deck 10 el 2. Presione el boton de funclon TAPE,
WwHw&%w$. 1 s%?%%! 20 +E!+!STAPEPI%%M
@ Set the Dolby NR and the reverse mode.
Seleccione el sistema de reduccion de ruldo
Dolby y ei modo de inversion.
%=Dolby NR%iXZW%RiZSG
o
m
TAPE/DEcK 1/2
o
A LIsJenmg to the radio
Escucha de la radio
WG%%JR?H%
a Recording from the radio
REC Grabacion de la radio
WIIEW5W
L/
@)To record from the radio, Inserl a cassette into @)Tune in to a station.
deck 2. Set the Dolby NR and the reverse Sintomce una emisora.
mode. $&3%$.
Para grabar de la radio, inserte un cassette en
el deck 2. Fije el Dolby NR y el modo de
inversion.
%RwfMw#4$w, W%MW%AX121W% 20
o
42
m
See pages 14 and 15.
Consulte Ias paginas 14 y 15.
?xx114%i215Ho
.,— .
11
7A(djust the volume and tone.
Ajuste el volumen y el tono.
~@~jgj#*~*o
.,—
(~ T~~rnthe system power off.
D(~sconecte ia a[imentaci~n del
sistema.
IEM%%l%lz%
.!—.
POWER
Q
After setting the timer
Turn the system power off. If the power is on, the
timer will not work at the preset time.
When the on-time ie reached
“SLEEP appears in the dlsplayand the sleep timer
starts to work.
The power is turned off automatically in 120 min-
utes.
To change the time
After setting has been completed, reset the time.
To check the timer-on time
Press the STANDBY button once.
Despues del ajuste del temporizador
Desconecte la alimentaclon del sistema. SI la
ahmentacion esta conectada, el temponzador no
trabajara a la hors ajustada.
Cuando Ilega la hors ajustada
Aparece “SLEEP en el visualizador y accionara el
cronodesconectador a la hors estabieclda. Se
desconecta automaticamente la alimentaclon en
120 minutes.
Para cambiar la hors
Despues de terminar el ajuste, reponga la hors.
Para comprobar la hors ajustada
Presione una vez el boton STANDBY.
To cancel the timer standby mode
Once the bmer is set, it activates every day.
To cancel it temporarily, press the STANDBY
button so that the 0 (REC) mdlcator disappears.
To restore the cancelled timer function, press the
STANDBY button so that the ~ (REC) indicator IS
displayed.
Notes
● When the timer is worked, the FM mode, stereo
or monaural, is selected according to the preset
condition.
● Thetimerdoes not work if the (~ (REC) indicator
is not displayed. If the on-time IS reached while
the power is turned on, the tlrner cannot work.
● The timer-on time cannot be set while the ~
(REC) indicator is displayed, or during record-
ing,
Para cancelar el motto de espera del
temporizadcrr
Una vez ajustado el temporizador, este acciona
cada d[a a la hors sefialada. Para cancelarlo
temporalmente, presione el boton STANDBY de
manera que desaparezca el indlicador @ (REC).
Para restablecer la funcion clel temponzador
cancelado, presione el boton STAN DBY de manera
que se visualice el indicador ~ (REC).
Notas
● Al trabajar el temporizador, el rnodo FM, estereo
o monoaural, se seleccicma segun la condicion
preestablecida,
● El temporizador no trabajara SIno esta visuahzado
el mdlcador 0 (REC). SI Ilega la hors ajustada
cuando esta c;nectada la ali&ntacion, no podra
trabajar el temporizador,
● El tempor}zador no podra ajustarse cuando el
mdlcador~ (REC) esta wsuahzado o durante la
grabacion.
mm2aww&
Bw#*Rmf&JaIHo WRttim%ia, ak%%w
WmFwJiwmfl%
wHHiw!%Ml!+?
#4’’sLEEI?’7Wi%_kfi%%, w@wwJwi
?iiIfFo =HJE+9Z1209E%ZF7 Elaml!!lio
W?wwl
aw2Em!v&wk Wi%wtEft.
wiHi3%#wff
5WESTANDBYEMf_-7A.
1
SLEEP
III
1
2 Set the time.
Programe el tiempo deseado.
Tw@w% SLEEP
-N
(’)
]
To change the time
Press the SLEEP button repeatedly until the de-
sired time is displayed.
To cancel the sleep-timer function
Press the SLEEP button repeatedly until the
“SLEEP indicator goes out.
When the SLEEP button is pressed while the
power is off
The power is turned on and the sleep timer starts
to work.
If the program source is changed while the
sleep timer is working
The sleep timer is still in effect as long as the
“SLEEP indicator is displayed.
44
Presione el boton SLEEP hasta que se visuaiice el =+R+R!&%EEP+i2& K3J7FI,W%%7 W%%%
tiempo deseado. k.
Para cancelar la funcion de cronodesconexion 3%=m%MiTSlE5i%%W’FVJflE
Presione el boton SLEEP hasta que desaparezca Z12%iHR!ESLEEPW&, iE3SJ“SLEEP “ E%%
el indicador “SLEEP.
%f%%%lko
Cuandoel boton SLEEPesta presionadocon la
alimentacion desconectada
HE%%Z%IHWE=LEEP%?*
Se conecta la alimentacion y acciona el
?&R&f%& EEllE2F$HM%fKCi’Fo
cronodesconectador.
%HHEHIEH%?i%ri’F%9H$@iS H R
Sise cambia la fuente del programa durante el P.Z’’SLEEP”%%!%F%X, FZM13~!%%~lJfl!I
trabajo del cronodesconectador ?%30
El cronodesconectador permanece activo mientras
el indicador “SLEEP se encuentre visuali.zado.
s
1[ I ~ Play the external source.
Furtciona la fuente externa.
v
VI DEO/AUX
To adjust the input level of the equipment Para ajustar et nivel de entrada del equipo
connected to the VIDEO/AUX jacks conectado a Ias tomas VIDEO/AUX.
1
2
Press the VI DEO/AUX function button and play 1 Presione el boton de funcion VIDEO/AUX y
the equipment, opere el equipo.
Turn the VIDEO/AUX INPUT LEVEL knob on 2 Gire laperillaVIDEO/AUX INPUT LEVEL situada
the rear panel until the level of the sound being
heard becomes the same as that of the other
sound sources.
To record from the other sources
1 Insert a cassette into deck 2.
Set the reverse mode, tape direction and Dolby
NR.
2 Press the VI DEO/AUX function button and play
the equipment.
3 Press the RECORD button.
en el tablero trasero hasta que el nivel del
sonido Ilegue al mismo nivel del sonido de Ias
otras fuentes sonoras.
Para grabar de Ias otras fuentea
1 Inserte un cassette en el deck 2.
Fije el modo de inversi6n, el sentido de la cinta
y Dolby NR,
2 Presione el boton de funcion VIDEO/AUX y
opere el equipo.
3 Presione el boton RECORD.
1
2
3
45
1 2
Miniplug (3.5a)
Miniclavija (3.5 mm de dia.)
W@EfZH(3.5@)
MIG
,.. : .-:
. “: ,;; . ,.-.
... -..
,“, .
,’, :’”
.-
.,
. ...=. ; .-, :
,. :,,. .: ?:,=.: --<.; .-, :
,.- . .
:-------- ... :,.:* ,:. ”
:1 -. >.,.,-’ . . . . .
.,. :,i.’”r. ,,,.. ,.. ,
:! %.y ,.; -. ... “
.
.
—
-$2
,,..’, ---
;, ‘j.
~~“’. ““
“.-. .:”.”.” .“.,.”,
.- .. .. .
. .
. . .. . . . .“. . ..”
.
.-’ -, :
,.. .
. . .
. . . . .
<., ,’ ..’ ,:. :Y..,.
.:;- ., ~. :;?,.. ~;,.,.
‘. ;:.. . . . . . . . . .
.$ ...,.,.
“.
.
. ‘- “-”
,.. .
>“----- -.
.“..,.:::;= :- ---” ..
.-...=--... :
Select the source to be mixed and play it.
Seleccione la fuente con la que desee realizar la mezcla, y
pongala en reproduction.
WW%*WJRZI%W*M*O
o 0 0 0
VI DEO/AUX I CD
b
3 Adjust the volume and tone.
Ajuste el volumen y el tono.
%EwHs%wmEJO
See pages 14 and 15.
Consulte Ias paginas 14 y 15.
Z3M11471115H0
I
4 Adjust the microphone volume.
Ajuste el volumen del microfono.
~g==~gq
MIXING PLAY
u
o
MIN ● ● MAX
I
46
To enjoy karaoke with an ordinary compact Para diafrutar del Karaoke con un disco MWEZWWMX+M3M
disc compacto ordinario
Notes on the VOCAL FADER
This function does not work correctly with the
following CDs:
~ Those with a monaural recording
o Those recorded with strong echoes
I Thoss with the vocal part recorded on the right
or Ief! side of the sound width
‘Toechothesound (NSX-330HE and NSX-A92HE
My)
:Slide the ECHO LEVEL lever toward MAX to
increase the echo.
lNotes
Notas sobre la funcion de VOCAL FADER
Esta funcirh no opera correctamente con Ios
siguientes discos compactos:
● Los discos grabados en monoaural
● Los discos grabados con fuertes ecos
● Los discos con la parte vocal grabada en el Iado
derecho e izquierdo de la anchura sonora.
Para anadir efecto de eco al sonido (Solo NSX-
330HE y NSX-A92HE)
Deslice la palanca ECHO LEVEL hacia la posici6n
MAX para aumentar el eco.
Notas
l! If a microphone is set too near the speaker, a ●
howling maybe produced. In this case, keep the
microphone away from the speaker, or decrease
the sound level.
II When not using the microphone, set the MIX- ●
ING PLAY control to MIN and remove the micro-
phone from the MIC jack.
III Do not set the microphone volume too high, by ●
observing the spectrum analyzer indication.
II For microphone mixing, it is recommended to
use a unidirectional type microphone to prevent ●
howling.
II The mixed sound cannot be recorded.
.
Si el microfono esta demasiado cerca de un
altavoz, es posible que se produzca aullido. En
este case, aleje el microfono del altavoz o
disminuya el nivel del sonido.
Cuando no vaya a emplear el microfono, ponga
el control MIXING PLAY en MIN y extraigalo de
la toma MIC.
No ajuste el nivel del microfono demasiado alto
observando la indication del analizador de
espectro.
Para la mezcla con microfono, se recomienda
emplear un microfono unidirectional a fin de
evitar el aullido.
No puede grabarse et sonido mezclado.
47
@
To clean the cabinet Para Iimpiar el exterior %fZW%#!
Use a soft cloth lightly moistened with mild deter- Emplee un pafio suave un poco humedecido en FB7AE* W8EMZM%RWTW7E$WNZ?
%M. :Wzl
gent solution. Do not use strong solvents, such as
alcohol, benzine or thinner.
Regular deck cleaning @
Clean the (recording/) playback head @ erasure
head @ (deck2 only), pinch rollers @, and cap-
stans @ regularly (every 10 hours of use) for
optimum sound quality. Use a cotton swab @
lightly moistened with cleaning fluid or denatured
alcohol,
To clean discs (@
Before playing, wipe the disc from the center out
with the cleaning cloth. After playing, store the disc
in its case,
solution de detergence poco concentrado. No
emplee solventes fuertes, como por ejemplo el
alcohol, bencina ni disolvente.
Limpieza regular del deck @
Para obtener sonido de optima calidad, Iimpie la
cabeza de (grabacion/) reproduction @, cabezas
de borrado @ (deck 2 solamente), Ios rodillos de
presion @, y Ios ejes de arrastre @con regularidad
(cada 10 horas de utilization). Emplee un palillo
de algodon @ Iigeramente humedecido en Iiquido
limPiador o en alCOhOldesnaturalizado.
Para Iimpiar discos@
Antes de la reproducci6n, frote el disco desde el
centro hacia afuera con el pario de Iimpieza.
Despu& de la reproduction guarde el disco en su
caja.
.. —.—. .. .. .
WH!M%?IJ, In%i%. 6XlI@W%R%frJ.
48
<FM section>
Frequency range
Usable sensitivity (IHF)
Alternate channel selectivity
Signal-to-noise rstio
Harmonic distortion
Frequency response
Stereo separation
Antenna
<AM (MW) section>
Frequency range
Usable sensitivity
Selectivity
Signal-to-noise ratio
Antenna
87.5 MHz to 108 MHz
1.3 pV (75 ohms) 13.2 dBf
50 dB (i400 kHz)
70 dB (STEREO), 76 dB (MONO)
0.3 % (MONO), 1 kHz
0.5 % (STEREO, L-R), 1 kFlz
30 HZ to 15 kHz (+0.5 dB, -3 dB)
33 dB at 1 kHz
75 ohms (unbalanced)
NSX-330HE, E, K, NSX-A92HE:
AM 531 (530) kHz to 1,602 (1 ,71O)
kHz
NSX-330LH, U, C, NSX-332U:
AM 530 (531) kHz to 1,710 (1,602)
kHz
350 pV/m
22 dB (9 kHz)
53dB(100 dB input)
Loop antenna
cLW section>(E and K models only)
Frequency range 144 kHz tO 290 kHz
Sensitivity 1,400 ~V/m
Antenna Loop antenna
<Timer section>
Progrsm timer On-timer, capable of free setting
Sleep timer Capable of setting in 10-minute
increments, 120 minutes maximum
<Amplifier section>
Power output NSX-330LH, HE, NSX-A92HE: 40W
+ 40W (6 ohms, T.H.D. 10% 1 kHz)
NSX-330E: 30W + 30W (6 ohms,
T.H, D. 1% lkHz)
NSX-330K: 40W + 40W (6 ohms,
T.H.D. 10% 1kHz)
30W + 30W (6 ohms, T,H.D. 1% 1
kHz)
FTC RULE (NSX-330U, C,
NSX-332U)
30 watts per channel, Min.
RMS at 6 ohms, from 65 Hz to 15
kHz, with no more than 1Y.
Total Harmonic Distortion
0.05% (15 W, 1 kHz, 6 ohms)
VI DEO/AUX: 150 mV (adjustable)
Harmonic distortion
Input sensitivity
cCassette deck section>
Track format
Frequency reeponse
Signal-to-noise ratio
Tape speed
Recording system
Erasure system
Motor
Heads
4 tracks, 2 channels
CrOz tape: 50 – 16,000 Hz
Normal tape: 50-15,000 Hz
60 dB (DOLBY NR ON, CrOz tape
peak level)
4.8 cm/sec. (17/.9ips)
AC bias
AC erase
DC servomotor x 1
Playback head x 1 (deck 1)
Recording/playback/erasure head x
1 (deck 2)
<CD player section>
Disc
Scanning method
Lseer
Rotation speed
Error correction
No. of channels
D-A conversion
Wow/flutter
Signal-to-noise ratio
Harmonic distortion
cSpeaker SX-N330>
Cabinet type
Speaker
Impedance
Music power
Output sound pressure level
Dimensions (W x H x D)
Weight
<General>
Power requirements
Power consumption
Compact disc
Non contact optical scanner (semi-
conductor laser applicabon)
Semiconductor li~ser (1 = 780 nm)
Approx. 500 rpm -200 rpm (CLV)
Cross Interleave, Reed Solomon
code
2 channels
16-bit Imear
Unmeasurable
90 dB (1 kHz, O dB)
0.05% (1 kHz, O dB)
3 way, bass reflex (Magnetism sealed
type)
130 mm (51/8in.) cone type woofer
50 mm (2 in.) cone type tweeter
20 mm (’3/16 In.) Ceramic typf? super
tweeter
6 ohms
40 w
87 dBIWlm
180 x 302,5x 200 mm
(7’/8 X 12 X 77/8 kl.)
2.6 kg (5.7 Ibs.)
NSX-330LH, HE, NSX-A92HE:
AC 120 V/220 V/240 V, swltchable
50/60 HZ
NSX-330U, C, N!3X-332U:
AC 120 V/220 V --240 V, switchab[e
50/60 Hz
NSX-330E: AC 230 V, 50 HZ
NSX-330K: AC 240 V, 50 I-Iz
NSX-330LH, HE, NSX-A92: 85 W
NSX-330/332U: 80W
NSX-330E, K: 21 OW
NSX-330C: 100W
Dimensions (W x H x D) Center unit:
Weight
Accessories
.
●
●
260 x 302,5x 329,5 mm
(10’/4 x 12 x 13 m,)
System”
620 x 302.5 x 32!3.5 mm
(24’/2xl2xl3irl)
Center unit: 7.2 kg (15.8 Ibs.)
System: 12.4 kg (27,3 Ibs.)
FM feeder antenna(1)
AM loop antenna(1)
Remote control (1)
Specifications and external appearance are subject to change without
notice due to product improvement.
Dolby noise reduction manufactured under Ilcense from Dolby Laborato-
ries Licensing Corporabon.
“DOLBY” and the double-D symbol on are trademarks of Dolby Labora-
tories Licensing Corporation.
The word “BBE and the “BBE symbol” aretrademarksof BBE Sound. Inc.
Under license from BBE sound, Inc.
Note
Please check the laws on copyright relating to recordings from discs, radio
or external tape for the country in which the machme is being used.
49
If the unit fails to perform as it is supposed to, by following this operation manual, please check it carefully in accordance with the chart below:
11
‘“*C There is no sound.
, q?
● The power cord is not connected properly.
Ill
● An incorrect function selector button is pressed.
~,
&&Bf,
m,.
~~h
- ● There is a bad connection between systems.
Ml,&
II
~.m s
a ● Excessive voltage was applied to a speaker jack,
.; * which tripped the amplifier’s voltage-protection
breaker.
There is no sound and no ● There is a shorl circuit in the speaker jack.
~a indicators are lit in the display
I● The breaker tripped because of connection to a low-
impedance speaker.
##l Sound comes from only one I ● Onespeakeris disconnected.
constant, wavelike static, I ● The antenna is not connected properly.
U!M I * The receiver is not correctlv tuned.
* The signal is too weak. -
c The system picks up outside noise.
The soun”d is distorted. = There is multipath distortion.
p,
~sl The tape does not run. ● Deck 2 is on pause.
rl
‘“? The sound is off-balance.
@
● The playback head is dirty.
,##” High sounds are too loud. ● The DOLBY NR mode is set differently from when
M%{
I the recordina was done
p
*-&j
;; There are no high sounds. ● A non-Dolby NR tape is being played back in that
m mode.
~(~g
I “ The Edavback head is dirtv.
1
Recording is impossible. * The erasure-prevention tab on the tape has been
I broken.
~~q
I ● There is an incorrect connection.
~~f I ● The recording head is dirty.
Erasure is impossible. ● The erasure head is dirty.
● The disc is incorrectly inserted.
Rmm
,.
I
] ● The disc is dirty.
Bma I
14
‘!
& j . There is condensation on the disc.
,Z, ● The player is on pause.
/,,,,,.
&& The output sound is not stereo.
J& ● The VOCAL FADER is turned on,
● Correct the connection.
● Press the function selector button to select the
correct input.
● Correct the connection.
● Disconnect the power cord, correct the condition,
including speaker connections, and connect the
power cord again.
. Disconnect the power cord, correct the condition,
including speaker connections, and connect the
power cord a~ain.
● Correct the speaker connection.
● Check the antenna connection.
● Correct the tuning.
● Install an outside antenna,
● Change the location or direction of the antenna.
● Turn the system to a different orientation.
● Move the system away from other electrical
appliances, like a TV or fluorescent lights, or move
the appliances.
● Change the orientation of the antenna.
● Replace the antenna with one that has the correct
orientation.
● Press 11and release t)ause.
● Clean the head.
● Reset DOLBY NR to the same setting as when the
recording was made.
● Turn off DOLBY NR.
● Clean the head.
c Cover the erasure-prevention hole well with tape.
● Correct the connection.
● Clean the head.
● Clean the erasure head.
● Insert the disc with the label facina uo
● Clean the disc.
● Wait about an hour and try again.
● Press 11PAUSE to release ~ause.
● Turn off the VOCAL FADER.
50
<Seccion de FM>
Gama de frecuencia 87,5 MHz a 108 MHz
Sensibilidad util (IHF) 1,3 VV (75 ohmios) 13,2 dBf
Sensibilidad de canal alternative
50 dB (+400 kHz)
Relation sehal-ruido 70 dB (STEREO), 76 dB (MONO)
Dietorsi6n armonica 0,3% (MONO) 1 kHz
0,5% (STEREO, L-R), 1 kHz
Respuesta de frecuencia 30 Hz a 15 kHz (+0,5 dB, – 3 dB)
Separation entre canales 33 dB a 1 kHz
. Antena 75 ohmios (desequllibrada)
cSeccion de AM (MW)> NSX-330HE, E, K, NSX-A92HE:
AM 531 (530) kHz a 1.602
(1 ,710) kHz
NSX-330LH, U, C, NSX-332U:
AM 530 (531) kHz a 1.710 (1.602) kHz
Sensibilidad util 350 LV/m
Salectividad 22 dB (9 kHz)
Relation sefial-ruido 53 dB (entrada de 100 dB)
Antena De cuadro
cSeccion de LW> (Solo Ios modelos E y K)
Gama de frecuencia 144 kHz a 290 kHz
Sensibilidad 1.400 pV/m
Antena De cuadro
<Seccion del temporizador>
Temporizador programmable Temporizador activado, capaz ajustarse
Iibremente
Cronodesconectador Capaz de programarse en increments de
10mmutoshastaun maximode120mmutos.
<Seccion del amplificador>
Salida de potencia NSX-330LH, HE, NSX-A92HE:
40VJ + 40W (6 ohmios, 10% de
distortion armonica total, 1 kHz)
NSX-330E: 30W + 30W (6 ohmios, 1% de
distortion armonica, 1 kHz)
NSX-330K: 40W + 40W (6 ohmios, 10% de
distortion armonica, 1 kHz)
30W + 30W (6 ohmios, 1YO de dlstorsion
arm6nica, 1 kHz)
Norma de la FTC (NSX-330U, C, NSX-332U)
30 vatios por canal, min., eficaces con no
mas del 1Y. de distortion armonica total
Distorsir5n armonica 0,05% (15 W, 1 kHz, 6 ohmlos)
Sensibilidad de entrada VIDEO/AUX: 150 mV (a]ustable)
cSeccion del deck de casetes estereo>
Formato de pistas 4 pilas, 2 canales
Respuesta de frecuencia Cinta de CrOz 50a 16.000 Hz
Cinta de normal: 50a 15.000 Hz
Reiacion seilal-ruido 60 dB (DOLBY NR ON, cinta de Cr02, nivel
de pico)
‘Velocidad de la cinta 4,8 cm/seg.
!Sistema de grabacion Polarization de CA
:Sistema de borrado Con CA
lMotor Servomotor de CC x 1
ICabezas De reproduccibn x 1 (deck 1)
De grabaci6n/reproducci6 n/borrado x 1
(deck 2)
<Seccion del reproductor de discos compactos>
Disco Compacto
Metodo de muestreo Explorador optico sin contacto
(aphcacion de laser de semiconductor)
Laser Laser de semiconductor (1 = 780 nm)
Velocidad de rotation Aprox. 500 rpm -200 rpm (CLV)
Correction de errores Intercalacloncruzada, codigo Reed Solomon
No. de canaies 2
Conversion D-A Lineai de 16 bitlos
Fluctuation y tremoio Inmensurable
Relation sefial-ruido 90 dB (1 kHz, O dB)
Distortion armonica 0,05% (1 kHz, O dB)
<Altavoces SX-N330>
Tipo de la caja acustica De 3 vias, reflectors de graves
(tipo hermetlco ai magnetlsrno)
Aitavoces De graves tipo cono de 130 mm
De agudos tipo cono de 50 mm
De super agudos tlpo ceramlco de 20 mm
impedancia 6 ohmios
Potencia musicai 40 w
Nivel de rxesion acustica de saiida
Dimensioned (an/ai/prf)
Peso
cSeccion comun>
Aiimentacion
Consumo de potencia
Dimensioned (an/ai/prf)
Peso
Accesorios
87 dBAMlm
180 x 302,5x 200 mm
2,6 kg
NSX-330LH, HE, NSX-A92HE: 120/220/
240V CA, commutable, 50/60 Hz
NSX-330U, C, NSX-3321J:
120/220 - 240V CA, conrnutable, 50/60 Hz
NSX-330E: 230V CA, 50 HZ
NSX-330K: 240V CA, 50 Hz
NSX-330LH, HE, NSX-A92: 85 W
NSX-3301332U: 80W
NSX-330E, K: 21 OW
NSX-330C: 100W
Unidad centrai:
260 x 302,5x 329,5 mm
Sistema:
620 x 302,5x 329,5 mm
Unidad centrai: 7,2 kg
.5kstema: 12,4 kg
Antena interior de FM (1)
Antena de cuadro de AM (1)
Control remoto (1)
● Las especificaciones y el aspecto externo estan sujetos a cambio sin
previo aviso, debido a mejoras del producto.
c Reducclon de ruido Dolby fabricado bajo iicencia de [)olby Laboratories
Licensing Corporation. Doiby y el simboio de la D doble no son marcas
de Dolby Laboratories Licensing Corporation.
● La paiabra “BBE y ei “s~mbolo BBE son marcas comerciaies de BBE
Sound, Inc.
Nota
Compruebe, porfavor, Ias Ieyes relativas a la grabacion de discos, la radio,
o casetes del pais en el que vaya a emplear el sistema.
51
Si el sistema no funciona como se supone que tendria que hacerlo siguiendo Ias instrucciones de manejo, compruebelo cuidadosamente de acuerdo con la
tabla siguiente:
● El cable de alimentacion no esta adecuadamente
conectado.
● Corrija la conexion.
● Ha presionado un boton selector de funcion
incorrect.
● Presione el boton selector de funcion correspondiente
a la entrada.
● Lasconexiones entrelos componentes delsistema
no son correctas.
● Corrija lasconexiones.
● Sehaaplicado unatensionexcesiva alosterminales
del altavoz, y se ha disparado el disyuntor de
protection contra sobretension del amplificador,
● En losterminalesdel altavoz sehaproducidoun
cortocircuito.
● Eldisyuntor sedisparo debidoa laconexiondeun
altavoz de baja impedancia.
● Elotroaltavoz estadesconectado.
● Desconecte laalimentacion ysolucione el problema,
incluyendo Ias conexiones de Ios altavoces, y vuelva
a conectar el cable de alimentacion.
● Desconecte la alimentacion y soiucione el problems,
incluyendo Ias conexiones de Ios altavoces, y vuelva
a conectar el cable de alimentacion.
● Conecte correctamente Ios altavoces.
● Compruebe la conexion de la antena.
● Sintonice correctamente,
● Instale una antena exterior.
● La antena no esta correctamente conectada.
● El receptor no esta correctamente sintonizado.
● La seiial es demasiado debil.
● El sistema esta captando ruido exterior. ● Cambie la ubicacion de la antena.
● Oriente el receptor en un sentido diferente.
● Aleje el sistema de aparatos electricos, tales como un
televisor, lamDarasfluorescentes, oelectrodomesticos.
u
~@ Elsonido esta distorsionado. ● Se esta produciendo distorsi6n por trayectoria
:%
multiple.
● Cambie la orientation de la antena.
● Reemplace la antena porotra que posea la orientaclon
corrects.
~?~ La cinta no se mueve. I ● El deck 2 se encuentra en pausa. ● Presione II para desactivar el modo de Pausa
El sonido esta desequilibrado. ● La cabeza esta sucia.
Los sonidos de altafrecuenciason I ● El modo DOLBY NR no esel mismo queel empleado
● Lfmpiela,
Q Ponga DOLBY NR en la misma position que la
empleada cuando grabo la cinta.
~W~ demasiado fuertes, I cuando se grabo la cinta
No hay sonidos de altafrecuencia. I . Esta tratando de repropducir una cinta grabada sin ● Ponga DOLBY NR en OFF.
1el sistema de reduccion de ruido Dolby con tal
sistema.
● La cabeza esta sucia.
No es posible grabar. ● El casete carece de Iengtieta de seguridad.
● Las conexiones no son correctas.
● Limpiela.
● Cubra el orificio con cinta tiastica.
● Corrijalas.
I ● La cabeza esta sucia. ● Limpiela adecuadamente.
● Limpiela.
● Insertelo con la cara de la etiqueta hacia arriba.
● Limpielo.
● Espere aproximadamente una hors y vuelva a
intentarlo.
● Presione [1 PAUSE paradesactivarel modode pausa.
k!&&! NO es Dosible borrar,  “ La cabeza de borrado esta sucia.
m Noes posiblereproducir. ● El disco no esta correctamente insertado.
~
● Se ha condensado humedad en el disco.
● El reproductor se encuentra en el modo de pausa.
b~= El sonido de salida no es estereo I c EL VOCAL FADER esta conectado ● Desconecte el VOCAL FADER,
52
<FME.WE%$9>
$R=E3EEI 87. 5MHz - 108MHz
WM%WR(IHF) 1.3 LV(75Q) 13.2dBf
5t!W%EiWF& 50dB (+400kHz)
fls/%kL 70dB (T&&H , 7~dB (=*)
%ik*E 0.3%(=%) , F?lkHzH
0.5% (iLtW$?,L-R) ,t?lkHzi%
!J!E=Z*R 3oHz–15kHz
(+0,5dB, –3dB)
S@&ZwH&E
. 33dB, F+lkHz%
x % 75 Q (3WMM!)
<AM(MW)SWR353>
%*n El NSX-330HE,E,K,NSX-A92HE
.4M531(530)kHz-1 ,602{1 .710)kHz
NSX-330LH,U, C, Nsx-332LT:
AM530~531)kHz-1.710~l, b02)hH,
=rHEii!l J% 350IJV/m
ERR 22dB (9kHz)
.fg / I= ~~ 53dB (100dB $&L)
E ?@ Biwx$a
(LWiWlff!353> (#&T&&E%!IK&&l!)
$R-+RE 144kHz–290kHz
?S%s 1,400 MV/m
x % ~&~&
<z3wf%j39>
%E E&%3 Z%%, %$ww ElE13iw
MB.ERR%S Sloasikw$i> 5?CJC120$ME
<iMA*%*>
ti~$ilw NSX-330LH , HE. NSX-A92HE.
40W+40W
(6! ,T. H. DIO%,lkHz)
NSX-330E30W +30W
(6 Q. T. H. Dl%,lkHz)
NSX-330K:40W +40W
(6Q ,T. H. DIO%,lkHz)
30W+30W(6Q ,T. H. Dl%,lkHz)
FTC RLTLE(fW3Et!NSX-33C Lr.C.
NSX-332U)
&i-’5fE3oKH
RMS 6 Q .65Hz–15kHz
M.w(lR%Ef&E 1 %
*X19<E 0.05% (15W,lkHz,6Q)
&i’A%ik B VIDEO/AUX:150mV (WH=)
53
k!ztwmwaE%14’R EwPHM’Fwft, Km%mli?$m?a.
. i%i%fEiJR.
$H3ME, fl%%iEHS2E%, iEEZ%FRiFi%iR.
● WE I I w%W%mtH&
● l’i%2iEi?EzEE%o
● imil!m$wwi.
● ‘&*,’gj&&g&
liS#VOCAL FADER.
54
II
.
Main unit
@ PAUSE (11)/SET button ~ @ @ Q
@ Display window
@ REV MODE button -+ @ @ @I
@ DOLBY NR button ~ @ @l
@ Remote sensor+ @I
(@TIMER buttons (STANDBY, SLEEP) - @ @
@ SYNCHRO DUBBING buttons
(NORMAL, HIGH) + @
@JRECORD/REC MUTE button ~ @ @l @
@ Disc tray
@ STOP ( ■ )/CLEAR button -P @ @
c] PLAY/DIRECTION button (< ➤) + @ @
@)TUNING/pRESETfllMER/.SKlp/.SEARCMSMS
buttons (- DOWN/~ UP) - @ @ @ @
a
@TUNER buttons (TUNING, PRESET) + @ @
@)FM MODE button ~ @
@CLOCK button 4 @
0) OPEN/CLOSE button - @
@ EDIT buttons (AUTO, PRGM) + @ @
@ REPEAr button - @
@ DISPLAY button ~ @
@ RANDOhA button + @
Unidad principal
@ Boton PAUSE (11)/SET -“ @ @ @
@ Ventanilla visualizadora
@ Boton REV MODE+ @ @ @I
@ Boton DOLBY NR + @ @
@Sensor remoto + @
@ Botones TIMER (STANDBY, SLEEP) - @ @
@ Botones SYNCHRO DUBBING
(NORMAL, HIGH) - @
@ Boton RECORD/REC MUTE -+ @ @ @
@ Receptor de discos
@ Boton STOP ( ■ )/CLEAR+ @ @
@ Boton PLAY/DIRECTION (<p)+ @ @
@Botones TUNING/PRESET/TIMER/SKIP/
SEARCH/MS (4 DOWN/M UP) - @ @
@@o
@ Botones TUNER (TUNING, PRESET)-@ @
@ Boton FM/MODE + @
@ Boton CLOCK 4 @
@ Boton OPEN/CLOSE _ @
@ Eotones EDIT (AUTO, PRGM) - @ @
@ Boton REPEAT 4 @I
@ Boton DISPLAY - @
@ Boton RANDOM + @
TIMER (2-K*) +w+t
(STANDBY, SLEEp) + @ @
SYNCHRO DUBBING
(l=l~w$+)wil(wi! Ew) - @
RECORD/REC MUTE
($%&/&k%fw3) $za + @ @ @
(4 P)+@ia)
TUNING/PRESET/TIMER/SKIP/
SEARCH/MS
(mi#/lRm/z@%/Mw/a ti/*Rw B8)&
$R(qDOWN/~UP) +@@@@@
RJWMB(TUNING, PRESET) + @ @
FM/MODE (%l$R/%i~) fi$fl + @
CLOCK (EW$i)M$il + @
OPEN/CLOSE (}TH/Rl%7) +ik~ + @
EDIT (%%) E&%(AUTO , PRGM) + @ @
REPEAT (=7S) W&l+ @
DISPLAY (%%) %2$3+ @
RANDOM (E&%)E2W + @
55
. .
Main unit
Q VOCAL FADER button+ @
@ POWER button+ ~
@T-BASS button 4 @
@ PHONES jack+ @
@MlCjack4 @
@ ECHO LEVEL lever
(NSX-330HE, NSX-A92 only)
@ Cassette compartment (deck 1)
@ MIXING PLAY knob -+ @
@ BBE button + @
@ GRAPHIC EQUALIZER buttons
(ROCK, POP, CLASSIC) - @
@VOLUME control + @
@ Function buttons
(TAPE/DECK l/2, TUNER/BAND, VIDEO/AUX,
CD)
@ Cassette compartment (deck 2)
Unidad principal
@ Boton VOCAL FADER+ @
@ Boton POWER -D ~
@ Boton T-BASS -+ @
@ Toma PHONES - @
@Toma MIC - @
@I Palanca ECHO LEVEL
(S010 NSX-330HE, NSX-A92)
@ Compartimiento de casete (deck 1)
@ Perilla MIXING PLAY+ @
@ Boton BBE + @
@ Botones GRAPHIC EQUALIZER
(ROCK, POP, CLASSIC) - @
@ Control VOLUME a @
@ Botones de funcion
(TAPE/DECK 1/2, TUNEWBAND, VIDEO/AUX,
CD)
@ Compartimiento de casete (deck 2)
@
@
@
@
@
@
@
@
@
@
@
@
@
GRAPHIC EQUALIZER (!iE!Z3q&@%)#$X
(ROCK , POP, CLASSIC) + @
VOLUME(%S) %%!+@
gJfi~#$li
(TAPE/DECK 1/2 , TUNER/
BAND , VIDEO/AUX , CD)
*ABM (%%%$ 2 )
56
Display window
a Spectrum analyzer
~ T-BASS indicator
IS BBE indicator
~ Stereo indicator
@Timer standby indicator
I@Timer/frequency/CD time counter
@Tape side indicator
18 Music calendar
:
19 RECOFID indicator
ID DOlby NR indicator
@Deck 2 reverse mode indicator
@ RANDC)M/REPEAT indicator
@Clock/function indicator
@ CD edit recording indicator
@program indicator
@Tape direction indicator
Ventanilla visualizadora
@ Analizador de espectro
@ Indicador T-BASS
@ Indicador BBE
@ Indicador de estereo
@ Indicador de espera del temporizador
@ Contadordetemporizador/frecuencia/tiempo de
CD
@ Indicador de la cara de cinta
@ Calendario musical
@ Indicador RECORD
@ Indicador Dolby NR
@ Indicador del modo de inversion del deck 2
@ Indicador RANDOM/REPEAT
@ Indicador de reloj/funcion
@ indicador de grabacion con edition de discos
compactos
@ Indicador de programa
@ Indication del sentido de la cinta
57
Remote control Control remoto $&2%
@ SLEEP button
@TIMER button
@ RANDOM button
@ DISPLAY button
@ Function buttons
(TAPE, TUNER, VIDEO/AUXr CD)
@TUNING/PRESET/TIMER buttons
(+/ w, M/ Pbf)
@ PAUSE (11)/SET button
The n/SET button does not function to set the
clock and to preset radio stations.
@ GEQ button
@ REC/REC MUTE (0/0) button
To start recording, first press this button and
then press the 4 ➤ button within 2 seconds.
@ POWER button
@CLOCK button
@FM MODE button
@ OPEN/CLOSE button
@ REPEAT button
@ Numeric buttons (1 - O)
@+1 O button
@Stop ( ■ )/CLEAR button
@ Play/DIRECTION (<›) button
@T-BASS button
@ BBE button
@VOLUME buttons (A,~)
@ MUTE button
@ Boton SLEEP
@ Boton TIMER
@ Boton RANDOM
@ Boton DISPLAY
@ Botones de funcion
(TAPE, TUNER, VIDEO/AUX, CD)
@ Botones TUNING/PRESET/TIMER
(44 /f+ m/w)
@ Boton PAUSE (11)/SET
El boton n/SET no funciona para regular el reloj
y para presintonizar Ias emisoras.
@ Boton GEQ
@ Boton REC/REC MUTE (0/0)
Para iniciar la grabacion, presione primero este
boton yluegoelboton -Fdentrode2segundos.
@ Boton POWER
@ Boton CLOCK
@ Boton FM MODE
@ Boton OPEN/CLOSE
@l Boton REPEAT
@ Botones numericos (1-10)
@ Boton +1O
@ Boton de parada ( ■ )/CLEAR
@ Bot6n de reproduction/DIRECTION (<›)
@ Boton T-BASS
@ Boton BBE
@ Botones VOLUME (~,v)
@ Boton MUTE
SLEEP (@&W)E&
TIMER (%i%%)&Mll
RANDOM ({%%) #&t
DISPLAY (%ifi) #%i
~~:~& ( TApE, TUNER ,vIDE()/
AUX , CD )
TUNING/PRESET/TIMER (%:g/~~/
58
.
Battery insertion
Colocacion de Ias pilas
ZE%UZ5??%
1 2
*
(R6P, AA)
Eattery replacement Reemplazo de Ias pilas ‘iEti.ZE%
When the maximum operation distance of the Cuando et alcance maximo del controlador remoto %%wah~RRFEK2%4*ntEEmwzzH>
remote control decreases, replace the batteries disminuya, reemplace Ias pilas por otras nuevas.
with new ones.
FW$$l%ltliklo
Consejos para la operation corrects %iIM%ER2*f%
Hints for correct operation .
10 For the remote control to operate, it should have
an unobstructed line of sight with the REMOTE
SENSCEt. This is because the remote control
uses infrared light rays. .
f) When there is a strong ambient light source, the
performance of the infrared REMOTE SENSOR
is degraded, which can cause unreliable opera-
tion. .
,, The recommended effective distance for wi~e-
Iess operation is 7 meters (23 feet). Operation
can be performed at an angle of up to 30° from
either side, but the effective distance becomes
somewhat shorter. .
~ Using televisions with the same type of infrared
remote control, in the same direction, will cause
the system to operate incorrectly. Do not use
other kinds of wireless remote controls at the
same time.
Para emplear el telemando, no debera existir ● iXlw?w@mm$’HR, 3?GwQG??!w%$
ningun obstaculo en la I[nea visual entre el y el
sensor decontrol remoto. Esto se debe a que el
[REMOTE SENSOR) 7V%%WH%W5EES+$
telemando utiliza rayos infrarrojos.
Cuando la Iuz ambiental sea intensa, el
rendimiento del sensor de control remoto de
rayos infrarrojos se degradara, 10 que puede
causar una operation poco fiable.
La distancia recomendada para la operation
por control remoto inalambrico es de 7 metros.
La operation podra realizarse con un anguio de
hasta 30° a cada Iado, pero la distancia efectiva
se volvera mas corta,
El empleo de televisors con el mismo tipo de
control remoto por rayos infrarrojos, en el mismo
sentido, hara que el sistema funciones
incorrectamente. No emplee otros tipos de
controladores remotos de rayos infrarrojos al
mismo tiempo.
Notes on batteries Notas sobre Ias pilas
,,
*
Do not mix different types of batteries, or old ●
batteries with new ones.
When you are not going to use the unit for a long c
period c~f
time, remove them to prevent possible
electrolyte leakage.
No mezcle pilas de tipos diferentes, ni una vieja
y otra nueva.
Cuando novayaaemplearel controladorremoto
durante mucho tiempo, extraiga Ias pilas para
evitar la posible fuga de su electrolito.
ilk
● 7vzwfwml!flmwL @w%mntLwMEMo
● mtEwammEffl*/%i?L Em’xtim!, H!mlk
Rw<,
59
CAUTION
Use of controls or adjustments or performance of procedures other
than those specified herein may result in hazardous radiation expo-
sure,
ATTENTION
L’utilisation de commandes, reglages ou procedures autres que ceux
specifies peut enra;ner une dangereuse exposition aux radiations,
This compact disc player is classified as a CLASS 1 LASER product.
The CLASS 1 LASER PRODUCT label is located on the rear exterior.
m
CLASS 1
LASER PRODUCT
o
LUOKAN 1
LASERLAITE
tzzl
CAUTION!
Invisible laser radiation when open and inter locks
defeated. Avoid exposure to beam.
ADVARSEL!
Usynlig Iaserstaling ved ~bning, m% sikkerhedsafbrydereer ude af
funktion. Undg~ bds~ttelse for str%ling.
VAROITUS!
Laitteen kayttaminen muulla kuin tassa kayttoohjeessa mainitulla
tavalla saattaa altistaa kayttajan turvallisuusluokan 1 ylittavalle
niikymattomalle Iasersateiylle.
VARNING!
Om apparaten anvands pa annat satt an i denna bruksanvisning
specificerats, kan anvandaren utsatta for osynlig laser-str2dning,
som overskrider gransen for Iaserklass 1,
Note
This product is manufactured to comply with the radio inter-
ference requirements of EEC directive 82/499/ECC.
Nota
Este producto cumple Ios requisites de radlointerferencia de
la normativa de la CEE 82/499/CEE.
OBSERVERA
SA Iange som apparaten ar ansluten till natet flyter en svag
strom genom densamma, aven da den ar avstangd. Om man
under en Iangre tid ej har for avsikt att anvanda den, drag da
ur natkabeln.
BEMERK
Apparatet erstadig forbundet med Iysnettet, sa kenge stikket
er tilsluttet til stikkontakten, selv om afbryteren er slaet fra.
Hvis apparatet ikke bruges i Ieengere tid, skal netledningen
tr=kkes ud.
C MODEL
CAUTION: TO PREVENT ELECTRIC SHOCK DO
NOT USE THIS (POLARIZED) PLUG WITH AN EX-
TENSION CORD, RECEPTACLE OR OTHER OUT-
LET UNLESS THE BLADES CAN BE FULLY lN-
SERTED TO PREVENT BLADE EXPOSURE
AIWA CO., LTD.

Más contenido relacionado

La actualidad más candente

Diagrama daewoo-racer-tbi
Diagrama daewoo-racer-tbiDiagrama daewoo-racer-tbi
Diagrama daewoo-racer-tbiLuis Carlos
 
228 Multitronic.pdf
228 Multitronic.pdf228 Multitronic.pdf
228 Multitronic.pdfjcarrey
 
Manual de-Bobinagem-weg
Manual de-Bobinagem-wegManual de-Bobinagem-weg
Manual de-Bobinagem-wegPedro Narváez
 
Costo y tiempo en edificacion (carlos suarez salazar)
Costo y tiempo en edificacion (carlos suarez salazar)Costo y tiempo en edificacion (carlos suarez salazar)
Costo y tiempo en edificacion (carlos suarez salazar)Oshiro Toyoda
 
Sincronización, torques & tips para el armado del motor peugeot 1.6 l
Sincronización, torques & tips para el armado del motor peugeot 1.6 lSincronización, torques & tips para el armado del motor peugeot 1.6 l
Sincronización, torques & tips para el armado del motor peugeot 1.6 ltumotormx
 
Manual electrico de toyota corolla 2012
Manual electrico de toyota corolla   2012Manual electrico de toyota corolla   2012
Manual electrico de toyota corolla 2012Melany Calle
 
Esquema elétrico e diagnóstico mbb
Esquema elétrico e diagnóstico mbbEsquema elétrico e diagnóstico mbb
Esquema elétrico e diagnóstico mbbJunior Iung
 
CATÁLOGO TRW (VÁLVULAS DE CABEÇOTE)
CATÁLOGO TRW (VÁLVULAS DE CABEÇOTE)CATÁLOGO TRW (VÁLVULAS DE CABEÇOTE)
CATÁLOGO TRW (VÁLVULAS DE CABEÇOTE)Kesley de Souza
 
Nissan qd32 engine_service_manual
Nissan qd32 engine_service_manualNissan qd32 engine_service_manual
Nissan qd32 engine_service_manualJuan Paleo Rivera
 
422687091 t680-t880-sistema-multiplexado
422687091 t680-t880-sistema-multiplexado422687091 t680-t880-sistema-multiplexado
422687091 t680-t880-sistema-multiplexadoGabrielDuarte140
 
Dce circuitos elect toyota
Dce circuitos elect toyotaDce circuitos elect toyota
Dce circuitos elect toyotaDario Luis
 
162604176-DPO-2012.pdf
162604176-DPO-2012.pdf162604176-DPO-2012.pdf
162604176-DPO-2012.pdfLuisIbacetaV
 
CATALOGO CAJA ZF IVECO TRAKKER Y STRAILY.pdf
CATALOGO CAJA ZF IVECO TRAKKER Y STRAILY.pdfCATALOGO CAJA ZF IVECO TRAKKER Y STRAILY.pdf
CATALOGO CAJA ZF IVECO TRAKKER Y STRAILY.pdfLuisDiaz391603
 

La actualidad más candente (20)

Diagrama daewoo-racer-tbi
Diagrama daewoo-racer-tbiDiagrama daewoo-racer-tbi
Diagrama daewoo-racer-tbi
 
A10 vo manual
A10 vo manualA10 vo manual
A10 vo manual
 
228 Multitronic.pdf
228 Multitronic.pdf228 Multitronic.pdf
228 Multitronic.pdf
 
Nissan D21 (Manual de Reparación)
Nissan D21 (Manual de Reparación)Nissan D21 (Manual de Reparación)
Nissan D21 (Manual de Reparación)
 
Manual de-Bobinagem-weg
Manual de-Bobinagem-wegManual de-Bobinagem-weg
Manual de-Bobinagem-weg
 
Costo y tiempo en edificacion (carlos suarez salazar)
Costo y tiempo en edificacion (carlos suarez salazar)Costo y tiempo en edificacion (carlos suarez salazar)
Costo y tiempo en edificacion (carlos suarez salazar)
 
Sincronización, torques & tips para el armado del motor peugeot 1.6 l
Sincronización, torques & tips para el armado del motor peugeot 1.6 lSincronización, torques & tips para el armado del motor peugeot 1.6 l
Sincronización, torques & tips para el armado del motor peugeot 1.6 l
 
Manual electrico de toyota corolla 2012
Manual electrico de toyota corolla   2012Manual electrico de toyota corolla   2012
Manual electrico de toyota corolla 2012
 
Motor perkins-manhual de taller
Motor perkins-manhual de tallerMotor perkins-manhual de taller
Motor perkins-manhual de taller
 
Wabco abs & ebs
Wabco abs & ebsWabco abs & ebs
Wabco abs & ebs
 
Esquema elétrico e diagnóstico mbb
Esquema elétrico e diagnóstico mbbEsquema elétrico e diagnóstico mbb
Esquema elétrico e diagnóstico mbb
 
dr ecus null-1.pdf
dr ecus null-1.pdfdr ecus null-1.pdf
dr ecus null-1.pdf
 
CATÁLOGO TRW (VÁLVULAS DE CABEÇOTE)
CATÁLOGO TRW (VÁLVULAS DE CABEÇOTE)CATÁLOGO TRW (VÁLVULAS DE CABEÇOTE)
CATÁLOGO TRW (VÁLVULAS DE CABEÇOTE)
 
Motores diesel nissan sd 23
Motores diesel nissan sd 23 Motores diesel nissan sd 23
Motores diesel nissan sd 23
 
Sistema de alimentacion
Sistema de alimentacionSistema de alimentacion
Sistema de alimentacion
 
Nissan qd32 engine_service_manual
Nissan qd32 engine_service_manualNissan qd32 engine_service_manual
Nissan qd32 engine_service_manual
 
422687091 t680-t880-sistema-multiplexado
422687091 t680-t880-sistema-multiplexado422687091 t680-t880-sistema-multiplexado
422687091 t680-t880-sistema-multiplexado
 
Dce circuitos elect toyota
Dce circuitos elect toyotaDce circuitos elect toyota
Dce circuitos elect toyota
 
162604176-DPO-2012.pdf
162604176-DPO-2012.pdf162604176-DPO-2012.pdf
162604176-DPO-2012.pdf
 
CATALOGO CAJA ZF IVECO TRAKKER Y STRAILY.pdf
CATALOGO CAJA ZF IVECO TRAKKER Y STRAILY.pdfCATALOGO CAJA ZF IVECO TRAKKER Y STRAILY.pdf
CATALOGO CAJA ZF IVECO TRAKKER Y STRAILY.pdf
 

Similar a Guía completa del sistema estéreo AIWA NSX-330

pdfslide.net_lg-21sb1rl-l4-chasis-cw81bpdf.pdf
pdfslide.net_lg-21sb1rl-l4-chasis-cw81bpdf.pdfpdfslide.net_lg-21sb1rl-l4-chasis-cw81bpdf.pdf
pdfslide.net_lg-21sb1rl-l4-chasis-cw81bpdf.pdfssuserfd24a1
 
74041318 lg-21 fs7rl
74041318 lg-21 fs7rl74041318 lg-21 fs7rl
74041318 lg-21 fs7rldjniko2005
 
Panasonic+tc 32 ds600+l+chassis+km26
Panasonic+tc 32 ds600+l+chassis+km26Panasonic+tc 32 ds600+l+chassis+km26
Panasonic+tc 32 ds600+l+chassis+km26JACK196141
 
46319630 21fs4rk-lg-21-slim-tv
46319630 21fs4rk-lg-21-slim-tv46319630 21fs4rk-lg-21-slim-tv
46319630 21fs4rk-lg-21-slim-tvDomingo Cordova
 
Manuel de faradios y cosas como tú y ély
Manuel de faradios y cosas como tú y élyManuel de faradios y cosas como tú y ély
Manuel de faradios y cosas como tú y élyAngelMatamala
 
Tc electronic nova_system_manual_spanish
Tc electronic nova_system_manual_spanishTc electronic nova_system_manual_spanish
Tc electronic nova_system_manual_spanishRonaldo Araujo
 
MANUAL MEZCLADORA MACKIE.pdf
MANUAL MEZCLADORA MACKIE.pdfMANUAL MEZCLADORA MACKIE.pdf
MANUAL MEZCLADORA MACKIE.pdfEdgarAzahel
 
Centralita Resol Deltasol E
Centralita Resol Deltasol ECentralita Resol Deltasol E
Centralita Resol Deltasol EGogely The Great
 
taylor_iii_asc_fr_en_es_pl_v2.01-41.pdf
taylor_iii_asc_fr_en_es_pl_v2.01-41.pdftaylor_iii_asc_fr_en_es_pl_v2.01-41.pdf
taylor_iii_asc_fr_en_es_pl_v2.01-41.pdfJose253896
 
Folleto interruptores-dx3-y-tx3
Folleto interruptores-dx3-y-tx3Folleto interruptores-dx3-y-tx3
Folleto interruptores-dx3-y-tx3Jan Martinezz
 
Sony+kdl 32 r425a+chassis+rb1tk
Sony+kdl 32 r425a+chassis+rb1tkSony+kdl 32 r425a+chassis+rb1tk
Sony+kdl 32 r425a+chassis+rb1tktecxel
 
Guia rapida arrancador ats22
Guia rapida arrancador ats22Guia rapida arrancador ats22
Guia rapida arrancador ats22Julio Infantes
 
Cardenas uchima duque_monitores_180604 (1)
Cardenas uchima duque_monitores_180604 (1)Cardenas uchima duque_monitores_180604 (1)
Cardenas uchima duque_monitores_180604 (1)nidiau
 

Similar a Guía completa del sistema estéreo AIWA NSX-330 (20)

pdfslide.net_lg-21sb1rl-l4-chasis-cw81bpdf.pdf
pdfslide.net_lg-21sb1rl-l4-chasis-cw81bpdf.pdfpdfslide.net_lg-21sb1rl-l4-chasis-cw81bpdf.pdf
pdfslide.net_lg-21sb1rl-l4-chasis-cw81bpdf.pdf
 
M98203201 01
M98203201 01M98203201 01
M98203201 01
 
74041318 lg-21 fs7rl
74041318 lg-21 fs7rl74041318 lg-21 fs7rl
74041318 lg-21 fs7rl
 
Dt830 b
Dt830 bDt830 b
Dt830 b
 
Yas manual j1000frecuencia
Yas manual j1000frecuenciaYas manual j1000frecuencia
Yas manual j1000frecuencia
 
Panasonic+tc 32 ds600+l+chassis+km26
Panasonic+tc 32 ds600+l+chassis+km26Panasonic+tc 32 ds600+l+chassis+km26
Panasonic+tc 32 ds600+l+chassis+km26
 
46319630 21fs4rk-lg-21-slim-tv
46319630 21fs4rk-lg-21-slim-tv46319630 21fs4rk-lg-21-slim-tv
46319630 21fs4rk-lg-21-slim-tv
 
Manuel de faradios y cosas como tú y ély
Manuel de faradios y cosas como tú y élyManuel de faradios y cosas como tú y ély
Manuel de faradios y cosas como tú y ély
 
14 sb1+ l2-mfl42047710-sp
14 sb1+ l2-mfl42047710-sp14 sb1+ l2-mfl42047710-sp
14 sb1+ l2-mfl42047710-sp
 
Tc electronic nova_system_manual_spanish
Tc electronic nova_system_manual_spanishTc electronic nova_system_manual_spanish
Tc electronic nova_system_manual_spanish
 
MANUAL MEZCLADORA MACKIE.pdf
MANUAL MEZCLADORA MACKIE.pdfMANUAL MEZCLADORA MACKIE.pdf
MANUAL MEZCLADORA MACKIE.pdf
 
Centralita Resol Deltasol E
Centralita Resol Deltasol ECentralita Resol Deltasol E
Centralita Resol Deltasol E
 
Ck2013
Ck2013Ck2013
Ck2013
 
taylor_iii_asc_fr_en_es_pl_v2.01-41.pdf
taylor_iii_asc_fr_en_es_pl_v2.01-41.pdftaylor_iii_asc_fr_en_es_pl_v2.01-41.pdf
taylor_iii_asc_fr_en_es_pl_v2.01-41.pdf
 
Folleto interruptores-dx3-y-tx3
Folleto interruptores-dx3-y-tx3Folleto interruptores-dx3-y-tx3
Folleto interruptores-dx3-y-tx3
 
Sony+kdl 32 r425a+chassis+rb1tk
Sony+kdl 32 r425a+chassis+rb1tkSony+kdl 32 r425a+chassis+rb1tk
Sony+kdl 32 r425a+chassis+rb1tk
 
Guia rapida arrancador ats22
Guia rapida arrancador ats22Guia rapida arrancador ats22
Guia rapida arrancador ats22
 
Manual mesa de som
Manual mesa de somManual mesa de som
Manual mesa de som
 
Roland Cube Bass 100
Roland Cube Bass 100Roland Cube Bass 100
Roland Cube Bass 100
 
Cardenas uchima duque_monitores_180604 (1)
Cardenas uchima duque_monitores_180604 (1)Cardenas uchima duque_monitores_180604 (1)
Cardenas uchima duque_monitores_180604 (1)
 

Último

texto argumentativo, ejemplos y ejercicios prácticos
texto argumentativo, ejemplos y ejercicios prácticostexto argumentativo, ejemplos y ejercicios prácticos
texto argumentativo, ejemplos y ejercicios prácticosisabeltrejoros
 
codigos HTML para blogs y paginas web Karina
codigos HTML para blogs y paginas web Karinacodigos HTML para blogs y paginas web Karina
codigos HTML para blogs y paginas web Karinavergarakarina022
 
Resolucion de Problemas en Educacion Inicial 5 años ED-2024 Ccesa007.pdf
Resolucion de Problemas en Educacion Inicial 5 años ED-2024 Ccesa007.pdfResolucion de Problemas en Educacion Inicial 5 años ED-2024 Ccesa007.pdf
Resolucion de Problemas en Educacion Inicial 5 años ED-2024 Ccesa007.pdfDemetrio Ccesa Rayme
 
RAIZ CUADRADA Y CUBICA PARA NIÑOS DE PRIMARIA
RAIZ CUADRADA Y CUBICA PARA NIÑOS DE PRIMARIARAIZ CUADRADA Y CUBICA PARA NIÑOS DE PRIMARIA
RAIZ CUADRADA Y CUBICA PARA NIÑOS DE PRIMARIACarlos Campaña Montenegro
 
EXPECTATIVAS vs PERSPECTIVA en la vida.
EXPECTATIVAS vs PERSPECTIVA  en la vida.EXPECTATIVAS vs PERSPECTIVA  en la vida.
EXPECTATIVAS vs PERSPECTIVA en la vida.DaluiMonasterio
 
Identificación de componentes Hardware del PC
Identificación de componentes Hardware del PCIdentificación de componentes Hardware del PC
Identificación de componentes Hardware del PCCesarFernandez937857
 
Introducción:Los objetivos de Desarrollo Sostenible
Introducción:Los objetivos de Desarrollo SostenibleIntroducción:Los objetivos de Desarrollo Sostenible
Introducción:Los objetivos de Desarrollo SostenibleJonathanCovena1
 
TIPOLOGÍA TEXTUAL- EXPOSICIÓN Y ARGUMENTACIÓN.pptx
TIPOLOGÍA TEXTUAL- EXPOSICIÓN Y ARGUMENTACIÓN.pptxTIPOLOGÍA TEXTUAL- EXPOSICIÓN Y ARGUMENTACIÓN.pptx
TIPOLOGÍA TEXTUAL- EXPOSICIÓN Y ARGUMENTACIÓN.pptxlclcarmen
 
30-de-abril-plebiscito-1902_240420_104511.pdf
30-de-abril-plebiscito-1902_240420_104511.pdf30-de-abril-plebiscito-1902_240420_104511.pdf
30-de-abril-plebiscito-1902_240420_104511.pdfgimenanahuel
 
TEMA 13 ESPAÑA EN DEMOCRACIA:DISTINTOS GOBIERNOS
TEMA 13 ESPAÑA EN DEMOCRACIA:DISTINTOS GOBIERNOSTEMA 13 ESPAÑA EN DEMOCRACIA:DISTINTOS GOBIERNOS
TEMA 13 ESPAÑA EN DEMOCRACIA:DISTINTOS GOBIERNOSjlorentemartos
 
DECÁGOLO DEL GENERAL ELOY ALFARO DELGADO
DECÁGOLO DEL GENERAL ELOY ALFARO DELGADODECÁGOLO DEL GENERAL ELOY ALFARO DELGADO
DECÁGOLO DEL GENERAL ELOY ALFARO DELGADOJosé Luis Palma
 
Caja de herramientas de inteligencia artificial para la academia y la investi...
Caja de herramientas de inteligencia artificial para la academia y la investi...Caja de herramientas de inteligencia artificial para la academia y la investi...
Caja de herramientas de inteligencia artificial para la academia y la investi...Lourdes Feria
 
NARRACIONES SOBRE LA VIDA DEL GENERAL ELOY ALFARO
NARRACIONES SOBRE LA VIDA DEL GENERAL ELOY ALFARONARRACIONES SOBRE LA VIDA DEL GENERAL ELOY ALFARO
NARRACIONES SOBRE LA VIDA DEL GENERAL ELOY ALFAROJosé Luis Palma
 
DE LAS OLIMPIADAS GRIEGAS A LAS DEL MUNDO MODERNO.ppt
DE LAS OLIMPIADAS GRIEGAS A LAS DEL MUNDO MODERNO.pptDE LAS OLIMPIADAS GRIEGAS A LAS DEL MUNDO MODERNO.ppt
DE LAS OLIMPIADAS GRIEGAS A LAS DEL MUNDO MODERNO.pptELENA GALLARDO PAÚLS
 
Manual - ABAS II completo 263 hojas .pdf
Manual - ABAS II completo 263 hojas .pdfManual - ABAS II completo 263 hojas .pdf
Manual - ABAS II completo 263 hojas .pdfMaryRotonda1
 
Clasificaciones, modalidades y tendencias de investigación educativa.
Clasificaciones, modalidades y tendencias de investigación educativa.Clasificaciones, modalidades y tendencias de investigación educativa.
Clasificaciones, modalidades y tendencias de investigación educativa.José Luis Palma
 
Lecciones 04 Esc. Sabática. Defendamos la verdad
Lecciones 04 Esc. Sabática. Defendamos la verdadLecciones 04 Esc. Sabática. Defendamos la verdad
Lecciones 04 Esc. Sabática. Defendamos la verdadAlejandrino Halire Ccahuana
 
ACUERDO MINISTERIAL 078-ORGANISMOS ESCOLARES..pptx
ACUERDO MINISTERIAL 078-ORGANISMOS ESCOLARES..pptxACUERDO MINISTERIAL 078-ORGANISMOS ESCOLARES..pptx
ACUERDO MINISTERIAL 078-ORGANISMOS ESCOLARES..pptxzulyvero07
 
Plan Refuerzo Escolar 2024 para estudiantes con necesidades de Aprendizaje en...
Plan Refuerzo Escolar 2024 para estudiantes con necesidades de Aprendizaje en...Plan Refuerzo Escolar 2024 para estudiantes con necesidades de Aprendizaje en...
Plan Refuerzo Escolar 2024 para estudiantes con necesidades de Aprendizaje en...Carlos Muñoz
 
Heinsohn Privacidad y Ciberseguridad para el sector educativo
Heinsohn Privacidad y Ciberseguridad para el sector educativoHeinsohn Privacidad y Ciberseguridad para el sector educativo
Heinsohn Privacidad y Ciberseguridad para el sector educativoFundación YOD YOD
 

Último (20)

texto argumentativo, ejemplos y ejercicios prácticos
texto argumentativo, ejemplos y ejercicios prácticostexto argumentativo, ejemplos y ejercicios prácticos
texto argumentativo, ejemplos y ejercicios prácticos
 
codigos HTML para blogs y paginas web Karina
codigos HTML para blogs y paginas web Karinacodigos HTML para blogs y paginas web Karina
codigos HTML para blogs y paginas web Karina
 
Resolucion de Problemas en Educacion Inicial 5 años ED-2024 Ccesa007.pdf
Resolucion de Problemas en Educacion Inicial 5 años ED-2024 Ccesa007.pdfResolucion de Problemas en Educacion Inicial 5 años ED-2024 Ccesa007.pdf
Resolucion de Problemas en Educacion Inicial 5 años ED-2024 Ccesa007.pdf
 
RAIZ CUADRADA Y CUBICA PARA NIÑOS DE PRIMARIA
RAIZ CUADRADA Y CUBICA PARA NIÑOS DE PRIMARIARAIZ CUADRADA Y CUBICA PARA NIÑOS DE PRIMARIA
RAIZ CUADRADA Y CUBICA PARA NIÑOS DE PRIMARIA
 
EXPECTATIVAS vs PERSPECTIVA en la vida.
EXPECTATIVAS vs PERSPECTIVA  en la vida.EXPECTATIVAS vs PERSPECTIVA  en la vida.
EXPECTATIVAS vs PERSPECTIVA en la vida.
 
Identificación de componentes Hardware del PC
Identificación de componentes Hardware del PCIdentificación de componentes Hardware del PC
Identificación de componentes Hardware del PC
 
Introducción:Los objetivos de Desarrollo Sostenible
Introducción:Los objetivos de Desarrollo SostenibleIntroducción:Los objetivos de Desarrollo Sostenible
Introducción:Los objetivos de Desarrollo Sostenible
 
TIPOLOGÍA TEXTUAL- EXPOSICIÓN Y ARGUMENTACIÓN.pptx
TIPOLOGÍA TEXTUAL- EXPOSICIÓN Y ARGUMENTACIÓN.pptxTIPOLOGÍA TEXTUAL- EXPOSICIÓN Y ARGUMENTACIÓN.pptx
TIPOLOGÍA TEXTUAL- EXPOSICIÓN Y ARGUMENTACIÓN.pptx
 
30-de-abril-plebiscito-1902_240420_104511.pdf
30-de-abril-plebiscito-1902_240420_104511.pdf30-de-abril-plebiscito-1902_240420_104511.pdf
30-de-abril-plebiscito-1902_240420_104511.pdf
 
TEMA 13 ESPAÑA EN DEMOCRACIA:DISTINTOS GOBIERNOS
TEMA 13 ESPAÑA EN DEMOCRACIA:DISTINTOS GOBIERNOSTEMA 13 ESPAÑA EN DEMOCRACIA:DISTINTOS GOBIERNOS
TEMA 13 ESPAÑA EN DEMOCRACIA:DISTINTOS GOBIERNOS
 
DECÁGOLO DEL GENERAL ELOY ALFARO DELGADO
DECÁGOLO DEL GENERAL ELOY ALFARO DELGADODECÁGOLO DEL GENERAL ELOY ALFARO DELGADO
DECÁGOLO DEL GENERAL ELOY ALFARO DELGADO
 
Caja de herramientas de inteligencia artificial para la academia y la investi...
Caja de herramientas de inteligencia artificial para la academia y la investi...Caja de herramientas de inteligencia artificial para la academia y la investi...
Caja de herramientas de inteligencia artificial para la academia y la investi...
 
NARRACIONES SOBRE LA VIDA DEL GENERAL ELOY ALFARO
NARRACIONES SOBRE LA VIDA DEL GENERAL ELOY ALFARONARRACIONES SOBRE LA VIDA DEL GENERAL ELOY ALFARO
NARRACIONES SOBRE LA VIDA DEL GENERAL ELOY ALFARO
 
DE LAS OLIMPIADAS GRIEGAS A LAS DEL MUNDO MODERNO.ppt
DE LAS OLIMPIADAS GRIEGAS A LAS DEL MUNDO MODERNO.pptDE LAS OLIMPIADAS GRIEGAS A LAS DEL MUNDO MODERNO.ppt
DE LAS OLIMPIADAS GRIEGAS A LAS DEL MUNDO MODERNO.ppt
 
Manual - ABAS II completo 263 hojas .pdf
Manual - ABAS II completo 263 hojas .pdfManual - ABAS II completo 263 hojas .pdf
Manual - ABAS II completo 263 hojas .pdf
 
Clasificaciones, modalidades y tendencias de investigación educativa.
Clasificaciones, modalidades y tendencias de investigación educativa.Clasificaciones, modalidades y tendencias de investigación educativa.
Clasificaciones, modalidades y tendencias de investigación educativa.
 
Lecciones 04 Esc. Sabática. Defendamos la verdad
Lecciones 04 Esc. Sabática. Defendamos la verdadLecciones 04 Esc. Sabática. Defendamos la verdad
Lecciones 04 Esc. Sabática. Defendamos la verdad
 
ACUERDO MINISTERIAL 078-ORGANISMOS ESCOLARES..pptx
ACUERDO MINISTERIAL 078-ORGANISMOS ESCOLARES..pptxACUERDO MINISTERIAL 078-ORGANISMOS ESCOLARES..pptx
ACUERDO MINISTERIAL 078-ORGANISMOS ESCOLARES..pptx
 
Plan Refuerzo Escolar 2024 para estudiantes con necesidades de Aprendizaje en...
Plan Refuerzo Escolar 2024 para estudiantes con necesidades de Aprendizaje en...Plan Refuerzo Escolar 2024 para estudiantes con necesidades de Aprendizaje en...
Plan Refuerzo Escolar 2024 para estudiantes con necesidades de Aprendizaje en...
 
Heinsohn Privacidad y Ciberseguridad para el sector educativo
Heinsohn Privacidad y Ciberseguridad para el sector educativoHeinsohn Privacidad y Ciberseguridad para el sector educativo
Heinsohn Privacidad y Ciberseguridad para el sector educativo
 

Guía completa del sistema estéreo AIWA NSX-330

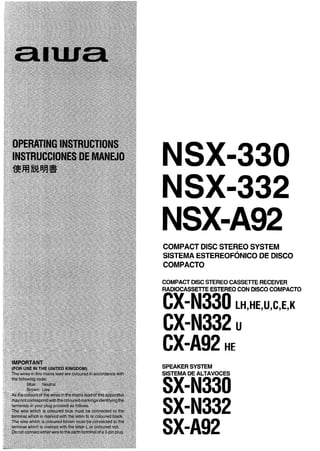
  • 1. NSX-330 NSX=332 NSX=A92 COMPACT DISC STEREO SYSTEM SISTEMA ESTEREOFONICO DE DISCO COMPACTO COMPACT DISC STEREO CASSEITE RECEIVER RADIOCASSEITE ESTEREO CON DISCO COMPACTO CX-N330 LH,HE,U,C,E,K CX-N332 U CX-A92 HE SPEAKERSYSTEM SISTEMADEALTAVOCES SX=N330 SX-N332 SX-A92
  • 2. “CAUTION: TO REDUCE THE RISK OF ELECTRIC SHOCK, DO NOT REMOVE COVER (OR BACK). NO USER-SERVICEABLE PARTS INSIDE. REFER SERVICING TO QUALIFIED SERVICE PERSONNEL.” Explanation of Graphical Symbols: The lightning flash with arrowhead symbol, within an equilateral triangle, is intended to A alert the user to the presence of uninsulated “dangerous voltage” wlthm the product’s enclosure that may be of sufficient magni- tude to constitute a risk of electric shock to persons. A The exclamation point within an equilateral triangle IS intended to alert the user to the presence of Important operating and main- tenance (serwcmg) Instructions in the lit- ● erature accompanying the appliance. TO REDUCE THE RISK OF FIRE OR ELECTRIC SHOCK, DO NOT EXPOSE THIS APPLIANCE TO RAIN OR MOISTURE. CAUTION Use of controls or adjustments or performance of procedures other than those specified herein may result in hazardous radiation exposure. Ezl CAUTION! A Invisible laser radiation when open and inter locks defeated. Avoid exposure to beam. WARNING This equipment has been certified to comply with the limits for a Class B computing device, pursuant to Subparl J of Part 15 of FCC Rules. Only peripherals cerbfied to comply with the Class B limits maybe attached to this equipment. Operation with noncertified peripherals is likely to result in interference to radio and TV reception. This equipment generates and uses radio frequency energy and if not installed and used properly, that Is, in strict accor- dance with the manufacturer’s Instructions, may cause inter- ference to radio and televwon reception. It has been type tested and found to comply with the limits for a Class B computing device m accordance with the specifications in Subpart J of Part 15 of FCC Rules, which are designed to provide reasonable protection against such mteflerence m a residential installation. However, there is no guarantee that interference WIII not occur in a parhcular installation. If this equipment does cause interference to radio or telewsion reception, which can be determined by turning the equipment off and on, the user is encouraged to try to correct the interference by one or more of the following measures: -reorient the receiving antenna -relocate the equipment with respect to the receiver -move the equipment away from the receiver -plug the equipment into a different outlet so that equipment and receiver are on different branch circuits. If necessary, the user should consult the dealer or an experi- enced radio/televmon technician for additional suggestions. The user may find the following booklet prepared by the Federal Communications Commission helpful: ‘[How to Identify and Resolve Radio-TV Interference Problems” This booklet is available from the US Government Printing Office, Washington, D.C., 20402, Stock No. 004-000-00345-4. L THIS DIGITAL APPARATUS DOES NOT EXCEED THE CLASS B LIMITS FOR RADIO NOISE EMISSIONS FROM DIGITAL APPARATUS AS SET OUT IN THE RADIO iN- TERFERENCE REGULATIONS OF THE CANADIAN DE- OWNER’S RECORD For your convenience, record the model number and serial number (you willfind them on the rear of your set) in the space provided below. Please refer to them when you contact your AIWA dealer m case of difficulty. Model No. Serial No. CX-N330 ~ I CX-A92 Model No. ~ SX-N330 SX-N332 SX-A92 I I I Serial No. I I 2
  • 3. FEATURES .............................................4 PRECAUTIONS .......................................5 CONNECTIONS ......................................6 CLOCK SETTING .............1................... 12 SOUND ADJUSTMENT ........................14 LISTENING TO A COMPACT DISC ......16 PROGRAMMED PLAY .......................... 19 RANDOM PLAY ....................................20 REPEAT PLAY ......................................20 PLAYING BACK A TAPE .....................21 CONTINUOUS PLAY FROM DECK TO DECK .....................................................24 TUNING INTO A STATION MANUALLY .......................................25 PRESETTING STATIONS .....................26 TUNING INTO A PRESET STATION ...27 ? RECORDING .........................................28 TAPE DUBBING ....................................32 RECORDING FROM COMPACT DISCS "...................." ..........................34 EDITING COMPACT DISCS .................36 Auto-edit recording ..........................36 Programmed-edit recording ............38 TIMER SETTING ...................................40 SLEEP TIMER SETTING ......................44 LISTENING TO OTHER SOURCES ......45 MICROPHONE MIXING ........................46 MAINTENANCE ....................................48 SPECIFICATIONS .................................49 TROUBLESHOOTING GUIDE ..............50 IDENTIFICATION OF PARTS ...............55 cARAcTERisTlcAs ............”..................4 PRECAUCIONES ....................................5 coNExloNEs .........................................6 PUESTA EN HORA DEL RELOJ ..........12 AJUSTE DEL SONIDO ......................... 14 ESCUCHA DE DISCOS COMPACTOS 16 REPRODUCTION PROGRAMADA ......19 REPRODUCTION ALEATORIA ............2O REPRODUCTION REPETIDA ..............20 REPRODUCTION DE CINTAS .............21 REPRODUCTION CONTINUA DE DECK A DECK ............................24 SINTONiA MANUAL DE EMISORAS .......................m ................25 MEMORIZATION DE EMISORAS ........26 SINTONiA DE EMISORAS MEMORIZADAS ................................27 GRABACION .........................................28 DUPLICATION DE CINTAS ..................32 GRABACION DE DISCOS COMPACTOS ....................................34 EDICION DE DISCOS COMPACTOS ...36 Grabacion con edition automatic ....................................36 Grabacion con edition programada ..................................38 PROGRAMACION DEL TEMPORIZADOR ..............................40 PROGRAMACION DEL CRONODESCONECTADOR .............44 ESCUCHA DE OTRAS FUENTES ........45 MEZCLA CON MICROFONO ................46 MANTENIMIENTO .................................48 ESPECIFICACIONES .................,,.,,,,,,,, 51 GUiA PARA LA SOLUCION DE PROBLEMAS ....................................52 IDENTIFICATION DE PARTES ............55 L The illustrations in this manual show the HE Las ilustraciones de este manual corresponded *WE9fJbbfiHRHEi#320 al modelo HE. 1 3
  • 4. BBE system Sistema BBE BBE is a technology developed for professional studio and live use. It gives astonishing definition and clarity to music reproduction. It makes high- frequency sound especially clear and brings out the special character of vocals’ and solo instru- ments, AIWA is the world’s first manufacturer to employ the BBE sound in consumer audio equipment. CD edit functions BBE es una tecnolog~a desarrollada para emplearse en estudios profesionales y en directo. BBE ofrece una definition y una claridad asombrosas a la reproduction musical. BBE hate especialmente claro el sonido de alta frecuencia y enfatiza el caracter especial de Ias votes y Ios instruments solistas. AIWAesel primerfabricante del mundoen emplear el sonido de BBE en un equipo de audio para el consumidor. Two different CD edit functions are available, and you can easily make original tapes according to your preference. Other features Amplifier section ● T-BASS for realistic reproduction at IOW sound levels. ● The desired tone quality can be selected from among three different preset tones. Tuner section e Synthesizer tuner. ● Internal daily eventksleep timer. Cassette deck section . High speed tape duplication. CD player section c Repeated playback of tracks. ● Playback of tracks in random order. Funciones de edicibn de discos compactos Existen cuatro funciones de edition de discos compactos para mayor comodidad de duplication que Ie permitiran crearfacilmente cintas originales a su gusto. Otras Seccion del amplificador ● T-BASS para ofrecer una reproduction realista a bajos niveles de sonido ● La calidad de tono puede seleccionarse de entre Ios tres diferentes tonos memorizados. Secci6n del sintonizador ● Sintonizador sintetizador ● Temporizador interno para programa diario/ y cronodesconectador Seccion del deck de casetes c Duplication de discos compactos a gran velocidad %w%$wwr- ● zEa#lwJTlki%o ● #E%RmwkMl Elo Seccion del reproductor de discos compactos ● Reproduction repetida de canciones ● Reproduction de canciones en orden aleatorio 4
  • 5. Follow the advice below for safe and correct opera- tion. On AC voltage (LH, HE, U, C models) Before use, check that the rated voltage of your system matches your local voltage. 17%!Z%tiEl :%%!%AC” ‘“1 NSX-A92 HE selectable, 50/60 Hz NSX-330 U, C 120/220-240 V AC NSX-332 U selectable, 50/60 Hz To adjust the operating voltage The system shc,uld have been set for use on your local voltage. If not, change the AC VOLTAGE selector on the rear panel with a screwdriver or similar object. On placement ● Do not use the system in places which are extremely hot, cold, dusty or humid. ● Place the system on a flat, even surface. ● Be careful nottoobstructthe ventilation holes on the rear panel, as increased internal tempera- ture may affect the electric parts. In particular, do not place the system in an airtight rack. On safety . . . When connecting and disconnecting the AC cord, grip the plug and not the cord itself. Pulling the cord may damage it and thus be hazardous. When you are not going to use the system for a long period of time, disconnect the AC cord. If the cord is plugged in, a small amount of current keeps on flowing to the system even if the power switch is not ON. If the AC cord is broken or damaged, or if the wires are exposed, contact your dealer or an AIWA setvice station and have it replaced or repaired immediately. On condensation When the room is heated, you sometimes see water drops on your windows; this is called con- densation. This can occur inside the CD player unit when: . it is moved from a cold spot to a warm spot. . it is used in a room where the heating system has just been turned on. ● it is used in a place with a lot of moisture. ● it is used where it has direct contact with cool air, such as near an air-conditioner. When it has condensation inside, the unit may not function normally. Let it stand for 1 to 2 hours before turning the power on; or, gradually heat the room and dry the unit before use. Should any trouble occur, disconnect the AC cord and refer servicing to qualified personnel only. For customers purchasing the U or C mod- els When using the unit in the AC 220–240V posi- tion, be sure to attach a suitable adaptor plug to the plug end of the AC cord. Adaptor plugs may be obtained at nominal cost from an authorized AIWA dealer. Para obtener una operation segura y apropiada, siga Ios consejos ofrecidos a continuation. Tension de CA (modelos LH, HE, U, C) Antes de emplear el sistema, compruebe si su tension nominal coincide con lade la red local. NSX-A92 HE seleccionable, 50/60 Hz NSX-330 U, C 120/220-240 V CA NSX-332 U seleccionable, 50/60 Hz Para ajustar la tension de alimentacion El sistema ha sido ajustado para emplearse con la tensi6n de la red local. Si la tensi6n de la red local is diferente, cambie el selector AC VOLTAGE del panel posterior del receptor estereo con un destornillador u otro objeto puntiagudo. Ubicacion ● ✎ ✎ No emplee et sistema en Iugares extremadamente calidos, fries, polvorientos, ni h(rmedos. Coloque el sistema sobre una superficie nivelada. Tenga cuidado de no obstruir Ios orificios de venfilacion del panel posterior del receptor estereo, ya que el aumento de la temperature interna podria afectar Ios components electr6nicos. En particular, nocoloque el sistema en un armario cerrado. Secfuridad . ● ~ara conectar y desconectar el cable de CA, sujeteel enchufe, noel propio cable. si tirase del cable podrfadafiarlo, Ioque resultariapeligroso. Cuando no vava a emriear el sistema durante . mucho tiem~o, de~conecte el cable de alimentacion. Cuando el cable de alimentacion este conectado, circulara una pequenacantidad de corriente incluso aunque el interruptor de alimentacion no este en ON. Si el cable de alimentaci6n se rompe o daiia, o si Ios hilos estan al descubierto, pongase inmediatamente en contacto con un centro de reparaciones AIWA para que se 10 reparen o cambien. Condensation Al calentar una sala, a veces pueden verse gotas de agua en Ias ventanas; esto se denomina condensaci6n. Este fenomeno puede ocurrir en el interior del reproductor de discos compactos cuando: ● se traslade de un Iugar frio a otro calido. ● se emplee en una sala en la que se acabe de poner en funcionamiento el sistema de calefaccidm. ● se emplee en un Iugar con mucha humedad. ● se emplee en un Iugar directamente en contacto con aire frio, como cerca de un acondicionador de aire. Cuando se haya producido condensation en el interior, es posible que el sistema no funcione normalmente. Dejelo 1 a 2 horas antes de conectar la alimentacion, o caliente gradualmente la sala y el sistema antes de emplear este. Si se produce algun problems, desconecte el cable de alirnentacion de CA y solicitar Ios.servicios de personal cualificado solamente. Para Ios clientas que hayan adquirido Ios modelos U o C Antes de emplear ei sistema en la position AC 220-240V, cerciorese de colocar en el cable de alimentacion el adaptador de enchufe adecuado. Los adaptadores de enchufe podran obtenerse al costo nominal del proveedorAIWA autorizado. NSX-330LH ,HE, 120/220/240V ?’liti~ NSX-A92HE %J=fj&J50/60Hz NSX-330U,C 120/220-240V ~1%.% NSX-332U fi%~ 50/60Hz 5
  • 6. To an AC outlet + ~) A un tomacorriente de CA %Af?%&3ZjfisNRj?H?!Zo Speaker (left) Altavoz (izquierdo) $%%%$ (E) Tips on connection Consejos sobre Ias conexiones ● Be sure to connect correctly, according to the ● Cerciorese de realizar Ias conexiones como se figure. muestra en la ilustracion. ● Turn on the power after verifying that the con- ● Conecte la alimentacion despues de haber nection is correct. verificadoque Iasconexionessean correctas. Notes on speaker connections Notas sobre la conexion de Ios altavoces ● Use speakers with an impedance of 6 ohms. ● ● This speaker system is magnetically shielded. However, if the speaker should affect the color . on the TV screen, turn off the TV, and turn it on again 15-30 minutes later. If the TV screen still has poor color, place the speaker system away from the TV. ● Do not leave magnets or objects generating magnetism near the speaker system. . Emplee altavoces con una impedancia de 6 ohmios. Este sistemade altavoces esta magneticamente apantallado. Sin embargo, si Ios altavoces afectan el color o de la pantalla del televisor, desconecte la alimentacion de este y vuelva a conectarla despues de 15 a 30 minutes. Si el colorde Iapantallasigue siendo de malacalidad, aleje el sistema de altavoces del televisor. No deje imanes ni objetos que generen magnetism cerca del sistema de altavoces. 6
  • 7. r Dust cap Tapa guardapolvo 1 To turn on the system Power isw.rppliedtothe system when the POWER button is pressed. The system can be turned off by pressing the same button again. When the power is turned on The indicator of the function button previously used flashes for 4 seconds, and the operation buttons usable in the function light up. E. g.) When the CD function is selected Ejemplo) Cuando se seleccione la funcion CD m) PAUSE Para activar el sistema %ti*Yi%K.li9ai63 El sistema se activa al presionarel boton POWER. %MEPOWEWMWF, *3MMJ7fltW%%Mo Este sistema puede desactivarse presionando otra #w{A*@*EIFl*&t&$, *%%iWk?%tlMaiKo vez el mismo boton. Cuando el sistema esta activado ‘H%%Ml@Be El indicador del boton de funcion previamente ~fi&~h+JagE#&!M$J+&KEfi?@J??l 4 M%& 7$ usado parpadea por4 segundos, y se enciende Ios botones de operation que pueden utilizarse en la gfi~;s$!gg%wwl%m~il+%lto tunclon. ‘DE?? ii% SET CLEAR PLAY/DIRECTION C2El DOWN [fij TUNING/PRESET/ TIMER/SKIP/SEARCH/MS 7
  • 8. Connect the red plug to the R jack, and the white plug to the L jack. Conecte la clavija roja a la toma R, y la clavija blanca a la toma L. WJ.&iiZ4%XRk27LF3, MD&% Ei%iAU%7LFTo LD player, VCR for playback, DAT deck, etc. Rer)roductor de discos laser, videoarabadora II n para reproduction, deck DAT, etc. - LDIE#& RWM$$M%M, DATRA!S%. II I mm I I I u. J Pin-cord (optional) Cordon con clavija (optional) To connect an analog record player Para conectar un tocadiscos analogo EMHYM$$e+sf Connect a player with an equalizer amplifier to Conecte un tocadiscos con un amplificador ~$fii%7fim*%Pg$*%%RvIDE0/ the VIDEO/AUX jacks. ecualizador a Ias tomas VIDEO/AUX. .4UXR?LM% 8
  • 9. Surround speaker (right) Altavoz periferico (derecho) m%%%?%%(%) Rear Trasera 7*H*R Surround speaker: AIWA SX-R1 00, SX-R1 50, SX-R200, etc. (optional) Altavoz periferico : AIWA SX-RI 00, SX-RI 50, SX-R200, etc. (optional) ~%%%% : AIWA SX-R1OO, SX-R150, SX-R200~(illflsf$) Setup example Ejemplo de instalacion !%E51F0 Surround speaker (left) Altavoz periferico (izquierdo) HLW&%%%(%) Notes Notas w . . ● ✎ The surrcund effect will not work with monaural c sources. Connect only surround speakers to the SUR- ● ROUND SPEAKERS jacks. Use surrcwnd speakers with an impedance of 16 ● ohms. Be sure i.o connect surround speakers to both ● right and left jacks. El efecto de sonido perimetrico no trabajara con ● &lBi4WWF%%E%E&B%o o fuentes monoaurales. A Ias tomas SURROUND SPEAKERS conecte ● ~$4W&%4Efi~xJ%ESURR0UND solamente altavoces oerimetricos. SPEAKERS%3LI. Emplee altavoces perimetricos con una ● #VHN3ti%%16 Q hbl!!%%%=%$o impedancia de 16 ohmios. ● LE%+E72, ZiWR!%?L%I!&%@Yo Cerciorese de conectar altavoces perimetricos a ambas tomas, izquierda y derecha. 9
  • 10. Rear (LH, HE, U, C models) Trasera (modelos LH, HE, U, C) f%Eii(LH. HE. U.(%4&) ‘Antenna terminals Terminals de antena (E, K models) (modelos E, K) (E. K $%&!) Position the supplied antennas after finding the best direction for radio reception. Coloque Ias antenas suministradas despues de haber encontrado la mejor orientation para la radiorrecepcion. E+21!H4k2%%J%4k2 R&% fif*, l$FitE$YJx*z ii. For FM recetXion Para la recepcion de FM For AM reception FMkk; . Extend horizontal Extiendala hOriZOntalmente. 7kW&f$ Para la recepcion de AM AMJIR%?EI u I For better FM re Para meiorar la FM2+?&JIk%M T Outdoor antenna .-. Antena exterior S**% lr FM175Q R J1 J To position the AM(MW/LW) loop antenna Ubicacion de la antena de cuadro de AM(MW/LbV) WIGt$AM(MW/LW)ERf% 33RZHti To hang on a wall 10 To stand on a surface Para colarla sobre una superficie EEMEq%il Para colgarla de una pared HElfAJl
  • 11. For better FM reception Para mejorar la recepcion de FM FM Z5%&]k%R For MWILW reception Para la recepcion de MW/LW For FM reception MW/LWJIfC%M Para la recepcion de FM FMJIk&?Rl o ( 0 Extend horizontally. Extiendala horizontalmente, -Y -. 1- : a= Outdoor antenna Antena exterior ~$’b%J%% -—-— ——— 3 T lr FM/75Q b h J + * PAL socket connector (female) Conector de normas PAL (hembra) PAL%13Z (EI) b Note on the FM feeder antenna Nota sobre la antena interior de FM I%R%FMIWl!lWX$% IDonot bring the ends near metal objects or curtain No acerque Ios extremes a objetos metalicos ni a ~&~*il#&gfi*~$jJ*R&f g#@jl.o rails. rieles de cortinas. lNotes on the AM (MW/LW) IOODantenna Notas sobre Iaconexion de la antena de cuadro M155AM(MW/LW)HWKX%4 . . u Do not unwind the looped antenna wire. de AM (MW/LW) ● i#~*i@y~tix*o I} Do not bring the loop antenna near the turntable ● No desbobine el conductor en forma de cuadro system or CD player, or close to the AC cord or de la antena. ● ;~@j$~fjx.$$&$@g& agfDg&E2fi/TL%j$$ sDeaker cords. since noise will be picked up. ● No acerque la antena de cuadro al giradiscos, al EW%E4%%%$R!❑F@-5 Ifip%wo reproductor de discos compactos, al cable de alimentacion de CA, ni a Ios cables de Ios altavoces, porque podria captar ruido. 11
  • 12. 1 CLOCK ~ b Within 4 seconds, go to step 2. Dentro de 4 segundos, siga al paso 2. 7=4 W$l!lmw%% 2 %%%. o Do SET b 2 5 Set the minutes. Ajuste Ios minutes. 3 Set the hour. Ajuste la hors. 6 Set the seconds. Ajuste Ios segundos. Ww!$% u Do SET b Clock starts from 00 second El reloj inicia su funcionamiento de 00. EOOWR7%%13%=. 12
  • 13. To set the time exactly Press the SET button in step 6 to starl the clock at the desired point, as indicated by another clock or time signal from an external time source. To display the clock while the power is on Press the CLOCK button. The clock is displayed for 4 seconds. During recording or dubbing, the clock is not dis- played even if the button is pressed. To switch the time display The time display is factory-set to the 12-hour stan- dard. When switching to the 24-hour standard, press the POWER button while pressing the CLOCK button. Repeat the same procedure to restore the 12-hour standard. In case of power failure ● for less than about 24 hours, the clock stops during the failure. Only the current time setting is needed. ● for more! than about 24 hours, setting of the current time, station presetting and timer setting are neecled. Note ● The current time cannot be set with the remote control. ● While setting the current time, the on-timer is not activated when the specified time is displayed. Para ajustar exactamente la hors Presione el boton SET en el paso 6 para poner en funcionamiento el reloj en el punto deseado, indicado por otro reloj o la sefial horaria de de una fuente externa. Para visualizer el reloj cuando el sistema esta activado Presione el boton CLOCK. El reloj se visualiza por 4 segundos. Durante la grabacion o duplication, el reloj no se visualizara aunque se presione el boton. Para cambiar la visualization de la hors La visualization de la hors ha sido ajustada en la fabrica al sistema de 12 horas. Para cambiarla al sistema de 24 horas, presione el bot6n POWER manteninedo pulsado el boton CLOCK. Paravolver al sistema de 12 horas, repita el mismo procedimiento. En caso de Corte del suministro electrico . . si el torte ha durado menos de unas 24 horas, el reloj se habra parado. Solamente necesitara poner en hors el reloj. si el torte ha durado mas de unas 24 horas, necesitara poner en hors el reloj, memorizar Ias emisoras, y programar el temporizador. Nota . La hors no puede ajustarse con el control remoto. ● Durante la puesta en hors, el temporizador no se activara cuando se visualice la hors especificada. ● mH2%lEEwm% Wfw?lo 13
  • 14. •1 To adjust the volume TO kICE!aS!S the volume, turn the VOLUME control clockwise. To decrease the volume, turn the VOLUME control counterclockwise. ❑ For louder deep bass Press the T-BASS button repeatedly and select one of the four levels for louder deep bass, or off position to your preference. Normally set to the second level. ❑ For clear and vivid high-definition sound - BBE system The two main causes of sound distortion are the deterioration of the higher harmonics and improper phase characteristics, The BBE system compen- sates for these causes of distortion to produce clear, high-definition sound reproduction closer to that of the original source, Press the BBE button repeatedly and select one of the four levels, or off position to your preference. la Para ajustar el volumen Ela31wwtiJ*s3 Para aumentar et volumen, gire et control VOL- %?%fiufiM&- Eif7i)jEK$VOLUMEJ4% IJ~$$. UME hacia la derecha. Para disminuirlo, girelo hacia la izquierda. ~3W%f&tSF&, FiffdE$@/OLUME&%IJ j&$$. El ❑I%i%wimfi%?m% Para graves profundos Presione et boton T-BASS repetidamente y FZE%EEET-BASSW& %% 5 f!tl?$WZ-LJ seleccione uno de Ios cuatro niveles FMFWHFJffk%, RtF&$&&J~fi, ~~offj~~o de graves. Normalmente, ajuste al segundo nivel. i&%ifg&g3 2 ~+~o ElPara un sonido de alta defmlclon, . . . . nitido y vivido - Sistema BBE ❑%%%~~&&W6%fkhf&@ - BBE%%t Las dos causas principals de la distortion del &%* Eb5tifD*%EmRR7A;MEPg% fLm sonido son el deterioro de Ias armonicas altas y Ias ZGf&%FJtH4~&l$o BBE%fjM?&E!!X%@ YJRE{j= inadecuada~ caracterfsticas de fase. El sistema BBE compensa estas causas de distortion para mfsW&E’R4rlF7 73’Rii?IEErqaaEfglblmwmR *&}J+ o produciruna reproduction sonorade altadefinicion casi igual a la fuente original, Presione el boton EZL’Z$W52BBEW3, %% 4 @F%WZ-, ELE3 BBE repetidamente y seleccione uno de Ios cuatro E% MYJSX, EmoffilEo niveles. 14
  • 15. ❑Selecting a factory-preset equaliza- •I Selecciondeuna curvadeecualizacion tion curve preajustada en fabrica ❑*%mw*it5w#$@E4% You can enjoy music with 3 different equaliza- Usted podradisfrutarde musicacon 3diferentes ?KmRH211mmz7R=wbq:3 M7Hfq%wti%z tion curves preset at the factory, curvas de ecualizacion preajustadas en fabrica. @#. * Select an equalization mode. Seleccione el modo de ecualizacion deseado. iWW$JBlf%o ROCK POP CLASSIC (e.g.)/ (Ejemplo) / ({JO) ROCK ‘F ~’: 4 : - ‘ ~: ~,1,,;lII:: ,.:,.’..”: ;,:::; ’:;:;;;:;;~;,;::”; ~ _ _ + ~: “ ““:iq’f=’l%lf””t: : :; ““ ‘ -{ ‘“ : y:h ~, f,”f ,:pt,;:’ :: ‘:. ~ ,’ - - ,: Preset equalization curve is displayed, Se visualiza la curva de ecualizacion prefijada, R%Xti?%ltifrt%f%i%%i. To cancel the selected mode Para cancelar el modo seleccionado m~lWf@%* Press the selected button twice. Presione dos veces el boton seleccionado. %EZlK+Wz$il%2Ao —. To select with the remote control Para seleccionar con el control remoto mi+l+m%+iRt2 Press it repeatedly. Presionelo repetidamente. ZE?EWEWLE2H0 GEQ 7!? r+p”’+c’’ss’c+%’r-l —-— .—— ROCK: Powerful sound emphasizing treble and ROCK: Sonido potente con Iosgraves y agudos ROCK bass enfatizados POP: POP: More presence of vocals and midrange POP: Mas presencia de Ios sonidos vocales CLASSIC: Sound enriched with heavy bass and y de la gama media CLASSIC fine treble CLASSIC: Sonido enriquecido con graves potentes y agudos fines About preset sound quality Cualidad acustica preajustada M%*5Q7’R% $~~%jJ bb”~=, ;!$~~. &&& When recording Cuando grabe $$79% The VOLIJME control, BBE button, GRAPHIC El control VOLUME, el boton BBE, Ios botones EQUALIZER buttons, and T-BASS button have no VOLUME. BBEWQt. GRAPHIC EQUAL- GRAPHIC EQUALIZER, y el boton T-BASS no effect. tendran efecto sobre la grabacion. IZER&&kT-BASS#&Ti& {’F%. Headphone use Utilization de auriculares ?3@!t=%%.Z@M Connect headphones to the PHONES jack. Conecte Ios auriculares a la toma PHONES. RBR@3%klEiAPH01fES%TLo To mute the sound temporarily %%??3BR%5$?3 Para silenciar temporalmente el sonido Press the MUTE button of the remote control. The Presione el boton MUTE del control remoto. &EH@&JMLJTEHL !71WWH+JWR! indicator of the function button blinks. To restore Parpadea el indicador del boton de funcion. Para N’%%.%%%’IXE%?3, RIFWH2!%W41L the sound, press the button again. restablecer el sonido, presione nuevamente e! mismo boton. 15
  • 16. m-- (? wOpEN’cLOsE t? Total number of tracks and pl~ying time .umero total de Ias canciones y tiempo de reproduction EilfB 2M%WW%EORWS 3 PLAY/DIRECTION 9 Qb Play begins. Inicia la reproduction EM=Fl?& Track number being played and elapsed play- ing time El numero de la cancion en reproduction y el tiempo transcurrido w El%kE%mw%w%, *R7RW’%HKJRM. 16
  • 17. To stop play Press the M button. To pause Press the Iil button. To resume play, press the II button again. To play an 8cm CD Load a disc onto the inner circle of the tray. Note on the display window If the disc includes more than 17 tracks, the track numbers after 17 are not displayed. To check the remaining time Press the DISPLAY button during playback, The amount of time remaining until all tracks finish playing is disp;ayed. To resume the play time display, press the DIS- PLAY button again. If a dirty disc is used The disc may not play normally. (It may stop, the search for a track may take longer, etc.) In this case, press the ❑ STOP button to stop play, and take out the disc. Then wipe it with a cleaning cloth. A disc with a major flaw will not play normally either. Notes ● Do not place more than one compact disc on the disc tray at “the same time. c If, during CD play, the video image of a nearby television is distorted, or if static is heard from a nearby radio, please move this unit further away from the affected television or radio. Para cesar la reproduction Presione el boton ■ , Para realizar una pausa Presione el bot6n Il. Para reanudar la reproduction, vuelva a presionar el boton. Pars reproducer un disco compacto de 8 cm Coloquelo en el circulo interior de la bandeja. Nota aobre la ventanilla visualizadora Si ei disco contiene mas de 17 canciones, no se visualizaran 10s ntimeros posteriors a 17. Para comprobar el tiempo restsnte Presione el boton DISPLAY durante la reproduction. Se visualizara el tiempo de reproducci6n restante hasta el final del disco. Para reanudar la visualization del tiempo de reproduction, vuelva a presionar el boton DIS- PLAY. En caso de un disco sucio Ut7disco sucio puede que no se reproduzca normalmente. (Puede detenerse la reproduction, demerara mucho para buscar una cancion, etc.) En este case, interrumpa la reproduction presionando el boton de parada ~ STOP, saque el disco y l~mpielo con el pailo de Iimpieza. El disco con una rayadura grande puede tambien reproducirse anormalmente. ?5m%!=wi mm 9 E&It. mismo. %EwF&KWAz. Si, durante la reproduction de un disco compacto, Ias imageries de untelevisorcercano sufren distortion, o si se oyen estaticos en una radio cercana, aleje el eistemadel televisor del aparato de radio efectado.
  • 18. DOWN [*] b Keep it pressed. Mantenerlo presionado. –EE52 Togo back: Keep the + button pressed. Para retroceder: Mantenga presionado et bot6n Togo ahead: Keep the - button pressed. %%W21E31 : EXR+ w%. +, Release the button when you reach the point in the Para avanzat Mantenga presionado el boton B. ZSl=lf% : k% f%w+M& track you are looking for. Suelte el boton cuando alcance el punto deseado. &31JE?fiFfix&i%Jw B %fWatl#& DOWN Press it once. [*] Presionelo una vez +3T-YK0 b To find a previous track By pressing the 4 button once during play, the CD will return to the beginning of the current track. If the button is pressed repeatedly before play starts, the CD will return to the previous track(s). To skip tracks By pressing the* button once, the CD will move to the beginning of the next track. If the button is pressed repeatedly, the CD will move in succession to the following tracks. Note During random play, the beginning of the previous track cannot be searched for by pressing the+ button. Para buscar una cancion anterior Si presiona una vez el bot6n < durante la reproduction, el disco compacto volvera al comienzo de la cancion actual. Si 10presiona repetidamenteantes de que se inicie la reproduction, el disco compacto volvera al comienzo de canciones anteriores. Para buacar una canci6n posterior Si presiona una vez el boton ~ durante la reproduction, el disco compacto avanzara hasta el comienzo de la cancion siguiente. Si 10 presiona repetidamente antes, el disco compacto avanzara sucesivamente hasta el comienzo de canciones posteriors. Nota Durante la reoroduccion aleatoria no sera ~osible buscar el comienzo de presionando el boton +. la cancion a’nterior 18
  • 19. 1 Izm 7!? To check the programmed tracks 2 Select the desired tracks. Seleccione Ias canciones que desee. imHEim-!Jla lao - 3 Press the DOWN (+) or UP (-) button re- peatedly during the stop mode. The track number and the program number are displayed in pro- grammed order. To cancel programmed play Press the ■ STOP button during the stop mode, or press the 01’EN/CLOSE button. To change Ithe program After canceling the programmed play, program the tracks a{]ain. If the disc includes more than 17 tracks Tracks after the 17th can be programmed, but their track numbers are not displayed in the music calendar. Note While the sleep function is activated, program operation is impossible. Para comprobar Ias canciones programadas Presione el bot6n DOWN (44) o UP (-) repetidamente durante el modo de parada. El ntimero de canciones y el ntimero de programa se visualizaran en el orden programado. Para cancelar la reproduction programada Presione el boton ■ STOP durante el modo de parada o el boton OPEN/CLOSE. Para cambiar el programa Despues de cancelar la reproducci6n programada, programe nuevamente Ias canciones. ‘d &mwiQEi E%JE%5W$EE%R!EDOWN (+4) m (*) wao M El ?mmmww%wRti*o Hwmw%l W%kfi5WWEE ❑ STOP&Mfk, :N23W !EOPEN/CLOSE#&. wRw%%17BJlf%!YJ!$kl El, {Em El$w%f%w% Si el disco contiene mas de 17 canciones a~% ElE*RR%. Pueden programarse Ias canciones posteriors a la 17a., pero sus ntimeros no se visualizaran en el % calendario musical. ‘i%f@t~J&@d@, ~~tik&fi&.%*{+0 Nota Durante la activation de la funcion de cronodesconectador, sera imposible la operation del programa. 19
  • 20. — — To cancel random play Para cancelar la reproduction aleatoria Press the RANDOM button so that “RANDOM” in mmlXt%7&Y’U%*m-4$zSl El Presione el boton RANDOM de forma que “RAN- the display goes out. Z%Wi# ElZ&3%%, #/iERANDOMWf& DOW desaparezca del visualizador. To cancel repeat play Para cancelar la reproduction repetida EZ$HEE+X61?5 Press the REPEAT buttonso that “REPEA~ in the Presione el boton REPEAT de manera que se W!EfREPEAT#@, iXlI!kR5RliKf’’REPEAT” display goes out. apague la visualization “REPEAT”. W%. Repeat play during programmed play Reproduction repetida durante la funcion de Press the REPEAT button during programmed &@@%k?%&+E,%3J@3%f2E?iEEZti73 reproduction programada. play so that “REPEA~ is displayed. Repeat play Presioneel boton REPEAT durante la reproduction &%*&g$&%tiS%gBREPEATa&, will be performed, programada de manera que se visualice “RE- ftif7REPEAT’’Wfitimo mmmmka. PEAT”. Se realizara la reproduction repetida. 20
  • 21. { . . . -. . -1 ,’ 2 t II o Cp TAF’f:/DECt( 1/2 2 To stop play Press the ■ button. To pause (deck 2 only) Press the II button. -. To resume play, press the II button again. To change play direction During play or pause, press the 4 ➤button. Usable tapes Normal (type I), CrOZ (Type II) or metal (type IV) tapes can be played. The type of the tape is detected automatically when you insert the tape. Para cesar la reproduction Presione el boton H. Para realizar una pausa (deck 2 solamente) Presione el boton Il. Para reanudar la reproduction, vuelva a presionar el boton IB. Para cambiar el sentido de reproduction Durante la reproduction o el modo de pausa, presione el boton < F. Cintas utilizable Podran reproducirse cintas de tipo normal (tipo I), CrOz (tipo II), ode metal (tipo IV). El tipo de cinta se detectara automaticamente cuando inserte un casete. 3 PLAY/DIRECTION 9 QD @:Forward side :~:p Reverse side Cara frontal Cara posterior WiW *KIM 21
  • 22. When listening to a tape recorded with DOLBY NR Press the DOLBY NR button to turn on the “no NR” indicator on the display window. For Dolby NR processed tape: Turn on the indicator. For a tape recorded without Dolby NR system: Turn off the indicator. To select the reverse mode (deck 2 only) Press the REV MODE button until the desired mode indicators are turned on. Selected deck number Wmero del deck seleccionado -J W*X%H%%W% E.g.) The forward side of deck2 will be played backwhen the PLAY button is pressed. Ejemplo) La cara de avarice del deck 2 se reproducira al presionar el boton PLAY. @J: ?i&?EPLAY#QtU% %W42 KIFJWIWHk n. To s;bct the deck to be played back when tapes are inserted in both decks Paraescuchar una cintagrabadaconel sistema de reduccion de ruido Dolby Presione el boton DOLBY NR a fin de que se encienda el indicador “no NW en la ventanilla visualizadora. Para una cinta grabada con el sistema de reduccion de ruido Dolby: Haga que se encienda el indicador. Para una cinta grabada sin el sistema de reduccion de ruido Dolby: Haga que se apague el indicador. En el deck 1 Ias dos caras del casete se reproduciran una vez, Para bobinar rapidamente la cinta Durante el modo de parada, presione el boton + o * y despues el boton ■ a fin de parar el bobinado. Si inicia la reproduction desde la cara poste- rior En el deck 1, la cinta se parara siempre cuando se haya reproducido una vez la cara posterior. En el deck 2, si ha seleccionado ~), la cinta se parara cuando se haya reproducido una vez la cara posterior, Nota Es posible que se oiga ruido si hay un televisor encendido. En tal caso apague el televisor o separelo de este sistema. Para comprobar el deck y la cara de reproduction de la cinta durante el modo de parada La ventanilla visualizadora muestra el deck y la cara seleccionados para la reproduction. Consulte la figura en la columns de ingles. Para seleccionarel decks reproducirse cuando Ias cintas estan insertadas en ambos decks. Each time it is pressed, the deck number changes. Cada vez que presione, cambia el numero del Otherwise, the deck which was closed last is @7AwEl!kR$E, Z%&Rti!%E!PE&%, ?3Ru, deck. De 10contrario, se selecciona el deck que se selected. selecciono tiltimo. JM%%%3J%?W%91W5$H% 22
  • 23. Press ~ or + during playback, referring to the following table. Note . Searching fcr the beginning of a track cannot be correctly carried out on with the following tapes: ● A tape with a blank of less than 4 seconds ● A tape with a noisy blank ● A tape with long low-level sections ● A tape of low recording level Presione * o < durante la reproduction, consultando la tabla siguiente. l!=z!l=kl=l PMY,o,REcT,ON lml’”l+- 1 I I I I I 23
  • 24. o 9 TAPEIDEcK 112 2 3 Select 2. Seleccione 3- REV MODE 7!7 4 PLAY/DIRECTION +!/ UD Press repeatedly. Presione repetidamente. 3ZTZE&#Z’$& To select the deck to be played back first Para saleccionar el deck que debe reproducer BEHHWJH!31H%WE0 primero Each time it is pressed, the deck number changes. Cada vez que presione, cambia el nbmero del Otherwise, the deck which was closed last is se- %VA&EItk?Mt, %%%#@lW&41?&t, %FOJ, deck. De 10contrario, se selecciona el deck que se lM%W%FJz?%%i%@53Wgo Iected. selecciono tiitimo. 24
  • 25. 1 Select a band. Seleccione la banda. Wiw% o 2 Extinguish the preset number. Borre el numero prefijado. u Preset number Numero prefijado TEH%%W% To search for a station quickly (Auto ssarch) Press the DOWN (+) or UP (~) button for 1 to 2 seconds, and a station is searched for automati- cally. Wher a station is found, searching stops automatically. To stop it manually, press either the DOWN (441) or UP (M) button once. The searchil-lg may not stop at a station with a very weak signal. If the FM slerso broadcast signal is weak. Press the Flfl MODE button to extinguish “AUTO in the display. Background noise will be reduced although the broadcast becomes monaural. To change ths AM (MW) tuning interval The AM (MW) tuning interval of the LH, U and C models is factory-set to 10kHz, and that of the HE, E and K models to 9kHz. If you use ttm unit where the frequency allocation system is dilferent from the preset one, press the POWER button to turn off the power. Then, while pressing the TUNER/BAND button press the POWER buiton. To reset the interval, repeat this procedure. Para buscar rapidamente una emisora (Btisqueda automatic) Presione el boton DOWN (~) o UP (~) durante 102 segundos para buscar automaticamente una emisora. Sise encuentra la emisora, la b(rsqueda cesara automaticamente. Para cesarla manualmente, presione una vez e boton DOWN (+) o UP (-). Es posibleque no puedabuscarse una emisora con una serial muy debil. Si la sefial de rediodifusion de FM stereo es debil Presione el boton FM MODE para que desaparezca “AUTO del visualizador. El ruido de fondo se reducira, pero la recepcion sera monoaural. Para cambiar SI intervalo de sintonia de AM (MW) El intervalo desintoniade AM (MW) de Ios modelos LH, U v C esta aiustado en fabrica a 10kHz v el de los’m~delos HE; E y K esta ajustado a 9kHz. Si utiliza esta unidad donde el sistetna de aeignaci6n de frecuencia es diferente del preestablecido, presione et boton POWER para desconectar la alimentacion. Luego de esto, mientras mantiene presionado el boton TUNER/BAND, oprima el boton POWER. Para reponer el intervalo, repita este procedimiento. 3 Select a station. Seleccione una emisoram W5aMo DOWN LJP 25
  • 26. D_ C-J 1 Select a band and station. Seleccione la banda y la emisora. iFl!&!%S@Uts*o + +5+ TUNEWBAND Q u Extinguish preset number. Haga que desaparezca el numero de memorization. Preset numb~r. Ntimero de memorization. TFGlq%??i% m 2 Select a preset number (1 to 32). Seleccione un numero de memorization (1 a 32). i&iWW!’l%H& (1=32) SET b b Note Nota The remote control cannot be used for preset- EI control remoto no puede utilizarse para la ting. memorization. 26 3 Memorize the station. Memorice la emisora. %21WIS*. o no SET b 4 Repeat steps 1 to 3. Rapita Ios pasos 1 a 3. ZH51Z3*!S!0 .
  • 27. 1 — r Select a band. Seleccione la banda. i2iE%Jk!% o v TUNER/BAND 2 PRESET To select a preset number When the DOWN (+) or UP (-) button is pressed repeatedly, you can search for the manually preset and factory-set* stations, only in the band which is selected in step 1. Example) When you preset three AM (MW) stations to numbers 1 to 3, the preset numbers are searched as following in the AM (MW) band. 1+2+3+25+26+27+28-+29 To receive a Stiition of the other bands, first change the band by pressing the TUNER/BAND button. ‘Factory-set stations FM: Number 1 to 24 AM/MW: Number 25 to 29 LW (E, K models only): Number 30 to 32 Para seleccionar un ntimero momorizado Presionando el boton DOWN (44) o UP (*), usted podra buscar manualmente Ias emisoras memorizadas y preajustadas en fabrica*, solo en la banda seleccionada en el paso 1. Ejemplo) Cuando usted memorice tres emisoras a Ios numeros 1 al 3, Ios ntimeros memorizados son buscados como sigue en la banda AM (MW) 1+2+3+25+26-+27+28+29 Para sintonizar una emisora de otras bandas, cambie primero la banda presionando el boton TUNER/BAND. *Emisoras preajustadas en fabrica FM: Numero 1 a 24 AMIMW: Ntimero 25 a 29 LW (modelos E, K solamente): Ntimero 30 a 32 3 Select a preset number. Seleccione el ntimero de memorization deseado. i!.wiw=!w~~mo 27
  • 28. When recording from a CD or a tape, see also the pages after 32. To stop recording Press the E button. To pause recording Press the II button. To resume recording, press the II button again. To start recording with the remote control First press the REC button, and then press the 4 ● (play) bu{ton within 2 seconds. Monitoring During recording, the output volume and tone of the speakers or headphones maybe freely varied without affecting the level of the recording. Usable tapes Normal (type I) and CrOz(type II) tapes can be recorded on. The type of the tape is detected automatically when you inserf it. To erase a recording It is possible to create a blank tape by erasing a recording. 1 Press the TAPE button, 2 Insert the tape you want to erase into deck 2. 3 Set the reverse mode and the recording direc- tion. 4 Press the VIDEO/AUX button. (Turn off the power of the external equipment connected to the VIDEO/AUX jack.) 5 Press the RECORD button. Note When a tape without an erasure prevention tab is inserted, the dubbing operation will not begin. Para grabar de un disco compacto o una cinta, Consulte Ias paginas posteriors a 32, Para cesar la grabacion Presione el bottm H Para realizar una pausa en la grabacion Presione el boton II Para reanudar la grabacion, vuelva a presionar el boton Il. Para iniciar la grabacibn con el control remoto Presione primero el bot6n REC, y Iuego oprima el boton < ➤(reproduction) poraproximadamente 2 segundos. Monitoreo Durante la grabacion, el volumen y el tono de salida de Ios altavoces o auriculares pueden cambiarse sin afectar el nivel de grabacion. Cintas utilizable Para grabar podra emplear cintas de tipo normal (tipo I) y CrC)z (tipo 11), El tipo de cinta se detectara autom~ticamente cuando inserte un casete. A.
  • 29. . .——* 1 I “L ~: — —, ~ ~: _.#: .—.— . 4 :Selecl :Selecl Ew9$ii o L —— . TAPE/DEcK T —,—, Es posible crear una cinta en blanco borrando una gtJ~B~o rmahaci6n. 1 z- 1 2 3 4 5 Presione el bot6n TAPE. z?W31tH%f Irlserte M.cinta que desea borrar en el deck 2. 2 #*@m&&. Fije el modo de inversion y la direccion de 3 grabacidrr. %%!%7%%% 4 PresionC! el boton VIDEO/AUX, (Desconecte la %%311%flto alimentacion del equipo externo conectado a la toma VIDEO/AUX.) %X’lzfi$fia, I%lZ!2-%t I17Z%E. Presione el boton RECORD. G2J%%*%%%M%* 5 E* 29
  • 30. @ To record with Dolby noise reduction system The Dolby Noise Reduction system reduces tape hiss and noise. Press the DOLBY NR button to turn on the “no NW indicator on the display. For recording with DOLBY NR: Turn on the indicator, For recording without DOLBY NR system: Turn off the indicator. @ To select the reverse mode Press the REV MODE button until the desired mode indicators are turned on, When you record on both sides, be sure to record on the front side first. Recording automatically stops after the reverse side recording is com- pleted, even if the REV MODE button is set to CZ>. To insert a 4-second blank space during re- cording Press the RECORD/REC MUTE button during the recording or recording pause mode. The red indicator blinks and incoming signals will not be recorded on the tape, then a 4-second blank space will be inserted. 4 seconds after the RECORD/REC MUTE button is pressed, the cassette deck will automatically enter the recording pause mode. To resume recording, press the II button. For a blsnk space of less than 4 seconds After pressing the RECORD/REC MUTE button, quickly press it again while the red indicator is blinking and the recording will restart. For a blank space of more than 4 seconds After deck 2 enters the recording pause mode, press the RECORD/REC MUTE button again. Each time this button is pressed, a 4-second blank space is added. Note If squealing sounds (beating) occur when record- ing an AM(MW), LW broadcast, change the FM MODE button to a different position, so as to eliminate the beat noise. By pressing the buffon repeatedly, the dot light is on and off in turn in the display window. 30 @ Para grabar con el sistema de reduccion de ruido Dolby El sistema de reduccion de ruido Dolby reduce el siseo y el ruido de la cinta. Presione el boton DOLBY NR de forma que se encienda indicador “00 NIT’ en el visualizador. Para grabar con el sistema de reduccir% de ruido Dolby: Haga que se encienda el indicador. Para grabar sin el sistema de reducci6n de ruido Dolby: Haga que se apague el indicador. @ Para aeleccionar el modo de ionveraion Presione el boton REV MODE hasta que se enciendan Ios indicadores de modo deseados, Nota Para grabar en ambas caras, cerciorese de comenzar por la frontal. La grabaci6n se parara autom&icamente despues de haber finalizado la cara posterior, inclusoaunqueel boton REV MODE este en (=). Para insertar un eapacio en blanco de 4 segundos durante la grabacion Presione el boton RECORD/REC MUTE durante la grabacir% o en el modo de grabaci6n en pausa. El indicador rojo parpadeard, y Ias sefiales de entrada no se grabaran en la cinta, y se insertara un espacio en blanco de 4 segundos. 4 segundos despues de haber presionado el boton RECORD/REC MUTE, el deck entrara autom~ticamente en el modo de grabacitm en pausa. Para reanudar la grabacion, presione el boton Il. Para dejar espacios en blanco de menos de 4 aegundoa Despues de haber presionado el boton RECORD/ REC MUTE, vuelva a presionarlo rapidamente mientras el indicador rojo este parpadeando, y se reanudara la grabacion. Para dejar un espacio en blsnco de mas de 4 segundos Despuesdeque el deck2 hayaentrado en el modo de grabacion en pausa, presione repetidamente el boton RECORD/REC MUTE. Cada vez que 10 presione, se afiadira un espacio en blanco de 4 segundos. Nota Sise escuchan silbidos (batido) cuando se graban programas de AM (MW), LW, cambie el boton FM MODE a una position diferente para eliminartales ruidos. Presionando este boton repefidamente, la Iuz de punto se enciende y se apaga en la ventanilla visualizadora.
  • 31. lfl~ [gEl Side A ❑ Cara A AEd ~o ‘;*J ( e @ ~= . ‘} &> , Tab for side A Detection slot Lengueta para lacara A Ranura de deteccion ARiMWFWW’ M’MJM ,— . .4 Cassette tape notes Tape slaclk ❑ Check ancl tighten slack tape before use with a pencil or similar tool. Slack tape may possibly break or gc!t jammed in the mechanism. C-1 20 tapt! C-1 20 tapf? is extremely thin and easily deformed or clamaged. It is not recommended for use in this unit. To prevent accidental erasure ❑ Use a screwdriver or other pointed tool to break off the plastic tabs. Reuse ~] Cover the tab openings with cellophane tape. ● Take care not to cover the CrOz tape detection slot when covering the tab openings. Notas sobre Ias cintas de casete Cinta floja ❑ Compruebe y tense la cinta usando un Iapiz o herramienta similar. La cinta cuando esta floja puede romperse o atascarse en el mecanismo. Cinta C-120 La cinta C-120 es muy fina y se deforms o daha con facilidad. No se recomienda para su empleo en este aparato. Para evitar borradoa accidentals ❑ Emplee un destornilladoro herramienta puntiaguda para romper Ias Ienguetas de plastico. Para volver a grabar ❑ Cubra Ios orificios de Ias Ienguetas con cinta adhesiva. ● Tengacuidadode nocubrirla ranuradedetecci6n de cintas CrOz cuando tape Ias aberturas de Ias pestahas. 31
  • 32. 1 0 v TAPE/DEcK 1/2 2 For playback For recording Para reproduction Para grabacion EC*FR $Ram , 3 Start dubbing. Inicie la duplication. WfHm& SYNCHRO DUBBING as NORMAL HIGH b -c) First the tapes are rewound to the beginning of their forward sides, and then recording starts, Se rebobinan Ias Cintas al comlenzo de SUS caras de avarice y Iuego inicia la grabacion. E%, #W&WHWKE&%W4uFll%lE% %%$% Er#tio 32
  • 33. To stop dubbing Press the 11~ button. About same tape side dubbing (STSD) This feature allows both sides of the dubbed tape to match those of the original tape. The reverse side of both tapes will start at the same time as soon as the longer tape has been reversed. @ To select dubbing speed NORMAL: For dubbing at normal speed. HIGH: For dubbing at high speed. No’tes on dubbing . . . . During dubbing, only the ■ button operates. The same Dolby NR system as used on the recorded tape is automatically used for the tape to be recorded on. During dubbing, noise may be recorded on the tape if a “TVis on. If that happens, turn off the TV or move it away from the unit. If the leader segment of the tape to be recorded on is longer than that of the tape to be played back, recording on the reverse side may stop midway through the program. In that case, dub each side manually by following the next pro- cedure. To dub some part of the original tape manually Press the IRECORD button instead of one of the SYNCHRO DUBBING buttons. The tapes are not rewound, and dubbing starts immediately. ● Make sure that “TAPE 1” is displayed. If not, dubbing will not start. ● Before dubbing, set the tape direction, and set the reverse mode to the” ~ “ position. Tolne adjustment during dubbing ● ‘“rhe VOLUME, T-BASS, BBE and GRAPHIC EQUALIZER buttons do not affect the level of the recording. ● “The output sound tone cannot be changed by the GRAPHIC EQUALIZER buttons in the middle of recording. Para cesar la duplication Presione el boton ■ . Duplication de la mismacara del casete(STSD) Esta funci6n Ie permitira hater que ambas caras del casete duplicado scan identicas a Ias del casete original. Las cintas de Ias caras posteriors de ambos casetes se pondran en movimiento al mismo tiempo tan pronto como se haya invertido el casete de mayor du raci6n. @ Para seleccionarlavelocidad deduplicacion NORMAL: Para duplicar a velocidad normal HIGH: Para duplicar a gran velocidad Notas sobre la duplication . . . ● Durante la duplication solamente funcionara el boton ■. Ef%&k%&B%o En la cinta du~licada se em~leara ● %lllw%aii% El%*$*, =1’SW9%%JJR*0 B cinta original. Durante la duplication, es posible que se grabe RW%ERZ2RHRWIEKI’K B VJTi&miFTmo ruido en la cinta si hay un televisor encendido. lkkWKZllKIV’lJ FJ2J%JR,=FWE$%%E%FR%. Cuando suceda esto, apague el televisor o aleielo de este sistema. =FZfJ&WW&#%M%91Ns Si ‘s1 segmento guia de la cinta que desee i% PERECORD%4f+UiEK tt$Z TSYNCHRO duplicar es mas Iargo que el de la cinta original, la grabacion de la cara posterior puede cesar antes de que finalice la cinta original. En tal case, duplique cada cara manual mente siguiendo el procedimiento que se da a continuation. Para duplicar manualmente alguna parte de la cinta original Presione ei boton RECORD en vez de unos de Ios botones SYNCHRO DUBBING. Nose rebobinan Ias cintas y la operation de duplication empieza inmediatamente. ● Cerciorese de que esta visualizado “TAPE 1”. De no estarlo, no comenzara la duplicaci6n. ● Antes de la duplication, fije la direccion de la cinta y el modo de inversion ala position” ~ “. wMi&%EfiamE ● VOLUME, T-BASS, BBE XlGRAPHIC EQUALIZER %Mtt7&##&+t3 %7. ● lE&=+A@%GRAPHIC EQUALIZER%M $%wwlw+mo Ajuste del tono durante la duplication ● Los botones VOLUME, T-BASS, BBE y GRAPHIC EQUALIZER no afectan el nivel de la grabacion. ● El tono de sonido de saiida no puede cambiarse mediante Ios botones GRAPHIC EQUALIZER durante la grabacion. 33
  • 34. n OPEN/CLOSE o 5 Select the reverse mode. Seleccione el modo de inversion. REV MODE T 34
  • 35. . 0 Q TAPE/DEcK 1/2 o RECORD T Afler play ia completed Despues de terminar la reproduction tiB&%22% The compact disc stops, but Deck 2 is still in the El disco compacto cesa, pero el Deck2 permanece %-hfu~fiwk, W%$w%217!lEm*a3ao recording mode. Press the STOP button to stop it. en el modo de grabaclon. Preslone el boton STOP %l!ESTOP@J%@ZZFf%k para detenerlo. To stop recording ML** Press the ■ button. The playback of the compact Para cesar la grabacion disc stops simultaneously. %&E ■ %@. E% WE%WJMWl%4$ko Preslone el boton ■ La reproducclon del disco compacto cesa simultaneamente. 35
  • 36. 36
  • 37. To check the editing contents on side B Press the DISPLAY button. To cancel the editing contents Press the ■ button or the OPEN/CLOSE button. Note on CD edit function Use a compact disc which includes upto20tracks. Up to t 2 tracks can be programmed for recording each side. Para comprobar Ias canciones a ser editadas %?i%$MBBifKI%&I%@? en la cara B &$E3DISPLAYE&fL Presione el boton DISPLAY. 7H%!Wi4Rwm%H Para cancelar Ias canciones a ser editadas WKSW&&EZOPEN/CLOSE+2?$Rc Presione el boton R o el boton OPEN/CLOSE boton. M%CD%KWW4E Nota sobre la funcion de edition del disco @wlR%i20Bm El wm%m)+o compscto 77Jw&!&FJ2$Kl%WFti12Em Elo Utilice un disco compacto que contiene 20 canciones. Podran programarse hasta 12 canciones para la grabacion de cada cara. 37
  • 38. 1 Put the side to be recorded on first facing you. Ponga la cara a grabarse primero enfrentada hacia usted. 5Hww%wJ-Ei$Hrw&. 5 Selected tracks for side A Seleccione Ias canciones deseadas para la cara A. E$A~&+%&! R . Remaining time of side A Tiempo restante de la cara A AEijRW%JEMRH%i ! Selected tracks Canciones seleccionadas Wxm El If the total time of the selected tracks exceeds the tape length The “--” mark is displayed instead of the track number and the track is canceiled. To check the program In the stop mode, press the DISPLAY button. Each time it is pressed, the contents of each side are displayed in turn. Remainina time on the tape To change a program First press the ■ STOP button to cancel the pro- gram, then reprogram the tracks. Time on cassette tapes Cassette tapes generally have a bit more tape than the time indicated on their labels. When you des- ignatethe nominal tape length in step4, you should have a little unrecorded tape at the end. Side A Track numbers Si el tiempo total de Ias canciones seleccionadas excede la duration de la cinta Se visuaiiza la marca “--” en vez del numero de la canci6n y se cancela la cancion. Para comprobar el programa En el modode parada, presioneel bot6n DISPLAY. Cada vez que presione este boton, se visualiza alternadamente Ias canciones de cada cara. Tiempo remanente en la cinta r Cara A Total number of tr~cks 38 Numero total de ca~ciones
  • 39. . . —. 2 3 4 Designate the tape length. Designe la duraci6n de la cinta. *WWW5E0 (Remote control only) (Solo el control remoto) (f& FEt+%M%) o [;1 EDIT— PRGM I CD ‘~+ ‘~ ~;x~c-,, Press once. Presione una vez. E2Ef-?k Tape length of side A Duration de la cinta de la cara A. ATEIFW&~i% ;. ...; ~,w-.. [ :.,g U ,!”’ . . . : 1(11 01[111 ~ .. ,. ,,~ *-.“z ,~ ,Fmf ~> :—-&J._ : 70,,0fk,Ah i,,,, 6 7 Select the tracks for 8 Start recording side B. Inicie la grabacion. Seleccione Ias Wwwio canciones deseadas @ Set the Dolby NR type and the reverse para la cara B. mode. ~BTFIti%~l%Ei$ E . Seleccione el sistemade reduccion de ruido Dolby y el modo de inversion. ‘&~Dolby NRWA2W$$KI%N,. D RECORD T L~ = First the tape is rewound to the Ibeginning of the forward side, and then recording starts. Se rebobina la cinta hasta el comienzo del Iado de avarice y Iuego inicia la grabacion. %x, wm?m?mw4mmm, ?7w$w iw?liio DISPLAY .- En primer Iugar, presione el boton ■ STOP para “--’’&ljtbpRRfi&l, LXiZ{tw El!%1% w B BP ~%, ~-~ ■ STOP+RilLAf~RX?~E~. %f$? cancela r el programa, luego vuelva a programar Ias canciones. +lWx7#o $&S+%% Duraci6n de la cinta de Ios cassettes 7Zi%&fi~iH, $2EDISPLAY+FH, La cinta de Ios cassettes normalmente dura algo @l&wH*, ~ufmkg~figbflqpjao mas que el tiempo inidcado en sus etiquetas. Cuandc, designe la duration nominal de la cinta en el paso 4, Ie quedara cierta cinta sin grabar al final. ‘~f~%+hb%~~~~p”q rAEd Nbmwos de canciones 39
  • 40. 40
  • 42. Y 6 Get ready for the source. Prepare la fuente. W!if%%imw o J Listening to a disc Escucha de un disco J&ga~$$jug)+ @) Load a disc onto the disctray. Coloque un disco en el receptor de disco. #@J&R j?G&Pgf&k.o @ Press the CD funcbon button. Presione el bot6n de funci6n CD. WECD~fiWM. o F CD ~ Insert a cassette tape into deck 1 or deck 2. @ Press the TAPE function button. Inserte un casete en el deck 10 el 2. Presione el boton de funclon TAPE, WwHw&%w$. 1 s%?%%! 20 +E!+!STAPEPI%%M @ Set the Dolby NR and the reverse mode. Seleccione el sistema de reduccion de ruldo Dolby y ei modo de inversion. %=Dolby NR%iXZW%RiZSG o m TAPE/DEcK 1/2 o A LIsJenmg to the radio Escucha de la radio WG%%JR?H% a Recording from the radio REC Grabacion de la radio WIIEW5W L/ @)To record from the radio, Inserl a cassette into @)Tune in to a station. deck 2. Set the Dolby NR and the reverse Sintomce una emisora. mode. $&3%$. Para grabar de la radio, inserte un cassette en el deck 2. Fije el Dolby NR y el modo de inversion. %RwfMw#4$w, W%MW%AX121W% 20 o 42
  • 43. m See pages 14 and 15. Consulte Ias paginas 14 y 15. ?xx114%i215Ho .,— . 11 7A(djust the volume and tone. Ajuste el volumen y el tono. ~@~jgj#*~*o .,— (~ T~~rnthe system power off. D(~sconecte ia a[imentaci~n del sistema. IEM%%l%lz% .!—. POWER Q After setting the timer Turn the system power off. If the power is on, the timer will not work at the preset time. When the on-time ie reached “SLEEP appears in the dlsplayand the sleep timer starts to work. The power is turned off automatically in 120 min- utes. To change the time After setting has been completed, reset the time. To check the timer-on time Press the STANDBY button once. Despues del ajuste del temporizador Desconecte la alimentaclon del sistema. SI la ahmentacion esta conectada, el temponzador no trabajara a la hors ajustada. Cuando Ilega la hors ajustada Aparece “SLEEP en el visualizador y accionara el cronodesconectador a la hors estabieclda. Se desconecta automaticamente la alimentaclon en 120 minutes. Para cambiar la hors Despues de terminar el ajuste, reponga la hors. Para comprobar la hors ajustada Presione una vez el boton STANDBY. To cancel the timer standby mode Once the bmer is set, it activates every day. To cancel it temporarily, press the STANDBY button so that the 0 (REC) mdlcator disappears. To restore the cancelled timer function, press the STANDBY button so that the ~ (REC) indicator IS displayed. Notes ● When the timer is worked, the FM mode, stereo or monaural, is selected according to the preset condition. ● Thetimerdoes not work if the (~ (REC) indicator is not displayed. If the on-time IS reached while the power is turned on, the tlrner cannot work. ● The timer-on time cannot be set while the ~ (REC) indicator is displayed, or during record- ing, Para cancelar el motto de espera del temporizadcrr Una vez ajustado el temporizador, este acciona cada d[a a la hors sefialada. Para cancelarlo temporalmente, presione el boton STANDBY de manera que desaparezca el indlicador @ (REC). Para restablecer la funcion clel temponzador cancelado, presione el boton STAN DBY de manera que se visualice el indicador ~ (REC). Notas ● Al trabajar el temporizador, el rnodo FM, estereo o monoaural, se seleccicma segun la condicion preestablecida, ● El temporizador no trabajara SIno esta visuahzado el mdlcador 0 (REC). SI Ilega la hors ajustada cuando esta c;nectada la ali&ntacion, no podra trabajar el temporizador, ● El tempor}zador no podra ajustarse cuando el mdlcador~ (REC) esta wsuahzado o durante la grabacion. mm2aww& Bw#*Rmf&JaIHo WRttim%ia, ak%%w WmFwJiwmfl% wHHiw!%Ml!+? #4’’sLEEI?’7Wi%_kfi%%, w@wwJwi ?iiIfFo =HJE+9Z1209E%ZF7 Elaml!!lio W?wwl aw2Em!v&wk Wi%wtEft. wiHi3%#wff 5WESTANDBYEMf_-7A.
  • 44. 1 SLEEP III 1 2 Set the time. Programe el tiempo deseado. Tw@w% SLEEP -N (’) ] To change the time Press the SLEEP button repeatedly until the de- sired time is displayed. To cancel the sleep-timer function Press the SLEEP button repeatedly until the “SLEEP indicator goes out. When the SLEEP button is pressed while the power is off The power is turned on and the sleep timer starts to work. If the program source is changed while the sleep timer is working The sleep timer is still in effect as long as the “SLEEP indicator is displayed. 44 Presione el boton SLEEP hasta que se visuaiice el =+R+R!&%EEP+i2& K3J7FI,W%%7 W%%% tiempo deseado. k. Para cancelar la funcion de cronodesconexion 3%=m%MiTSlE5i%%W’FVJflE Presione el boton SLEEP hasta que desaparezca Z12%iHR!ESLEEPW&, iE3SJ“SLEEP “ E%% el indicador “SLEEP. %f%%%lko Cuandoel boton SLEEPesta presionadocon la alimentacion desconectada HE%%Z%IHWE=LEEP%?* Se conecta la alimentacion y acciona el ?&R&f%& EEllE2F$HM%fKCi’Fo cronodesconectador. %HHEHIEH%?i%ri’F%9H$@iS H R Sise cambia la fuente del programa durante el P.Z’’SLEEP”%%!%F%X, FZM13~!%%~lJfl!I trabajo del cronodesconectador ?%30 El cronodesconectador permanece activo mientras el indicador “SLEEP se encuentre visuali.zado. s
  • 45. 1[ I ~ Play the external source. Furtciona la fuente externa. v VI DEO/AUX To adjust the input level of the equipment Para ajustar et nivel de entrada del equipo connected to the VIDEO/AUX jacks conectado a Ias tomas VIDEO/AUX. 1 2 Press the VI DEO/AUX function button and play 1 Presione el boton de funcion VIDEO/AUX y the equipment, opere el equipo. Turn the VIDEO/AUX INPUT LEVEL knob on 2 Gire laperillaVIDEO/AUX INPUT LEVEL situada the rear panel until the level of the sound being heard becomes the same as that of the other sound sources. To record from the other sources 1 Insert a cassette into deck 2. Set the reverse mode, tape direction and Dolby NR. 2 Press the VI DEO/AUX function button and play the equipment. 3 Press the RECORD button. en el tablero trasero hasta que el nivel del sonido Ilegue al mismo nivel del sonido de Ias otras fuentes sonoras. Para grabar de Ias otras fuentea 1 Inserte un cassette en el deck 2. Fije el modo de inversi6n, el sentido de la cinta y Dolby NR, 2 Presione el boton de funcion VIDEO/AUX y opere el equipo. 3 Presione el boton RECORD. 1 2 3 45
  • 46. 1 2 Miniplug (3.5a) Miniclavija (3.5 mm de dia.) W@EfZH(3.5@) MIG ,.. : .-: . “: ,;; . ,.-. ... -.. ,“, . ,’, :’” .- ., . ...=. ; .-, : ,. :,,. .: ?:,=.: --<.; .-, : ,.- . . :-------- ... :,.:* ,:. ” :1 -. >.,.,-’ . . . . . .,. :,i.’”r. ,,,.. ,.. , :! %.y ,.; -. ... “ . . — -$2 ,,..’, --- ;, ‘j. ~~“’. ““ “.-. .:”.”.” .“.,.”, .- .. .. . . . . . .. . . . .“. . ..” . .-’ -, : ,.. . . . . . . . . . <., ,’ ..’ ,:. :Y..,. .:;- ., ~. :;?,.. ~;,.,. ‘. ;:.. . . . . . . . . . .$ ...,.,. “. . . ‘- “-” ,.. . >“----- -. .“..,.:::;= :- ---” .. .-...=--... : Select the source to be mixed and play it. Seleccione la fuente con la que desee realizar la mezcla, y pongala en reproduction. WW%*WJRZI%W*M*O o 0 0 0 VI DEO/AUX I CD b 3 Adjust the volume and tone. Ajuste el volumen y el tono. %EwHs%wmEJO See pages 14 and 15. Consulte Ias paginas 14 y 15. Z3M11471115H0 I 4 Adjust the microphone volume. Ajuste el volumen del microfono. ~g==~gq MIXING PLAY u o MIN ● ● MAX I 46
  • 47. To enjoy karaoke with an ordinary compact Para diafrutar del Karaoke con un disco MWEZWWMX+M3M disc compacto ordinario Notes on the VOCAL FADER This function does not work correctly with the following CDs: ~ Those with a monaural recording o Those recorded with strong echoes I Thoss with the vocal part recorded on the right or Ief! side of the sound width ‘Toechothesound (NSX-330HE and NSX-A92HE My) :Slide the ECHO LEVEL lever toward MAX to increase the echo. lNotes Notas sobre la funcion de VOCAL FADER Esta funcirh no opera correctamente con Ios siguientes discos compactos: ● Los discos grabados en monoaural ● Los discos grabados con fuertes ecos ● Los discos con la parte vocal grabada en el Iado derecho e izquierdo de la anchura sonora. Para anadir efecto de eco al sonido (Solo NSX- 330HE y NSX-A92HE) Deslice la palanca ECHO LEVEL hacia la posici6n MAX para aumentar el eco. Notas l! If a microphone is set too near the speaker, a ● howling maybe produced. In this case, keep the microphone away from the speaker, or decrease the sound level. II When not using the microphone, set the MIX- ● ING PLAY control to MIN and remove the micro- phone from the MIC jack. III Do not set the microphone volume too high, by ● observing the spectrum analyzer indication. II For microphone mixing, it is recommended to use a unidirectional type microphone to prevent ● howling. II The mixed sound cannot be recorded. . Si el microfono esta demasiado cerca de un altavoz, es posible que se produzca aullido. En este case, aleje el microfono del altavoz o disminuya el nivel del sonido. Cuando no vaya a emplear el microfono, ponga el control MIXING PLAY en MIN y extraigalo de la toma MIC. No ajuste el nivel del microfono demasiado alto observando la indication del analizador de espectro. Para la mezcla con microfono, se recomienda emplear un microfono unidirectional a fin de evitar el aullido. No puede grabarse et sonido mezclado. 47
  • 48. @ To clean the cabinet Para Iimpiar el exterior %fZW%#! Use a soft cloth lightly moistened with mild deter- Emplee un pafio suave un poco humedecido en FB7AE* W8EMZM%RWTW7E$WNZ? %M. :Wzl gent solution. Do not use strong solvents, such as alcohol, benzine or thinner. Regular deck cleaning @ Clean the (recording/) playback head @ erasure head @ (deck2 only), pinch rollers @, and cap- stans @ regularly (every 10 hours of use) for optimum sound quality. Use a cotton swab @ lightly moistened with cleaning fluid or denatured alcohol, To clean discs (@ Before playing, wipe the disc from the center out with the cleaning cloth. After playing, store the disc in its case, solution de detergence poco concentrado. No emplee solventes fuertes, como por ejemplo el alcohol, bencina ni disolvente. Limpieza regular del deck @ Para obtener sonido de optima calidad, Iimpie la cabeza de (grabacion/) reproduction @, cabezas de borrado @ (deck 2 solamente), Ios rodillos de presion @, y Ios ejes de arrastre @con regularidad (cada 10 horas de utilization). Emplee un palillo de algodon @ Iigeramente humedecido en Iiquido limPiador o en alCOhOldesnaturalizado. Para Iimpiar discos@ Antes de la reproducci6n, frote el disco desde el centro hacia afuera con el pario de Iimpieza. Despu& de la reproduction guarde el disco en su caja. .. —.—. .. .. . WH!M%?IJ, In%i%. 6XlI@W%R%frJ. 48
  • 49. <FM section> Frequency range Usable sensitivity (IHF) Alternate channel selectivity Signal-to-noise rstio Harmonic distortion Frequency response Stereo separation Antenna <AM (MW) section> Frequency range Usable sensitivity Selectivity Signal-to-noise ratio Antenna 87.5 MHz to 108 MHz 1.3 pV (75 ohms) 13.2 dBf 50 dB (i400 kHz) 70 dB (STEREO), 76 dB (MONO) 0.3 % (MONO), 1 kHz 0.5 % (STEREO, L-R), 1 kFlz 30 HZ to 15 kHz (+0.5 dB, -3 dB) 33 dB at 1 kHz 75 ohms (unbalanced) NSX-330HE, E, K, NSX-A92HE: AM 531 (530) kHz to 1,602 (1 ,71O) kHz NSX-330LH, U, C, NSX-332U: AM 530 (531) kHz to 1,710 (1,602) kHz 350 pV/m 22 dB (9 kHz) 53dB(100 dB input) Loop antenna cLW section>(E and K models only) Frequency range 144 kHz tO 290 kHz Sensitivity 1,400 ~V/m Antenna Loop antenna <Timer section> Progrsm timer On-timer, capable of free setting Sleep timer Capable of setting in 10-minute increments, 120 minutes maximum <Amplifier section> Power output NSX-330LH, HE, NSX-A92HE: 40W + 40W (6 ohms, T.H.D. 10% 1 kHz) NSX-330E: 30W + 30W (6 ohms, T.H, D. 1% lkHz) NSX-330K: 40W + 40W (6 ohms, T.H.D. 10% 1kHz) 30W + 30W (6 ohms, T,H.D. 1% 1 kHz) FTC RULE (NSX-330U, C, NSX-332U) 30 watts per channel, Min. RMS at 6 ohms, from 65 Hz to 15 kHz, with no more than 1Y. Total Harmonic Distortion 0.05% (15 W, 1 kHz, 6 ohms) VI DEO/AUX: 150 mV (adjustable) Harmonic distortion Input sensitivity cCassette deck section> Track format Frequency reeponse Signal-to-noise ratio Tape speed Recording system Erasure system Motor Heads 4 tracks, 2 channels CrOz tape: 50 – 16,000 Hz Normal tape: 50-15,000 Hz 60 dB (DOLBY NR ON, CrOz tape peak level) 4.8 cm/sec. (17/.9ips) AC bias AC erase DC servomotor x 1 Playback head x 1 (deck 1) Recording/playback/erasure head x 1 (deck 2) <CD player section> Disc Scanning method Lseer Rotation speed Error correction No. of channels D-A conversion Wow/flutter Signal-to-noise ratio Harmonic distortion cSpeaker SX-N330> Cabinet type Speaker Impedance Music power Output sound pressure level Dimensions (W x H x D) Weight <General> Power requirements Power consumption Compact disc Non contact optical scanner (semi- conductor laser applicabon) Semiconductor li~ser (1 = 780 nm) Approx. 500 rpm -200 rpm (CLV) Cross Interleave, Reed Solomon code 2 channels 16-bit Imear Unmeasurable 90 dB (1 kHz, O dB) 0.05% (1 kHz, O dB) 3 way, bass reflex (Magnetism sealed type) 130 mm (51/8in.) cone type woofer 50 mm (2 in.) cone type tweeter 20 mm (’3/16 In.) Ceramic typf? super tweeter 6 ohms 40 w 87 dBIWlm 180 x 302,5x 200 mm (7’/8 X 12 X 77/8 kl.) 2.6 kg (5.7 Ibs.) NSX-330LH, HE, NSX-A92HE: AC 120 V/220 V/240 V, swltchable 50/60 HZ NSX-330U, C, N!3X-332U: AC 120 V/220 V --240 V, switchab[e 50/60 Hz NSX-330E: AC 230 V, 50 HZ NSX-330K: AC 240 V, 50 I-Iz NSX-330LH, HE, NSX-A92: 85 W NSX-330/332U: 80W NSX-330E, K: 21 OW NSX-330C: 100W Dimensions (W x H x D) Center unit: Weight Accessories . ● ● 260 x 302,5x 329,5 mm (10’/4 x 12 x 13 m,) System” 620 x 302.5 x 32!3.5 mm (24’/2xl2xl3irl) Center unit: 7.2 kg (15.8 Ibs.) System: 12.4 kg (27,3 Ibs.) FM feeder antenna(1) AM loop antenna(1) Remote control (1) Specifications and external appearance are subject to change without notice due to product improvement. Dolby noise reduction manufactured under Ilcense from Dolby Laborato- ries Licensing Corporabon. “DOLBY” and the double-D symbol on are trademarks of Dolby Labora- tories Licensing Corporation. The word “BBE and the “BBE symbol” aretrademarksof BBE Sound. Inc. Under license from BBE sound, Inc. Note Please check the laws on copyright relating to recordings from discs, radio or external tape for the country in which the machme is being used. 49
  • 50. If the unit fails to perform as it is supposed to, by following this operation manual, please check it carefully in accordance with the chart below: 11 ‘“*C There is no sound. , q? ● The power cord is not connected properly. Ill ● An incorrect function selector button is pressed. ~, &&Bf, m,. ~~h - ● There is a bad connection between systems. Ml,& II ~.m s a ● Excessive voltage was applied to a speaker jack, .; * which tripped the amplifier’s voltage-protection breaker. There is no sound and no ● There is a shorl circuit in the speaker jack. ~a indicators are lit in the display I● The breaker tripped because of connection to a low- impedance speaker. ##l Sound comes from only one I ● Onespeakeris disconnected. constant, wavelike static, I ● The antenna is not connected properly. U!M I * The receiver is not correctlv tuned. * The signal is too weak. - c The system picks up outside noise. The soun”d is distorted. = There is multipath distortion. p, ~sl The tape does not run. ● Deck 2 is on pause. rl ‘“? The sound is off-balance. @ ● The playback head is dirty. ,##” High sounds are too loud. ● The DOLBY NR mode is set differently from when M%{ I the recordina was done p *-&j ;; There are no high sounds. ● A non-Dolby NR tape is being played back in that m mode. ~(~g I “ The Edavback head is dirtv. 1 Recording is impossible. * The erasure-prevention tab on the tape has been I broken. ~~q I ● There is an incorrect connection. ~~f I ● The recording head is dirty. Erasure is impossible. ● The erasure head is dirty. ● The disc is incorrectly inserted. Rmm ,. I ] ● The disc is dirty. Bma I 14 ‘! & j . There is condensation on the disc. ,Z, ● The player is on pause. /,,,,,. && The output sound is not stereo. J& ● The VOCAL FADER is turned on, ● Correct the connection. ● Press the function selector button to select the correct input. ● Correct the connection. ● Disconnect the power cord, correct the condition, including speaker connections, and connect the power cord again. . Disconnect the power cord, correct the condition, including speaker connections, and connect the power cord a~ain. ● Correct the speaker connection. ● Check the antenna connection. ● Correct the tuning. ● Install an outside antenna, ● Change the location or direction of the antenna. ● Turn the system to a different orientation. ● Move the system away from other electrical appliances, like a TV or fluorescent lights, or move the appliances. ● Change the orientation of the antenna. ● Replace the antenna with one that has the correct orientation. ● Press 11and release t)ause. ● Clean the head. ● Reset DOLBY NR to the same setting as when the recording was made. ● Turn off DOLBY NR. ● Clean the head. c Cover the erasure-prevention hole well with tape. ● Correct the connection. ● Clean the head. ● Clean the erasure head. ● Insert the disc with the label facina uo ● Clean the disc. ● Wait about an hour and try again. ● Press 11PAUSE to release ~ause. ● Turn off the VOCAL FADER. 50
  • 51. <Seccion de FM> Gama de frecuencia 87,5 MHz a 108 MHz Sensibilidad util (IHF) 1,3 VV (75 ohmios) 13,2 dBf Sensibilidad de canal alternative 50 dB (+400 kHz) Relation sehal-ruido 70 dB (STEREO), 76 dB (MONO) Dietorsi6n armonica 0,3% (MONO) 1 kHz 0,5% (STEREO, L-R), 1 kHz Respuesta de frecuencia 30 Hz a 15 kHz (+0,5 dB, – 3 dB) Separation entre canales 33 dB a 1 kHz . Antena 75 ohmios (desequllibrada) cSeccion de AM (MW)> NSX-330HE, E, K, NSX-A92HE: AM 531 (530) kHz a 1.602 (1 ,710) kHz NSX-330LH, U, C, NSX-332U: AM 530 (531) kHz a 1.710 (1.602) kHz Sensibilidad util 350 LV/m Salectividad 22 dB (9 kHz) Relation sefial-ruido 53 dB (entrada de 100 dB) Antena De cuadro cSeccion de LW> (Solo Ios modelos E y K) Gama de frecuencia 144 kHz a 290 kHz Sensibilidad 1.400 pV/m Antena De cuadro <Seccion del temporizador> Temporizador programmable Temporizador activado, capaz ajustarse Iibremente Cronodesconectador Capaz de programarse en increments de 10mmutoshastaun maximode120mmutos. <Seccion del amplificador> Salida de potencia NSX-330LH, HE, NSX-A92HE: 40VJ + 40W (6 ohmios, 10% de distortion armonica total, 1 kHz) NSX-330E: 30W + 30W (6 ohmios, 1% de distortion armonica, 1 kHz) NSX-330K: 40W + 40W (6 ohmios, 10% de distortion armonica, 1 kHz) 30W + 30W (6 ohmios, 1YO de dlstorsion arm6nica, 1 kHz) Norma de la FTC (NSX-330U, C, NSX-332U) 30 vatios por canal, min., eficaces con no mas del 1Y. de distortion armonica total Distorsir5n armonica 0,05% (15 W, 1 kHz, 6 ohmlos) Sensibilidad de entrada VIDEO/AUX: 150 mV (a]ustable) cSeccion del deck de casetes estereo> Formato de pistas 4 pilas, 2 canales Respuesta de frecuencia Cinta de CrOz 50a 16.000 Hz Cinta de normal: 50a 15.000 Hz Reiacion seilal-ruido 60 dB (DOLBY NR ON, cinta de Cr02, nivel de pico) ‘Velocidad de la cinta 4,8 cm/seg. !Sistema de grabacion Polarization de CA :Sistema de borrado Con CA lMotor Servomotor de CC x 1 ICabezas De reproduccibn x 1 (deck 1) De grabaci6n/reproducci6 n/borrado x 1 (deck 2) <Seccion del reproductor de discos compactos> Disco Compacto Metodo de muestreo Explorador optico sin contacto (aphcacion de laser de semiconductor) Laser Laser de semiconductor (1 = 780 nm) Velocidad de rotation Aprox. 500 rpm -200 rpm (CLV) Correction de errores Intercalacloncruzada, codigo Reed Solomon No. de canaies 2 Conversion D-A Lineai de 16 bitlos Fluctuation y tremoio Inmensurable Relation sefial-ruido 90 dB (1 kHz, O dB) Distortion armonica 0,05% (1 kHz, O dB) <Altavoces SX-N330> Tipo de la caja acustica De 3 vias, reflectors de graves (tipo hermetlco ai magnetlsrno) Aitavoces De graves tipo cono de 130 mm De agudos tipo cono de 50 mm De super agudos tlpo ceramlco de 20 mm impedancia 6 ohmios Potencia musicai 40 w Nivel de rxesion acustica de saiida Dimensioned (an/ai/prf) Peso cSeccion comun> Aiimentacion Consumo de potencia Dimensioned (an/ai/prf) Peso Accesorios 87 dBAMlm 180 x 302,5x 200 mm 2,6 kg NSX-330LH, HE, NSX-A92HE: 120/220/ 240V CA, commutable, 50/60 Hz NSX-330U, C, NSX-3321J: 120/220 - 240V CA, conrnutable, 50/60 Hz NSX-330E: 230V CA, 50 HZ NSX-330K: 240V CA, 50 Hz NSX-330LH, HE, NSX-A92: 85 W NSX-3301332U: 80W NSX-330E, K: 21 OW NSX-330C: 100W Unidad centrai: 260 x 302,5x 329,5 mm Sistema: 620 x 302,5x 329,5 mm Unidad centrai: 7,2 kg .5kstema: 12,4 kg Antena interior de FM (1) Antena de cuadro de AM (1) Control remoto (1) ● Las especificaciones y el aspecto externo estan sujetos a cambio sin previo aviso, debido a mejoras del producto. c Reducclon de ruido Dolby fabricado bajo iicencia de [)olby Laboratories Licensing Corporation. Doiby y el simboio de la D doble no son marcas de Dolby Laboratories Licensing Corporation. ● La paiabra “BBE y ei “s~mbolo BBE son marcas comerciaies de BBE Sound, Inc. Nota Compruebe, porfavor, Ias Ieyes relativas a la grabacion de discos, la radio, o casetes del pais en el que vaya a emplear el sistema. 51
  • 52. Si el sistema no funciona como se supone que tendria que hacerlo siguiendo Ias instrucciones de manejo, compruebelo cuidadosamente de acuerdo con la tabla siguiente: ● El cable de alimentacion no esta adecuadamente conectado. ● Corrija la conexion. ● Ha presionado un boton selector de funcion incorrect. ● Presione el boton selector de funcion correspondiente a la entrada. ● Lasconexiones entrelos componentes delsistema no son correctas. ● Corrija lasconexiones. ● Sehaaplicado unatensionexcesiva alosterminales del altavoz, y se ha disparado el disyuntor de protection contra sobretension del amplificador, ● En losterminalesdel altavoz sehaproducidoun cortocircuito. ● Eldisyuntor sedisparo debidoa laconexiondeun altavoz de baja impedancia. ● Elotroaltavoz estadesconectado. ● Desconecte laalimentacion ysolucione el problema, incluyendo Ias conexiones de Ios altavoces, y vuelva a conectar el cable de alimentacion. ● Desconecte la alimentacion y soiucione el problems, incluyendo Ias conexiones de Ios altavoces, y vuelva a conectar el cable de alimentacion. ● Conecte correctamente Ios altavoces. ● Compruebe la conexion de la antena. ● Sintonice correctamente, ● Instale una antena exterior. ● La antena no esta correctamente conectada. ● El receptor no esta correctamente sintonizado. ● La seiial es demasiado debil. ● El sistema esta captando ruido exterior. ● Cambie la ubicacion de la antena. ● Oriente el receptor en un sentido diferente. ● Aleje el sistema de aparatos electricos, tales como un televisor, lamDarasfluorescentes, oelectrodomesticos. u ~@ Elsonido esta distorsionado. ● Se esta produciendo distorsi6n por trayectoria :% multiple. ● Cambie la orientation de la antena. ● Reemplace la antena porotra que posea la orientaclon corrects. ~?~ La cinta no se mueve. I ● El deck 2 se encuentra en pausa. ● Presione II para desactivar el modo de Pausa El sonido esta desequilibrado. ● La cabeza esta sucia. Los sonidos de altafrecuenciason I ● El modo DOLBY NR no esel mismo queel empleado ● Lfmpiela, Q Ponga DOLBY NR en la misma position que la empleada cuando grabo la cinta. ~W~ demasiado fuertes, I cuando se grabo la cinta No hay sonidos de altafrecuencia. I . Esta tratando de repropducir una cinta grabada sin ● Ponga DOLBY NR en OFF. 1el sistema de reduccion de ruido Dolby con tal sistema. ● La cabeza esta sucia. No es posible grabar. ● El casete carece de Iengtieta de seguridad. ● Las conexiones no son correctas. ● Limpiela. ● Cubra el orificio con cinta tiastica. ● Corrijalas. I ● La cabeza esta sucia. ● Limpiela adecuadamente. ● Limpiela. ● Insertelo con la cara de la etiqueta hacia arriba. ● Limpielo. ● Espere aproximadamente una hors y vuelva a intentarlo. ● Presione [1 PAUSE paradesactivarel modode pausa. k!&&! NO es Dosible borrar, “ La cabeza de borrado esta sucia. m Noes posiblereproducir. ● El disco no esta correctamente insertado. ~ ● Se ha condensado humedad en el disco. ● El reproductor se encuentra en el modo de pausa. b~= El sonido de salida no es estereo I c EL VOCAL FADER esta conectado ● Desconecte el VOCAL FADER, 52
  • 53. <FME.WE%$9> $R=E3EEI 87. 5MHz - 108MHz WM%WR(IHF) 1.3 LV(75Q) 13.2dBf 5t!W%EiWF& 50dB (+400kHz) fls/%kL 70dB (T&&H , 7~dB (=*) %ik*E 0.3%(=%) , F?lkHzH 0.5% (iLtW$?,L-R) ,t?lkHzi% !J!E=Z*R 3oHz–15kHz (+0,5dB, –3dB) S@&ZwH&E . 33dB, F+lkHz% x % 75 Q (3WMM!) <AM(MW)SWR353> %*n El NSX-330HE,E,K,NSX-A92HE .4M531(530)kHz-1 ,602{1 .710)kHz NSX-330LH,U, C, Nsx-332LT: AM530~531)kHz-1.710~l, b02)hH, =rHEii!l J% 350IJV/m ERR 22dB (9kHz) .fg / I= ~~ 53dB (100dB $&L) E ?@ Biwx$a (LWiWlff!353> (#&T&&E%!IK&&l!) $R-+RE 144kHz–290kHz ?S%s 1,400 MV/m x % ~&~& <z3wf%j39> %E E&%3 Z%%, %$ww ElE13iw MB.ERR%S Sloasikw$i> 5?CJC120$ME <iMA*%*> ti~$ilw NSX-330LH , HE. NSX-A92HE. 40W+40W (6! ,T. H. DIO%,lkHz) NSX-330E30W +30W (6 Q. T. H. Dl%,lkHz) NSX-330K:40W +40W (6Q ,T. H. DIO%,lkHz) 30W+30W(6Q ,T. H. Dl%,lkHz) FTC RLTLE(fW3Et!NSX-33C Lr.C. NSX-332U) &i-’5fE3oKH RMS 6 Q .65Hz–15kHz M.w(lR%Ef&E 1 % *X19<E 0.05% (15W,lkHz,6Q) &i’A%ik B VIDEO/AUX:150mV (WH=) 53
  • 54. k!ztwmwaE%14’R EwPHM’Fwft, Km%mli?$m?a. . i%i%fEiJR. $H3ME, fl%%iEHS2E%, iEEZ%FRiFi%iR. ● WE I I w%W%mtH& ● l’i%2iEi?EzEE%o ● imil!m$wwi. ● ‘&*,’gj&&g& liS#VOCAL FADER. 54
  • 55. II . Main unit @ PAUSE (11)/SET button ~ @ @ Q @ Display window @ REV MODE button -+ @ @ @I @ DOLBY NR button ~ @ @l @ Remote sensor+ @I (@TIMER buttons (STANDBY, SLEEP) - @ @ @ SYNCHRO DUBBING buttons (NORMAL, HIGH) + @ @JRECORD/REC MUTE button ~ @ @l @ @ Disc tray @ STOP ( ■ )/CLEAR button -P @ @ c] PLAY/DIRECTION button (< ➤) + @ @ @)TUNING/pRESETfllMER/.SKlp/.SEARCMSMS buttons (- DOWN/~ UP) - @ @ @ @ a @TUNER buttons (TUNING, PRESET) + @ @ @)FM MODE button ~ @ @CLOCK button 4 @ 0) OPEN/CLOSE button - @ @ EDIT buttons (AUTO, PRGM) + @ @ @ REPEAr button - @ @ DISPLAY button ~ @ @ RANDOhA button + @ Unidad principal @ Boton PAUSE (11)/SET -“ @ @ @ @ Ventanilla visualizadora @ Boton REV MODE+ @ @ @I @ Boton DOLBY NR + @ @ @Sensor remoto + @ @ Botones TIMER (STANDBY, SLEEP) - @ @ @ Botones SYNCHRO DUBBING (NORMAL, HIGH) - @ @ Boton RECORD/REC MUTE -+ @ @ @ @ Receptor de discos @ Boton STOP ( ■ )/CLEAR+ @ @ @ Boton PLAY/DIRECTION (<p)+ @ @ @Botones TUNING/PRESET/TIMER/SKIP/ SEARCH/MS (4 DOWN/M UP) - @ @ @@o @ Botones TUNER (TUNING, PRESET)-@ @ @ Boton FM/MODE + @ @ Boton CLOCK 4 @ @ Boton OPEN/CLOSE _ @ @ Eotones EDIT (AUTO, PRGM) - @ @ @ Boton REPEAT 4 @I @ Boton DISPLAY - @ @ Boton RANDOM + @ TIMER (2-K*) +w+t (STANDBY, SLEEp) + @ @ SYNCHRO DUBBING (l=l~w$+)wil(wi! Ew) - @ RECORD/REC MUTE ($%&/&k%fw3) $za + @ @ @ (4 P)+@ia) TUNING/PRESET/TIMER/SKIP/ SEARCH/MS (mi#/lRm/z@%/Mw/a ti/*Rw B8)& $R(qDOWN/~UP) +@@@@@ RJWMB(TUNING, PRESET) + @ @ FM/MODE (%l$R/%i~) fi$fl + @ CLOCK (EW$i)M$il + @ OPEN/CLOSE (}TH/Rl%7) +ik~ + @ EDIT (%%) E&%(AUTO , PRGM) + @ @ REPEAT (=7S) W&l+ @ DISPLAY (%%) %2$3+ @ RANDOM (E&%)E2W + @ 55
  • 56. . . Main unit Q VOCAL FADER button+ @ @ POWER button+ ~ @T-BASS button 4 @ @ PHONES jack+ @ @MlCjack4 @ @ ECHO LEVEL lever (NSX-330HE, NSX-A92 only) @ Cassette compartment (deck 1) @ MIXING PLAY knob -+ @ @ BBE button + @ @ GRAPHIC EQUALIZER buttons (ROCK, POP, CLASSIC) - @ @VOLUME control + @ @ Function buttons (TAPE/DECK l/2, TUNER/BAND, VIDEO/AUX, CD) @ Cassette compartment (deck 2) Unidad principal @ Boton VOCAL FADER+ @ @ Boton POWER -D ~ @ Boton T-BASS -+ @ @ Toma PHONES - @ @Toma MIC - @ @I Palanca ECHO LEVEL (S010 NSX-330HE, NSX-A92) @ Compartimiento de casete (deck 1) @ Perilla MIXING PLAY+ @ @ Boton BBE + @ @ Botones GRAPHIC EQUALIZER (ROCK, POP, CLASSIC) - @ @ Control VOLUME a @ @ Botones de funcion (TAPE/DECK 1/2, TUNEWBAND, VIDEO/AUX, CD) @ Compartimiento de casete (deck 2) @ @ @ @ @ @ @ @ @ @ @ @ @ GRAPHIC EQUALIZER (!iE!Z3q&@%)#$X (ROCK , POP, CLASSIC) + @ VOLUME(%S) %%!+@ gJfi~#$li (TAPE/DECK 1/2 , TUNER/ BAND , VIDEO/AUX , CD) *ABM (%%%$ 2 ) 56
  • 57. Display window a Spectrum analyzer ~ T-BASS indicator IS BBE indicator ~ Stereo indicator @Timer standby indicator I@Timer/frequency/CD time counter @Tape side indicator 18 Music calendar : 19 RECOFID indicator ID DOlby NR indicator @Deck 2 reverse mode indicator @ RANDC)M/REPEAT indicator @Clock/function indicator @ CD edit recording indicator @program indicator @Tape direction indicator Ventanilla visualizadora @ Analizador de espectro @ Indicador T-BASS @ Indicador BBE @ Indicador de estereo @ Indicador de espera del temporizador @ Contadordetemporizador/frecuencia/tiempo de CD @ Indicador de la cara de cinta @ Calendario musical @ Indicador RECORD @ Indicador Dolby NR @ Indicador del modo de inversion del deck 2 @ Indicador RANDOM/REPEAT @ Indicador de reloj/funcion @ indicador de grabacion con edition de discos compactos @ Indicador de programa @ Indication del sentido de la cinta 57
  • 58. Remote control Control remoto $&2% @ SLEEP button @TIMER button @ RANDOM button @ DISPLAY button @ Function buttons (TAPE, TUNER, VIDEO/AUXr CD) @TUNING/PRESET/TIMER buttons (+/ w, M/ Pbf) @ PAUSE (11)/SET button The n/SET button does not function to set the clock and to preset radio stations. @ GEQ button @ REC/REC MUTE (0/0) button To start recording, first press this button and then press the 4 ➤ button within 2 seconds. @ POWER button @CLOCK button @FM MODE button @ OPEN/CLOSE button @ REPEAT button @ Numeric buttons (1 - O) @+1 O button @Stop ( ■ )/CLEAR button @ Play/DIRECTION (<›) button @T-BASS button @ BBE button @VOLUME buttons (A,~) @ MUTE button @ Boton SLEEP @ Boton TIMER @ Boton RANDOM @ Boton DISPLAY @ Botones de funcion (TAPE, TUNER, VIDEO/AUX, CD) @ Botones TUNING/PRESET/TIMER (44 /f+ m/w) @ Boton PAUSE (11)/SET El boton n/SET no funciona para regular el reloj y para presintonizar Ias emisoras. @ Boton GEQ @ Boton REC/REC MUTE (0/0) Para iniciar la grabacion, presione primero este boton yluegoelboton -Fdentrode2segundos. @ Boton POWER @ Boton CLOCK @ Boton FM MODE @ Boton OPEN/CLOSE @l Boton REPEAT @ Botones numericos (1-10) @ Boton +1O @ Boton de parada ( ■ )/CLEAR @ Bot6n de reproduction/DIRECTION (<›) @ Boton T-BASS @ Boton BBE @ Botones VOLUME (~,v) @ Boton MUTE SLEEP (@&W)E& TIMER (%i%%)&Mll RANDOM ({%%) #&t DISPLAY (%ifi) #%i ~~:~& ( TApE, TUNER ,vIDE()/ AUX , CD ) TUNING/PRESET/TIMER (%:g/~~/ 58
  • 59. . Battery insertion Colocacion de Ias pilas ZE%UZ5??% 1 2 * (R6P, AA) Eattery replacement Reemplazo de Ias pilas ‘iEti.ZE% When the maximum operation distance of the Cuando et alcance maximo del controlador remoto %%wah~RRFEK2%4*ntEEmwzzH> remote control decreases, replace the batteries disminuya, reemplace Ias pilas por otras nuevas. with new ones. FW$$l%ltliklo Consejos para la operation corrects %iIM%ER2*f% Hints for correct operation . 10 For the remote control to operate, it should have an unobstructed line of sight with the REMOTE SENSCEt. This is because the remote control uses infrared light rays. . f) When there is a strong ambient light source, the performance of the infrared REMOTE SENSOR is degraded, which can cause unreliable opera- tion. . ,, The recommended effective distance for wi~e- Iess operation is 7 meters (23 feet). Operation can be performed at an angle of up to 30° from either side, but the effective distance becomes somewhat shorter. . ~ Using televisions with the same type of infrared remote control, in the same direction, will cause the system to operate incorrectly. Do not use other kinds of wireless remote controls at the same time. Para emplear el telemando, no debera existir ● iXlw?w@mm$’HR, 3?GwQG??!w%$ ningun obstaculo en la I[nea visual entre el y el sensor decontrol remoto. Esto se debe a que el [REMOTE SENSOR) 7V%%WH%W5EES+$ telemando utiliza rayos infrarrojos. Cuando la Iuz ambiental sea intensa, el rendimiento del sensor de control remoto de rayos infrarrojos se degradara, 10 que puede causar una operation poco fiable. La distancia recomendada para la operation por control remoto inalambrico es de 7 metros. La operation podra realizarse con un anguio de hasta 30° a cada Iado, pero la distancia efectiva se volvera mas corta, El empleo de televisors con el mismo tipo de control remoto por rayos infrarrojos, en el mismo sentido, hara que el sistema funciones incorrectamente. No emplee otros tipos de controladores remotos de rayos infrarrojos al mismo tiempo. Notes on batteries Notas sobre Ias pilas ,, * Do not mix different types of batteries, or old ● batteries with new ones. When you are not going to use the unit for a long c period c~f time, remove them to prevent possible electrolyte leakage. No mezcle pilas de tipos diferentes, ni una vieja y otra nueva. Cuando novayaaemplearel controladorremoto durante mucho tiempo, extraiga Ias pilas para evitar la posible fuga de su electrolito. ilk ● 7vzwfwml!flmwL @w%mntLwMEMo ● mtEwammEffl*/%i?L Em’xtim!, H!mlk Rw<, 59
  • 60. CAUTION Use of controls or adjustments or performance of procedures other than those specified herein may result in hazardous radiation expo- sure, ATTENTION L’utilisation de commandes, reglages ou procedures autres que ceux specifies peut enra;ner une dangereuse exposition aux radiations, This compact disc player is classified as a CLASS 1 LASER product. The CLASS 1 LASER PRODUCT label is located on the rear exterior. m CLASS 1 LASER PRODUCT o LUOKAN 1 LASERLAITE tzzl CAUTION! Invisible laser radiation when open and inter locks defeated. Avoid exposure to beam. ADVARSEL! Usynlig Iaserstaling ved ~bning, m% sikkerhedsafbrydereer ude af funktion. Undg~ bds~ttelse for str%ling. VAROITUS! Laitteen kayttaminen muulla kuin tassa kayttoohjeessa mainitulla tavalla saattaa altistaa kayttajan turvallisuusluokan 1 ylittavalle niikymattomalle Iasersateiylle. VARNING! Om apparaten anvands pa annat satt an i denna bruksanvisning specificerats, kan anvandaren utsatta for osynlig laser-str2dning, som overskrider gransen for Iaserklass 1, Note This product is manufactured to comply with the radio inter- ference requirements of EEC directive 82/499/ECC. Nota Este producto cumple Ios requisites de radlointerferencia de la normativa de la CEE 82/499/CEE. OBSERVERA SA Iange som apparaten ar ansluten till natet flyter en svag strom genom densamma, aven da den ar avstangd. Om man under en Iangre tid ej har for avsikt att anvanda den, drag da ur natkabeln. BEMERK Apparatet erstadig forbundet med Iysnettet, sa kenge stikket er tilsluttet til stikkontakten, selv om afbryteren er slaet fra. Hvis apparatet ikke bruges i Ieengere tid, skal netledningen tr=kkes ud. C MODEL CAUTION: TO PREVENT ELECTRIC SHOCK DO NOT USE THIS (POLARIZED) PLUG WITH AN EX- TENSION CORD, RECEPTACLE OR OTHER OUT- LET UNLESS THE BLADES CAN BE FULLY lN- SERTED TO PREVENT BLADE EXPOSURE AIWA CO., LTD.