Descargar para leer sin conexión

![Configuring the Router for SSH
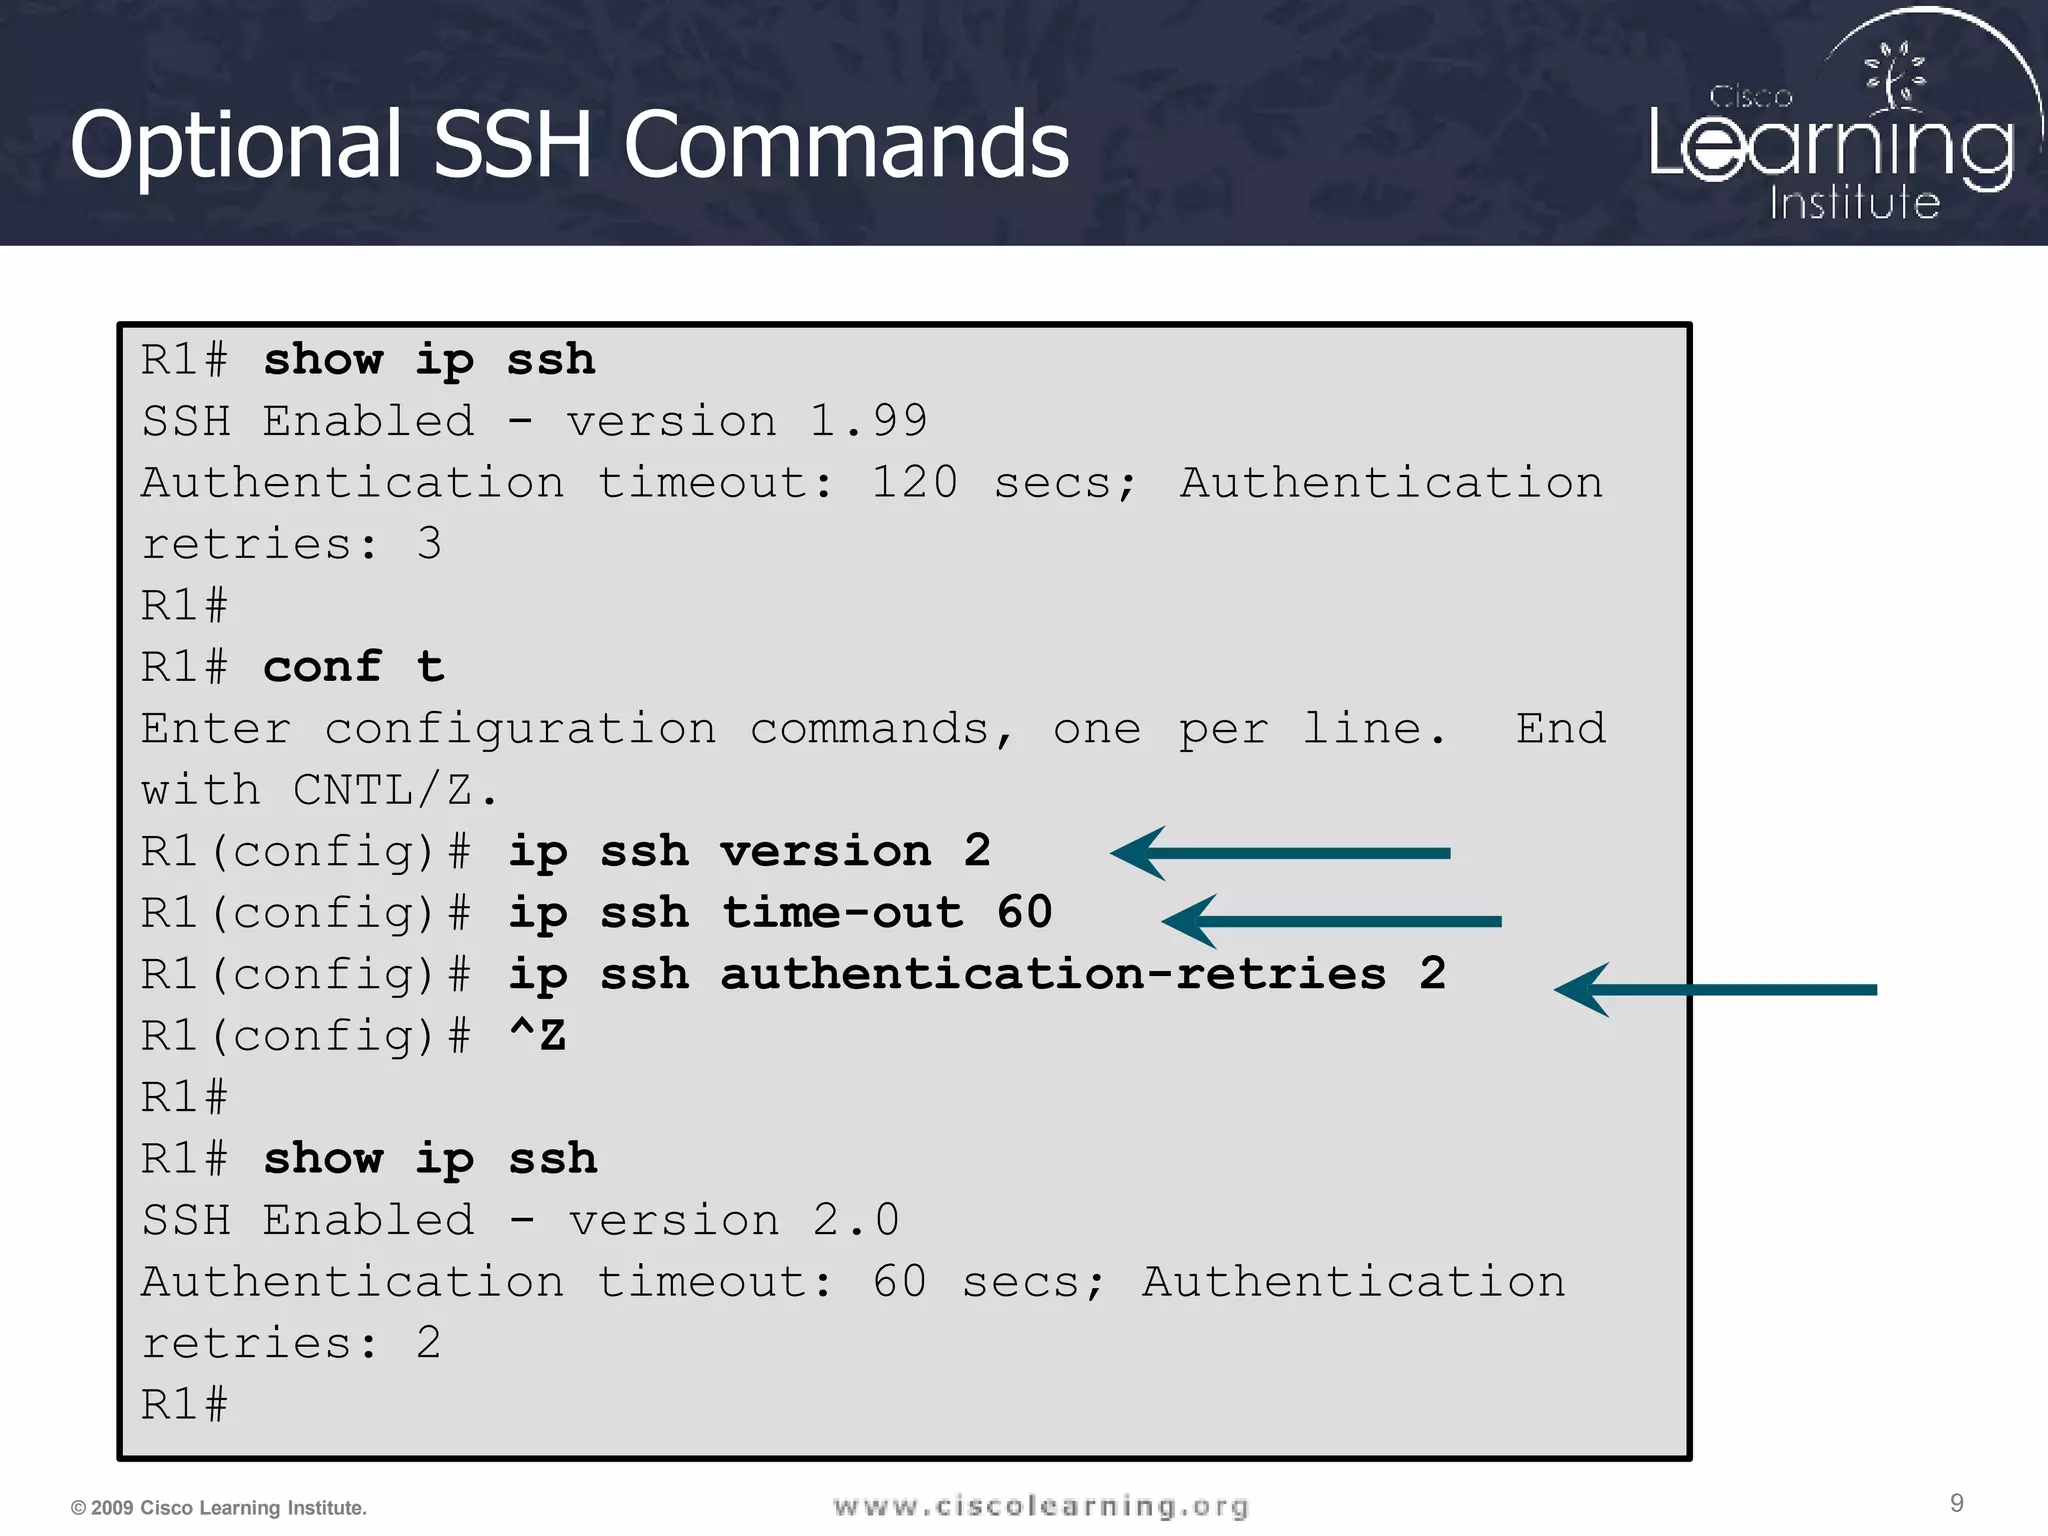
R1# conf t
R1(config)# ip domain-name span.com
R1(config)# crypto key generate rsa general-keys
modulus 1024
The name for the keys will be: R1.span.com
% The key modulus size is 1024 bits
% Generating 1024 bit RSA keys, keys will be non-
exportable...[OK]
R1(config)#
*Dec 13 16:19:12.079: %SSH-5-ENABLED:
been enabled
R1(config)# username Bob secret cisco
R1(config)# line vty 0 4
R1(config-line)# login local
SSH 1.99 has
R1(config-line)#
R1(config-line)#
transport input ssh
exit
1. Configure the IP domain
name of the network
2. Generate one way
secret key
3. Verify or create a local
database entry
4. Enable VTY inbound
8
© 2009 Cisco Learning Institute.
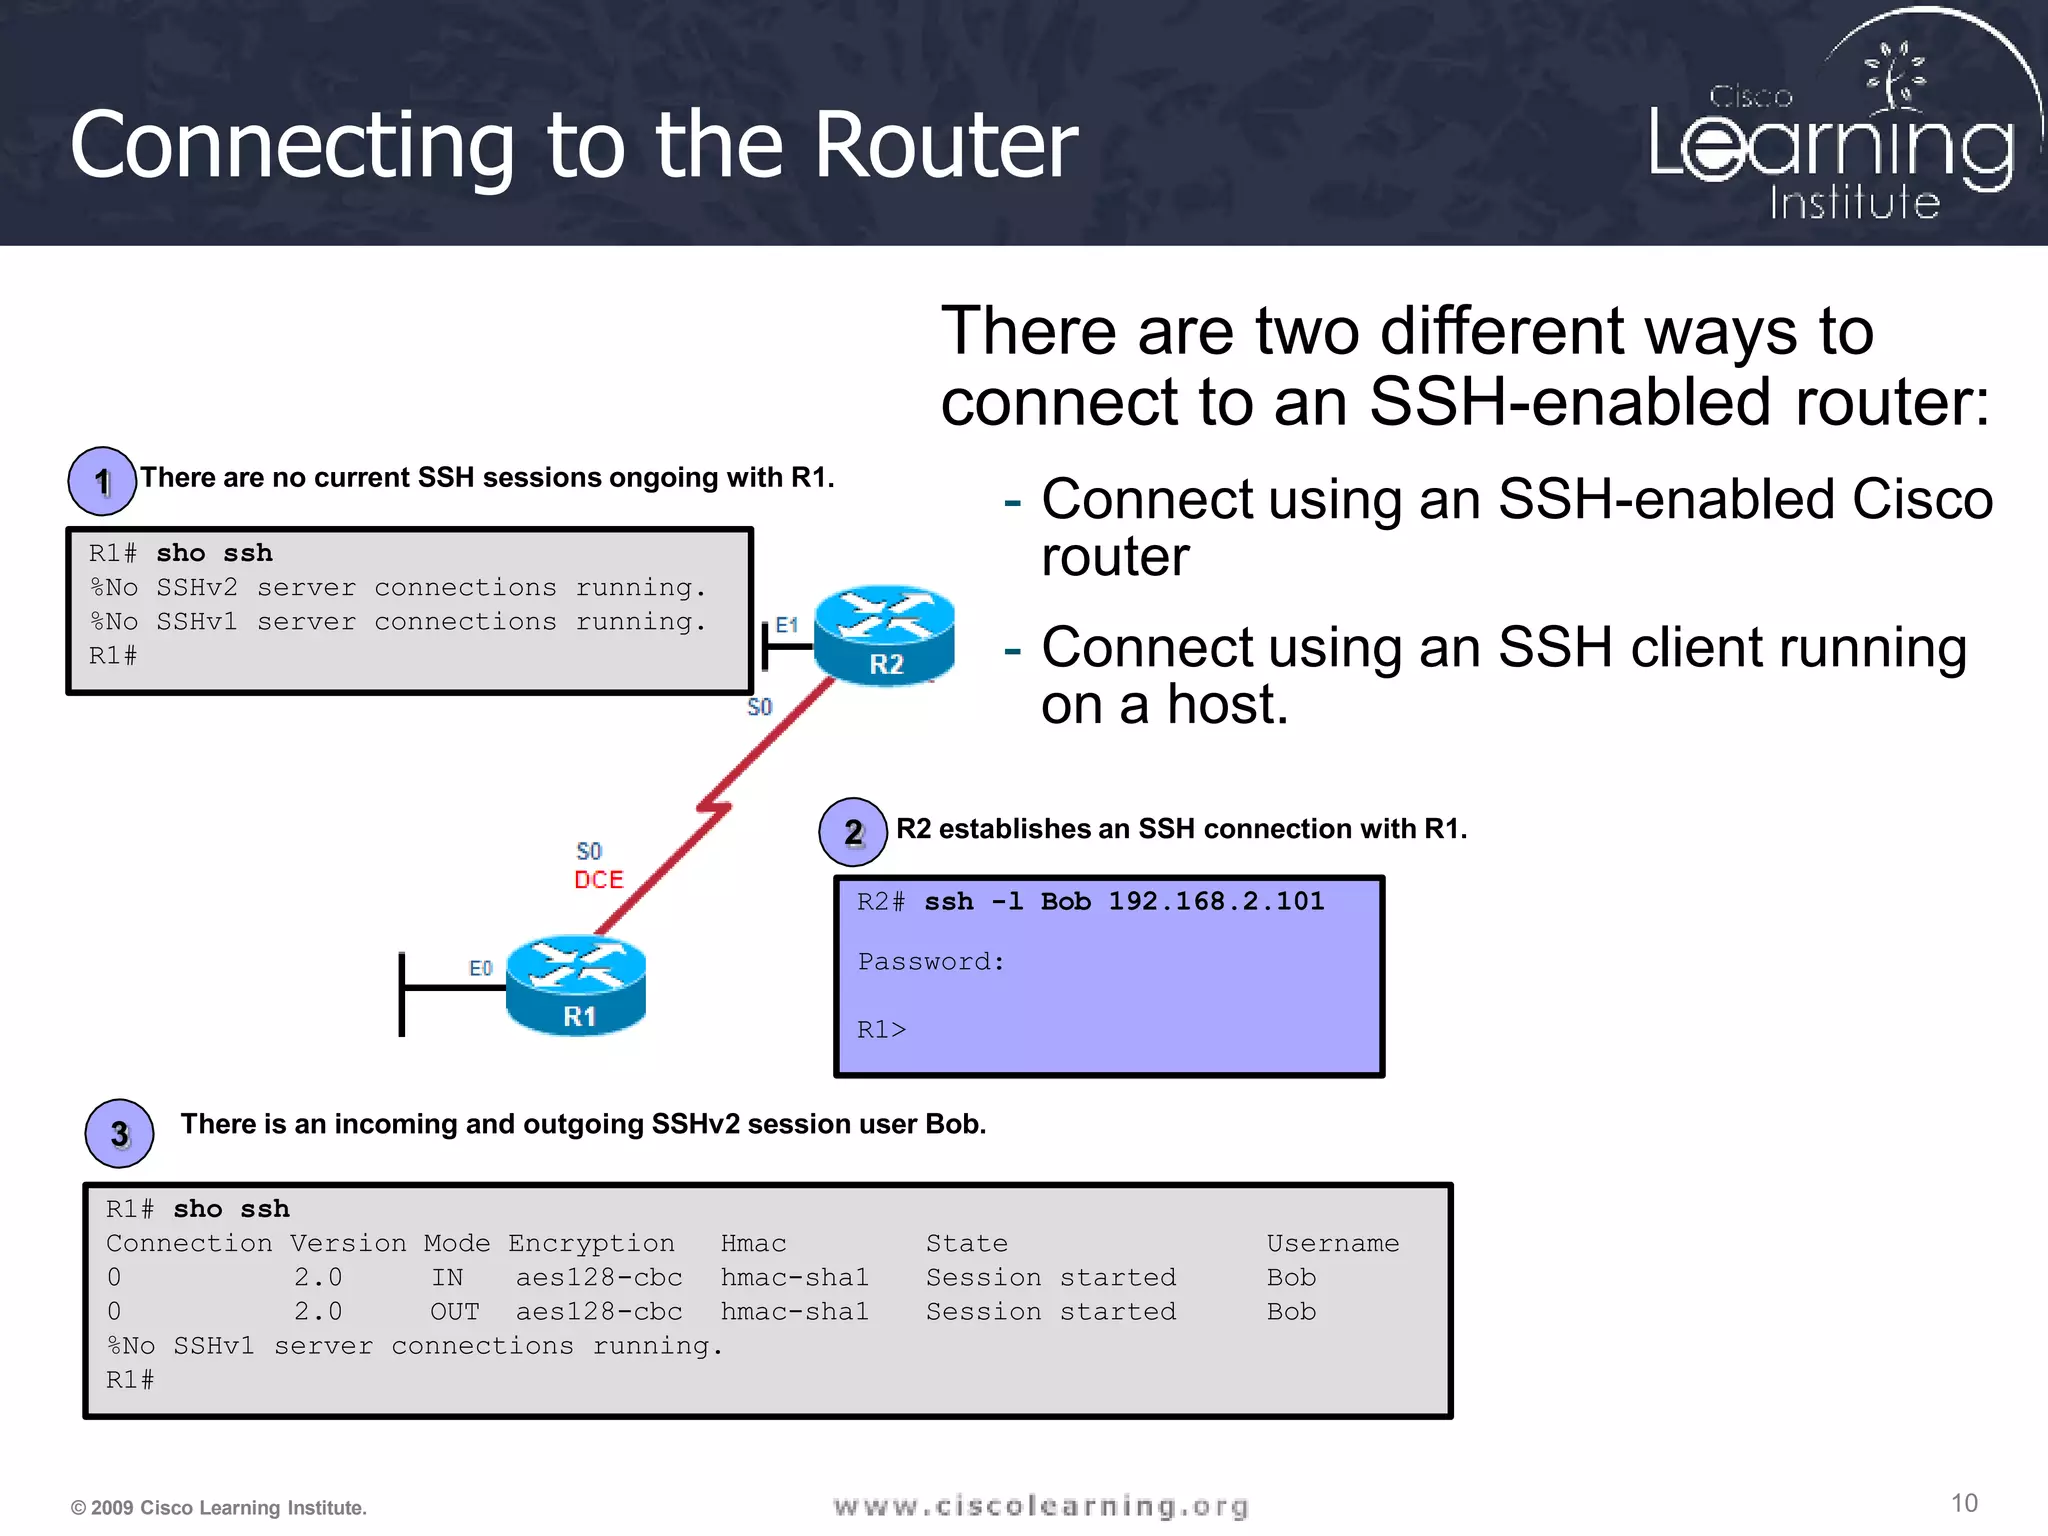
SSH sessions](https://image.slidesharecdn.com/ccna-security-ch2-securing-network-devices-211130172308/75/Ccna-security-ch2-securing-network-devices-8-2048.jpg)


Este documento describe varias técnicas para asegurar los routers de borde, incluyendo el uso de múltiples routers perimetrales, seguridad física y del sistema operativo, y autenticación de acceso administrativo. También cubre temas como mensajes de banner, SSH, syslog y NTP para lograr una gestión segura de los dispositivos de red.


