
Recomendados
Más contenido relacionado
La actualidad más candente
La actualidad más candente (19)
Destacado
Destacado (20)
Similar a Cómo crear un reloj de sol 3
Similar a Cómo crear un reloj de sol 3 (20)
Más de achiles75
Último
Último (20)
Cómo crear un reloj de sol 3
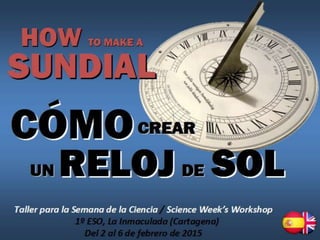
- 1. Taller para la Semana de la Ciencia / Science Week’s Workshop 1º ESO, La Inmaculada (Cartagena) Del 2 al 6 de febrero de 2015 CÓM O HOW TO MAKE ASUNDIAL CREAR UN RELOJ DE SOL
- 2. MATERIAL NECESARIO MATERIAL NEEDED • Tijeras • Pegamento de barra • Regla • Compás • Transportador de ángulos • Lápiz y rotulador • Cartulina blanca • Brújula
- 9. MATERIAL NECESARIO MATERIAL NEEDED White Poster Board
- 11. MATERIAL NECESARIO MATERIAL NEEDED Set Square
- 12. MATERIAL NECESARIO MATERIAL NEEDED Pencil and Pen Marker
- 13. 1 STE P PASO 1
- 14. 1 STE P PASO 1 Se traza una línea recta en el centro de la cartulina blanca Trace a straight line in the middle of the white poster board
- 15. 1 STE P PASO 1 Se traza una línea recta en el centro de la cartulina blanca Trace a straight line in the middle of the white poster board
- 16. 2 STE P PASO 2 Con el compás, dibuja sobre la recta una semicircunferencia de 8 cm de radio With the compass tool, draw a semicircle (r =8 cm) on top of the straight line
- 17. 2 STE P PASO 2 Con el compás, dibuja sobre la recta una semicircunferencia de 8 cm de radio With the compass tool, draw a semicircle (r =8 cm) on top of the straight line
- 18. 3 STE P PASO 3 Con el transportador, marcamos los ángulos de 15º en 15º de dicha semicircunferencia With the protractor, mark on the semicircle angles of 15º each (15º, 30º, 45º…)
- 19. 3 STE P PASO 3 Con el transportador, marcamos los ángulos de 15º en 15º de dicha semicircunferencia With the protractor, mark on the semicircle angles of 15º each (15º, 30º, 45º…)
- 20. 4 STE P PASO 4 Se indica el horario, cada ángulo es 1 hora 6:00 h. = 0º 12:00h. = 90º 18:00 h. = 180º Write the hours, each angle is 1 hour
- 21. 4 STE P PASO 4 Se indica el horario, cada ángulo es 1 hora 6:00 h. = 0º 12:00h. = 90º 18:00 h. = 180º Write the hours, each angle is 1 hour
- 22. 5 STE P PASO 5 Con la ayuda de la brújula, indicar el Norte sobre el ángulo de 90º (hora 12) With the help of the compass, indicate the North Point over the 90º angle (12th hour)
- 23. 5 STE P PASO 5 Con la ayuda de la brújula, indicar el Norte al ángulo de 90º (hora 12) With the help of the compass, indicate the North Point over the 90º angle (12th hour)
- 24. 6 STE P PASO 6 Ahora se dibuja un rombo bajo la semicircunferencia con estas medidas: D = 8 cm (Diagonal mayor) α = 37,50 respecto a D (ángulo menor = 75º) Now draw a rhombus below the semicircle with the given measurements
- 25. 6 STE P PASO 6 Ahora se dibuja un rombo bajo la semicircunferencia con estas medidas: D = 8 cm (Diagonal mayor) α = 37,50 respecto a D (ángulo menor = 75º) Now draw a rhombus below the semicircle with the given measurements
- 26. 7 STE P PASO 7 Se hacen 2 solapas a los lados superiores del rombo Make 2 flaps on the rhombus upper sides
- 27. 7 STE P PASO 7 Se hacen 2 solapas a los lados superiores del rombo Make 2 flaps on the rhombus upper sides
- 28. 8 STE P PASO 8 Recortamos el reloj de sol por los bordes Cut out the sundial outline
- 29. 8 STE P PASO 8 Recortamos el reloj de sol por los bordes Cut out the sundial outline
- 30. 9 STE P PASO 9 Plegamos el rombo hacia adelante y pegamos las solapas sobre las líneas de las 11h y 13h. Fold the rhombus forward and glue the flaps onto the lines of the 11th and 13th hours
- 31. 9 STE P PASO 9 Plegamos el rombo hacia adelante y pegamos las solapas sobre las líneas de las 11h y 13h. Fold the rhombus forward and glue the flaps onto the lines of the 11th and 13th hours
- 32. 10 STE P PASO 10 ¡Terminado! Ahora nos colocamos bajo el sol y seguimos las indicaciones del profesor Finished! Now go outdoors under the sun and follow the teacher’s indications
- 33. EL TALLER DEL RELOJ SOLAR THE SUNDIAL WORKSHOP 1ES O
- 36. A total success!! ¡Todo un éxito! 1º B ESO
- 37. Thanks for watching! By José Miguel Sotos (science project) and Julen Querejeta (English and design)