El documento describe un proyecto realizado en la Escuela Laboral N° 4 en Realicó, Argentina. El proyecto buscó enseñarles a adultos mayores el uso de la tecnología para que no se sintieran aislados. Los adultos mayores aprendieron a usar computadoras, internet y herramientas digitales. A través de este proyecto, pudieron comunicarse y compartir sus historias. Expresaron haber rediscutido su identidad y sentirse capaces de aprender nuevas habilidades.
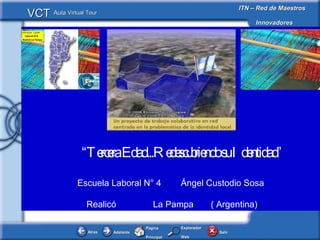
2. Objetivos Descripción Participamos de un proyecto que nuclea a instituciones educativas , desarrollando una indagación sobre distintos aspectos de la realidad social de la comunidad local y la reflexión sobre la identidad comunitaria en el contexto de la diversidad cultural , por medio del soporte de Aulas Unidas Argentinas del portal de Educared. Fue nuestra meta captar el interés de adultos de la “tercera edad”, cuya capacidad de aprendizaje se sustenta en tiempo y forma cuando se los considera sujetos con intereses y necesidades. “ Tercera Edad...Redescubriendo su Identidad ” Escuela Laboral N° 4 de Realicó, La Pampa ( Argentina)
3. Propósito Antecedentes QUIÉN SE ACUERDA DE LA TERCERA EDAD…??? Qué hacer con esos abuelos y abuelas que nacieron en la era NO CYBERNÉTICA y necesitan conectarse al mundo para no sentirse marginados? Apropiación de las NTICs Intercambio/Trabajo Colaborativo Capacidad de Aprendizaje Ritmo de Aprendizaje Comunicación “ Tercera Edad...Redescubriendo su Identidad ” Escuela Laboral N° 4 de Realicó, La Pampa ( Argentina)
4. Uso hábil de ordenadores Logros alcanzados Criterio para seleccionar herramientas TIC Competencias TIC Tecnológicas Informacionales Seguridad. Agilidad. Habilidad. Gestión Comunicacionales Producción. Participación Áreas de aprendizaje “ Tercera Edad...Redescubriendo su Identidad ” Escuela Laboral N° 4 de Realicó, La Pampa ( Argentina)
6. Desarrollo 1 Plan de Trabajo 2 Presentación de la Escuela 3 Imágenes Voces Historias 4 Presentaciones multimedia “ Tercera Edad...Redescubriendo su Identidad ” Escuela Laboral N° 4 de Realicó, La Pampa ( Argentina)
7. PROYECTO: Elaborar el Plan de trabajo Presentación de la escuela ImágenesVoces, historias Presentación Multimedia Diseñar y editar ,en el aula, la presentación de la escuela y de los participantes en la edición AUA 2006. Recopilar y sistematizar informa- ción Entrevistas Trabajo de Campo Fotos Diseño Producción Intercambio Comunicación Exposición Proyección “ Tercera Edad...Redescubriendo su Identidad ” Escuela Laboral N° 4 de Realicó, La Pampa ( Argentina)
8. E valuación del desarrollo del proyecto Evaluación continua, reflexiva, por observación directa, personalizada, acompañando todo el proceso con una actitud ética, seria y rigurosa. EN EL AULA EN LA COMUNIDAD Registro de la evolución del proceso Trascendencia Impacto “ Tercera Edad...Redescubriendo su Identidad ” Escuela Laboral N° 4 de Realicó, La Pampa ( Argentina)
9. PROYECTO: AUTORES Alumnos adultos de la “tercera Edad” de la Escuela Laboral N° 4 de Realicó, pequeña ´población pampeana de la República Argentina. Docente Coordinadora : Ana María Bobbio Ferrari Docente Colaboradora:Carina Elisabet Chiosso “ Tercera Edad...Redescubriendo su Identidad ” Escuela Laboral N° 4 de Realicó, La Pampa ( Argentina)
10. PROYECTO: En 2007 continuamos en Aulas Unidas Argentinas con el tema: “ Problemas ambientales y salud de la población” La Escuela Laboral Nº 4 fue seleccionada junto a cuatro escuelas argentinas , como ESCUELA LIDER para el intercambio virtual con 900 establecimientos educativos de la ciudad de San Pablo en la República de Brasil ( Segundo Turno : octubre-noviembre de 2007 ) “ Tercera Edad...Redescubriendo su Identidad ” Escuela Laboral N° 4 de Realicó, La Pampa ( Argentina)
11. Resultado del Proyecto REFLEXIONES de alumnos involucrados que resumen logros del grupo ( Se adjuntan archivos de audio vía E-Mail) Surge una valoración positiva del proceso y de los logros alcanzados por estos abuelos, que no siempre se puede traducir en palabras, porque –en gran medida- tiene que ver con los sentimientos. Abuelo José : “Nada termina como empieza”.Todos los descubrimientos se han debido siempre a la necesidad, inherente al ser humano, que es la curiosidad; el saber cómo y por qué ... Abuela Norma : “Gracias a Aulas Unidas Argentinas pude comunicarme con el entorno y los otros de diversos lugares”…. Abuela Ester : “Casi sin darme cuenta aprendí a utilizar las tecnologías. Cada aportación la viví como un signo que expresó nuestra realidad social”… Abuelo Hugo : “Hermosa experiencia Aulas Unidas Argentinas .Nos permitió el dominio de las TIC para enriquecer nuestra cultura”… “ Tercera Edad...Redescubriendo su Identidad ” Escuela Laboral N° 4 de Realicó, La Pampa ( Argentina)
12. AGRADECIMIENTO infinito a Aulas Unidas que ha posibilitado que estos abuelos hayan logrado no sólo REDUSCUBRIR su IDENTIDAD , sino darse cuenta que FUERON CAPACES DE… “ Solamente dos legados perdurables podemos aspirar a dejarles a nuestros hijos y nietos: Uno alas y el otro raíces” “ Tercera Edad...Redescubriendo su Identidad ” Escuela Laboral N° 4 de Realicó, La Pampa ( Argentina)
13. DOCENTE Responsable del Proyecto : Prof . BOBBIO FERRARI ,Ana Maria LC 6.360.067 Coordinadora Laboratorio de Informática [email_address] Docente colaborador: CHIOSSO, Carina Elisabet. Escuela Laboral N ° 4 “Ángel Custodio Sosa ” Realicó provincia de LA PAMPA. ARGENTINA [email_address] http://losinternautas.wikispaces.com “ Tercera Edad...Redescubriendo su Identidad ” Escuela Laboral N° 4 de Realicó, La Pampa ( Argentina)
Notas del editor
This Virtual Classroom Tour template has been provided so you can develop your own Virtual Classroom Tours. Use the template to record a special learning project that you have found particularly successful in your classroom. Then share the project with other teachers in your school, district or beyond. Here’s how: Follow the prompts on each slide and in the embedded Word documents, in this PowerPoint document, to insert your project information. When you have finished inputting all of the project information that is requested, delete the prompts. Select each one and press the Delete key. Note: To enter the title of your Virtual Classroom Tour you must select View , Slide Master , and enter it on the slide master. You might also wish to insert a picture illustrating the subject of your Classroom Learning Resource. Then click Close Master View . This will cause the title and picture to appear on each of the slides. From the Office Button menu choose Save As … and save the document as a PowerPoint Presentation . You can then distribute the Virtual Classroom Tour.
On this slide, embed the student handouts and the resources created for this project. Some examples are a student project overview, Internet and other resources, directions for art projects, or instructions to students for peer editing of projects. To embed the resources, follow these steps: Have the resource document available. From the Insert menu choose Object . Select Create from File… and click Browse… . Find the file you want to include and click OK . Select Display as icon and click Change Icon… and add a suitable caption. Click OK to add the caption and click OK to embed the file. Position the document icon at the bottom of the slide. You can go to View , Grid and Guides , and click Display Grid on Screen for a grid on which to line up your icons. Remember to activate an Object action from the Insert banner.
On this slide, embed the student handouts and the resources created for this project. Some examples are a student project overview, Internet and other resources, directions for art projects, or instructions to students for peer editing of projects. To embed the resources, follow these steps: Have the resource document available. From the Insert menu choose Object . Select Create from File… and click Browse… . Find the file you want to include and click OK . Select Display as icon and click Change Icon… and add a suitable caption. Click OK to add the caption and click OK to embed the file. Position the document icon at the bottom of the slide. You can go to View , Grid and Guides , and click Display Grid on Screen for a grid on which to line up your icons. Remember to activate an Object action from the Insert banner.
Open the Word documents at the bottom of each slide by double clicking the icons. Follow the prompts [in the yellow boxes] for inserting information about your learning project.
On this slide, embed the student handouts and the resources created for this project. Some examples are a student project overview, Internet and other resources, directions for art projects, or instructions to students for peer editing of projects. To embed the resources, follow these steps: Have the resource document available. From the Insert menu choose Object . Select Create from File… and click Browse… . Find the file you want to include and click OK . Select Display as icon and click Change Icon… and add a suitable caption. Click OK to add the caption and click OK to embed the file. Position the document icon at the bottom of the slide. You can go to View , Grid and Guides , and click Display Grid on Screen for a grid on which to line up your icons. Remember to activate an Object action from the Insert banner.
On this slide, embed the student handouts and the resources created for this project. Some examples are a student project overview, Internet and other resources, directions for art projects, or instructions to students for peer editing of projects. To embed the resources, follow these steps: Have the resource document available. From the Insert menu choose Object . Select Create from File… and click Browse… . Find the file you want to include and click OK . Select Display as icon and click Change Icon… and add a suitable caption. Click OK to add the caption and click OK to embed the file. Position the document icon at the bottom of the slide. You can go to View , Grid and Guides , and click Display Grid on Screen for a grid on which to line up your icons. Remember to activate an Object action from the Insert banner.