Mueble Directorio y consulado Francés
•Descargar como PPTX, PDF•
1 recomendación•6,297 vistas

Trabajo realizado por estudiantes diseño de interiores.

Recomendados
Más contenido relacionado
La actualidad más candente
La actualidad más candente (20)
Destacado
Destacado (14)
Similar a Mueble Directorio y consulado Francés
Similar a Mueble Directorio y consulado Francés (20)
Más de Tachie Gaya
Último
Último (20)
Mueble Directorio y consulado Francés
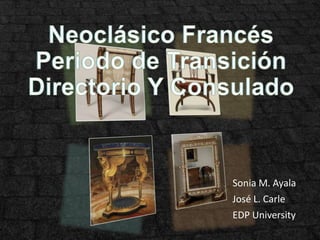
- 1. Sonia M. Ayala José L. Carle EDP University
- 2. Esta presentación ha sido preparadas con fines educativos para la Clase de Estilos Históricos II para EDP University. Bajo la tutoría de la Profesora (Tachie) Gaya
- 3. •Muebles estilo directorio. •Es un estilo fugaz. Un estilo de inspiración neoclásica, considerado de transición entre el estilo Luis XVI y el estilo imperio. Es Napoleón quien derrota el gobierno de Luis XVI . • Así denominado porque el poder Ejecutivo quedaba en manos de 5 miembros (directores), en tanto que el Legislativo descansaba en dos Cámaras (Consejo de los Quinientos y el Senado). •Se sitúa en Francia entre 1792 y 1799 por Napoleón Bonaparte quien luego se autoproclama emperador de Francia •El estilo directorio fue establecido por los arquitectos y decoradores de interiores Charles Percier (1764–1838) y Pierre François, Leonard Fontaine (1762–1853) • El diseño se caracterizaron por la sencillez de sus líneas, inspiradas en los objetos romanos y griegos. •Se elimina por completo la ornamentación de la monarquía de los Luises. líneas más rectas y ángulos pronunciados, la marquetería fue sustituida por la madera pintada cubierta por cera.
- 4. Inspirados en Grecia, Roma tras descubrimiento de las ruinas de Pompeya , Herculano. Las maderas utilizadas para la creación de los muebles eran las nacionales, nogal, roble ,haya y caoba. Los ornamentos mas comunes son las urnas antiguas, las flechas, los cisnes, las palmas, las liras y estrellas. Pata del frente eran rectas y las patas traseras estilo klismo griego. Las patas rectas apuntadas en los pies, sustituyeron las cabriole. Unas eran de sección cuadrada otras redondas y con moldura torneada en parte superior, y otra pequeña en la inferior Se utiliza en el torneado de las patas en balaustre. Con palmetas griegas, margaritas y rombos. Todo lo relacionado a los Luises es eliminado completamente. En tapicería se usaba el satén, los damascos, los terciopelos y brocados, en tanto los cortinajes lucían matices de azul, amarillo, verde y rojo en importantes rayados. El cojín y el respaldo eran duros . Nuevas formas en respaldos de fauteils, ovalados o en medallón, en el centro del travesaño superior del respaldo. El mueble mas característico es la silla.
- 5. Característica Los respaldos de las silla muestran una elegante curva hacia atrás. Los muebles de caoba o castaño, presentan líneas rectas. •El respaldo, cojín y asientos duros Patas delgadas y curvadas, el tipo clásico curvado hacia el exterior visto en los frescos griegos
- 6. Comparación Klismo” silla de , respaldo ligeramente inclinado y muy cómodas patas curvas Silla Directorio con respaldo inclinado y patas trasera curva inspirado en la silla Klismo. Muchos de los muebles tiene tallas geométricas.
- 8. Que es el periodo Consulado? El Consulado fue la institución de gobierno en Francia entre la caída del Directorio (Francia) tras el golpe de estado que dio Napoleón Bonaparte del 18 de Brumario de 1799 hasta el comienzo del Imperio Napoleónico en 1804. Por extensión, el término El Consulado se refiere también a dicho periodo histórico francés. El cargo de cónsules lo ostentaron Napoleón Bonaparte, Sieyès y Ducos fueron reemplazados por Jean Jacques Régis de Cambacérès y Charles-François Lebrun, quienes siguieron en el cargo hasta 1804, cuando Napoleón fue coronado Emperador de los franceses.
- 9. Se inspira mucho en el mueble egipcio . Mas tosco rectilíneos predomina el carácter militar Ornamentación de Flechas, lanzas, cisnes, liras, manos juntas, águilas , flor de loto, dentículos. Patas torneadas de esfinges y león. Los respaldos con forma de rolloshttp://www.prices4antiques.com /item_images/medium/54/61/24- 01.jpg
- 12. Si en algún momento el autor, marca, etc. no desean que su imagen esté aquí expuesta, ruego nos contacten para poder tomar las medidas oportunas Si alguno de sus autores desea que sean retirados ruego que me lo comunique por e-mail, no pretendemos aprovecharnos de sus trabajos, solo ofrecer conocimiento. Esta presentación ha sido creada con fines educativos, para la clase de Estilos Históricos II. Para compartir conocimiento con los estudiantes de San JuanSchool of Interior Design of EDP University. Toda información fue recuperada de las siguientes paginas web: http://www.slideshare.net/vanepenaranda/neoclasico- 26216858?from_search=1 http://www.slideshare.net/fezdoat/absolutismo-y- revfrancesa2?from_search=11 htthttp://www.slideshare.net/tachiedecor/historia-del-mueble-antiguo- ip://cristina-todoarte.blogspot.com/2010/11/estilo-directorio.html http://www.odisea2008.com/2010/05/mobiliario-decorativo.html
Notas del editor
- Pictures in SmartArt graphic with texture background(Intermediate)To reproduce the SmartArt effects on this slide, do the following:On the Home tab, in the Slides group, click Layout, and then click Blank.On the Insert tab, in the Illustrations group, click SmartArt.In the Choose a SmartArt Graphic dialog box, in the left pane, click Picture. In the Picture pane, double-click Picture Grid (third row) to insert the graphic into the slide. Select the graphic. Under SmartArt Tools, on the Format tab, click Size, enter 6.67” in the Height box and 9.59” in the Width box.Also under SmartArt Tools on the Format tab, click Arrange, click Align, and then do the following:Click Align to Slide.Click Align Middle. Click Align Center. Click each of the four picture placeholders in the SmartArt graphic, select a picture, and then click Insert.Press and hold CTRL, and select all four pictures. Under SmartArt Tools, on the Format tab, in the Shape Styles group, click Shape Outline, and then click No Outline.Also under SmartArtTools, on the Format tab, in the Shape Styles group, click Shape Effects, point to Shadow, and then under Outer click Offset Diagonal Bottom Left.Select the graphic, and then click one of the arrows on the left border. In the Type your text here dialog box, enter text.Press and hold CTRL and select all of the text boxes, and then do the following:On the Home tab, in the Font group, select Candara from the Font listSelect 24 in the Font Size boxClick Font Color and select White, Background 1.To reproduce the shape effects on this slide, do the following:On the Home tab, in the Drawing group, click Shapes, and then under Rectangles click Rectangle.On the slide, drag to draw a rectangle. Select the rectangle. Under Drawing Tools, on the Format tab, in the Shape Styles group, click the Format Shape dialog box launcher. In the Format Shape dialog box, click Fill in the left pane, in the Fill pane, click Solid fill, and then do the following:Click the button next to Color, click More Colors, and then in the Colors dialog box, on the Custom tab, enter values for Red: 123, Green: 154, and Blue: 53.In the Transparency box, enter 61%.Also in the Format Shape dialog box, click Line Color in the left pane, in the Line Color pane, click No line.Also in the Format Shape dialog box, click Size in the left pane, in the Size pane, under Size and rotate, do the following:In the Height box enter 2.8”.In the Width box, enter 2.8”.In the Rotation box enter 353°.Also in the FormatShape dialog box, click Glowand Soft Edges in the left pane, in the Glow and Soft Edges pane, under Soft Edges, click the button next to Preset and then click 10 Point. Position this rectangle over the top left picture in the SmartArt graphic.On the Home tab, in the Drawing group, click Arrange, and then click Send to Back.On the Home tab, in the Clipboard group, click the arrow to the right of Copy, and then click Duplicate.Repeat this process twice for a total of four rectangles.Select a duplicate shape. Under Drawing Tools, on the Format tab, in the Shape Styles group, click the Format Shape dialog box launcher. In the Format Shape dialog box, click Fill in the left pane, in the Fill pane, click the button next to Color, click More Colors, and then in the Colors dialog box, on the Custom tab, enter values for Red: 160, Green: 134, and Blue: 86.Also in the Format Shape dialog box, click Size in the left pane, in the Size pane, under Size and rotate, in the Rotation box, enter 4°.Position the duplicate shape over the bottom left picture in the SmartArt graphic.On the Home tab, in the Drawing group, click Arrange, and then click Send to Back.Select another duplicate shape. Under Drawing Tools, on the Format tab, in the Shape Styles group, click the Format Shape dialog box launcher. In the Format Shape dialog box, click Fill in the left pane, in the Fill pane, click the button next to Color, click More Colors, and then in the Colors dialog box, on the Custom tab, enter values for Red: 92, Green: 130, and Blue: 123.Also in the Format Shape dialog box, click Size in the left pane, in the Size pane, under Size and rotate, in the Rotation box, enter 7°.Position the duplicate shape over the top right picture in the SmartArt graphic.On the Home tab, in the Drawing group, click Arrange, and then click Send to Back.Select the last duplicate shape. Under Drawing Tools, on the Format tab, in the Shape Styles group, click the Format Shape dialog box launcher. In the Format Shape dialog box, click Fill in the left pane, in the Fill pane, click the button next to Color, click More Colors, and then in the Colors dialog box, on the Custom tab, enter values for Red: 149, Green: 111, and Blue: 73.Also in the Format Shape dialog box, click Size in the left pane, in the Size pane, under Size and rotate, in the Rotation box, enter 356°.Position the duplicate shape over the top right picture in the SmartArt graphic.On the Home tab, in the Drawing group, click Arrange, and then click Send to Back.To reproduce the background effects on this slide, do the following:On the Insert tab, in the Images group, click Picture.In the Insert Picture dialog box, select a picture and then click Insert.Select the picture.Under PictureTools, on the Format tab, in the Size group, click the Size and Position dialog box launcher. In the Format Picture dialog box, resize or crop the image so that the height is set to 7.5” and the widthis set to 10”. To crop the picture, click Crop in the left pane, and in the right pane, under Crop position, enter values into the Height, Width, Left, and Top boxes. To resize the picture, click Size in the left pane, and in the right pane, under Size and rotate, enter values into the Height and Width boxes.Also in the FormatPicture dialog box, click PictureCorrections in the left pane, in the Picture Corrections pane, under Brightness and Contrast, in the Brightness box enter -65%.Also in the Format Picture dialog box, click Picture Color in the left pane, in the Picture Color pane, under Recolor, click the button next to Presets, and then click Grayscale.Also in the Format Picture dialog box, click Artistic Effects in the left pane, in the Artistic Effects pane, click the button next to Artistic Effect, click Film Grain, and then in the Grain size box enter 55.Select the picture. On the Home tab, in the Drawing group, click Arrange, and then click Send to Back.